Hydrangea sugar flower tutorial with Lisa Templeton
Sugar flower expert Lisa Templeton from LM Cake shows us her method for creating a delightful hydrangea bouquet.
Decorating time:
2+ hours; Make over two days to allow drying time.
Skill level:
All
You will need:
- Ivory or white Pettinice
- Crisco
- Tylose powder
- Edible glue (tylose and water)
- Pme modelling tool
- Scriber needle tool
- Half a large sturdy plastic bag
- Floral wire ( around 22)
- Wire cutter
- Veiner hydrangea or rose veiner (optional)
- Lime or Spring green petal dust
- Paintbrushes for glue and dusting
- Cell board (optional)

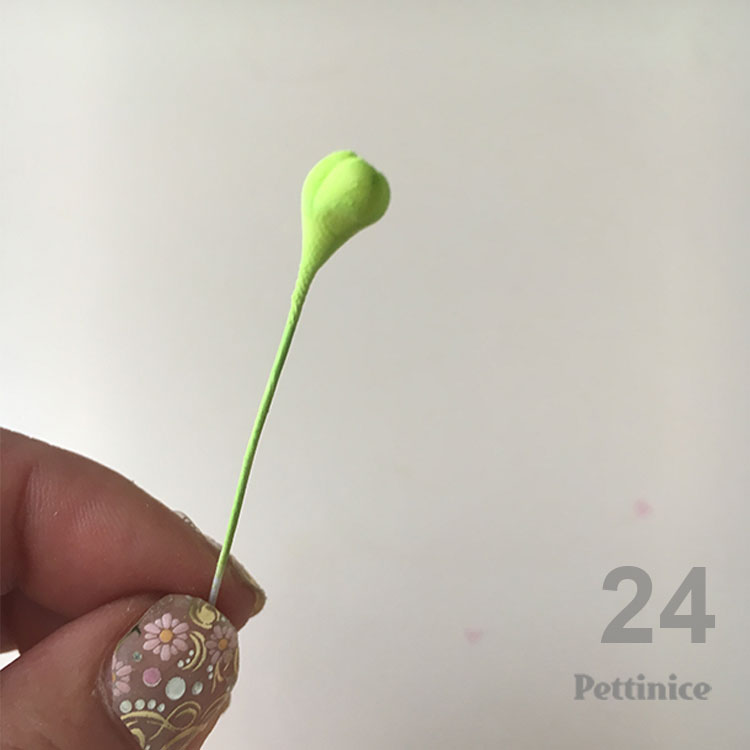
Making the hydrangea buds
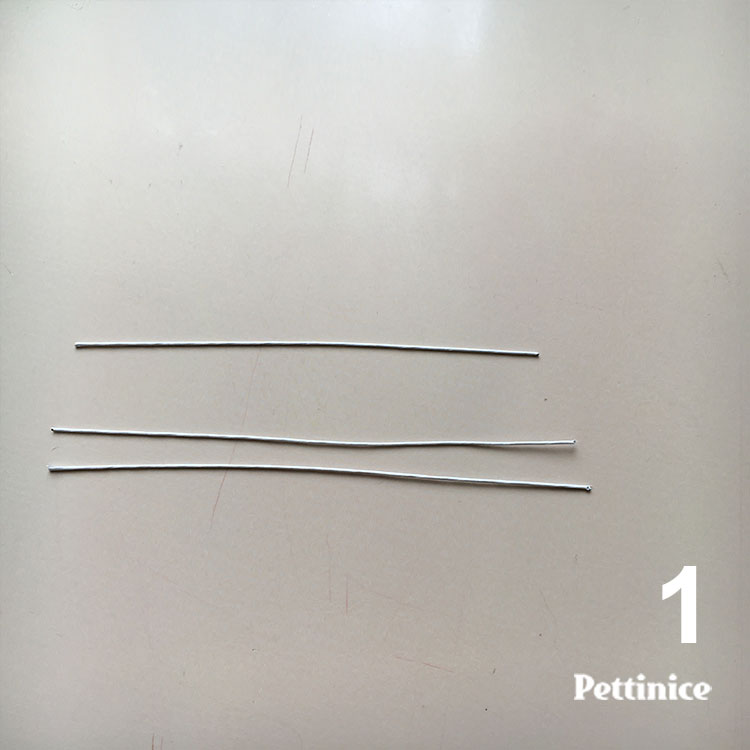
Take your 22 Gauge wire and cut one piece into 2 or 3.
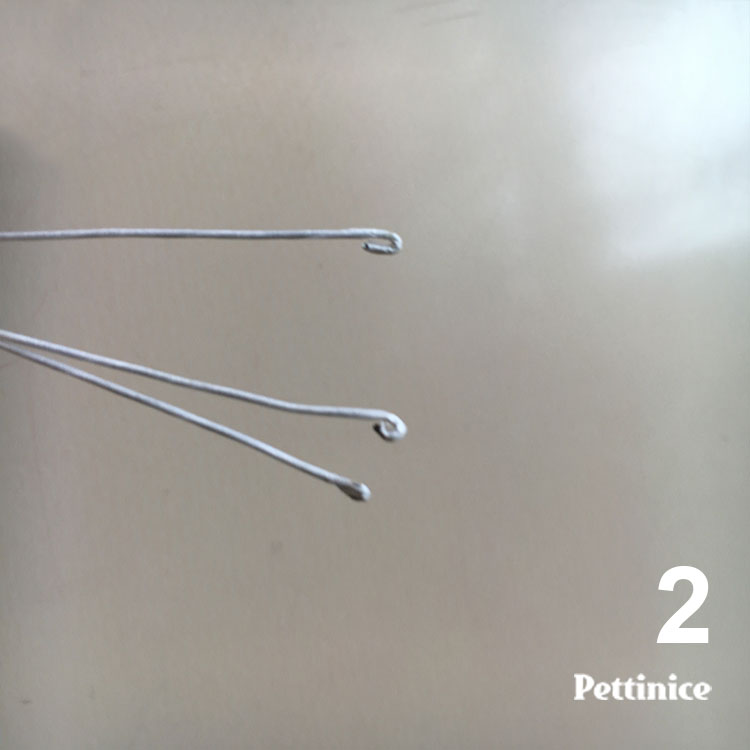
Then using the wire cutter gently bend over the tips to make wee tiny hooks.
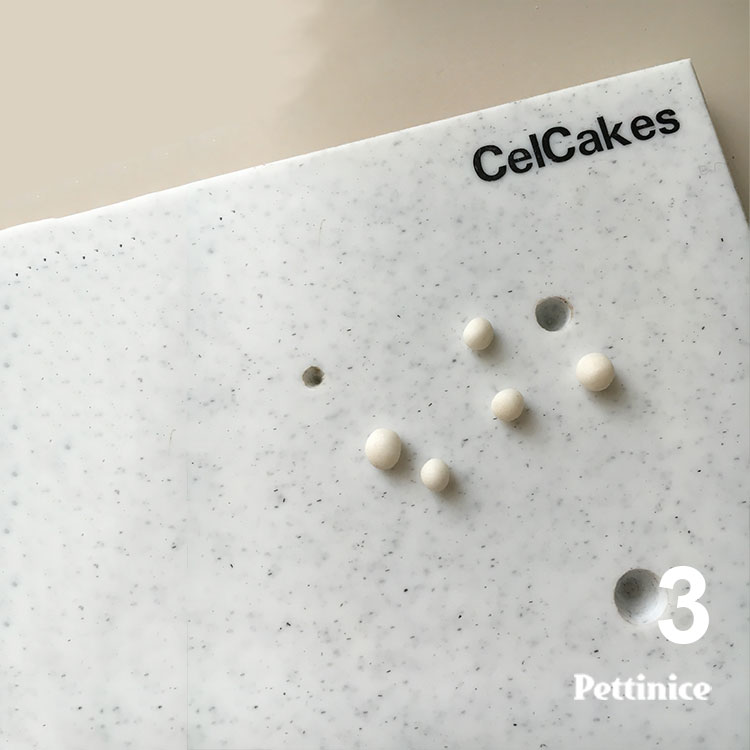
Roll tiny balls. (I use two smallest holes on cell board as guide.) In nature, buds are different sizes so be sure to vary yours too.
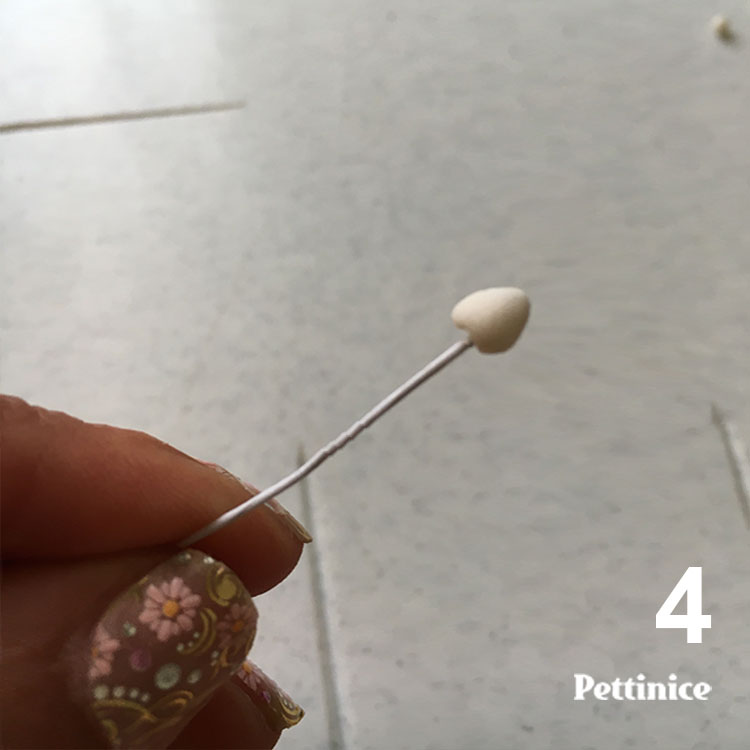
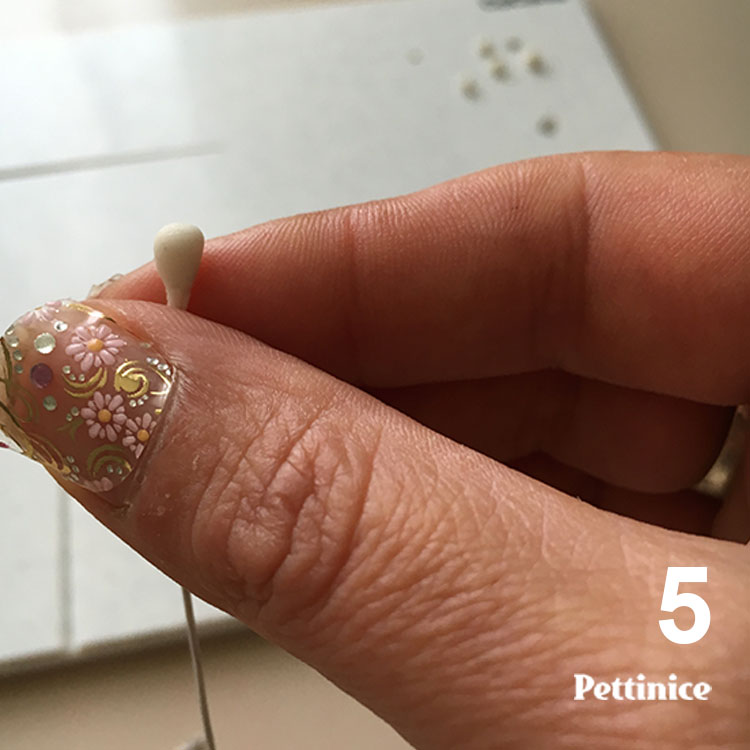
Place your little ball of paste on the end of your wire and gently roll the bottom with your fingers until it sticks well and has a rounded top.
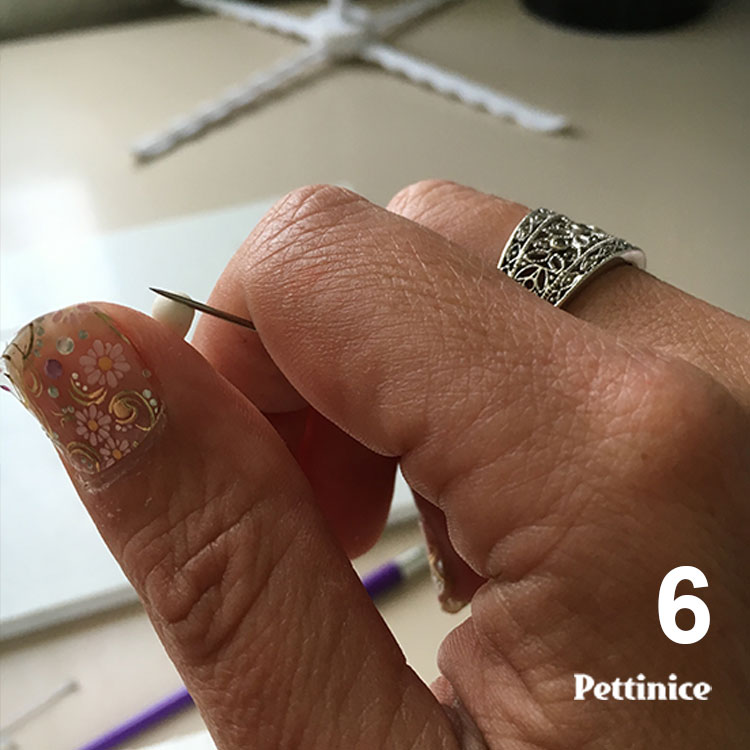
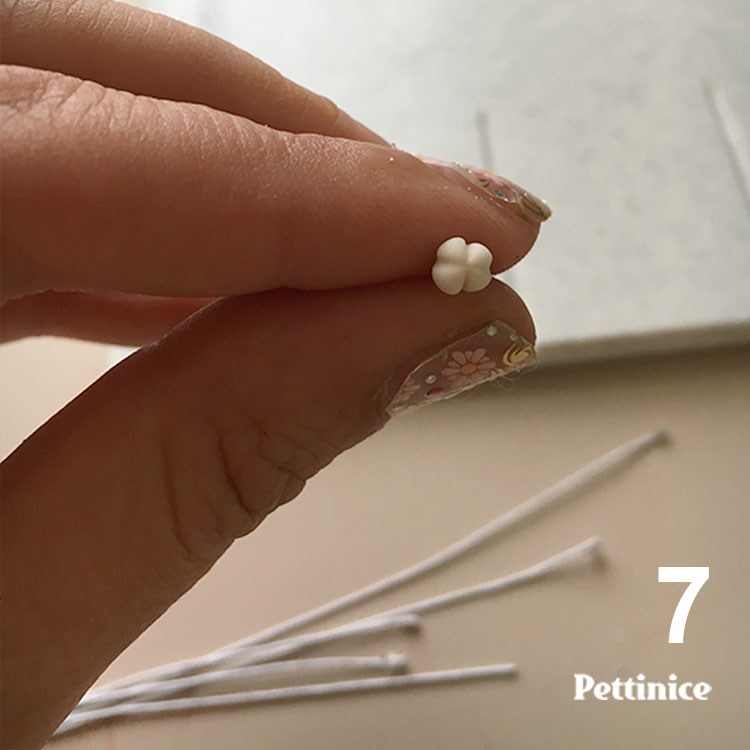
Using the scriber, firmly emboss a cross at the top as shown. Either hang or stick into a polystyrene dummy to allow it to dry. Make as many as you can these are your buds and flower centers. To make a display you need plenty as these are used for both the small flowers and buds. I used 60 for the piece shown.
Making the hydrangea petals
For best results, begin making your petals only after your hydrangea buds have dried. I usually make eight petals at a time.
With my sugar flower method, you do not need special cutters. You will create your hydrangea petals using a sturdy plastic bag (such as a snap lock, or ziplock), which you will need to cut open along one of the side seams so it opens like a book. Open your cut plastic bag, place a small ball of paste inside and fold the plastic over it to begin the next steps.

Using your thumb gently pull down to make the pointed bit at the bottom, then using your fingers push out the shape of the petal.
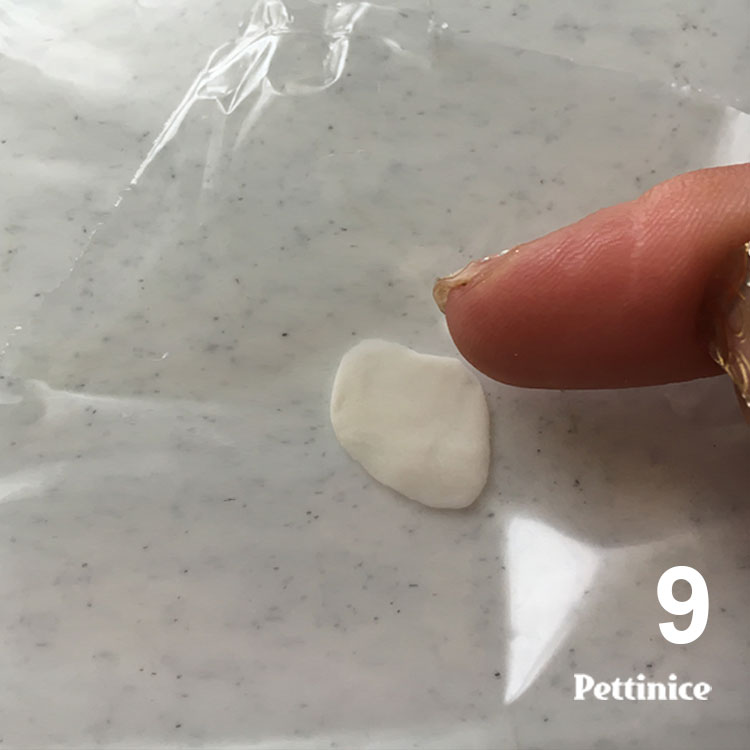
Remember to make them small about 1 cm to 1.5 cm long. Thin the edges of the petal with the side of your finger.
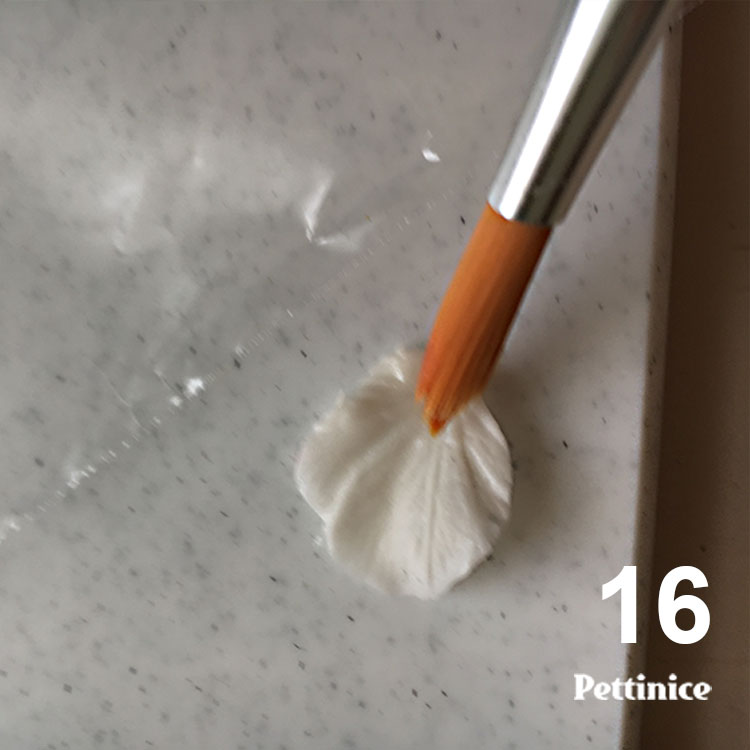
Using a Hydrangea veiner or Rose veiner press in the veins.
If you don't have a veiner, at STEP 9 above, emboss the veins with the edge of your fingernail while it is still in the plastic bag. Soft pressure is fine as you don't want to tear the bag.
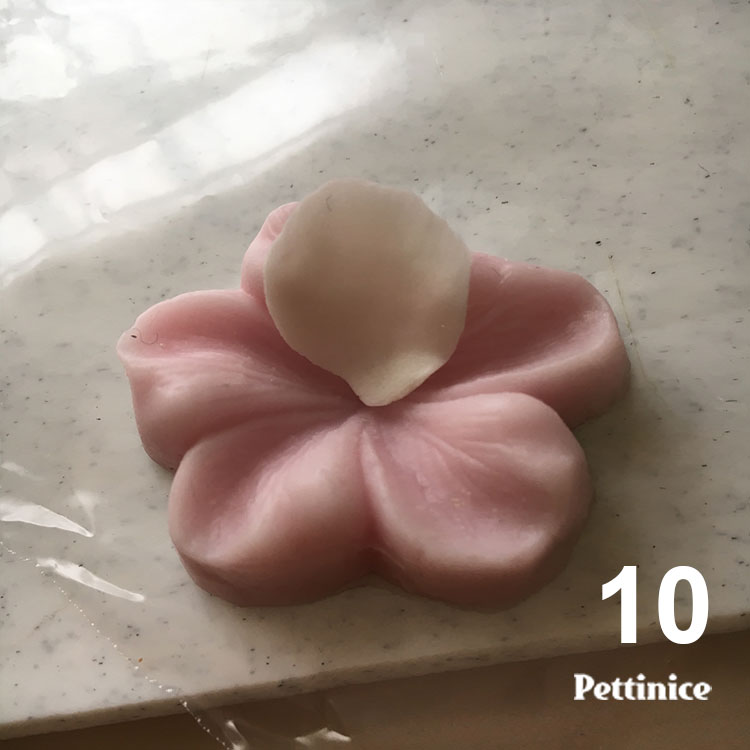
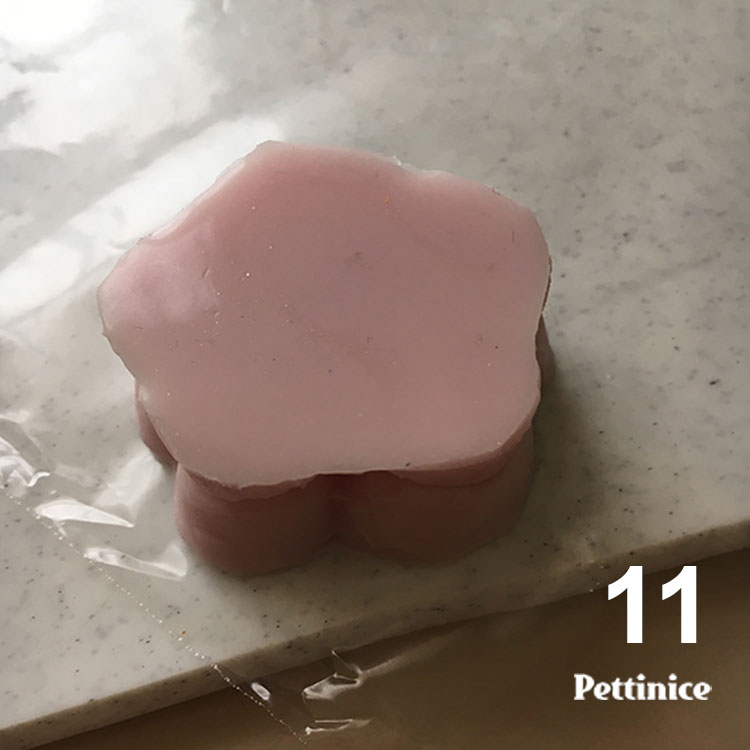
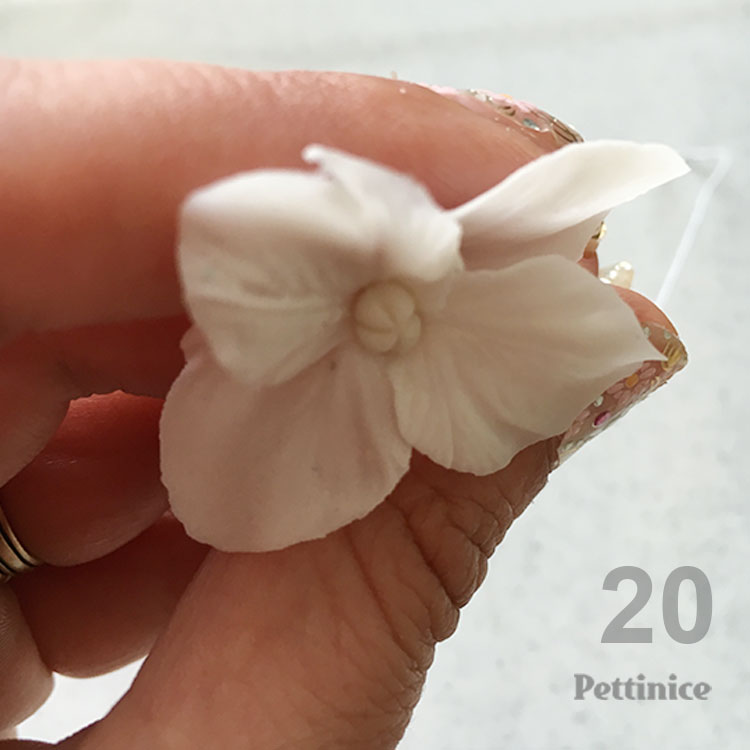
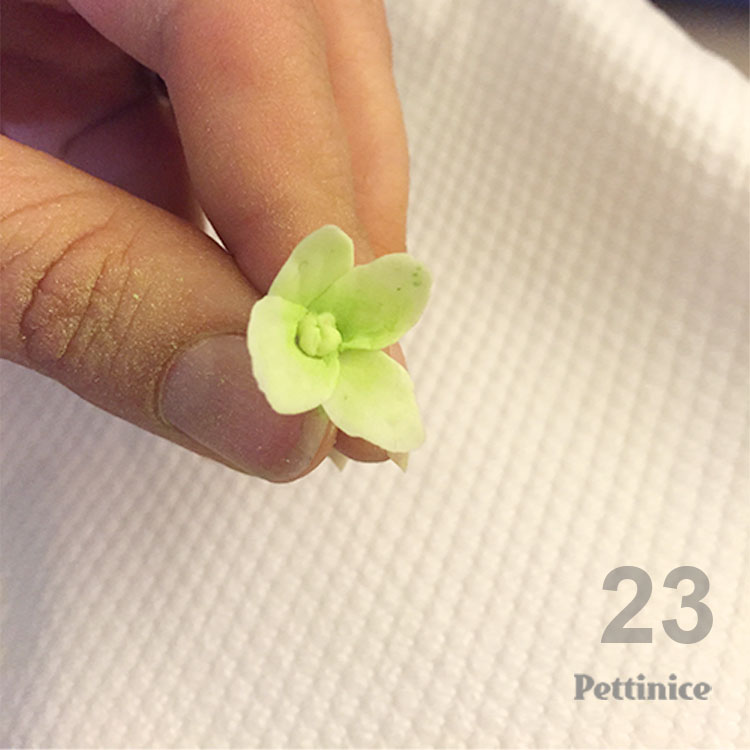
Assembling the hydrangea flowers
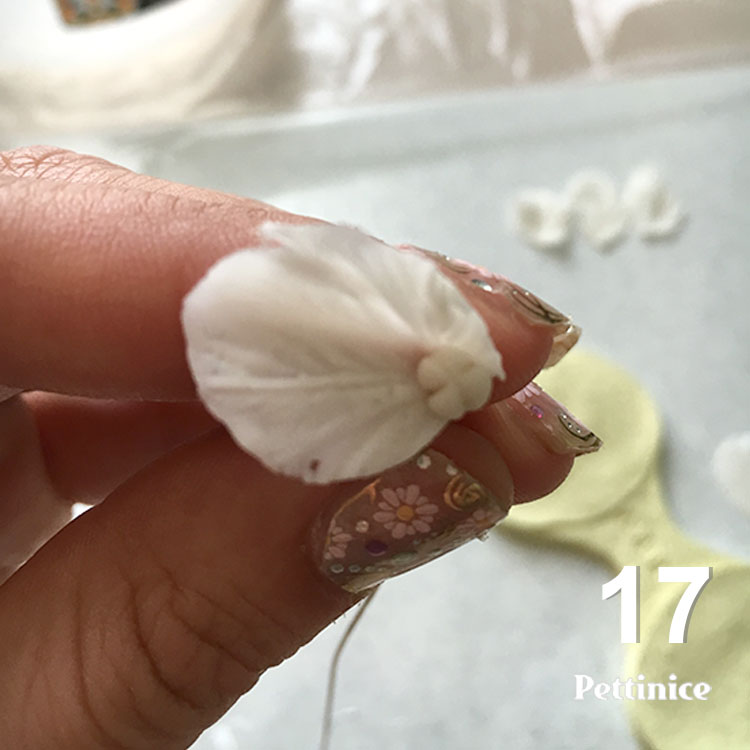
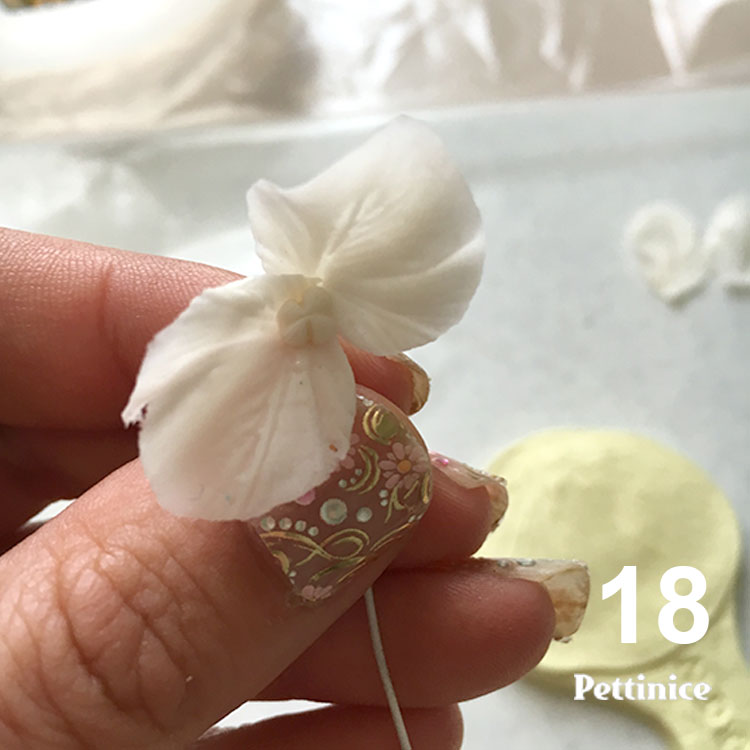
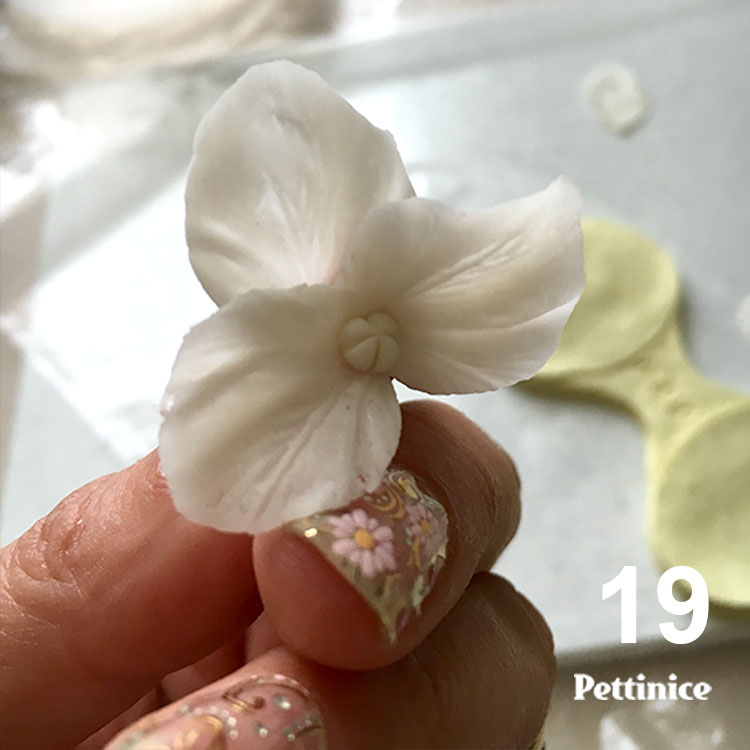
Now that your buds are dry, it's time to put everything together. Each flower will need four petals.
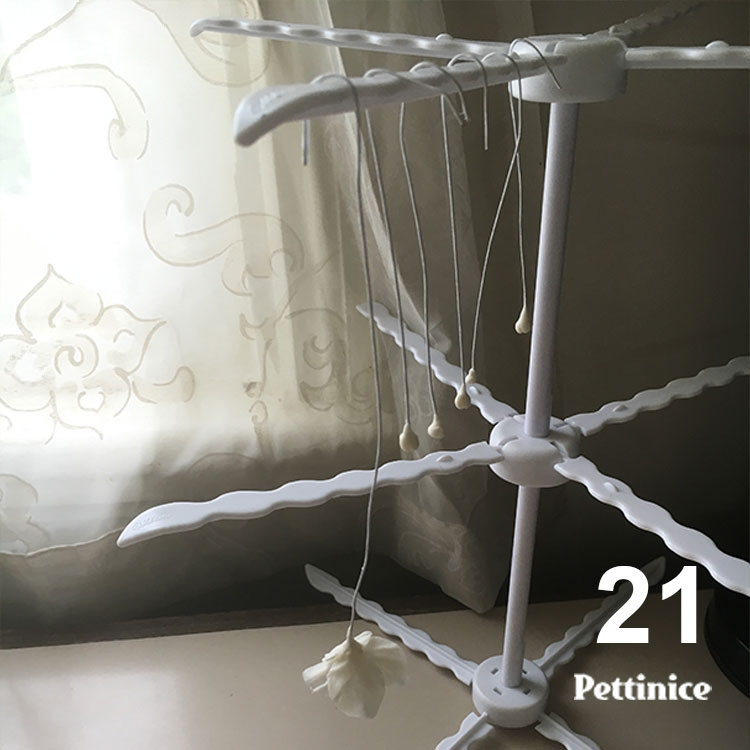
Use a tiny bit of glue* on the petal and glue on to you bud. Glue the next petal on the opposite side and then add the final two petals. Hang upside down to dry as shown in photos 16-21.
*Edible glue is tylose and water mixed together. If you don't have this, other options include using egg white, a diluted piping gel, or water. Be careful not to use too much.
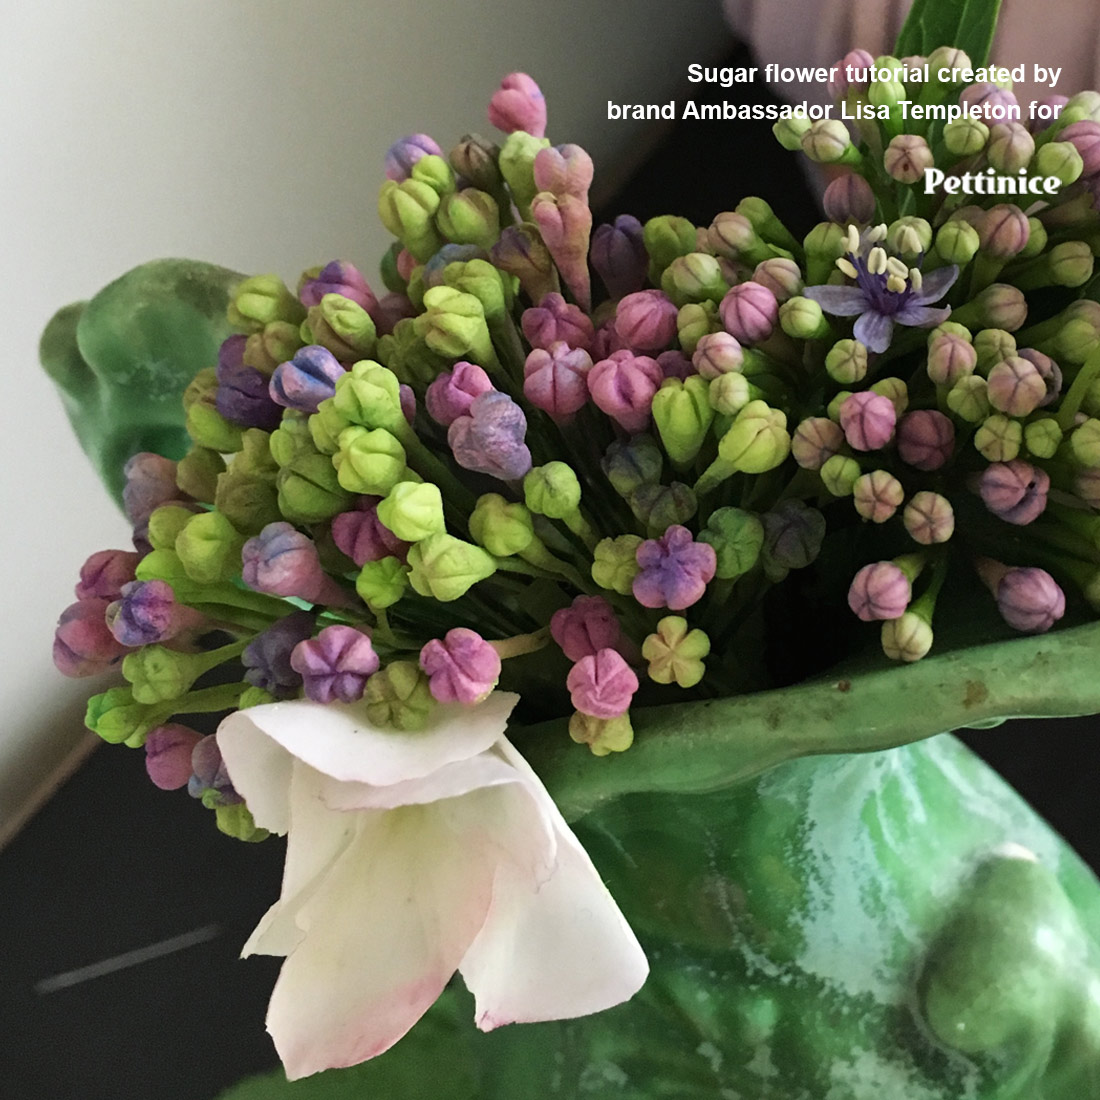
Have fun taking inspiration from nature. Can you tell which half of the photo are real and which are sugar flowers?
I have had a love affair with Bakels Pettinice for many years. I have tried other mediums, but nothing works like Pettinice. I’m a Bakels’ girl through and through and what I love most is not only can I use it for my cakes, but I can also make the most incredible flower paste to recreate the most delicate of flowers.
Dusting the hydrangea flowers
This step really brings the flowers to life. Once your flowers and buds are dry, it's time to Dust!
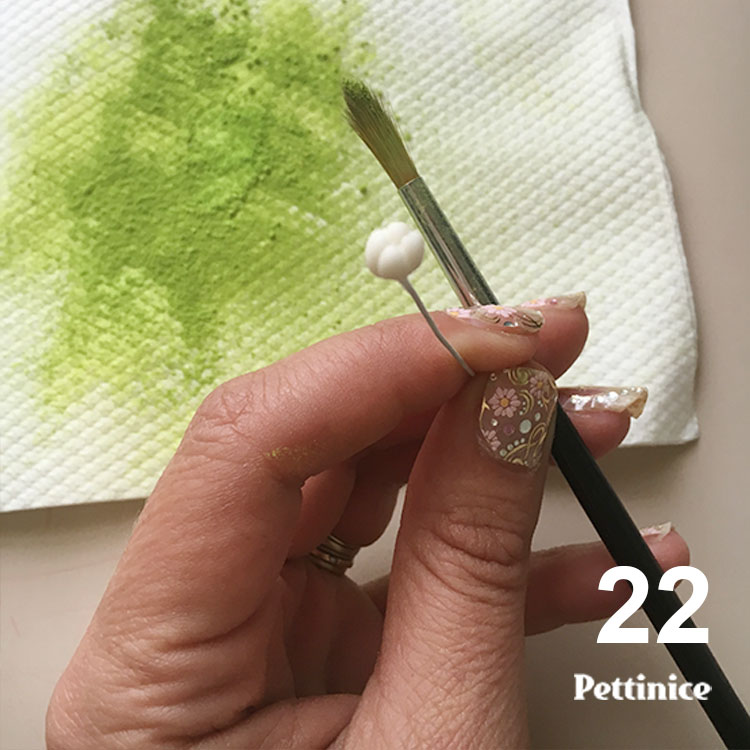
Get some spring green or lime green petal dust on a paper towel.
Use a dusting brush to dust your buds. (Only dust when completely dry!)
Remember to dust the wire too.
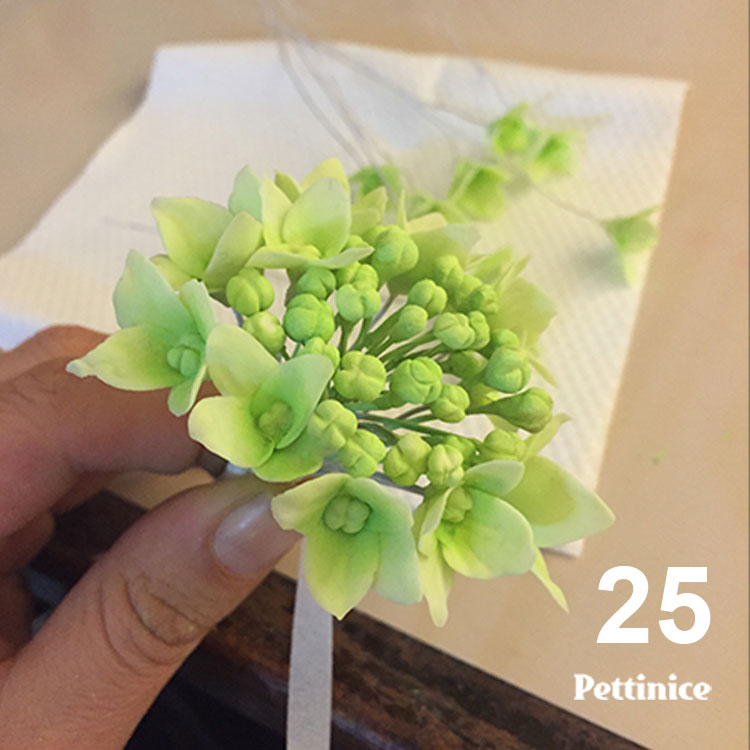
Once dusted you can tape them together. I wasn't making a big bunch so I have taped The buds in the center and flowers on edges.
Once the flowers are all taped you can dust the tape too so you don't have a white stalk.
I hope you have enjoyed this free-form hydrangea tutorial. Study hydrangeas and you will find many different varieties to make. By looking at the buds and centers you can create all sorts of hydrangeas free-form.


Lisa Templeton is a Pettinice Ambassador and owns LM Cake run in Timaru, New Zealand. Her passion is recreating her garden florals into sugar flowers. Read more about Lisa on her bio page.