Pug Cake armature and short cuts by Nina Blackburn
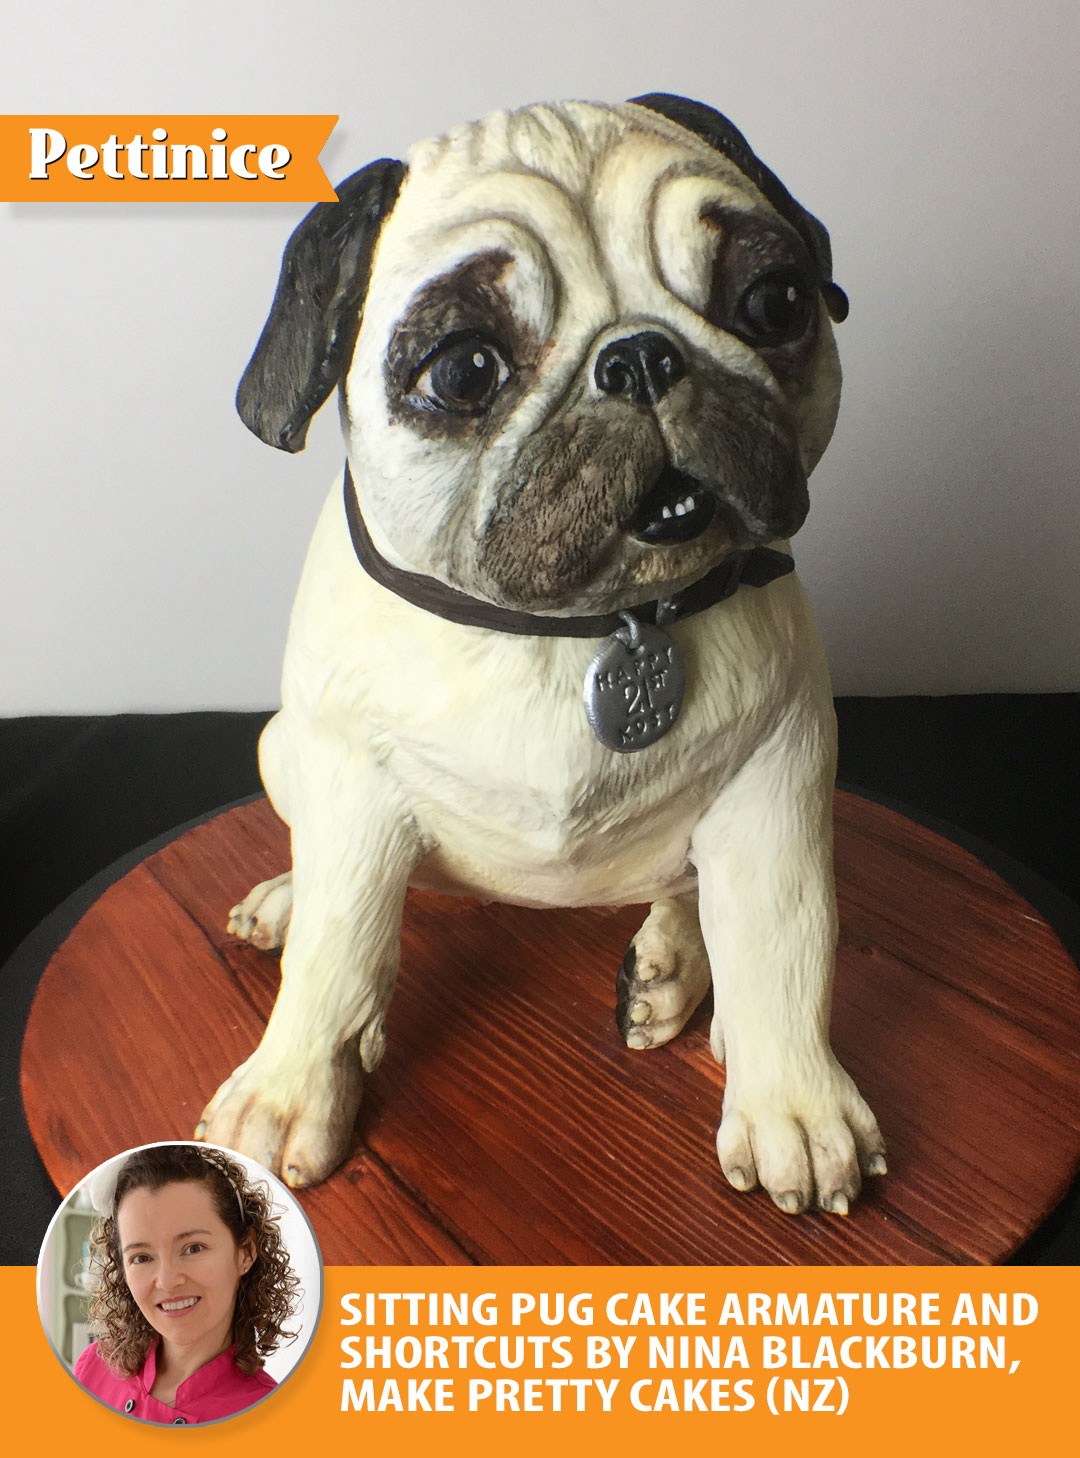
How much is that doggie in the window?
I do hope that doggie's for sale...
I love cake orders that send my heart all a-pitter-patter so when I got the phone call asking for a special 21st cake, I couldn't wait to get stuck in. We are huge pug fans, and my own Mr. Ten has been on a pugaganda campaign to adopt one into our own home for some time so I knew I had a lot to live up to with this project.
There are PLENTY of armature guides on the internet for creating a 3D cake like this. I wanted to show you my own spin, plus reveal a few easy short-cuts to help keep client cost down. If you like it, please swing by our Facebook page and give us a big like and share with your cake groups, guilds and anywhere else you think might find it helpful. Here we gooooooooooo!
Armature reveal
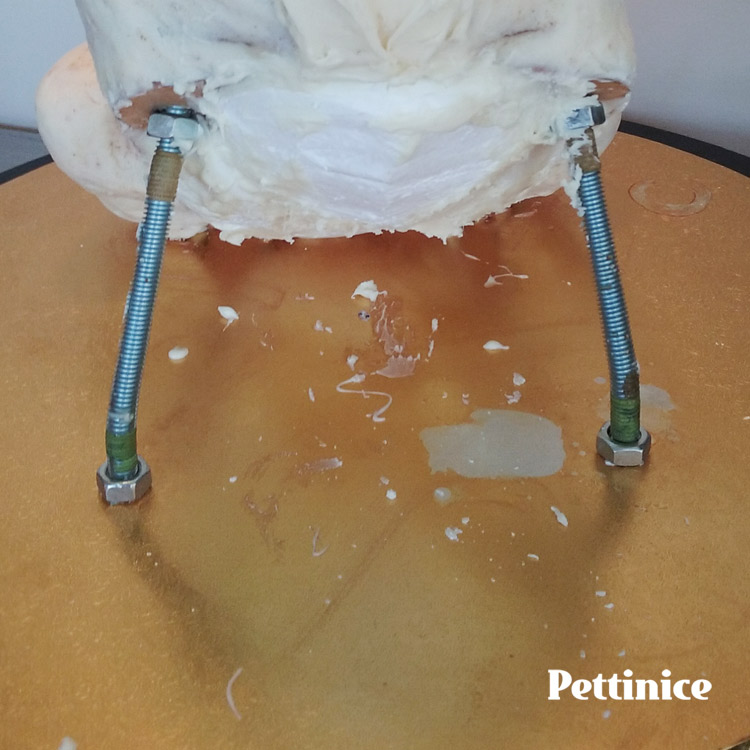
For this cake, I kept my armature pretty straightforward as shown. I wanted to have as many cake servings as possible and the structure needed to be totally solid, as it was travelling a fair distance. I used 8mm threaded rod, bent to shape. I roughly outlined a body shape with 3mm board.
I offset a gold 3mm tall MDF cakeboard, with a larger 3mm tall black board. They sat on my 9mm tall MDF platform, all secured together with screws. I then painted decorators glaze on all exposed surfaces, which is an edible shellac that creates a strong seal. A few coats, then a smooth layer of pure melted chocolate on top and I'm ready to go.
Using my template photograph, I made a few design decisions and used floral tape as a marker for where to bend my 8mm threaded rod.
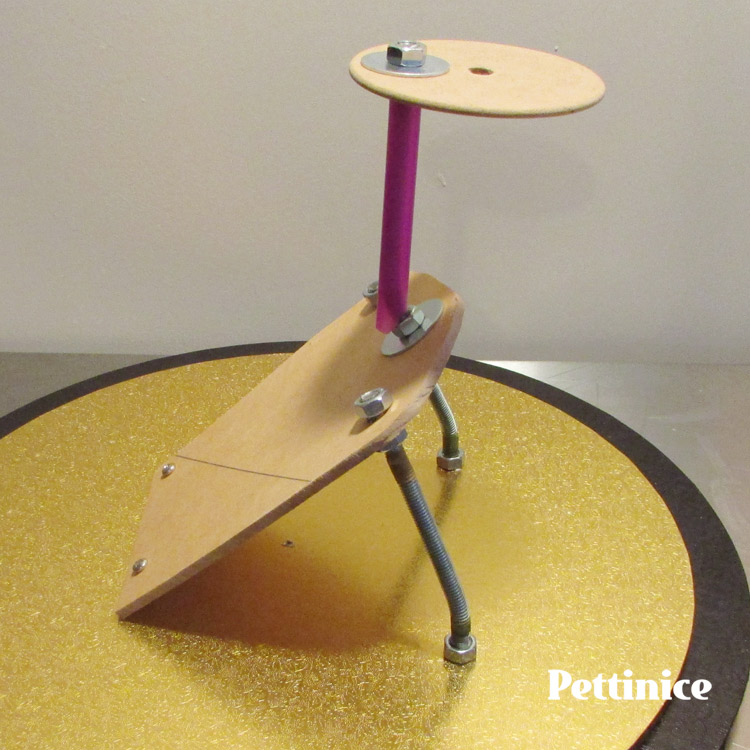
I used bubble tea straw to cover the neck area.

Bottom body board was screwed into the board.
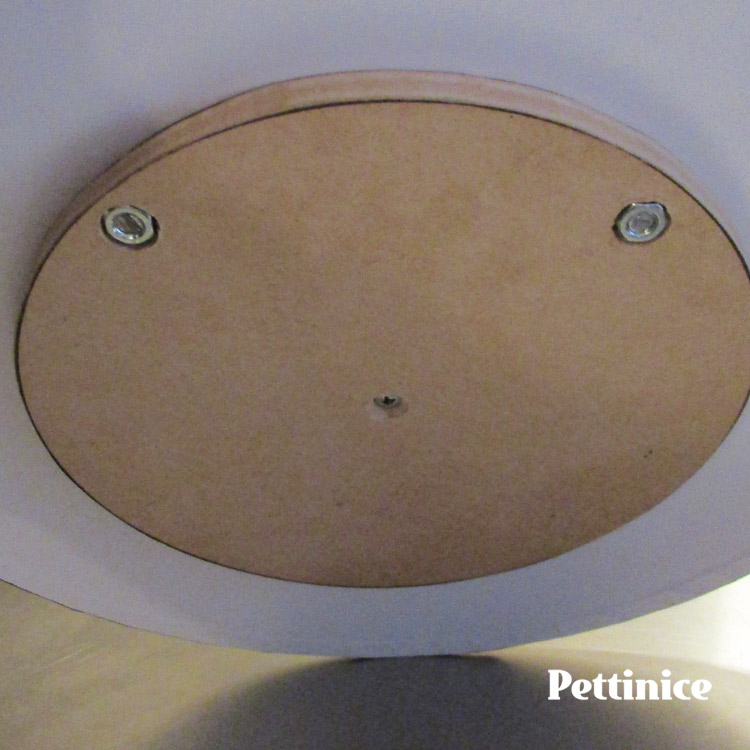
9mm MDF for platform, which was screwed to the top two boards. The nuts were countersunk, so it wouldn't scratch table surfaces. I later painted the edge of the board black.
Did you know?
You can brush on edible decorators glaze to seal all the screws, bolts, rods, washers and wood with several coats. Often called "leaf glaze" or "decorators glaze", you can purchase this edible shellac from all good cake decorating shops.
Tip 1: Use styro for rounded belly.
For the belly, I decided to shape a thin piece of styro, which I hot glued to the bottom of the body platform. Here is a quick photo showing you how it looks before being covered in ganache:
Using a small sliver of shaped polystyrene for the underbelly cuts cost for client and a great alternative to modelling chocolate.
Work in progress photos - just because!
This is my happy place. I just wanted to share a few work in progress photos of the carved pug before moving on to the next tip that works for me to help keep client costs down.
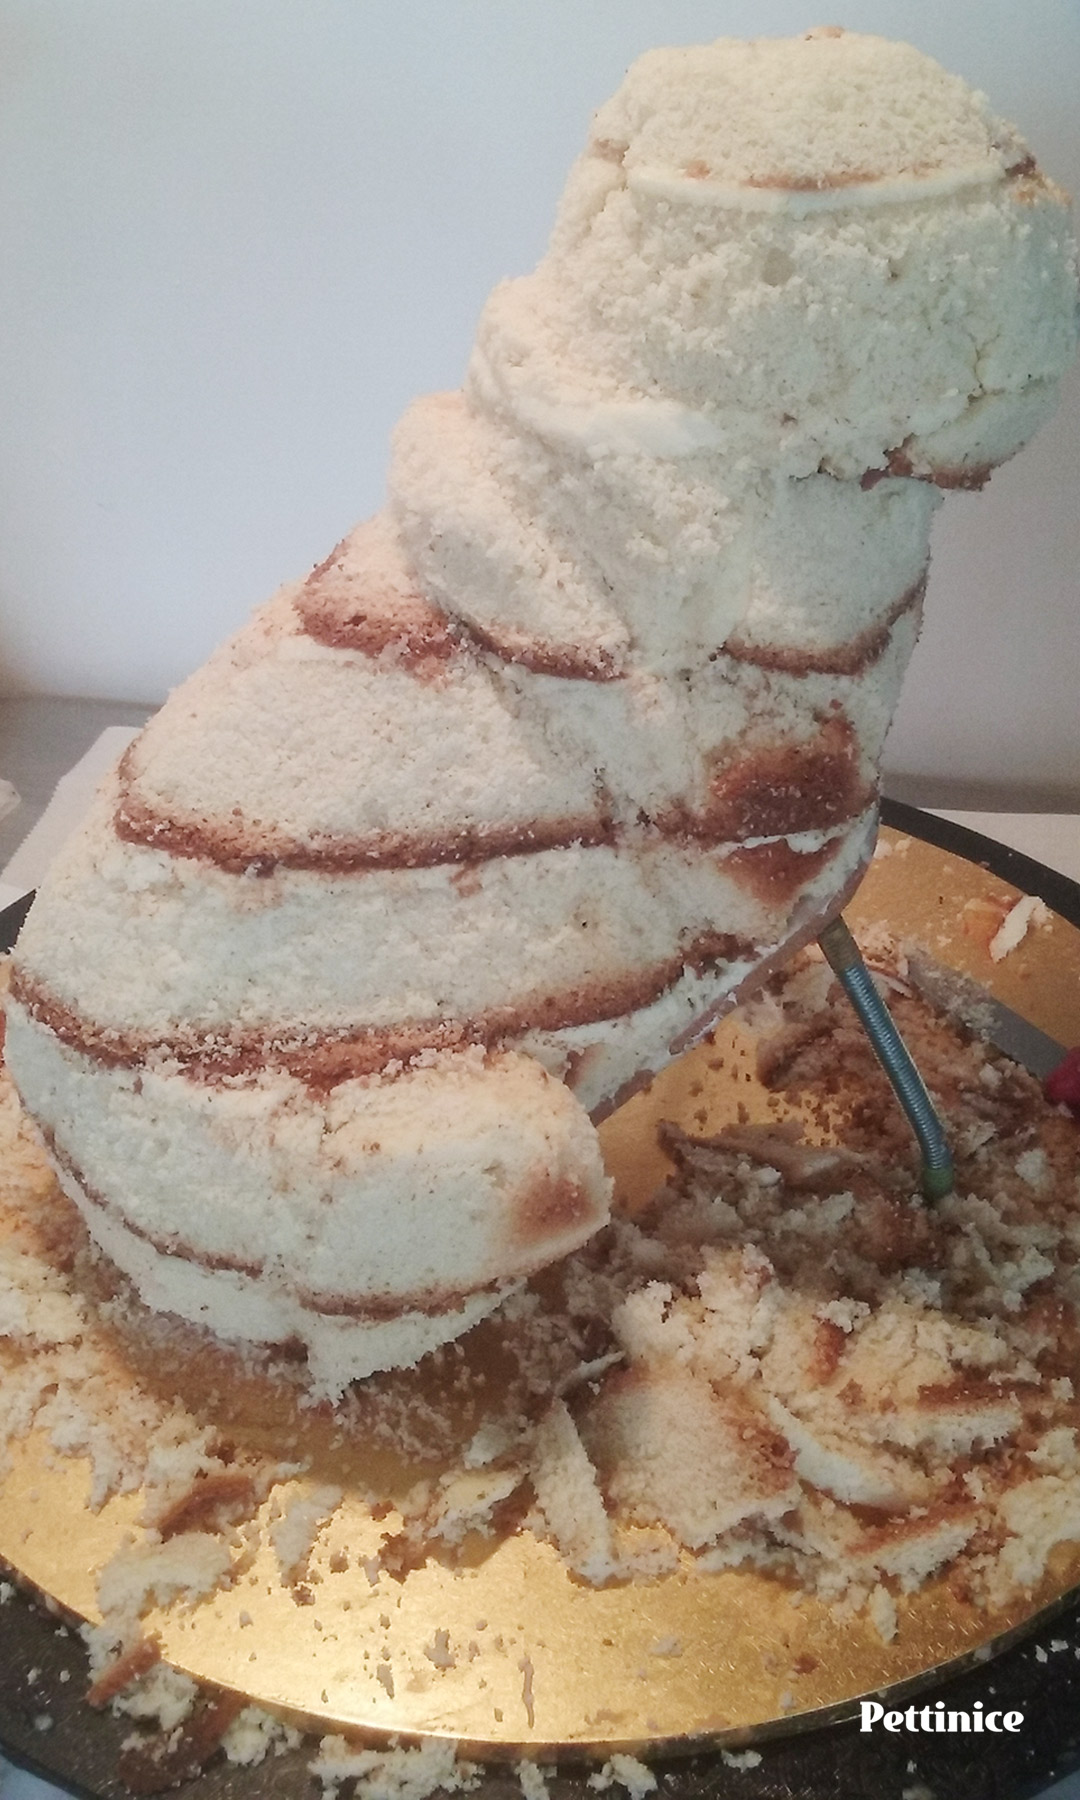
My favorite part of cake decorating! The carving. :)
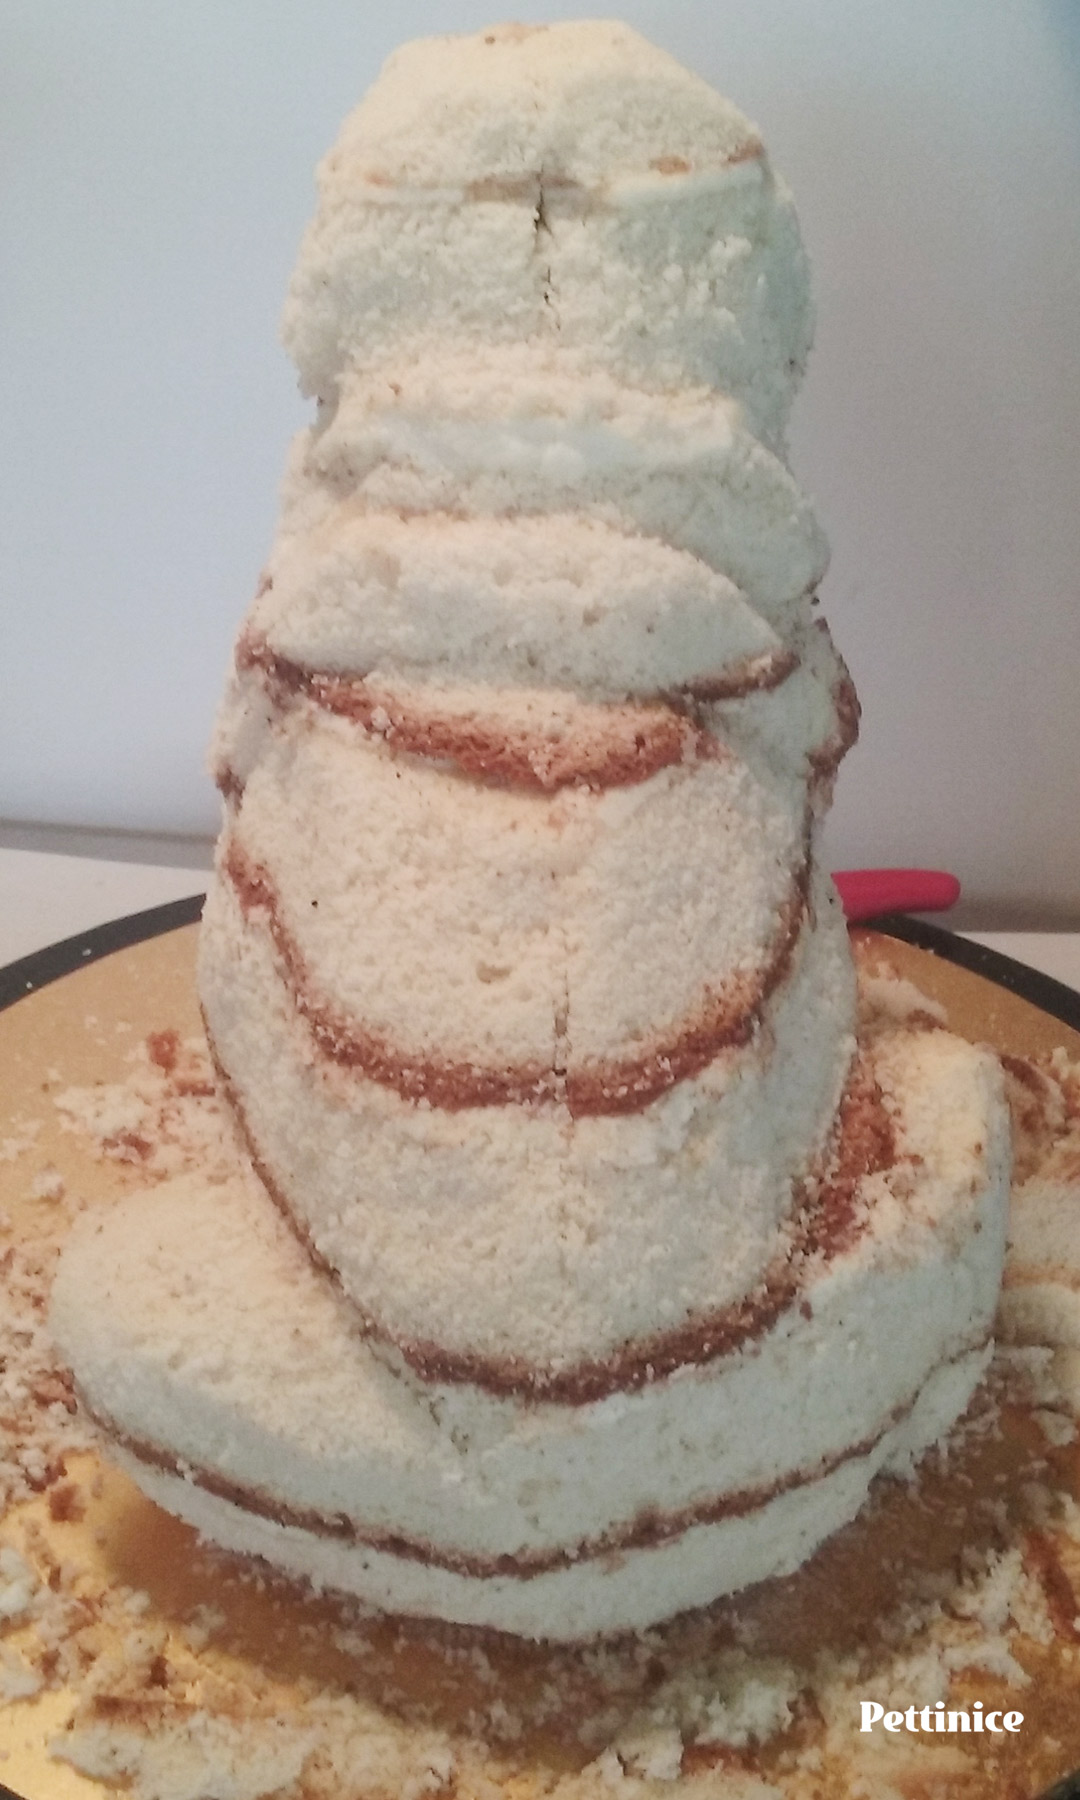
Bakel's vanilla cake mix with white chocolate and salted caramel filling. Yum!
And finally, a little shortcut for the front legs
I have already shown you the belly shortcut - and you will see what I did for the front legs.
Tip 2: Ganache is another one of your best sculpting friends.
I used aluminium foil tightly wrapped to create the general shape I wanted around the threaded rods. Next, I simply used the same 3:1 ganache for the rest of my cake, let set and covered in Pettinice fondant as per normal. That's it!
Sooooooo good, I think I will adopt this method from now for non edible components of my cakes.
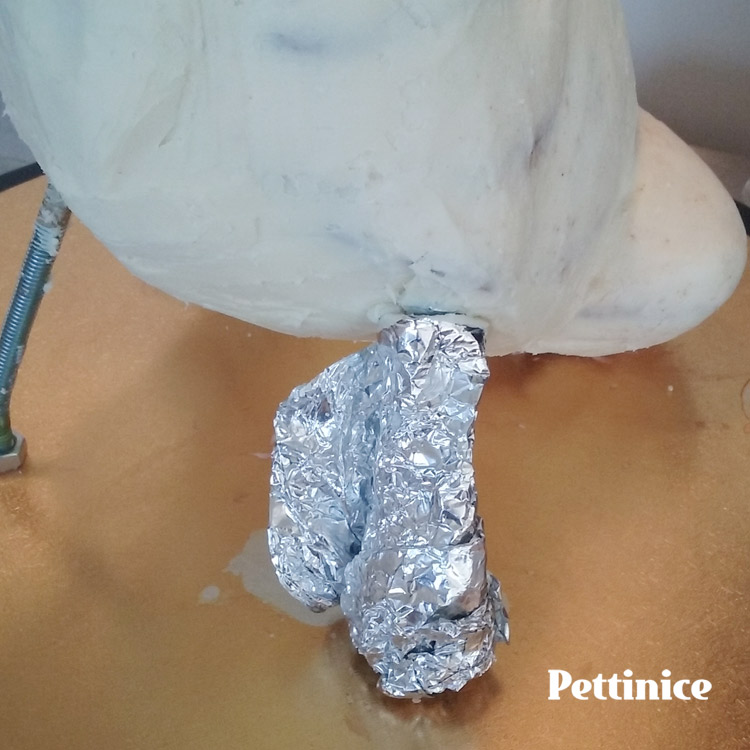
Tightly wrap aluminium foil around threaded rod until you have the shape you want.
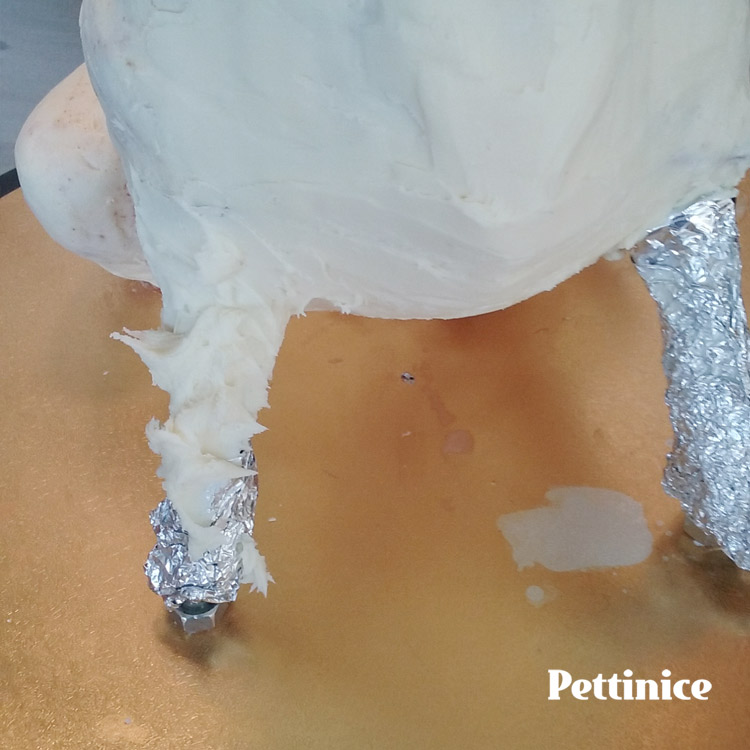
Cover with 3:1 ratio ganache and shape as per usual. Done!
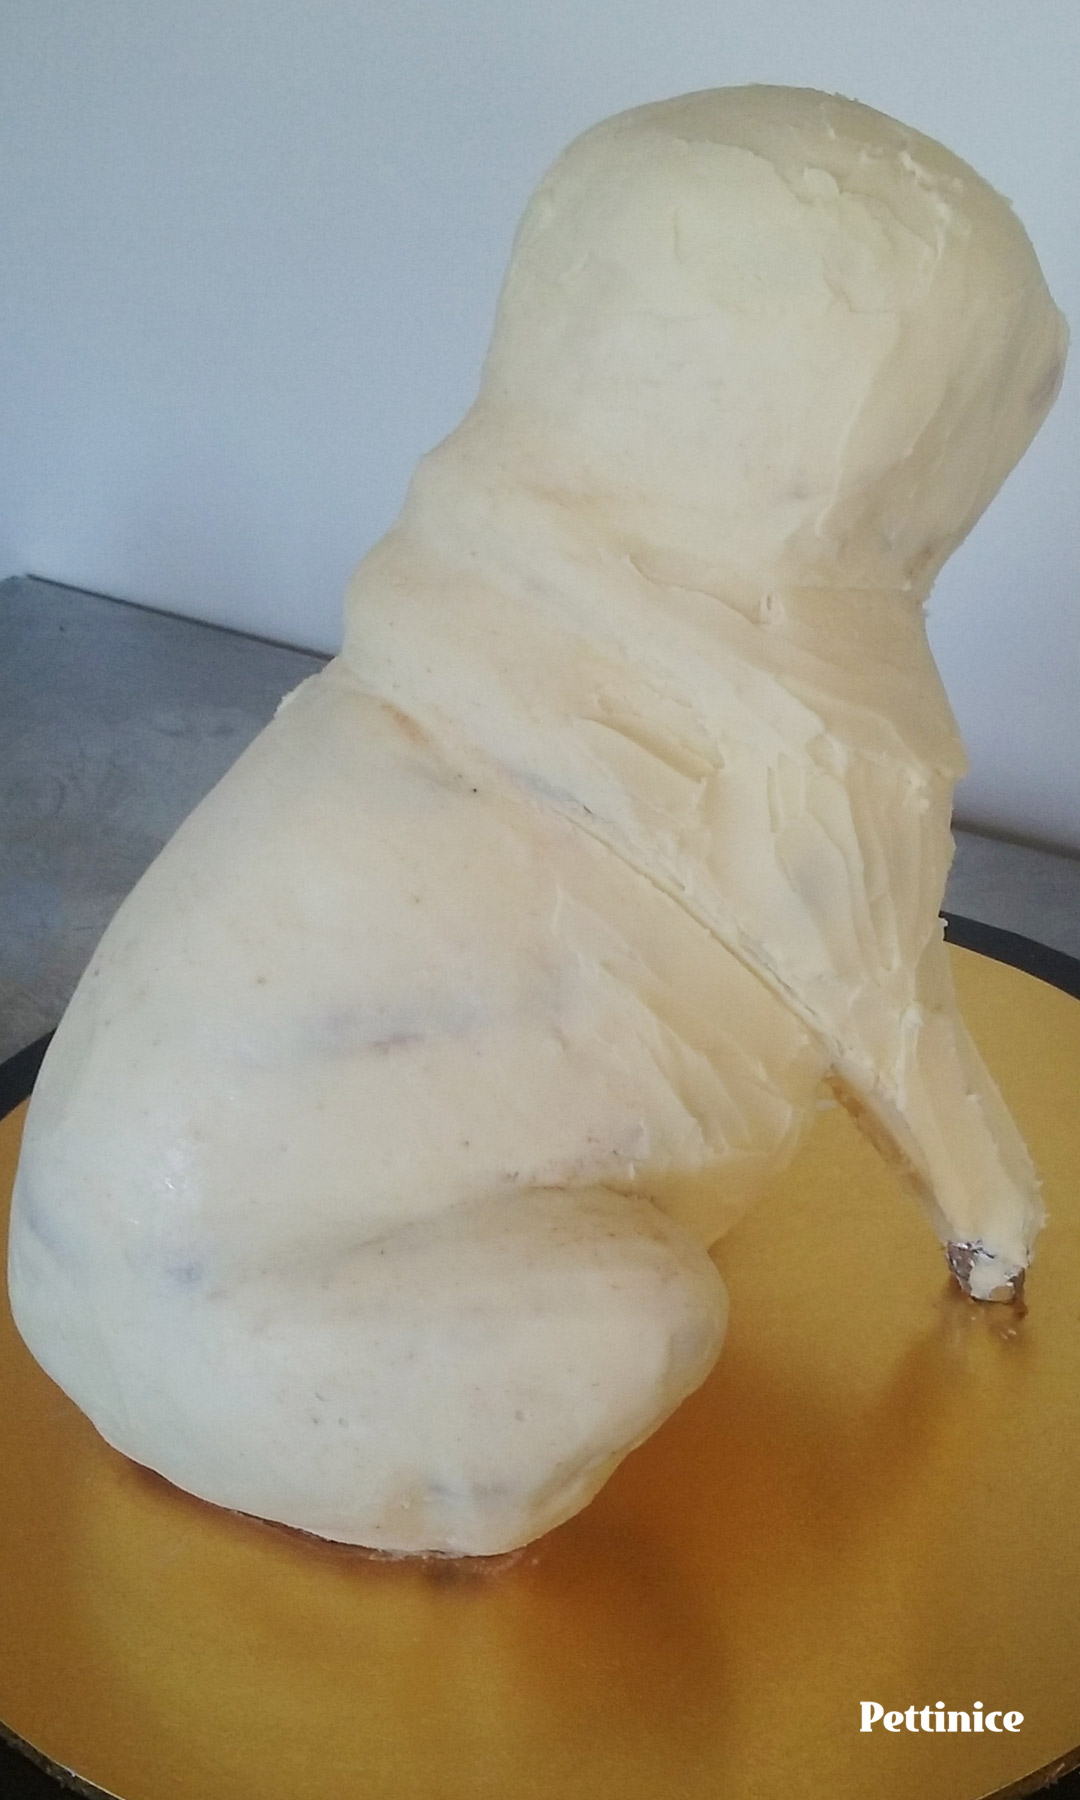
Needs a final smooth, then cover with Pettinice as usual.
For this project, I made a conscious effort to save costs for my client - both in material and my time. So I decided to skip modelling chocolate totally and instead used cake, fondant and ganache as my "go to".
And finally just for fun...
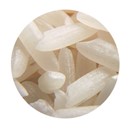
Thanks to a fabulous tip I filed away from Ruth Ricky of the Sugar Gypsy, I cut and used uncooked rice for the pug's teeth. Who knew? It was brilliantly effective!


Nina Blackburn is an award winning cake artist who owns Make Pretty Cakes in Auckland, New Zealand. A proud Pettinice Ambassador, and self confessed cake-a-holic who not only enjoys creating specialty 3D cakes, but also hosting and teaching cake decorating classes.
You can find Nina on Facebook and Instagram.


