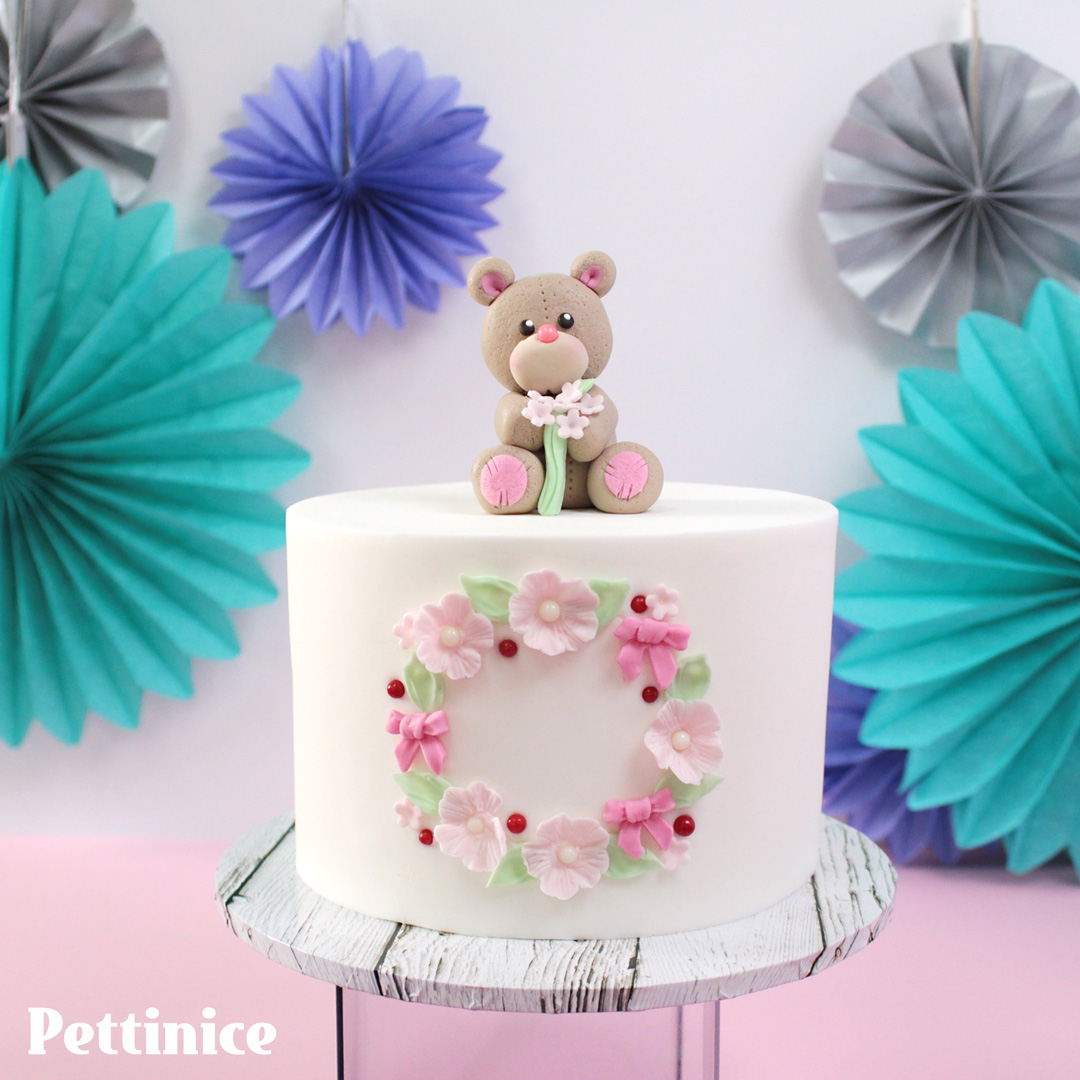
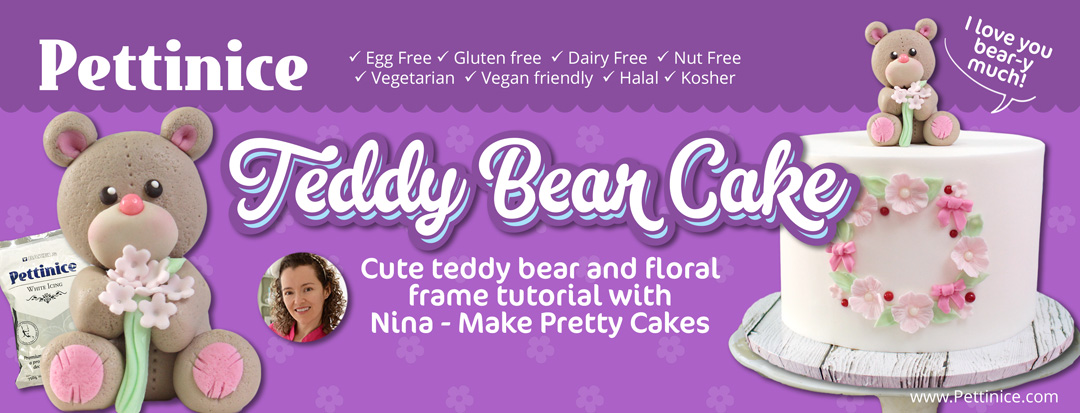
How to make a teddy bear topper and floral frame
Make Pretty Cakes owner Nina Blackburn shares an easy way to make a teddy bear topper and floral frame cake with us.
Edibles needed:
- 8" base cake
- White Pettinice
- 5g Green Pettinice
- 10g Pink Pettinice
- Soft pink edible dust for cheeks
- Tylose powder
- Raw spaghetti
OPTIONAL
- Edible cupcake sprinkles
Tools needed:
- Small brushes for dusting
- Sharp blade
- Circle cutter
- Toothbrush
- Toothpick
- Rolling pin
- Small brush for water
- Small flower plunger (or similar)
- Small bow mold (optional)
- Small flower veiner (optional)
- Dresden tool
- Stitching tool (optional)
- Decorating time: 1 hour
- Decorating skill: Beginner
Did you know our 750g packets are gluten, nut, dairy, and egg free?
Great for vegans too!

Making the floral frame
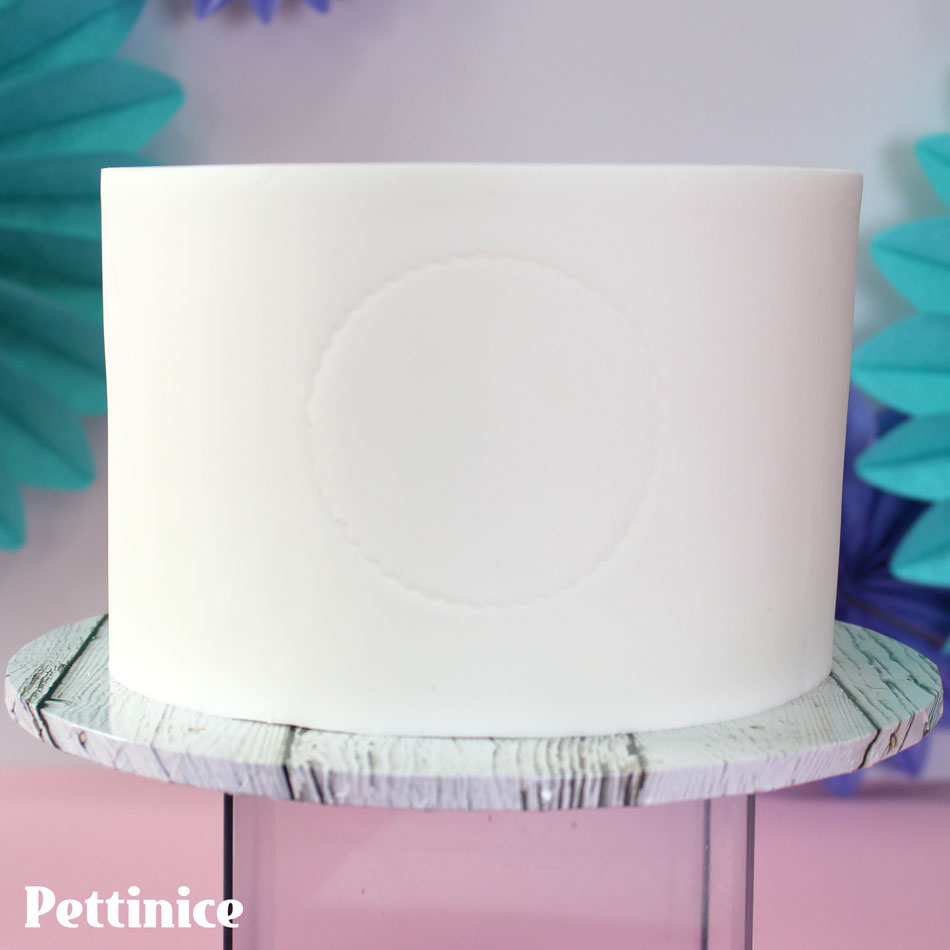
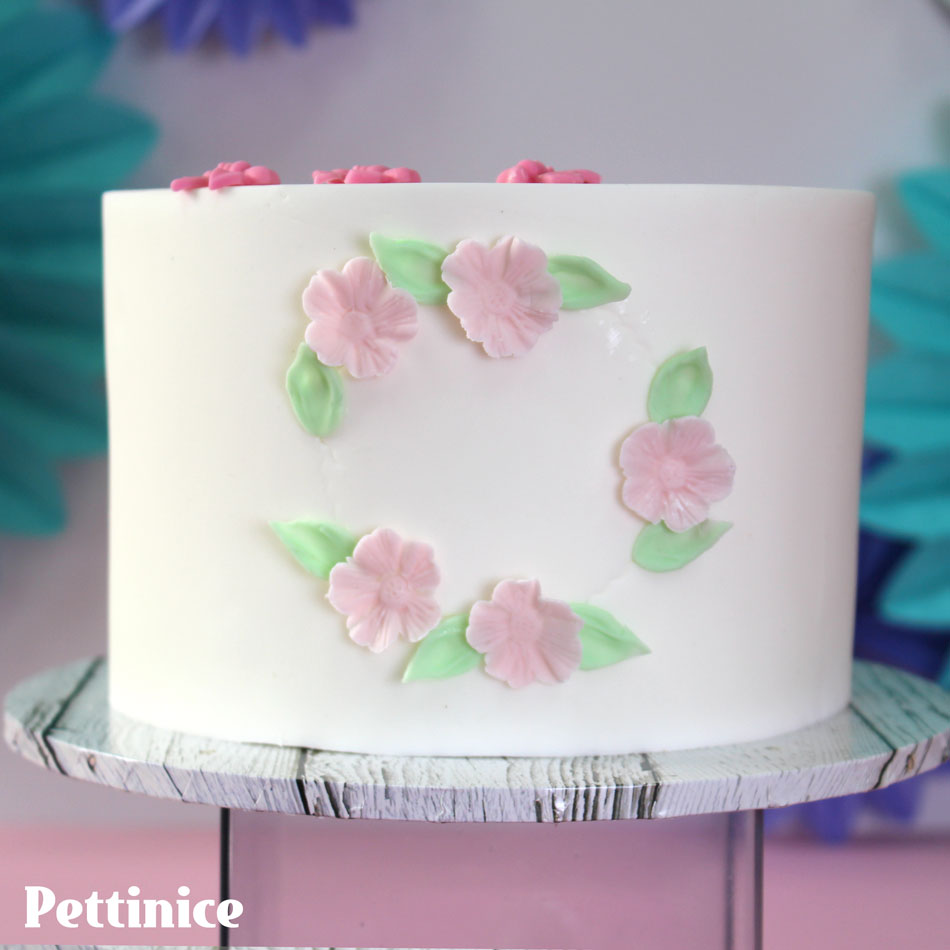
Cover your cake with Pettinice fondant and use a circle cutter to mark your frame as a guide..
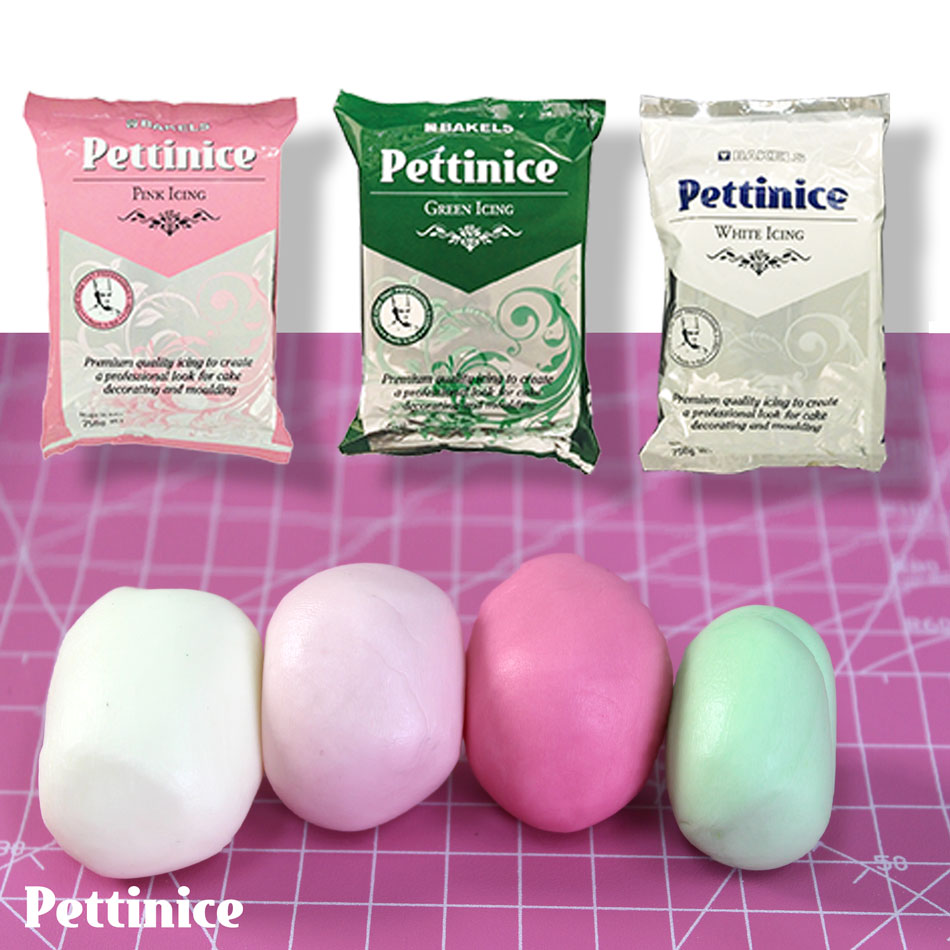
Using White Pettinice, mix various amounts of Green, Pink, and Chocolate Pettinice to create desired shades for your cake.
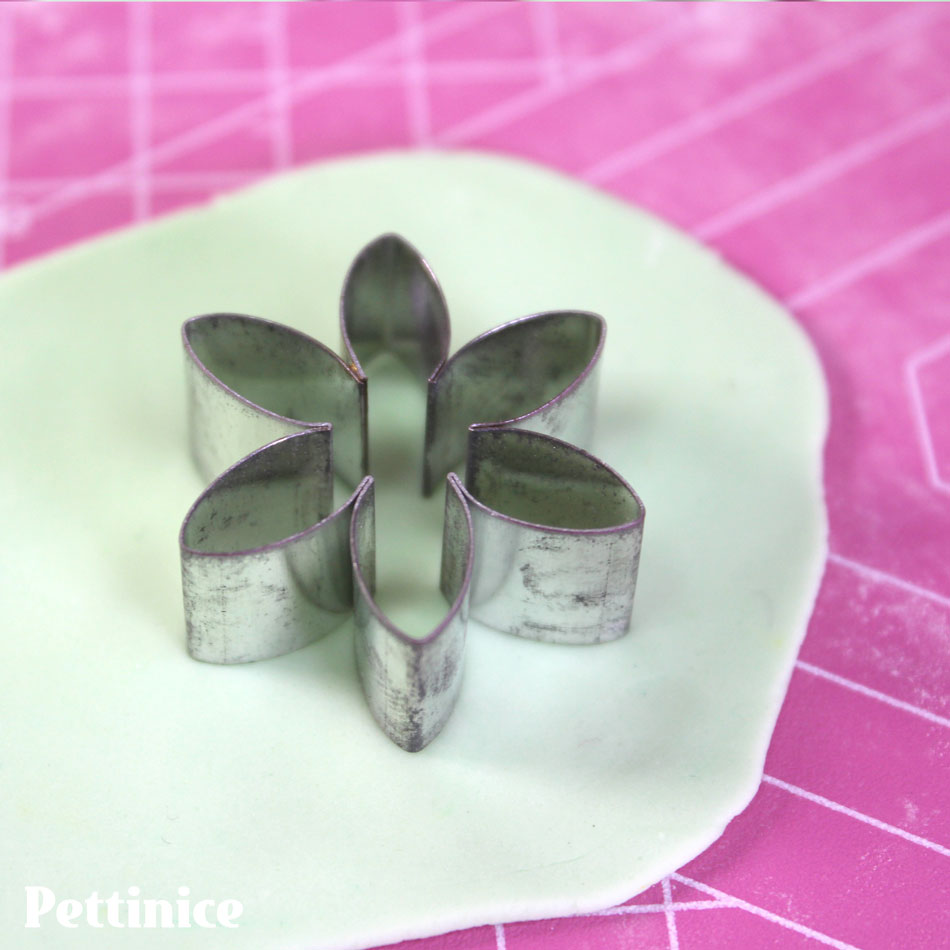
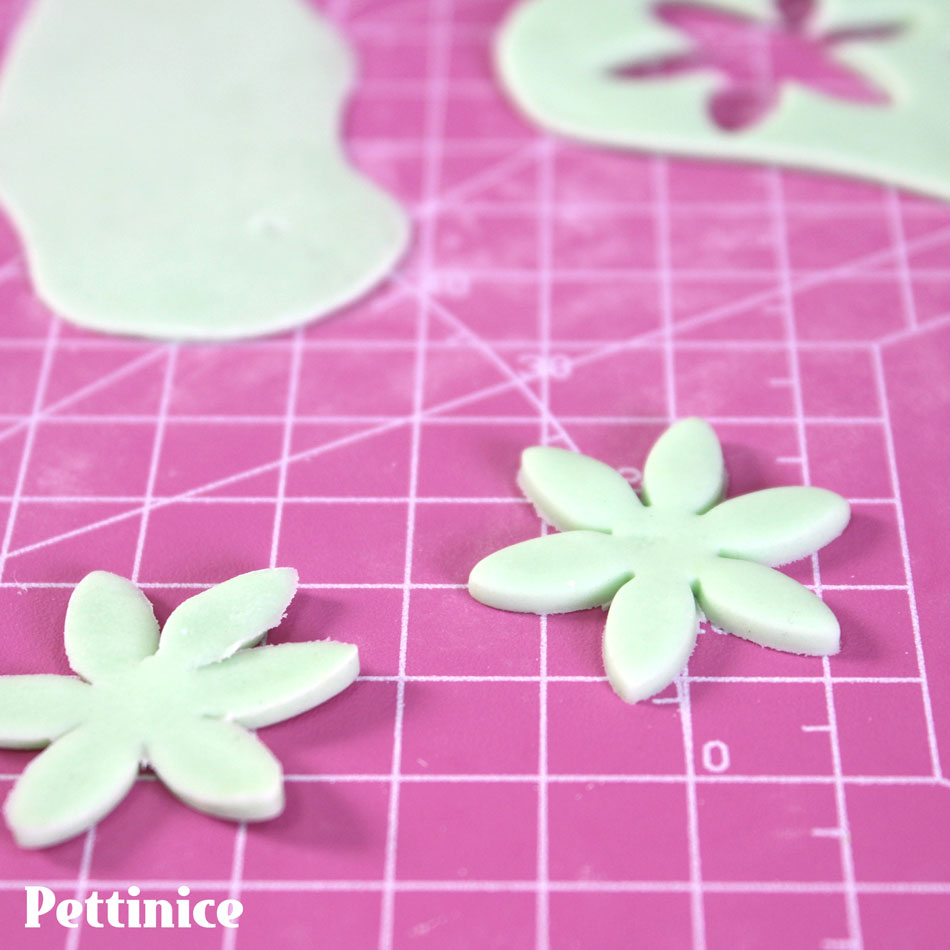
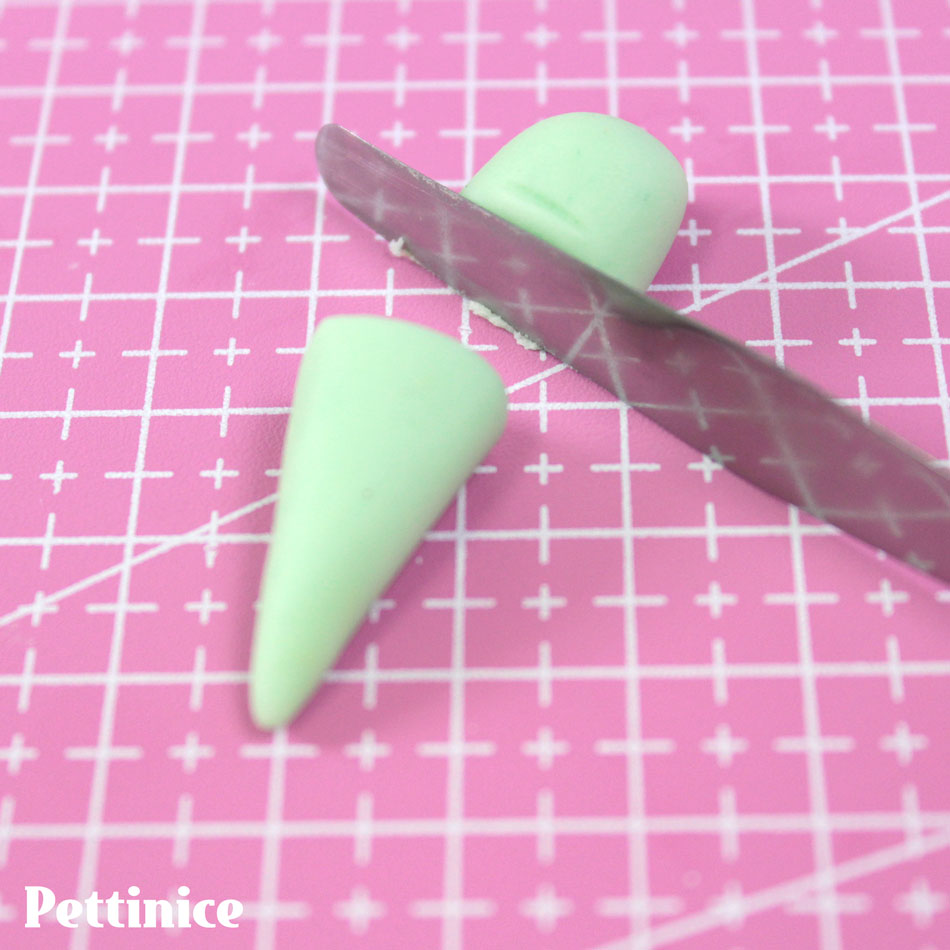
We want to create the leaves for the floral frame. You can either roll out small carrot shapes, or use a small flower plunger to create several petals at once.
.
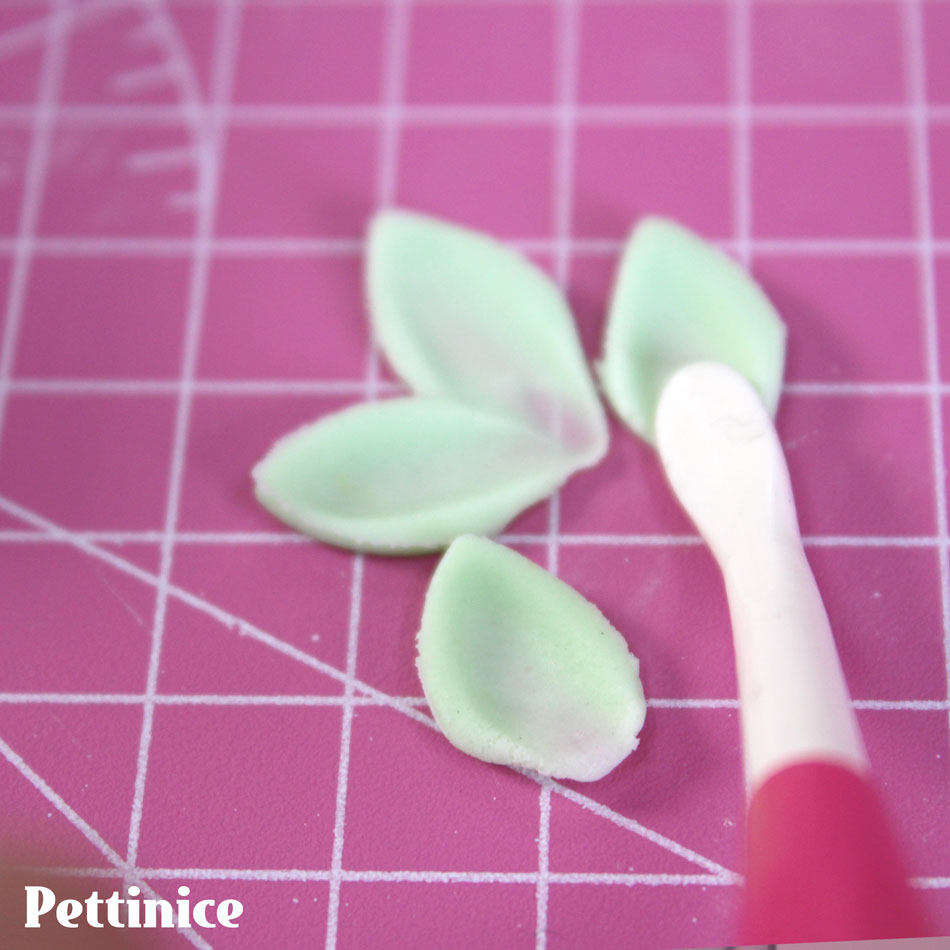
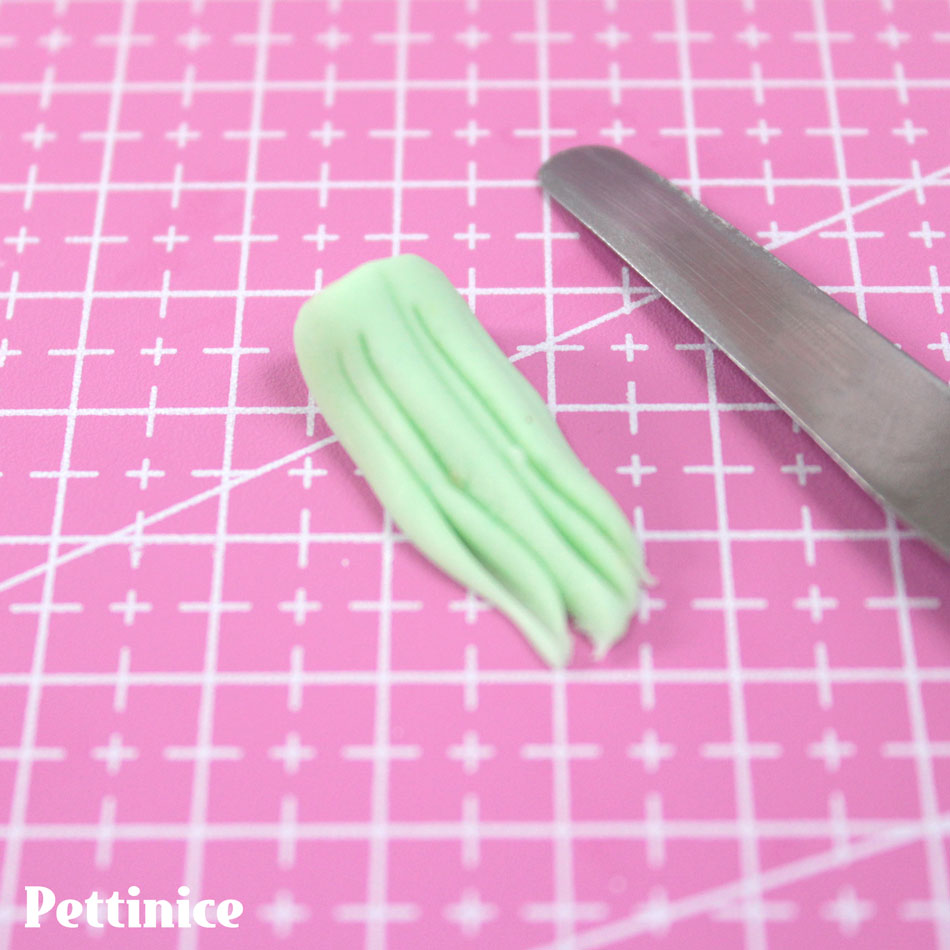
Separate the petals and use your Dresden tool to create movement.
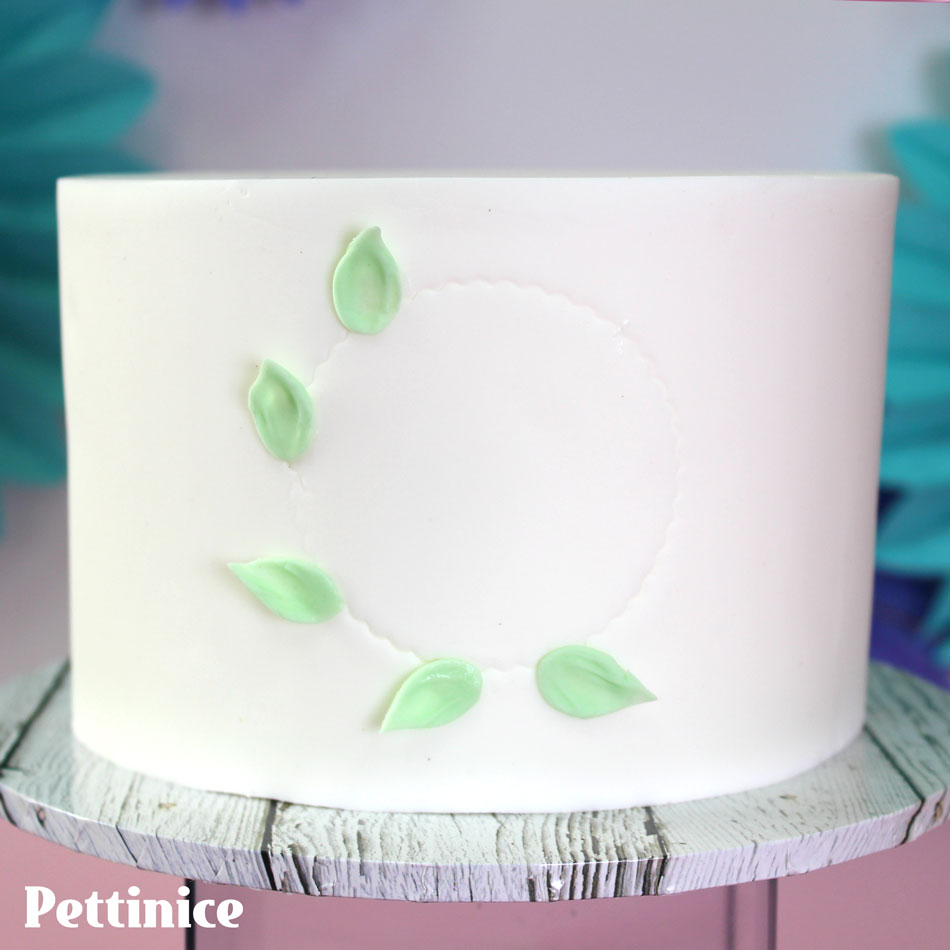
Using a little bit of water (or white vegetable fat), stick your petals along your guide.

I have left the message inside the frame blank - however you can place a fondant birthday number, or paint or write in any message you want (I love you! Happy Easter, etc.) Another great tip for this project is to pop your molds into the freezer for a quick minute so the fondant is easy to remove without losing its shape.

Create a few smaller flowers in various sizes and colours for your floral frame. Hold to one side so they dry a bit.
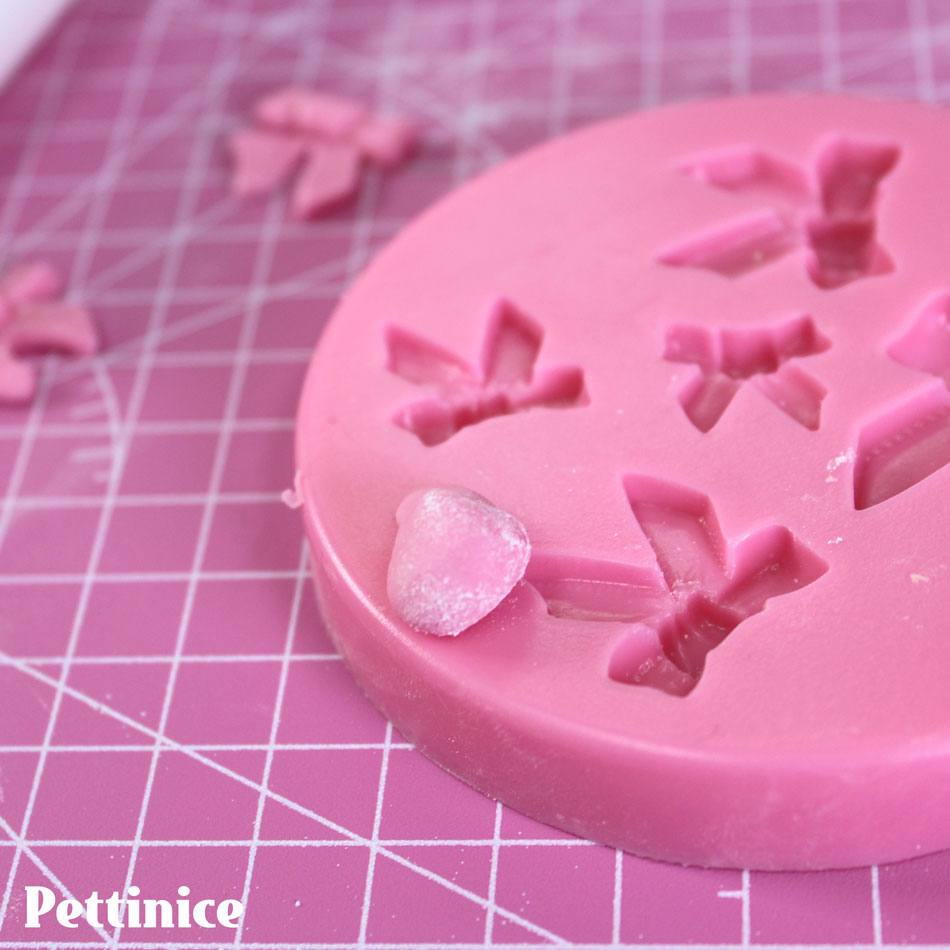
Pat a little icing sugar or cornflour onto a little ball of Petitnice before placing into the bow mold. This will help it from sticking.

After pushing your fondant into the mold, use a small sharp blade to remove the excess.

For bigger flowers you wish to hold a shape, add some Tylose powder to give it more strength when it hardens.
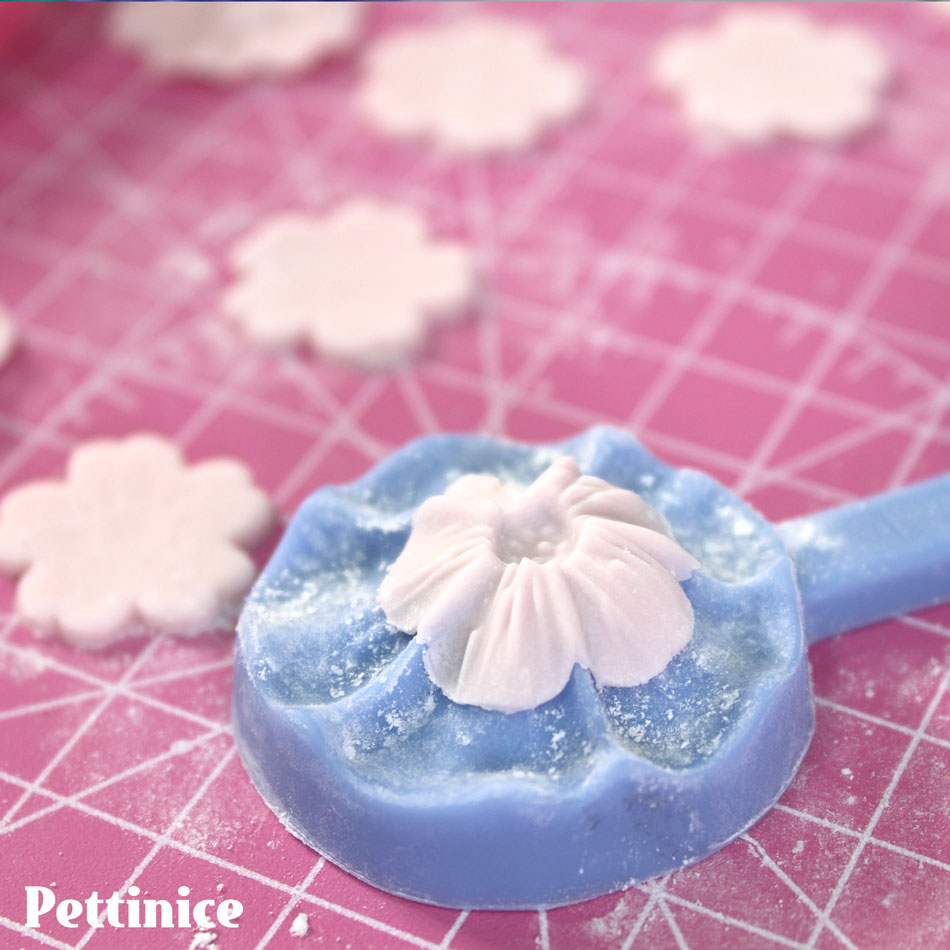
As a quick option, you can use a veined press to add texture to your petals.
Start building up your Floral frame.
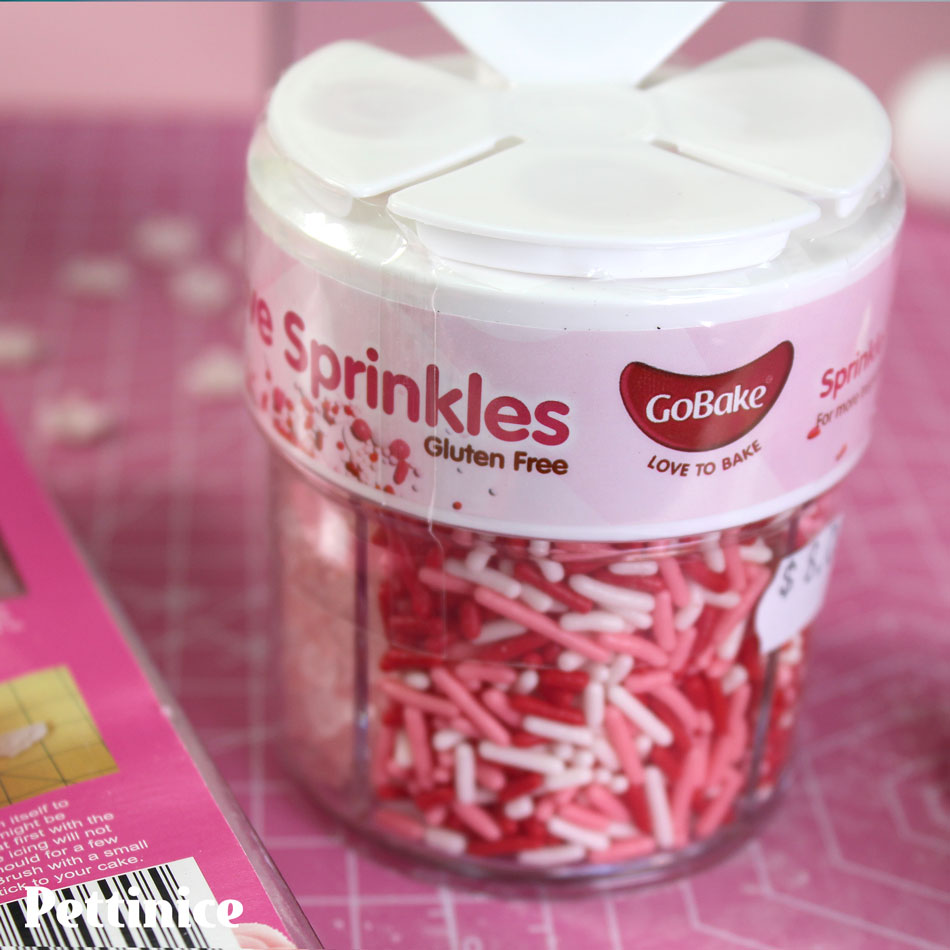
A really cute way to add details is using sprinkles!
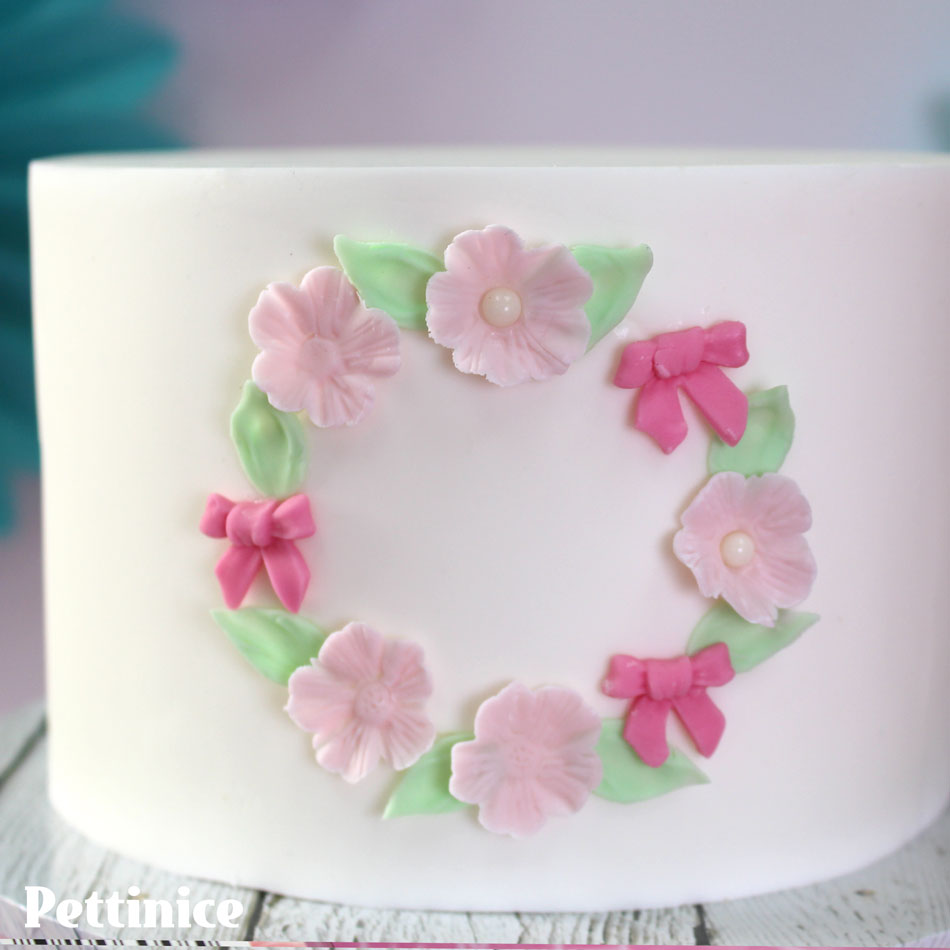
Continue building up your Floral frame with your bows and add some of the pearl sprinkles in the centre of your flowers..
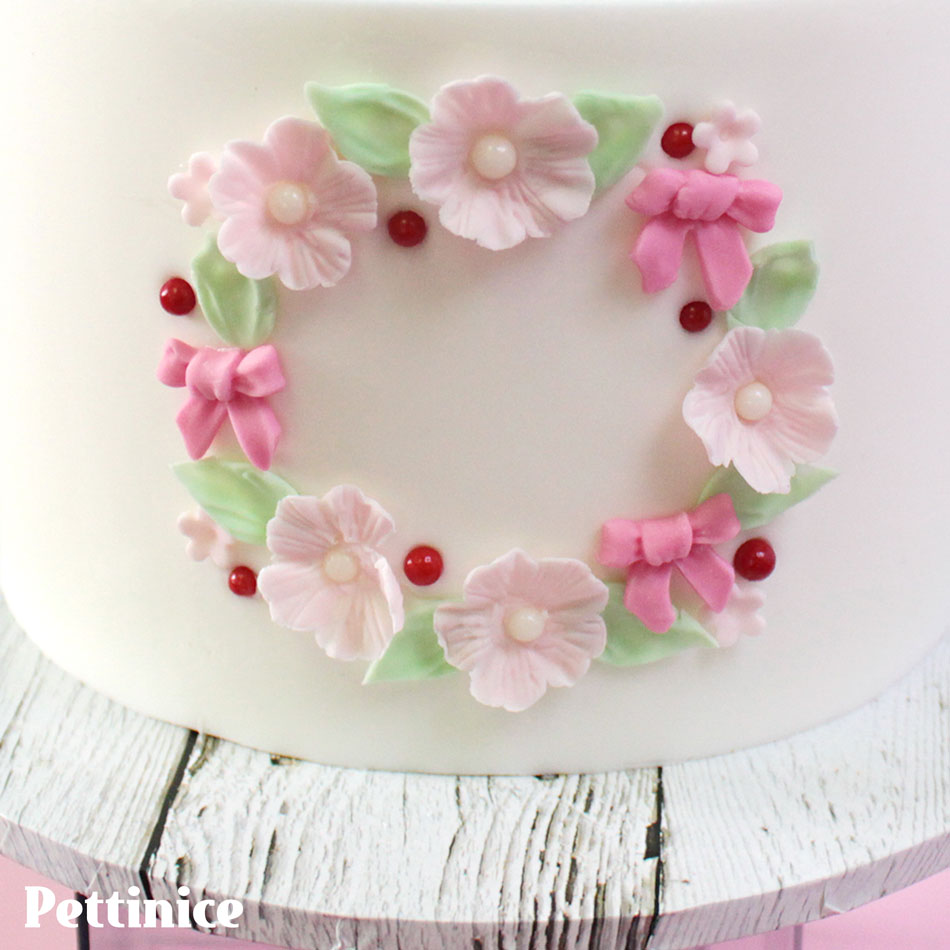
Place the smaller flowers and more sprinkles to fill your frame.
Making the teddy bear
Mix a small amount of Chocolate and White Pettinice, depending on how dark you would like your teddy bear to be.
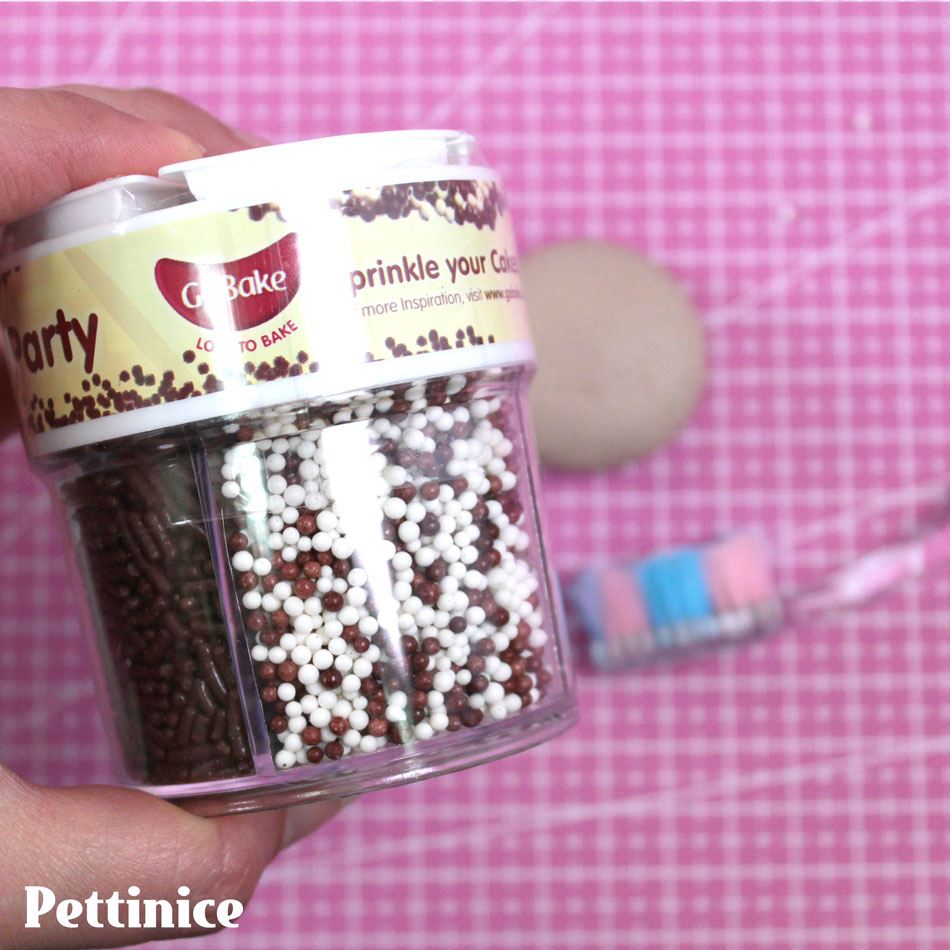
I also used the small white sprinkles for the eye twinkle.
If the teddy bear is small enough, you can get away with not using tylose powder.
However, if your teddy bear is on the larger side and you don't add tylose, there is a good chance it will slump and have a very wrinkled belly!
These are the shapes and gram weights I used for my teddy bear parts:
EARS
- Rolled into balls. 2.5 grams to divide in 2.
ARMS
- Rolled into a sausage, 9 grams to divide in 2.
HEAD
- Rolled into a ball and flattened, 17 grams
BODY
- Rolled into a teardrop and flattened, 30 grams
LEGS
- Rolled into a sausage, ends flattened against the table and centre rolled thinner, 15 grams to divide in 2.
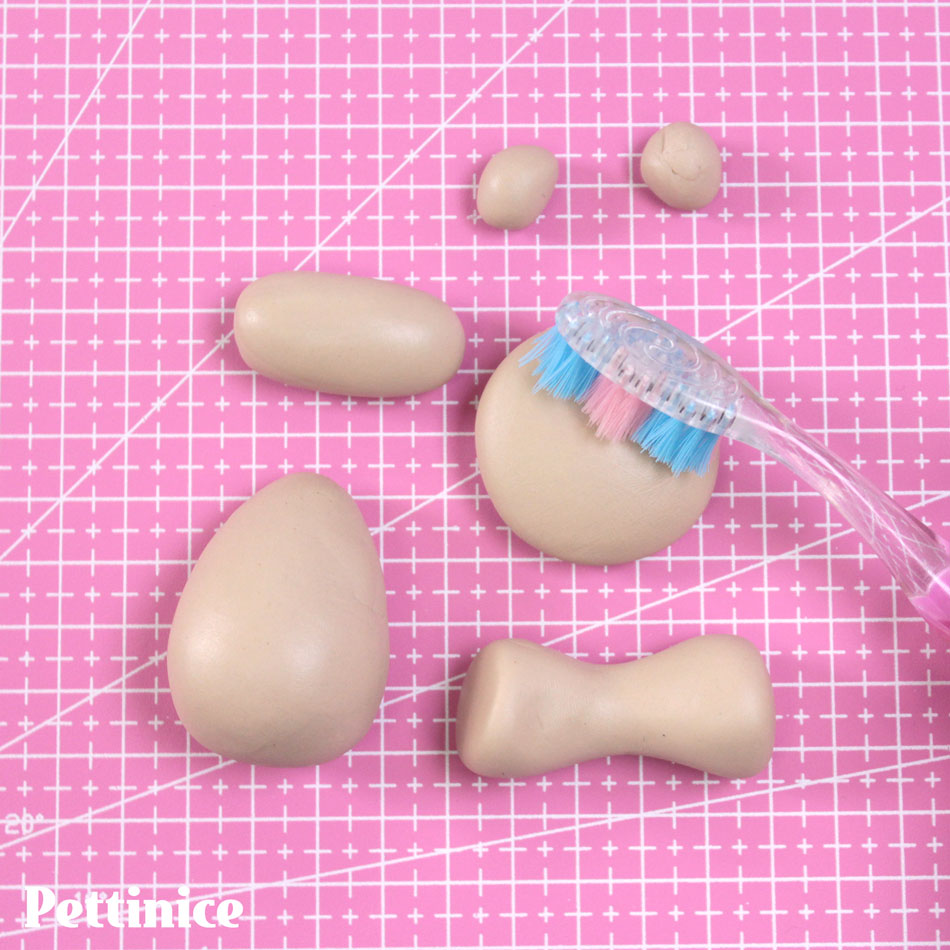
Totally optional, but you can add texture to your pieces by pressing bristles of a brand new toothbrush used only for cake decorating. Press down as hard as you wish your final texture to be.

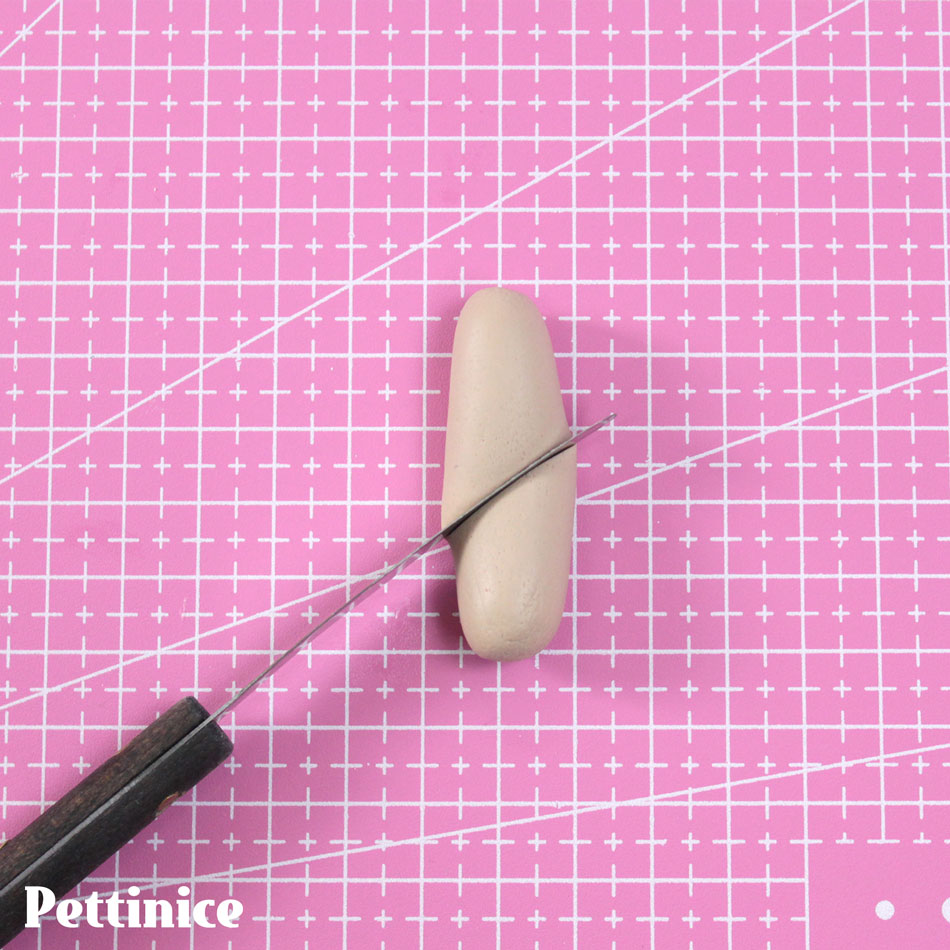
Cut your teddy's legs in half, and you will be sticking it to the body with a bit of water.
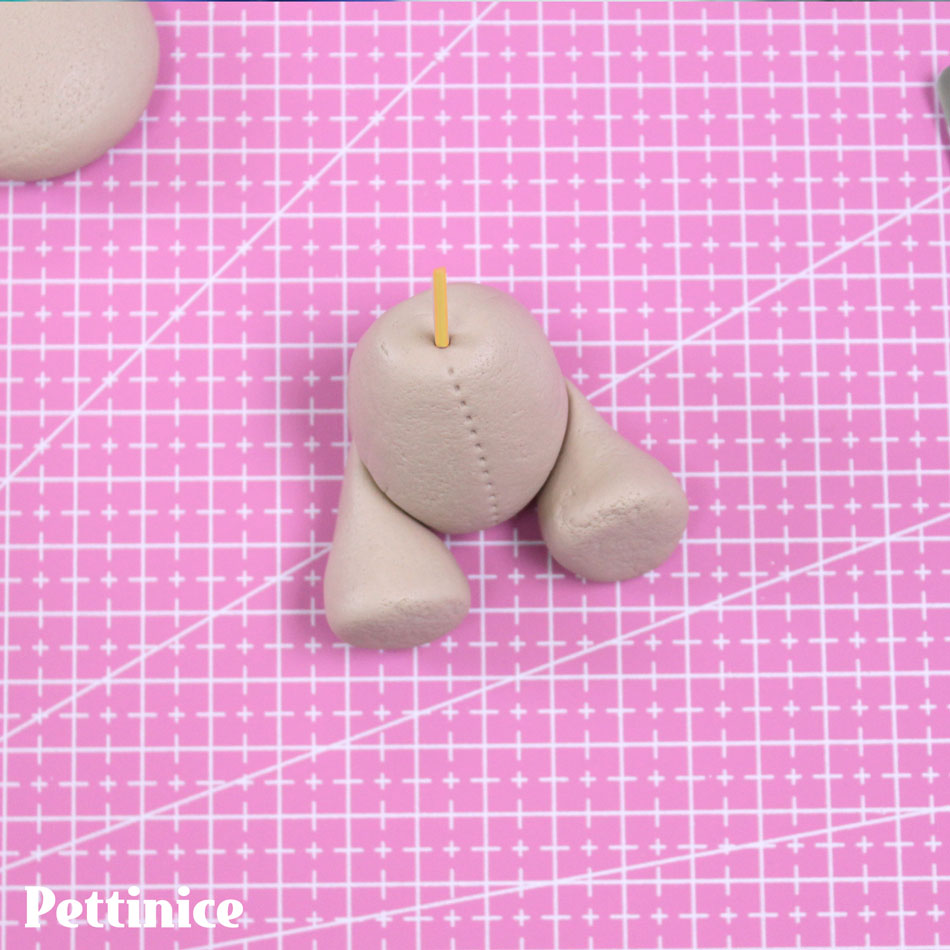
Use a piece of raw spaghetti to hold the body to the head.
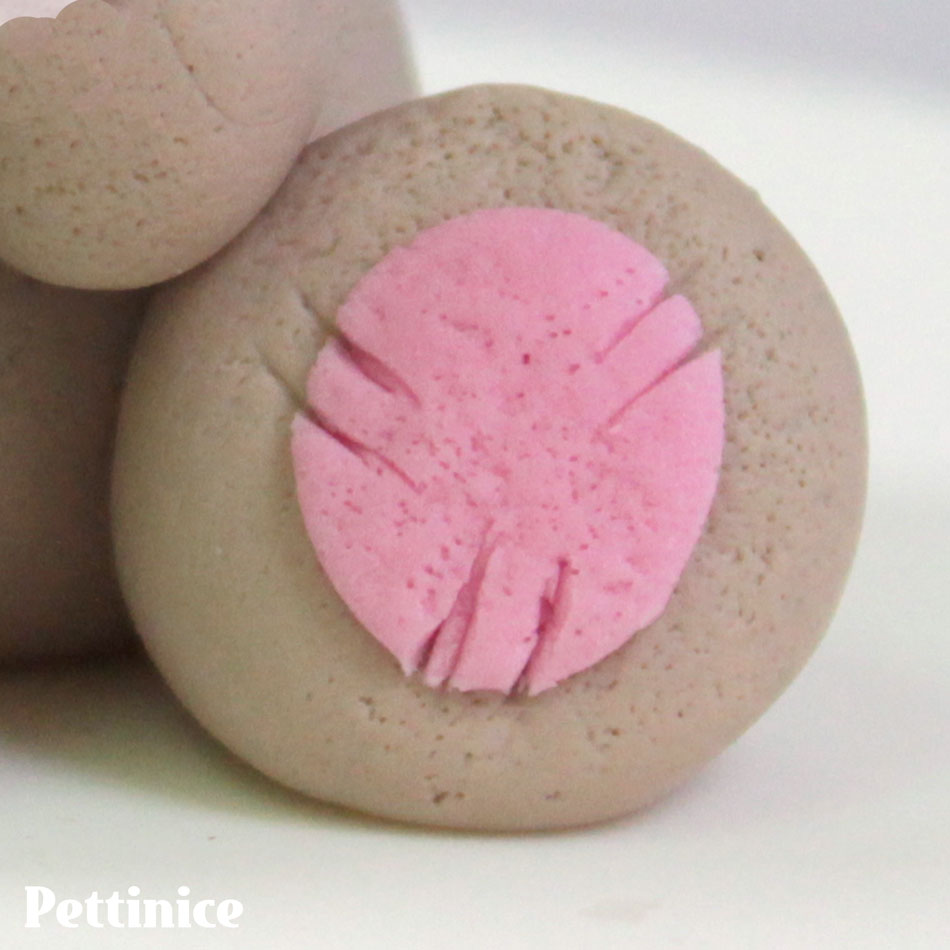
If you wish you can add some optional "patches" to your teddy using some of your leftover pink flower fondant.
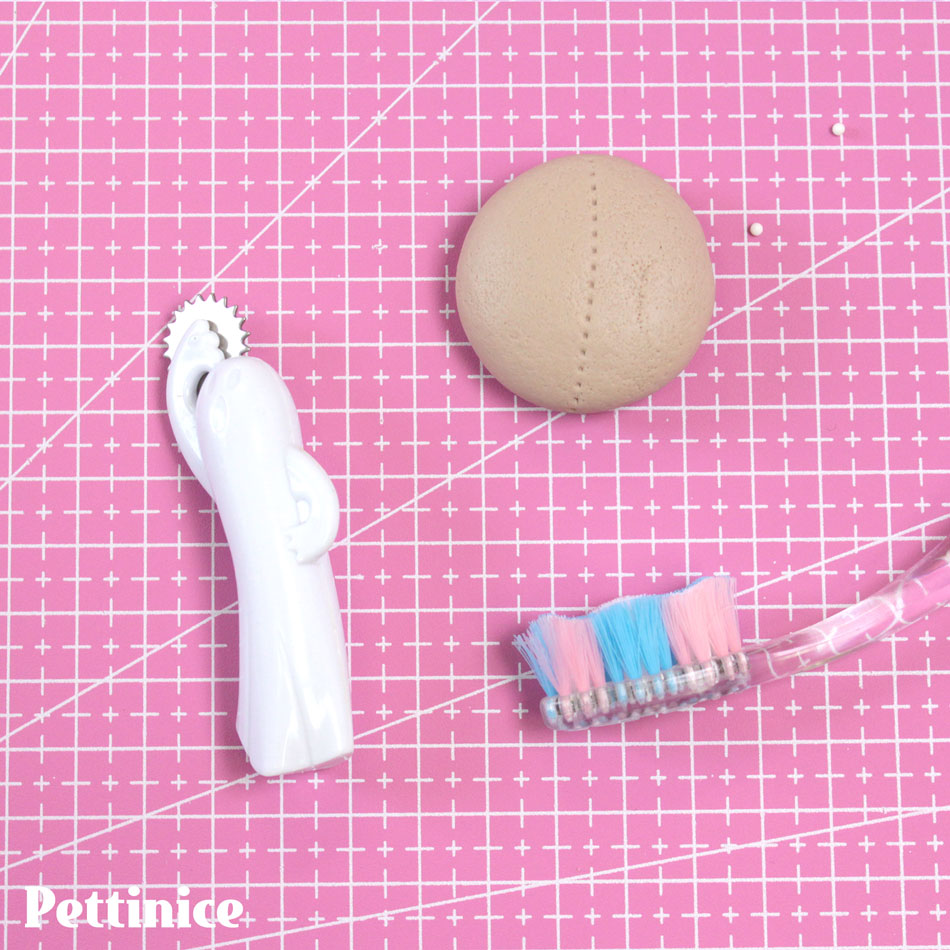
Use a stitching tool to add some detail to the teddy bear head and body. Press bristle details as desired.

Add some White Pettinice to create a lighter shade for the snout and stick a smaller flattened ball on the bottom half of the head. I used a pink sprinkle for the nose.
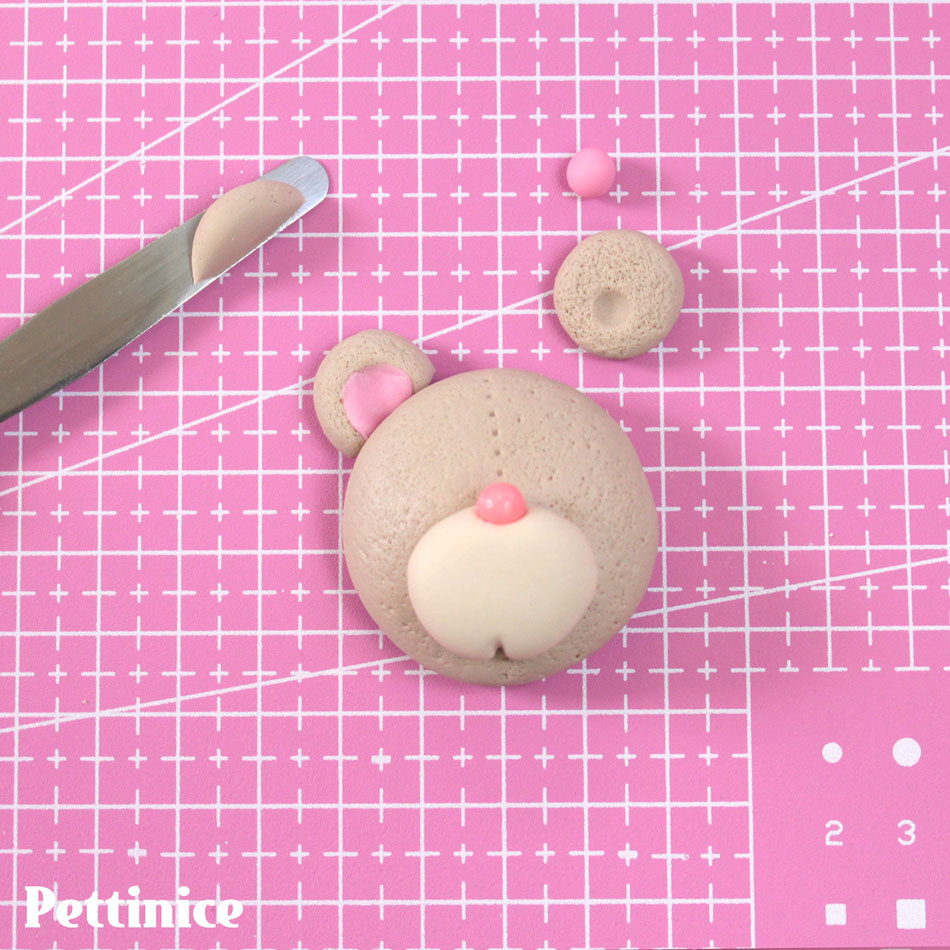
Use your toothpick to create a little dent in the snout. Texture the ears and roll a small pink ball to flatten inside the ears. Cut the ends and stick to the head with a little bit of water.
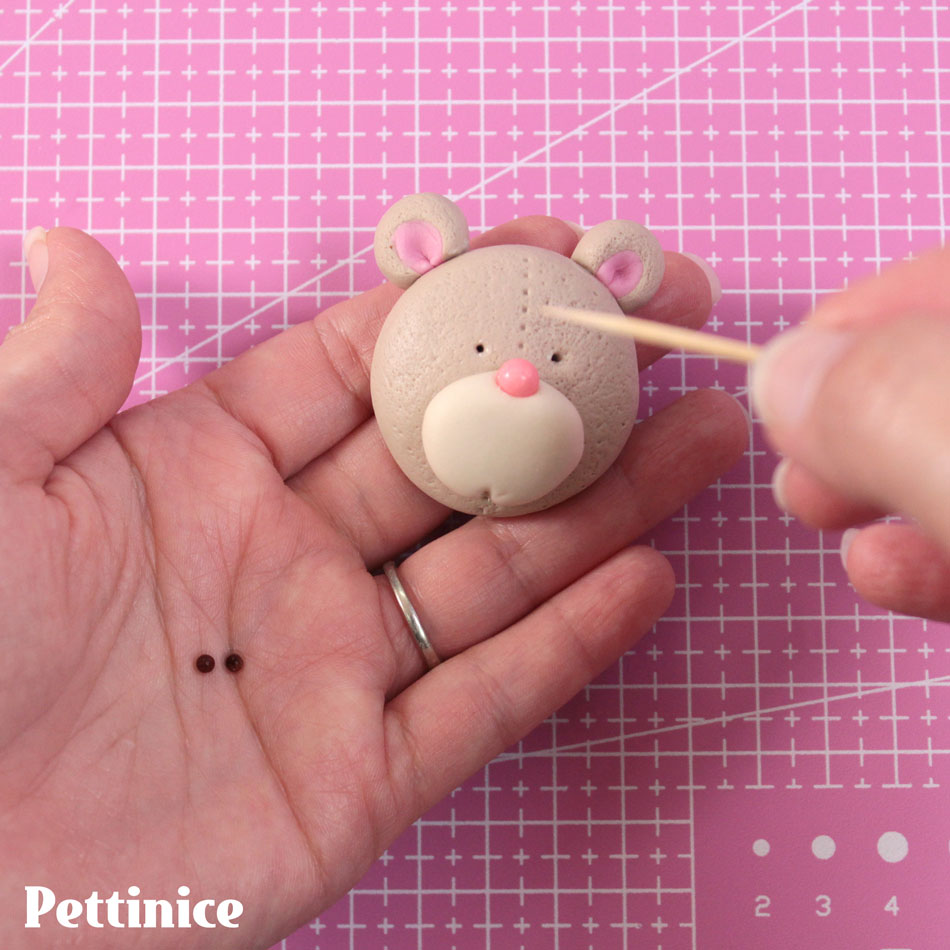
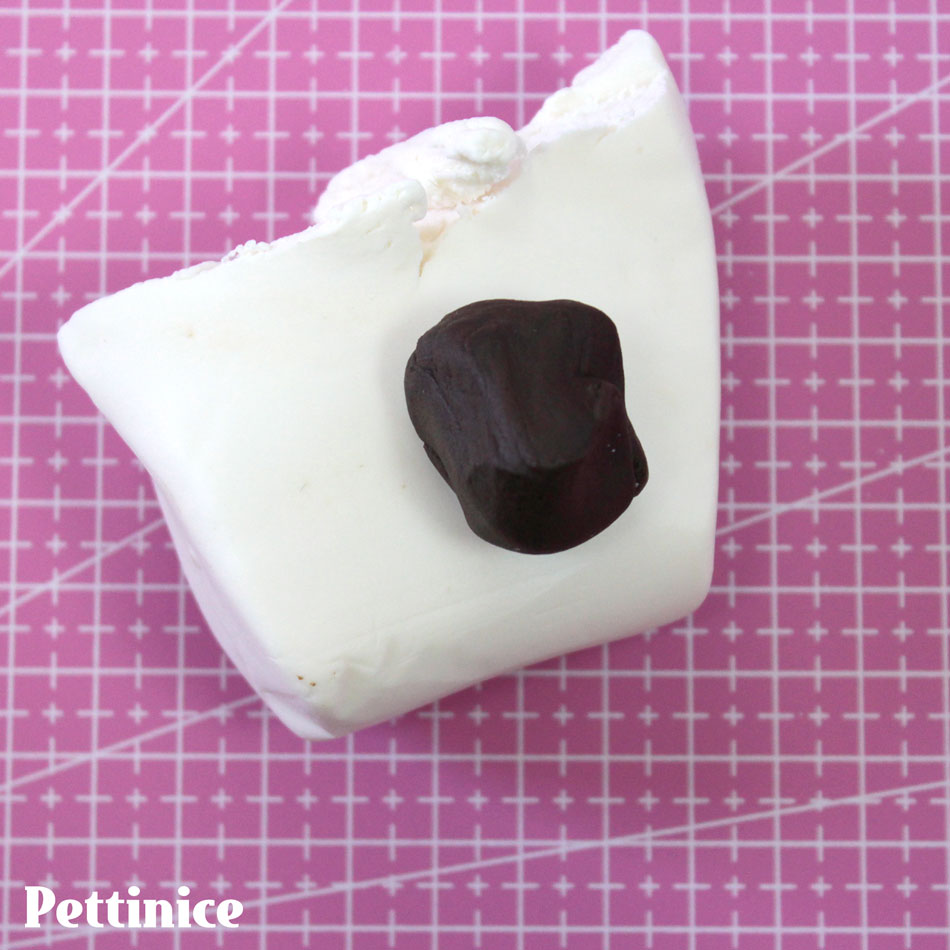
Use your toothpick to create a guide for your Chocolate fondant eyes.
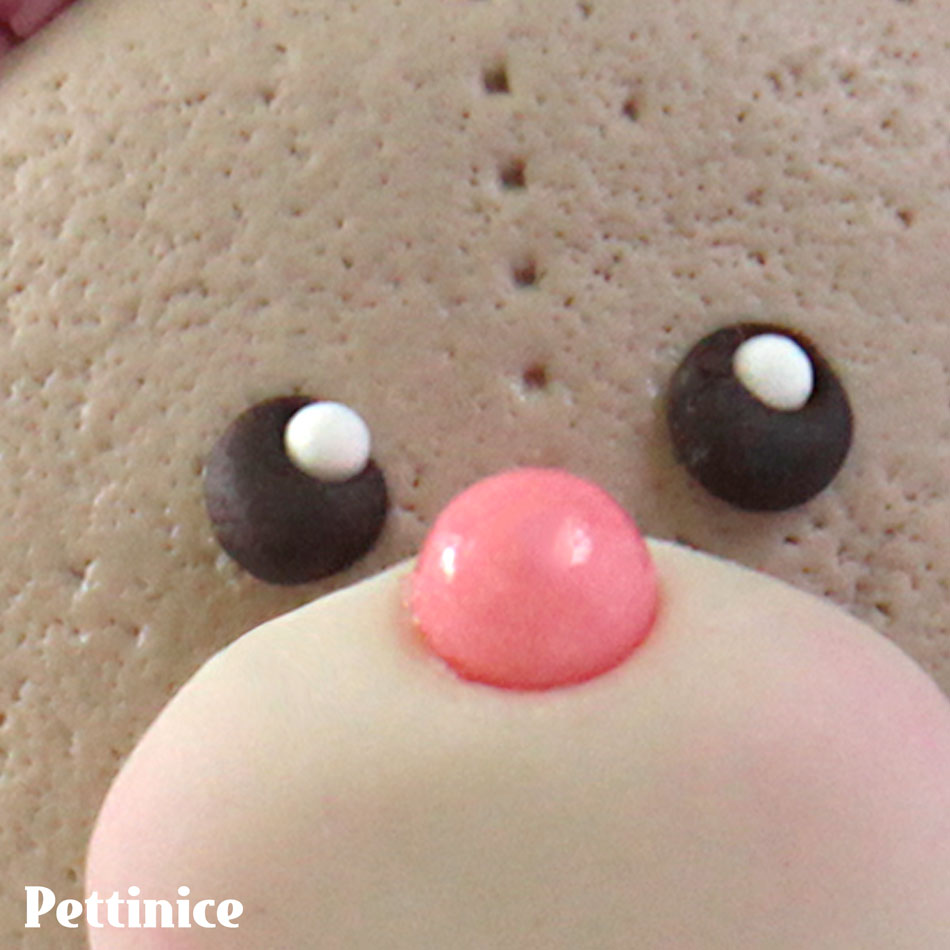
Next, press the white sprinkles in place for the eye twinkle. Pat down to flatten.
Roll a small cone to use for the flower bouquet the teddy bear will be holding
Use your blade to create the illusion of stems. You might need to trim this in half if it ends up too thick.
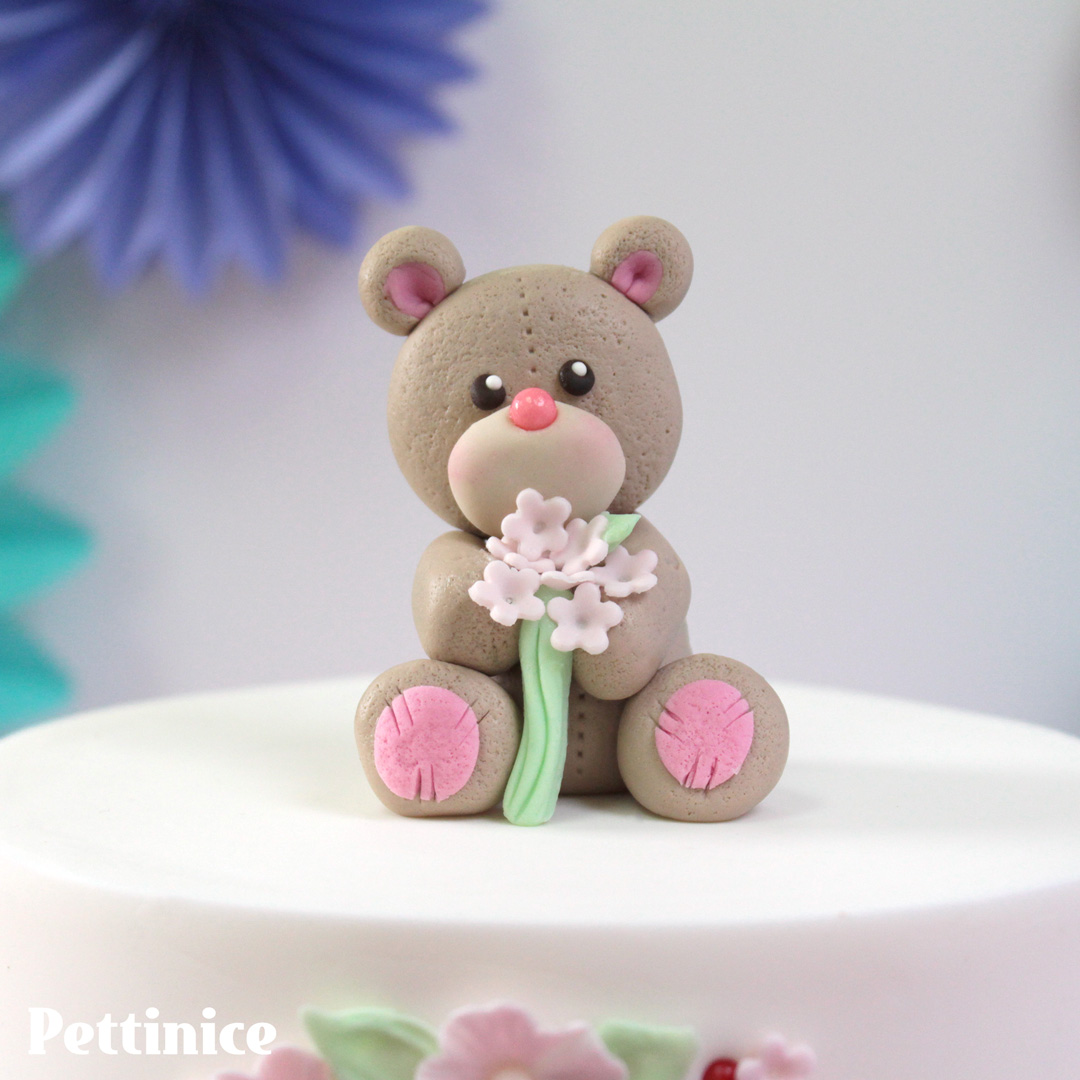
Stick the stems to the body, and press in the arms to "hold" her bouquet. Attach the head with a little bit of water, and finally add the extra flowers you created earlier.
That's all there is it to it! I hope you enjoyed this little tutorial and hopefully this inspires you to make your own "bear-y" special cake and I would love if you shared it with me if you do! Special thanks to GoBake for providing the Sprinkles and bow mold used for this tutorial.
Nina Blackburn is an award winning cake artist who owns Make Pretty Cakes in Auckland, New Zealand. A proud Pettinice Ambassador, and self confessed cake-a-holic who not only enjoys creating specialty 3D cakes, but also hosting and teaching cake decorating classes.
You can find Nina on Facebook and Instagram.