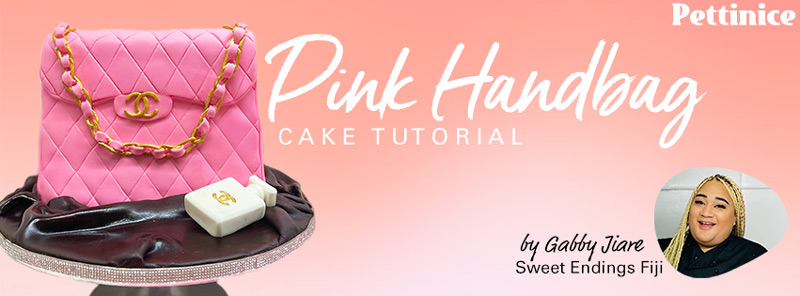
How to make a Chanel inspired handbag
.
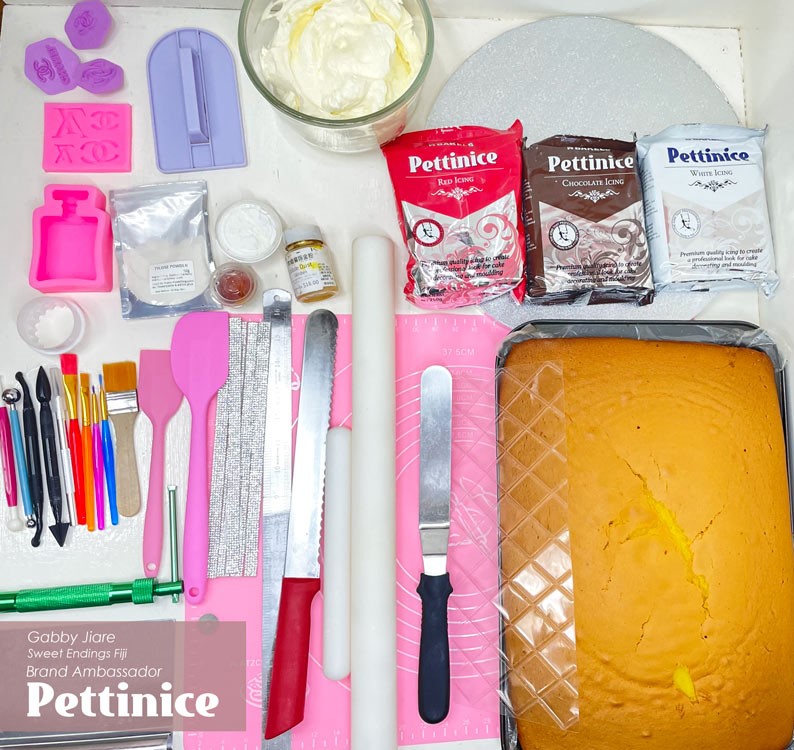
You will need:
Edibles
- 13x9” baked cake
- 2x pounds buttercream for filling and crumb coating
- White Pettinice fondant
- Red Pettinice fondant
- Chocolate Pettinice fondant
- Cornstarch (For dusting)
- Gold listed dust
- Vanilla essence
Tools
- Cake board (12” round preferably to present our cake on )
- Tylose powder (For chain link and toppers)
- Dresden/Veining tool
- Clay Extruder with the medium size circle setting
- Quilting mat
- Stitching tool
- Small sharp knife
- Brushes
- Chanel logo molds
- Cake scraper
- Rolling pin
- Pizza cutter
- Round fondant cutters
- Cake template here
Did you know? Pettinice is:


Layering and Crumb Coating
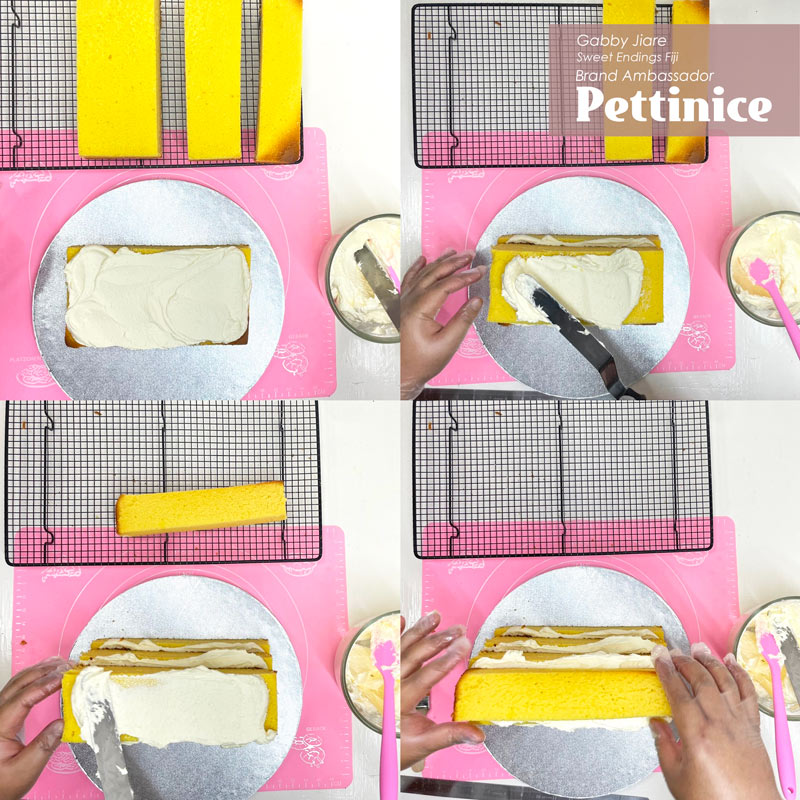
Centre stack and fill each layer
- Remove your cake from the tin and trim off any caramelization then continue to split the cakes into 4 x equal parts measuring 5”, 4”, 3” & 2” inches (see first image).
- Start building the body of your bag in descending order, placing the largest 5” layer onto your cake board, and adding layer of buttercream.
- Continue stacking each layer in the centre, with filling in between cake layers.
- Once you are done layering and adding the buttercream, go ahead and place the cake in the freezer and let it sit for 30mins.
*While your cake is chilling you can go ahead and prepare the edible toppers and elements for the cake as per the following section. The next step below is completed only after your cake has set up in the freezer for better carving results.
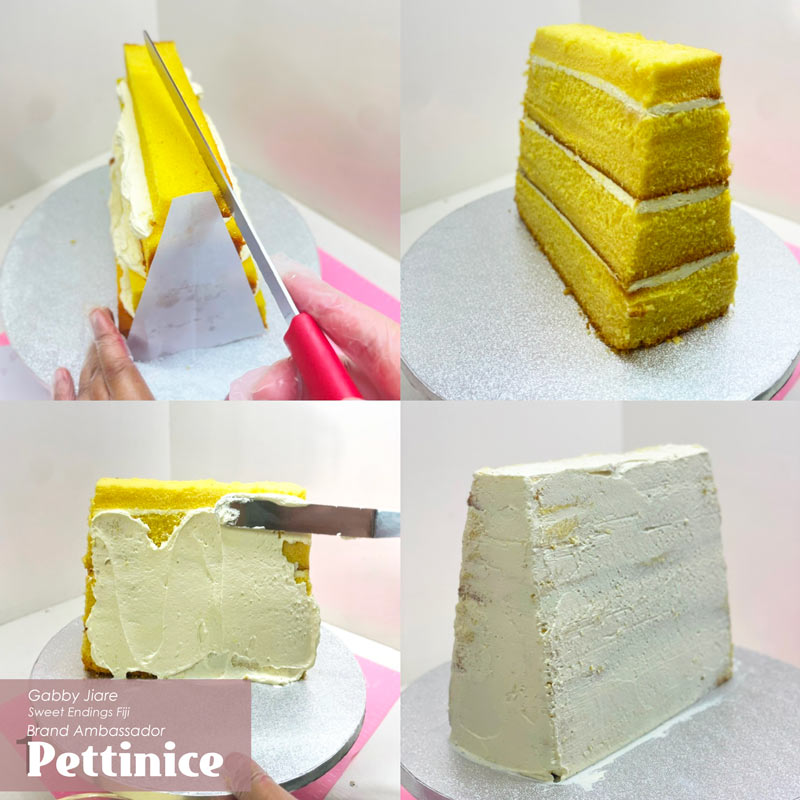
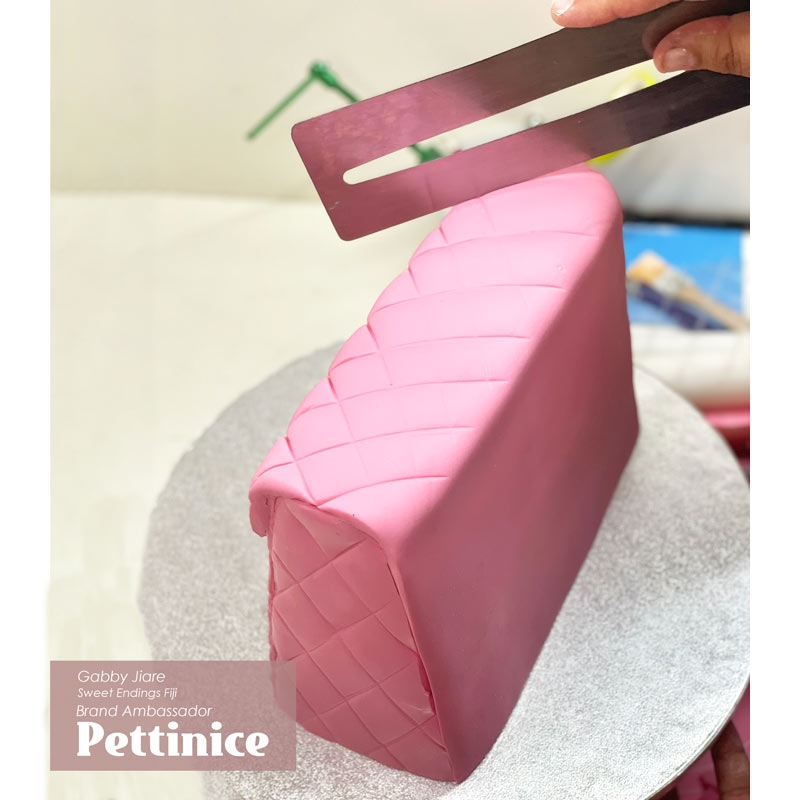
Using the template provided, Carve the cake as shown, then crumb coat for a smooth finish.
Click here for the cake template.
Bakels fondant has always been very reliable for me. Apart from it tasting great, it comes in a variety of saturated colours and the consistency is just right.
Edible Topper and Elements

Start this step while you are waiting for your cake to chill, as noted above.
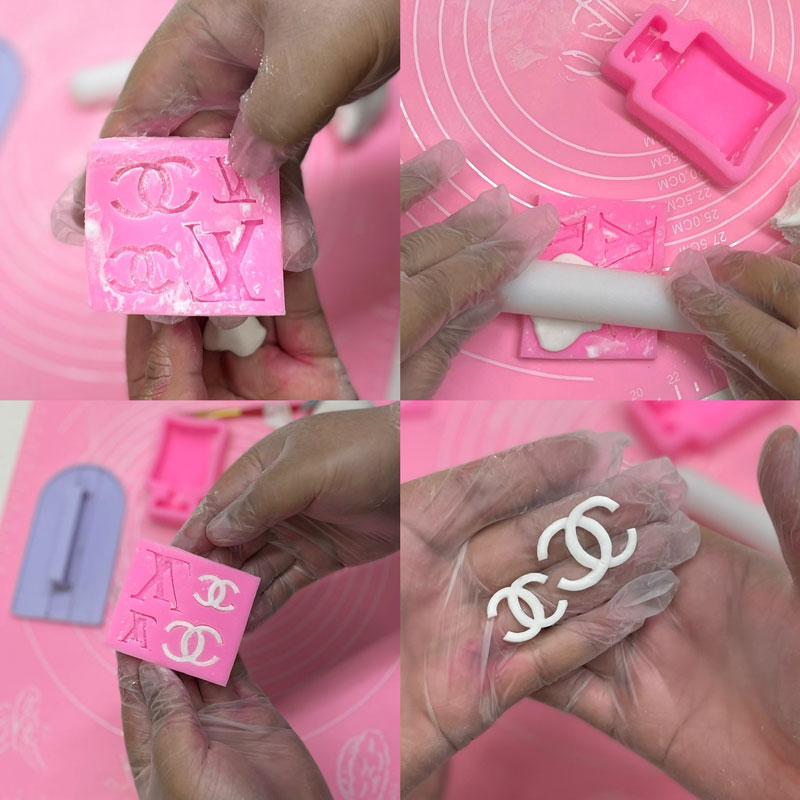
- Using our Chanel inspired fondant molds we will be making the “CC” logo and the perfume bottle. Add a bit of tylose powder to the White Pettinice to allow the toppers to dry quicker and become firm.
- For intricate and delicate molds it is best that you dust all the entire mold with cornstarch before molding in your fondant. When you’ve filled the mold, shape it back into place and begin smoothing the outer edge before you trim off the excess.
- Once this is done pop both molds into the freezer for 5 mins. This hardens them up a bit and makes it easier to remove the shapes. When all our toppers are carefully removed from the molds we can set them aside and start on with our next step.
Be mindful not to leave the toppers too long in the freezer as this may cause them to sweat a little when you bring them out.
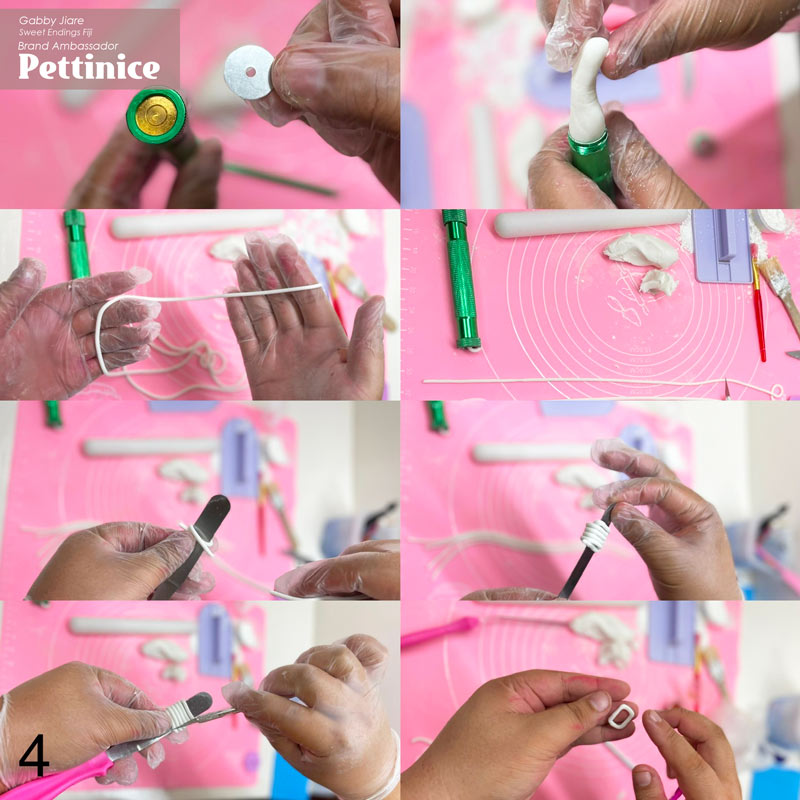
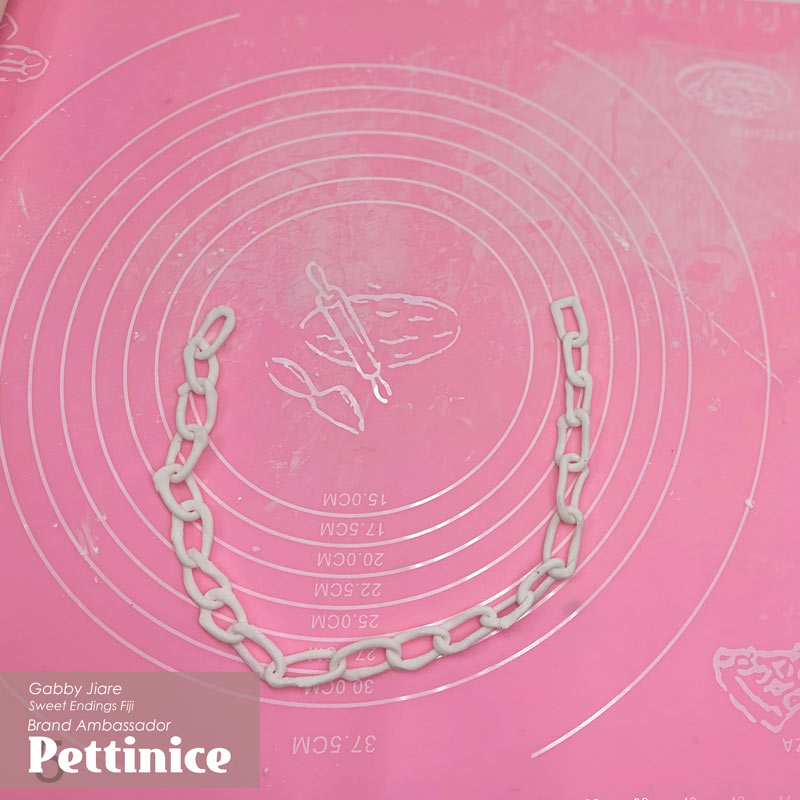
Chain link
.
If you have a chain mold you can skip this process, but if you don’t this is one way you can create your own that can look realistic but is a bit more time consuming.
- Using the leftover tylose mixed fondant, start by taking a piece and filling in the clay extruder. Once filled, begin making 8-inch long pieces. These will be super delicate so be careful not to stretch them too much.
- Using the first 8-inch piece, begin by loosely wrapping it around a small spatula.
- Cut and separate your pieces. Once separated, shape the piece into a rectangle shape as shown. Add additional link and glue the cut ends together
- Keep doing this till your chain measures 10-inches long. Once you’ve reached your desired length, set aside to firm up.
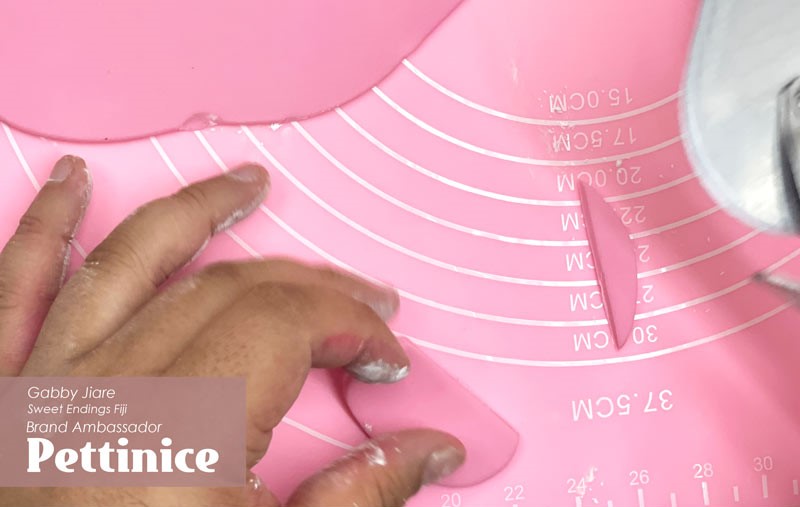
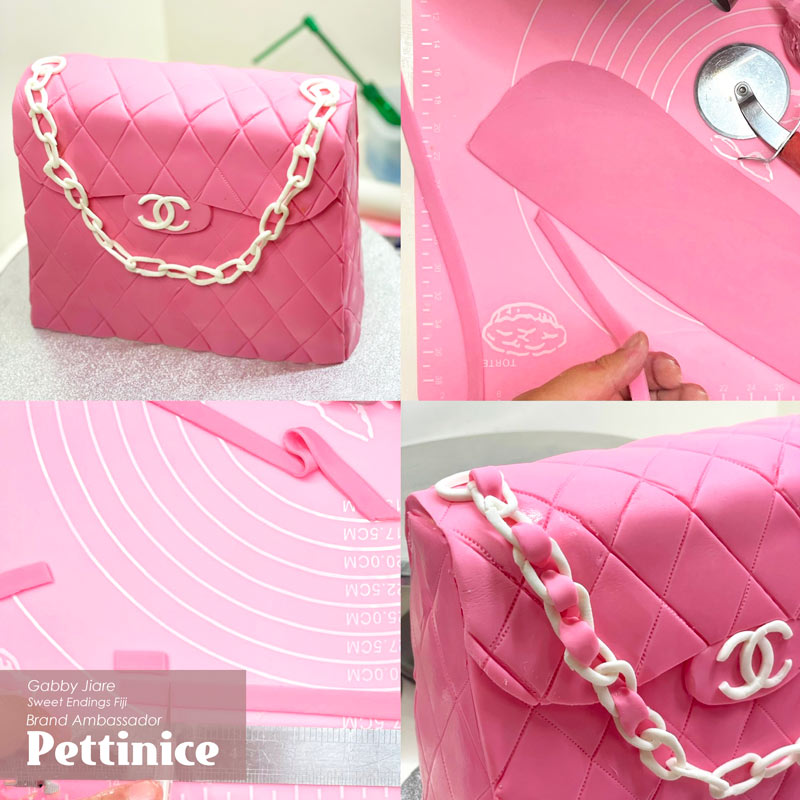
Cutting Out Panels to Cover the Cake
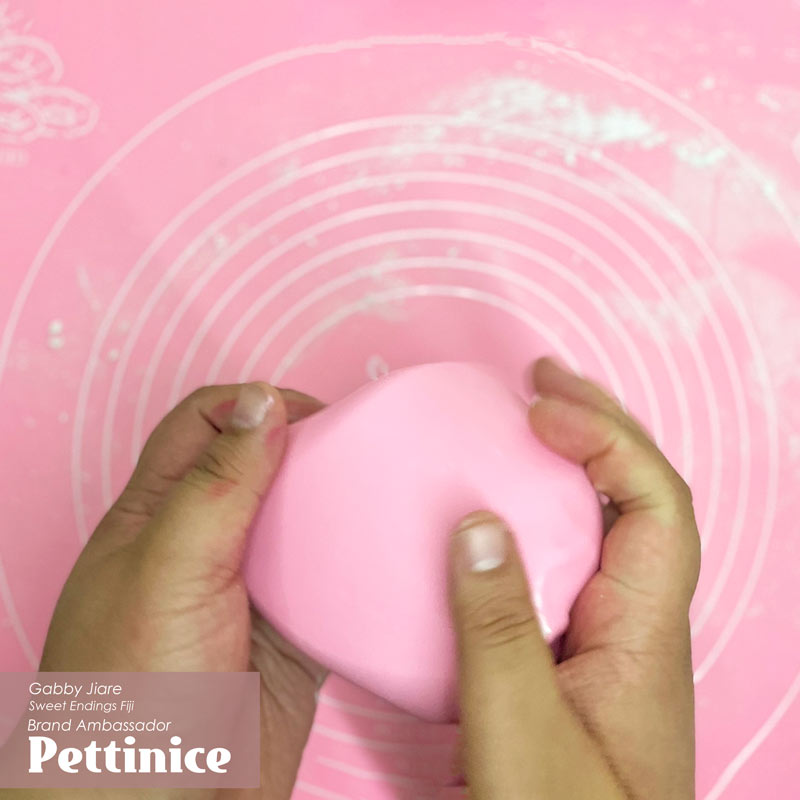
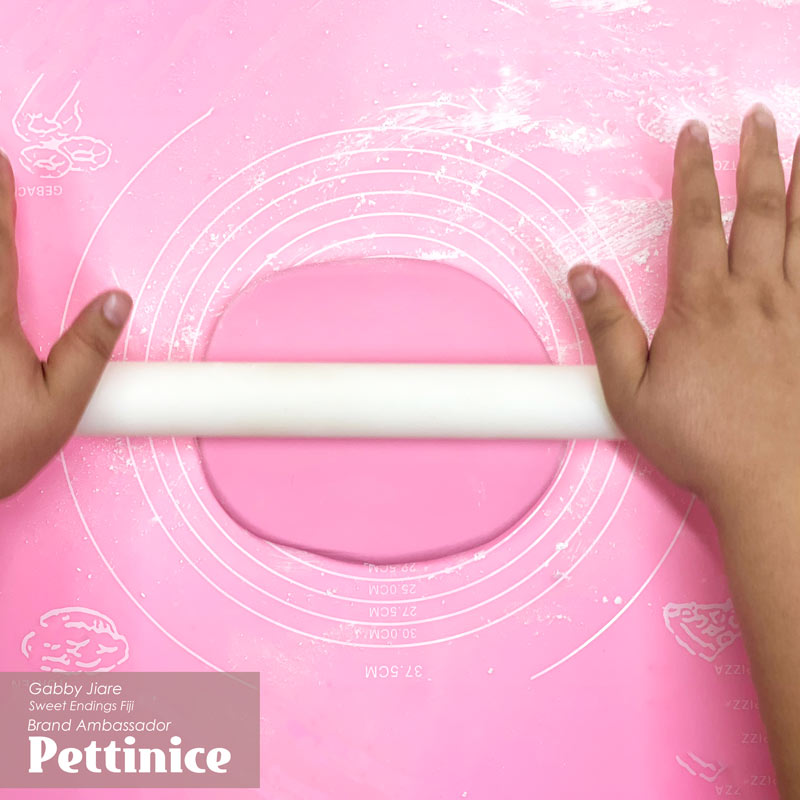
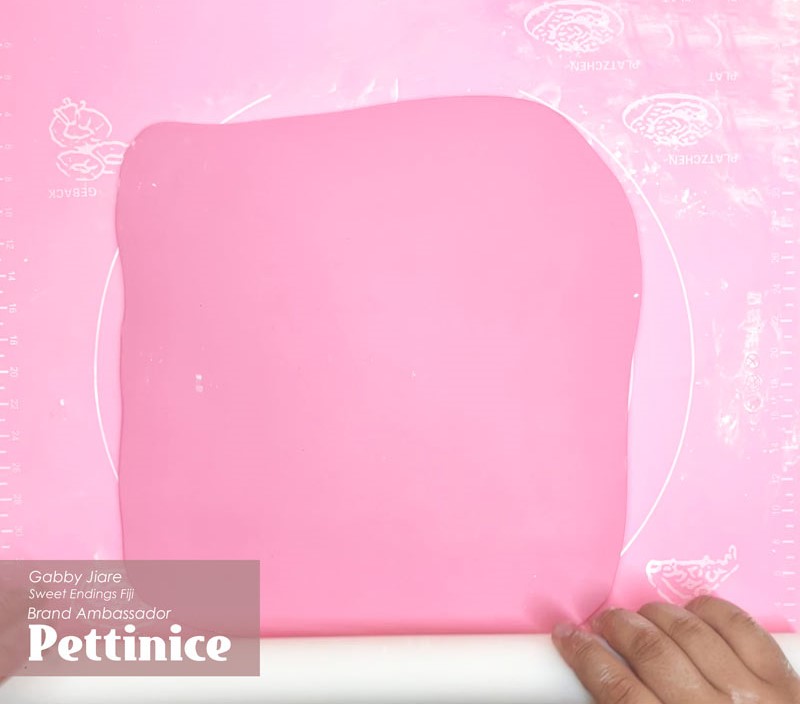
Now that our cake is chilled and ready we will begin by rolling our pink fondant made with 3 parts red to 2 packets of White Pettinice.
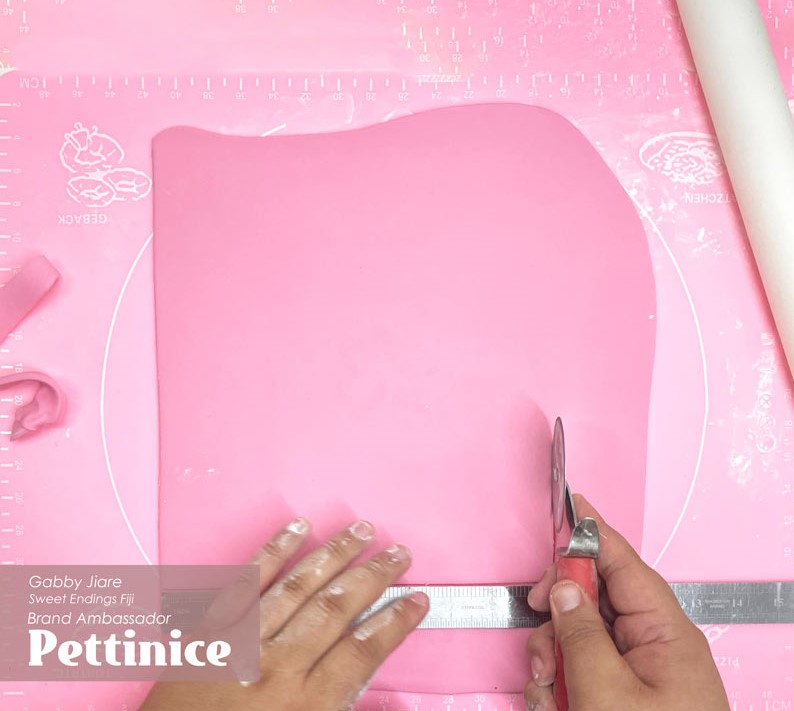
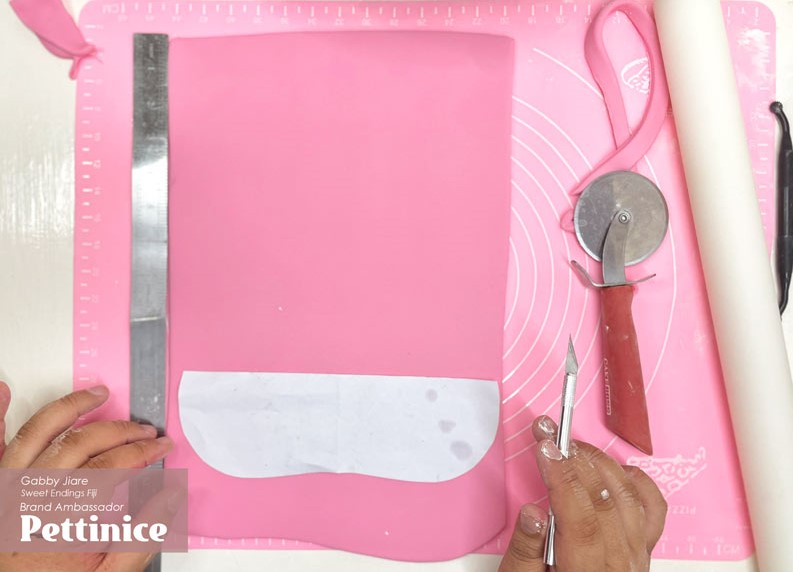
1. Roll out fondant to 1/8 of an inch thick.
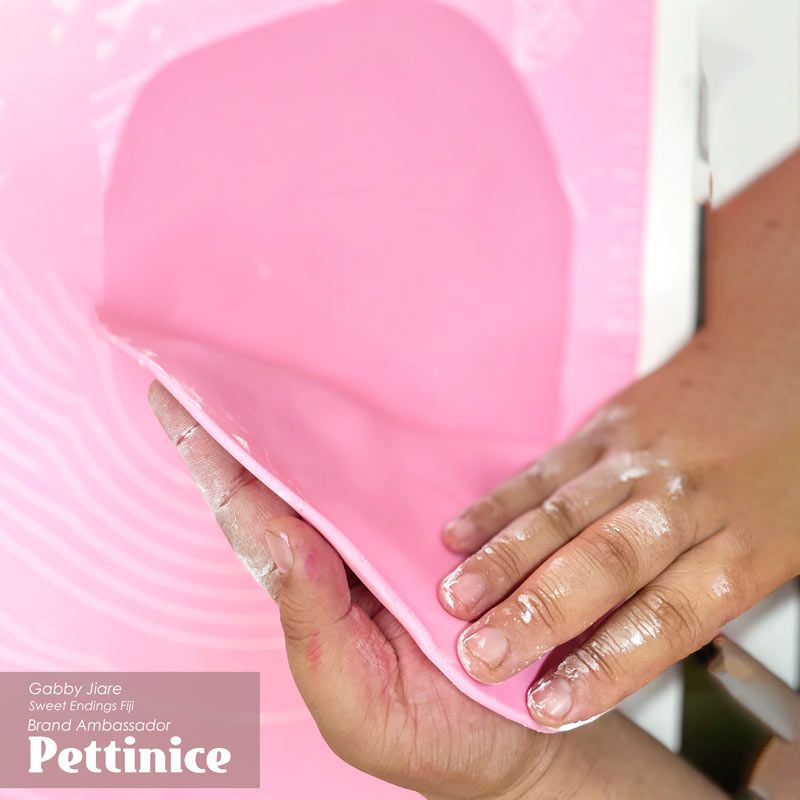
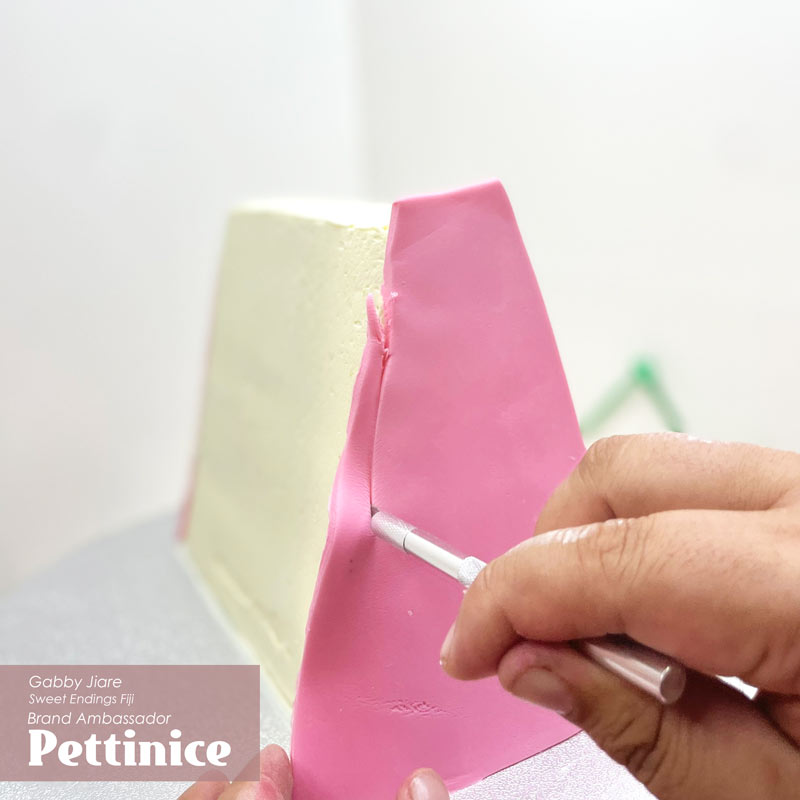
2. Using our templates, begin cutting 2 x portions of template (A) making sure you leave a bit of extra seam.
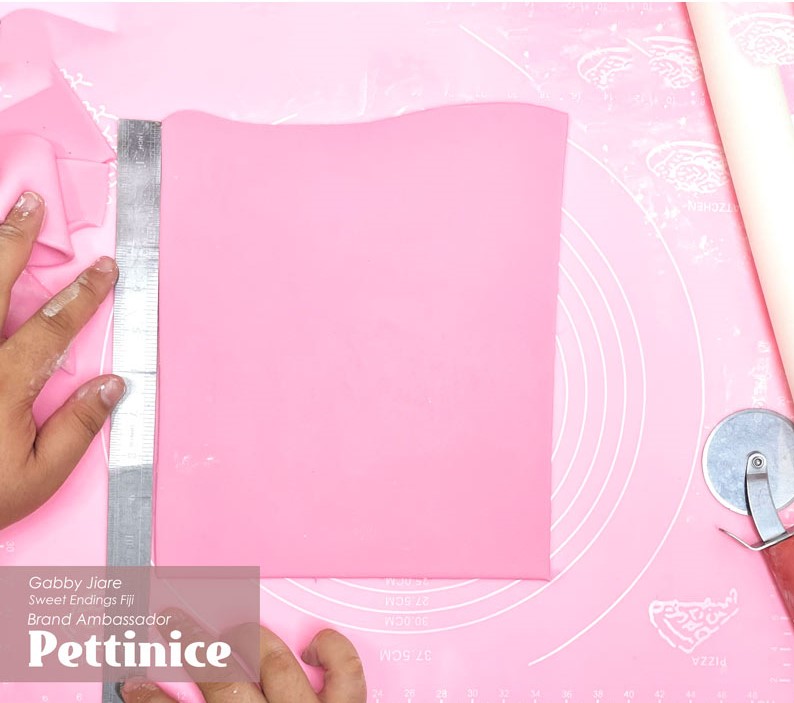
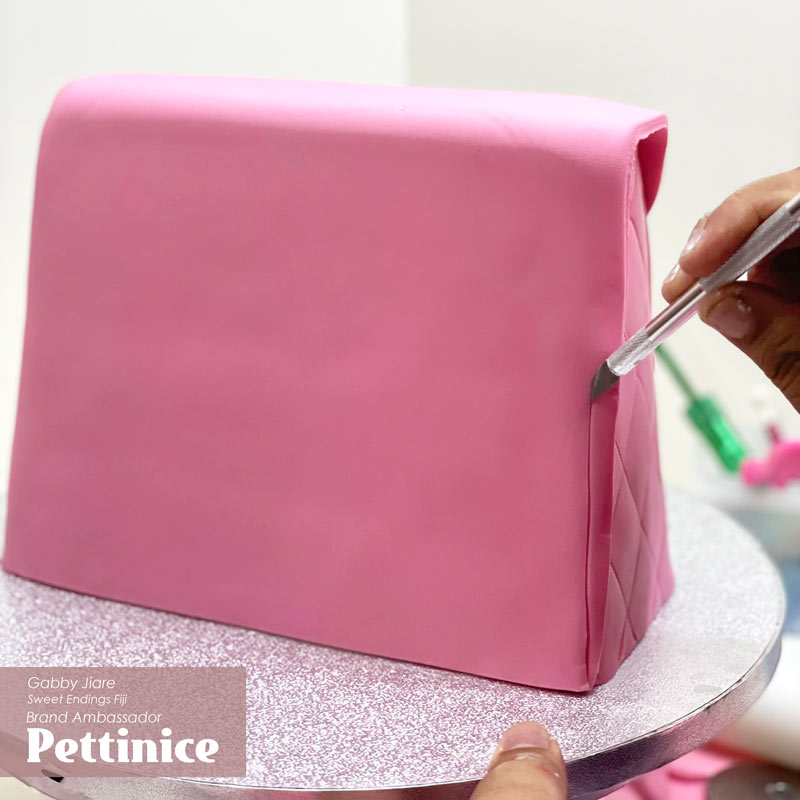
3. Place the cutout on the side of the cake making sure it’s level and cut off any excess.
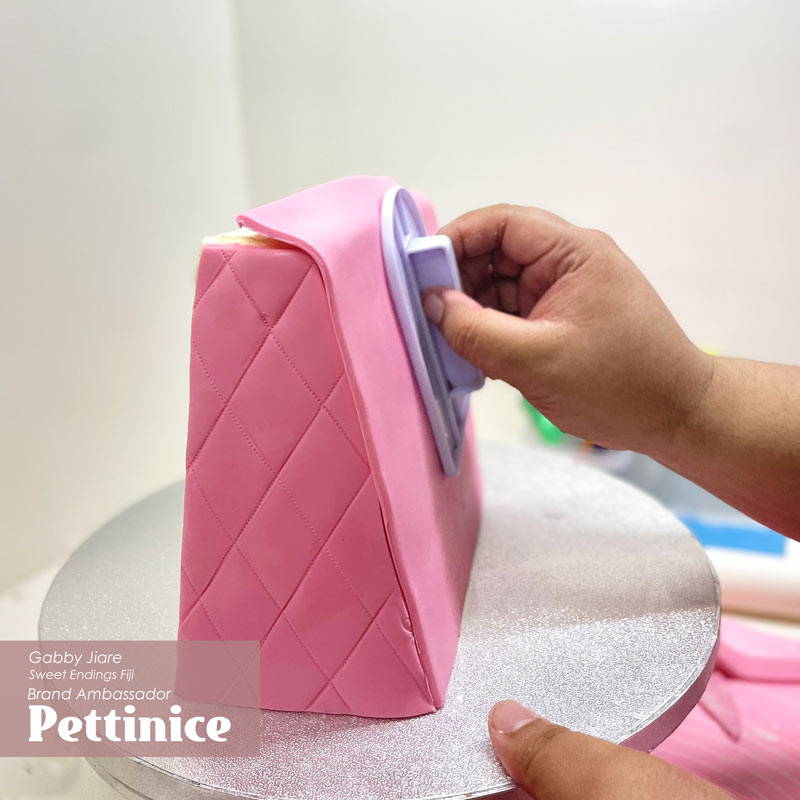
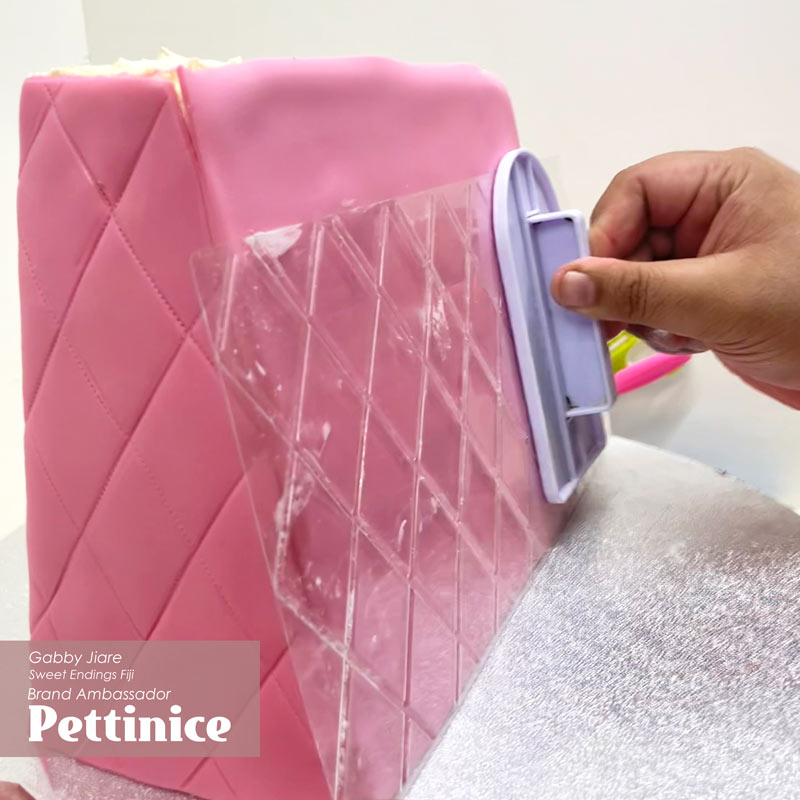
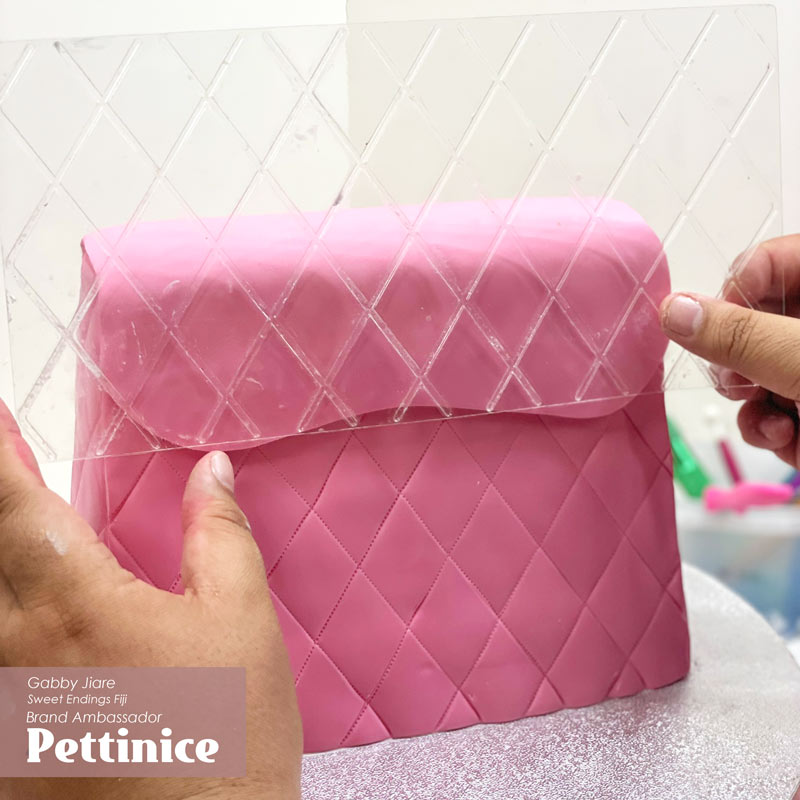
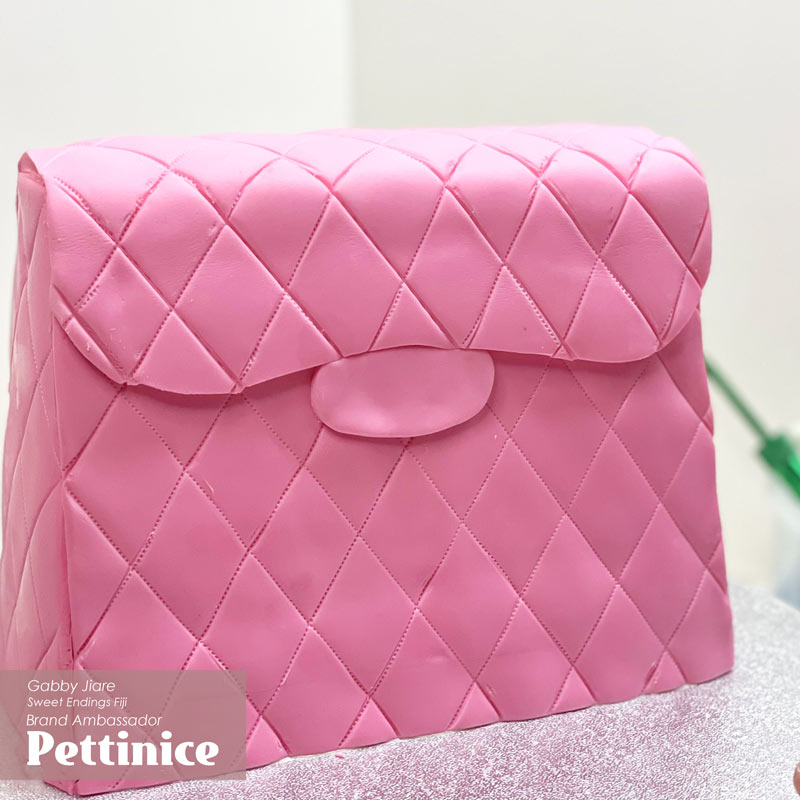
4. Using your quilt mat, align and mark out your pattern. Repeat for both sides of the cake.
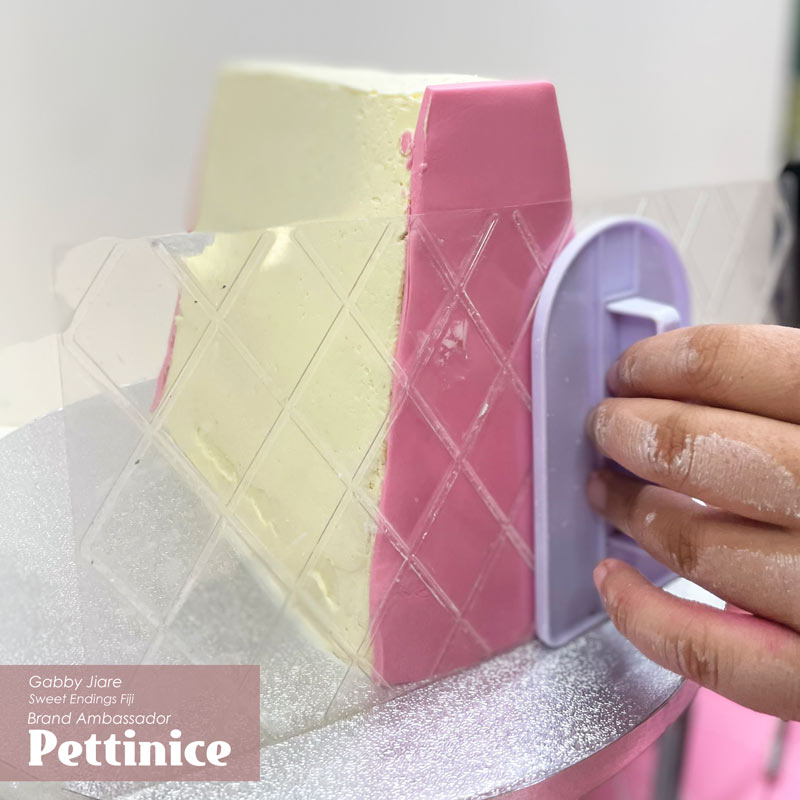
Tip: the quilt mat will help line everything together, but be sure to use your Quilting tool or Stitching tool to give the bag a more realistic look.*
5. We are now going to cover the front of the bag. Roll out a piece measuring 8”x10” and place on to the front of the cake. Trim off any excess.
6. After smoothing and trimming, repeat quilting technique.
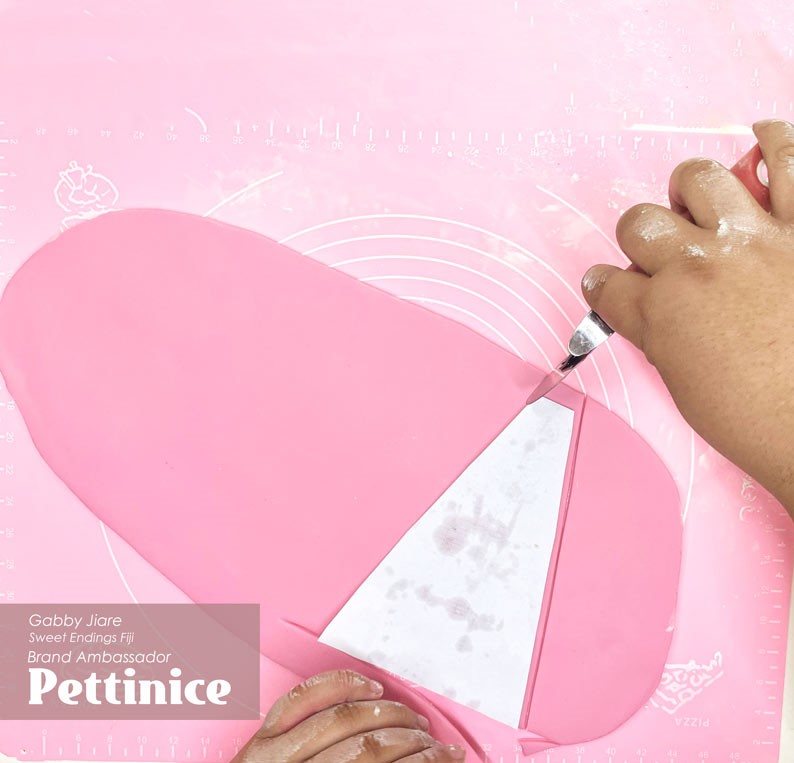
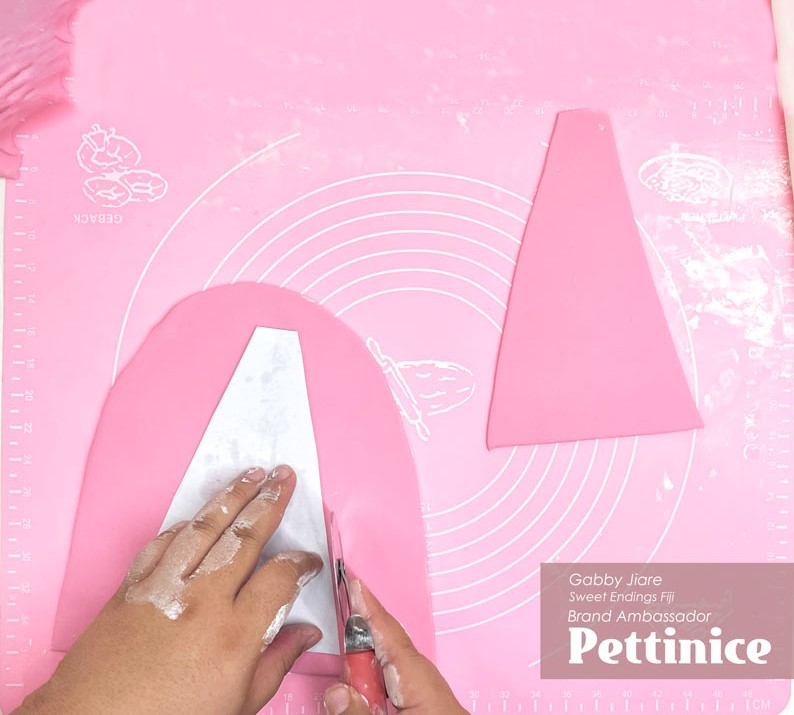
7. For the final cut out, roll out a longer piece at about 14” and use your template (B) to cut out the front shape of the bag. This will represent the flap where our chain link and logo will go.
If your room is humid, you can prep your fondant with a touch of cornflour to prevent it from sticking before rolling up.
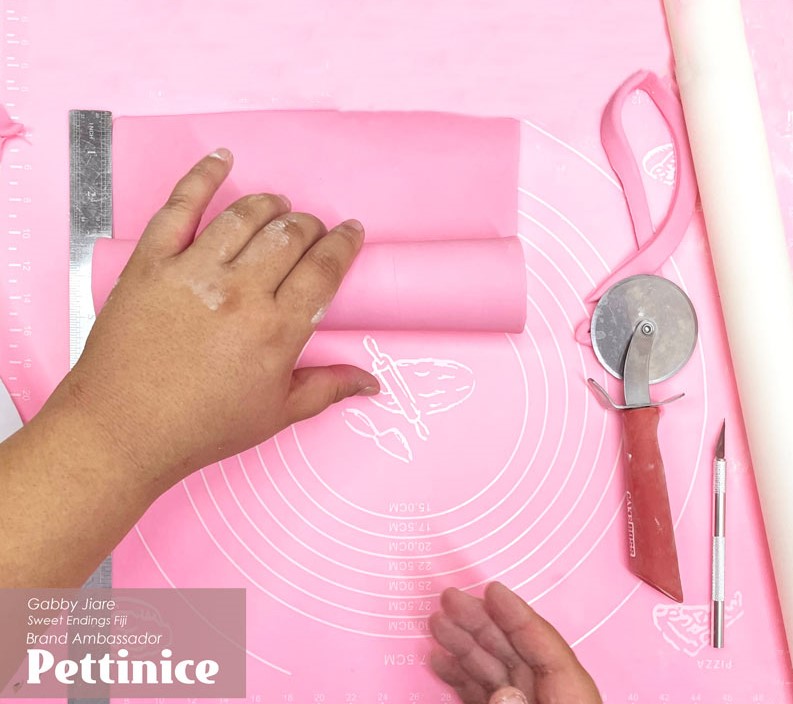
Unrolling the 14" piece onto the cake with a rolling pin. This is the back of the cake.
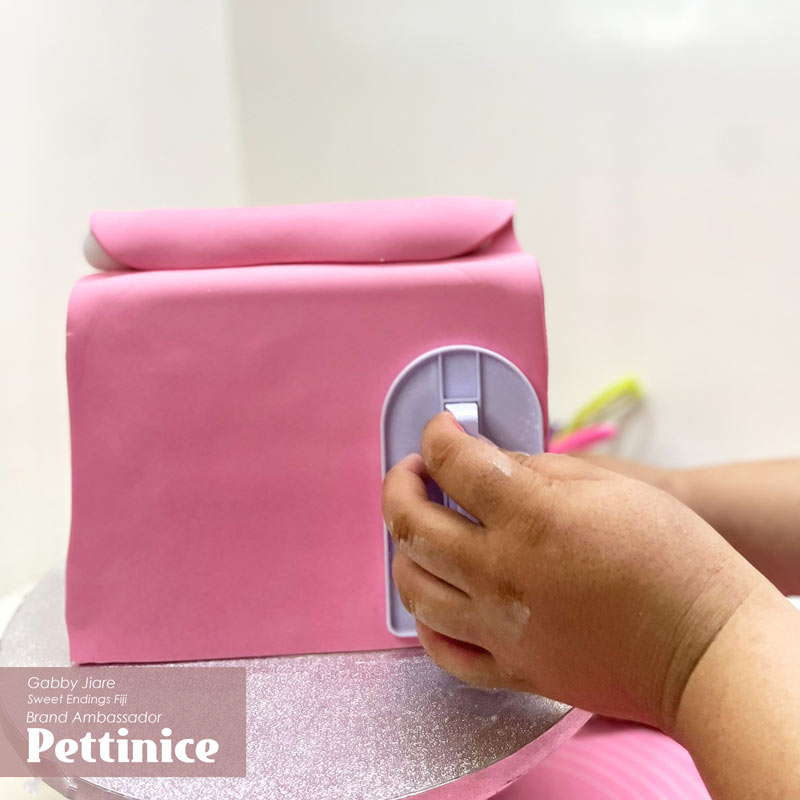
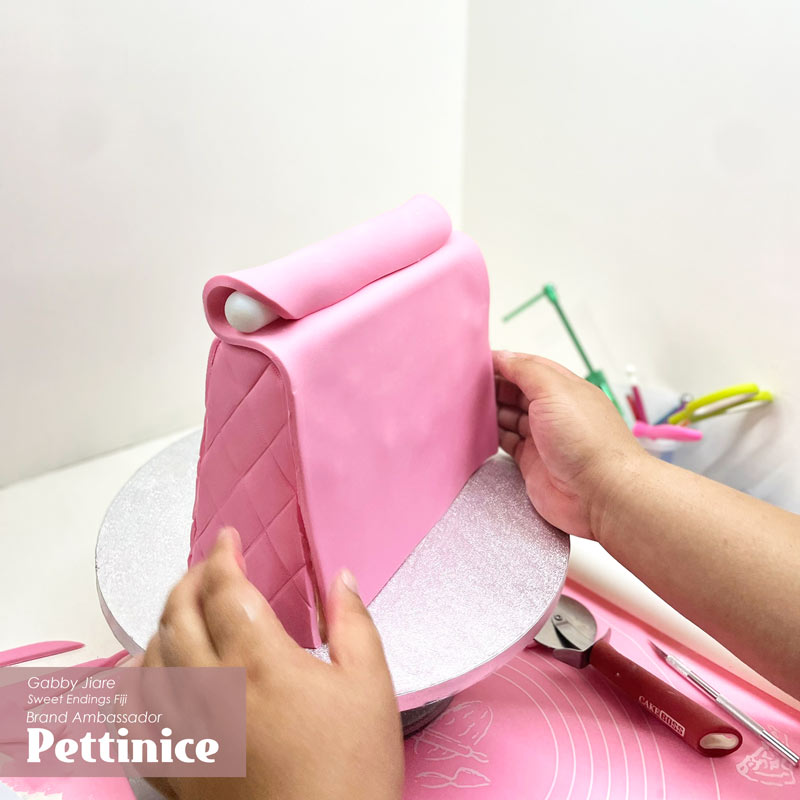
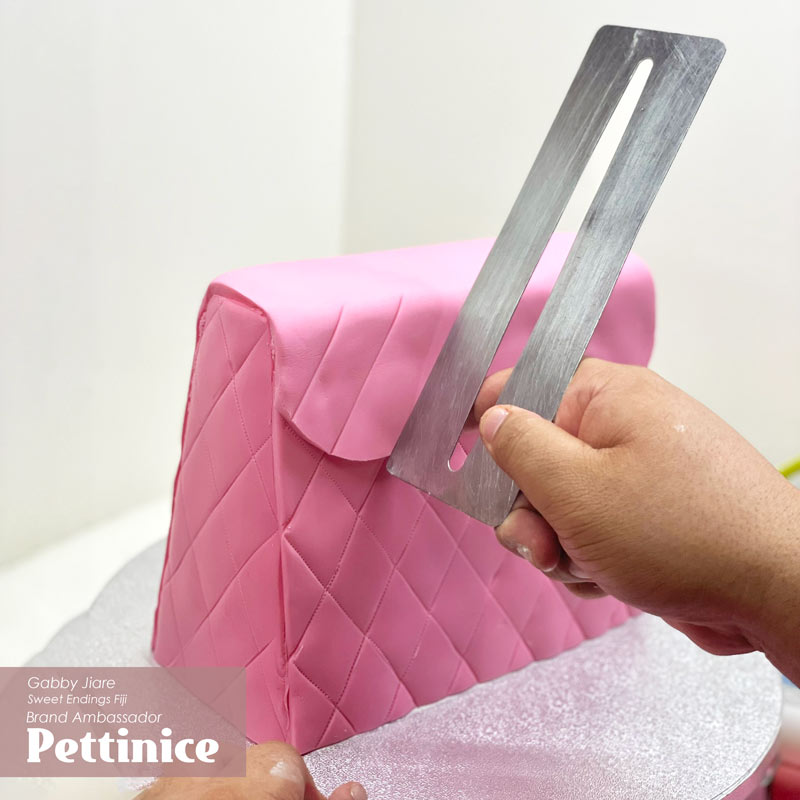
Use your cake smoother for a clean finish.
After smoothing, trim off excess Pettnice as shown.
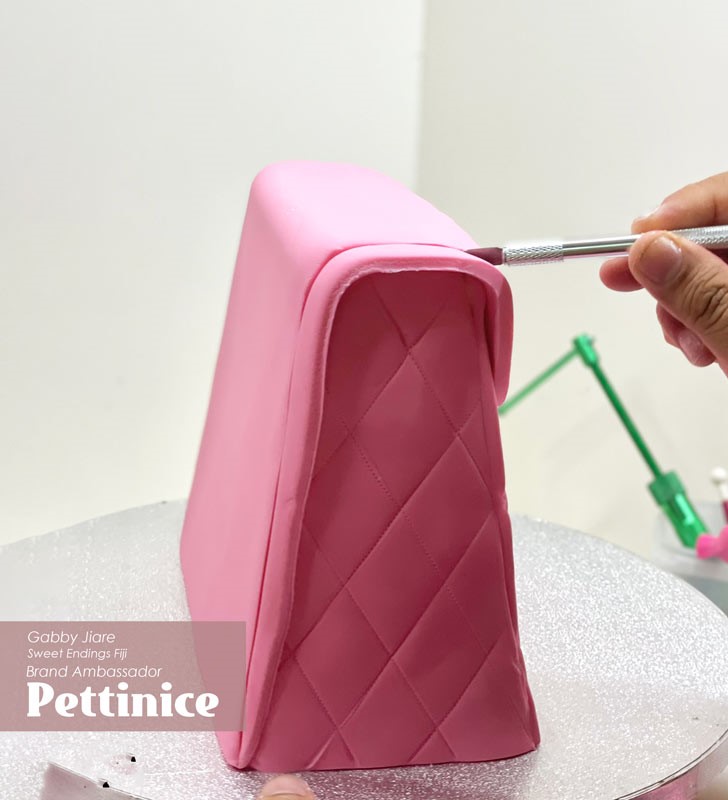
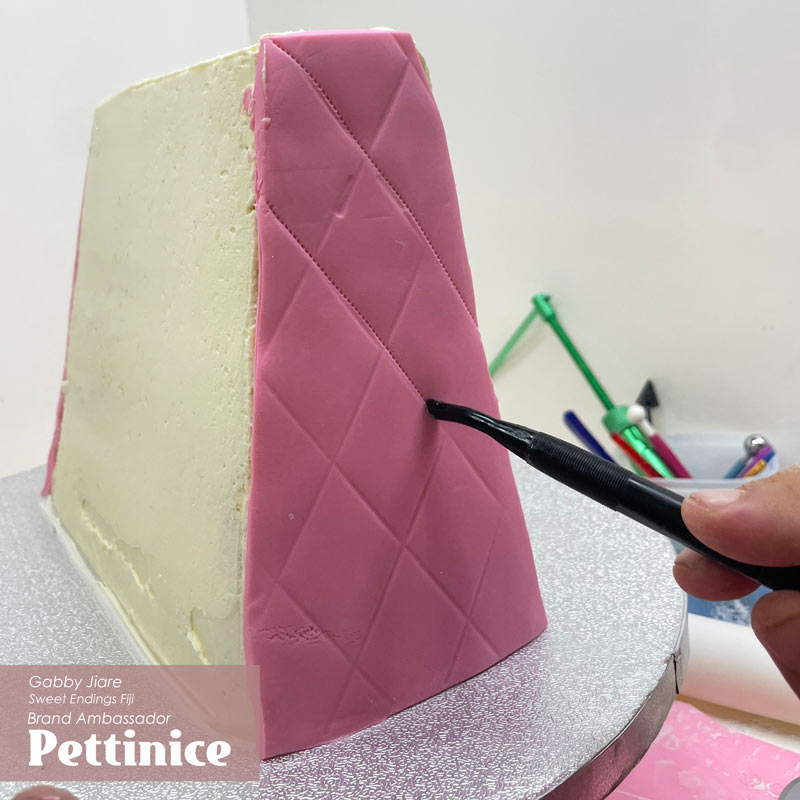
8. Using your quilt mat, start at the front by marking out your pattern making sure it lines up with the pattern you have already made on the front of the handbag. Using a ruler or a scraper to help align them even more before going over the lines with a stitching tool.

.
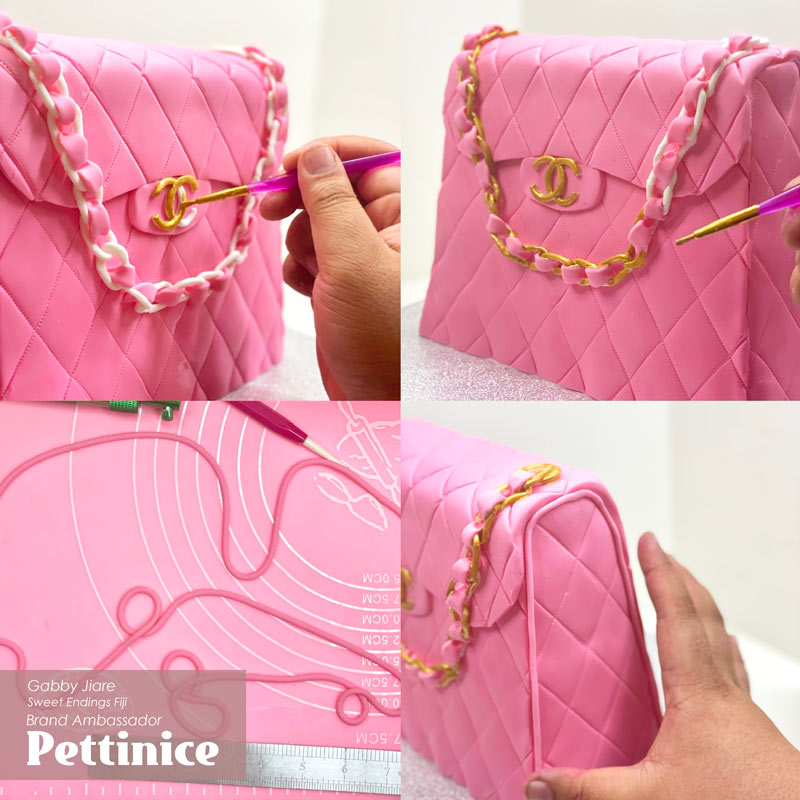
Final details
For the chain, we need to create the large rings that holds the handle together
9. Using your small circle cutters cut out 2x circles and hollow it out with a piping tip creating a ring. Place both rings on the top flap of the cake. With your chain link add a bit of of edible glue and attach it onto the cake making sure it secure. You may attach both ends first to the two rings then go back and add the glue along the chain.

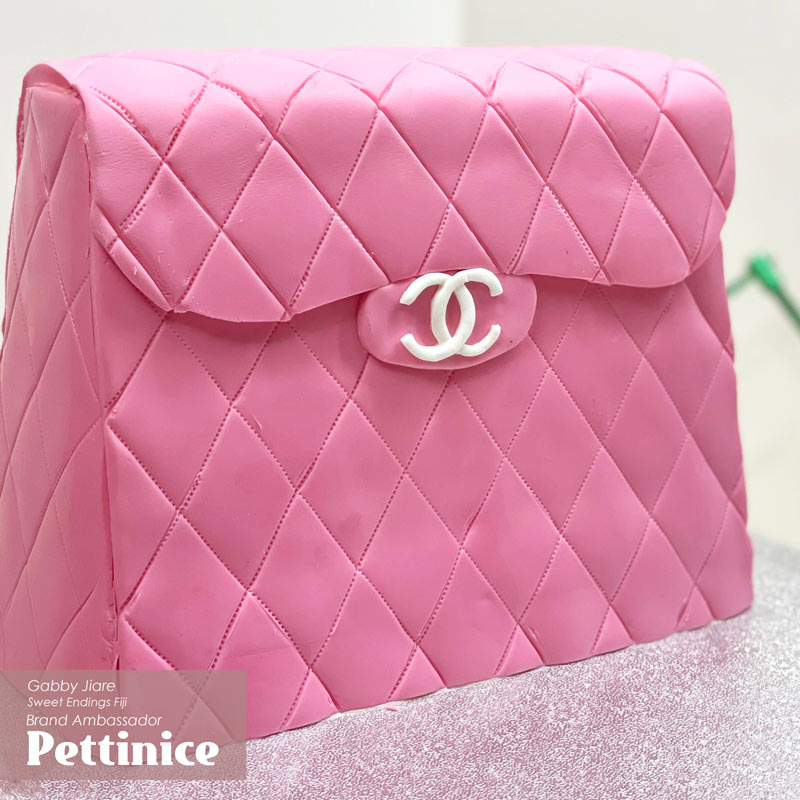
For the logo, we need to create the flap detail as follows:
10. Using a larger round cutter, cut off a piece of pink fondant into a semicircle shape. trim off a straight edge at the top as shown. Attach the flap to the cake, and then attach the logo you made earlier. Make sure you align it properly so that it sits straight within the seam of the flap.

Final finishing for the chain details:
11. Cut out 5x2cm ribbons in pink fondant and begin adding these to the gaps in our chain link. This will add more detail as per inspired bag.
12. Paint all the white elements with Gold luster dust, mixed with a bit of vanilla essence.
13. Using our Fondant extruder with the small pipe setting, begin creating more 8” long pieces (you will need 4) to cover all the seams as shown.
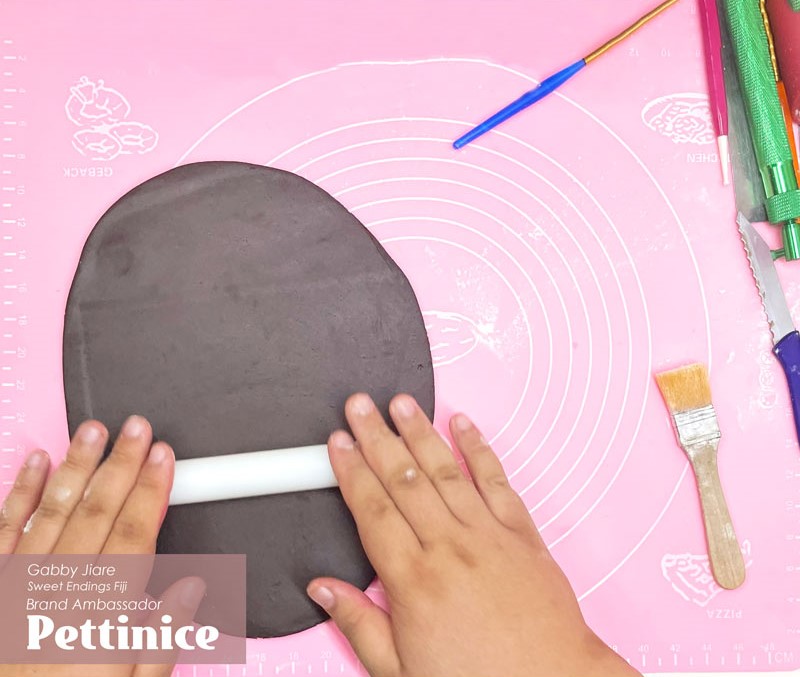
Covering the cake board
Using our Chocolate Pettinice fondant, we will begin finish decorating our board.
14. Roll out two large oval shapes and place ruffled around the cake and board creating the illusion of fabric. Hide the seams where they meet by folding the edges inwards. Trim excess.
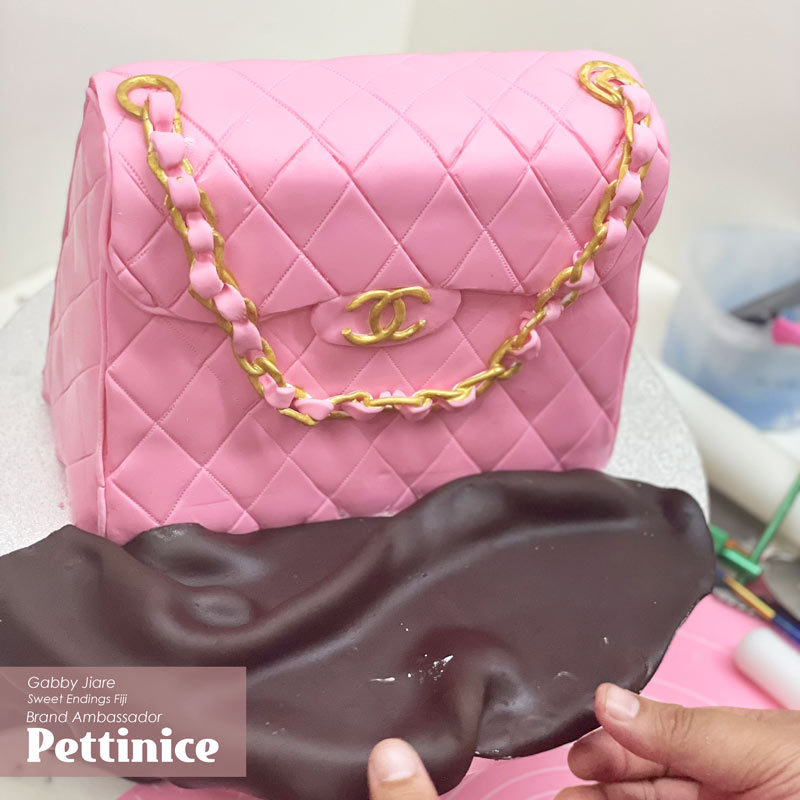
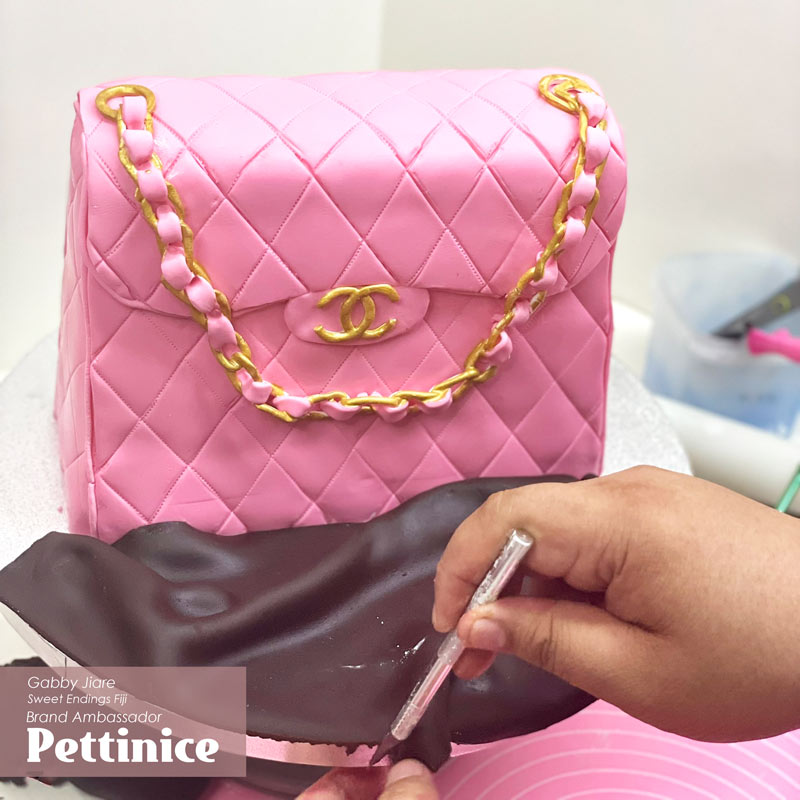
15. After adding on the ribbon border, place the rest of your toppers made earlier and Voila, you're done!
Gabby Jiare is a self-taught Cake Decorator who runs Sweet Endings Bakery in Fiji.
Growing up, Gabby was always so passionate about art and creativity. She has been decorating cakes for many years now and is majorly recognized for her unique and outstanding artistic abilities.
Gabby wishes to someday expand into teaching fondant classes and hosting Fijis first ever cake show. See more of Gabby's cakes at:

