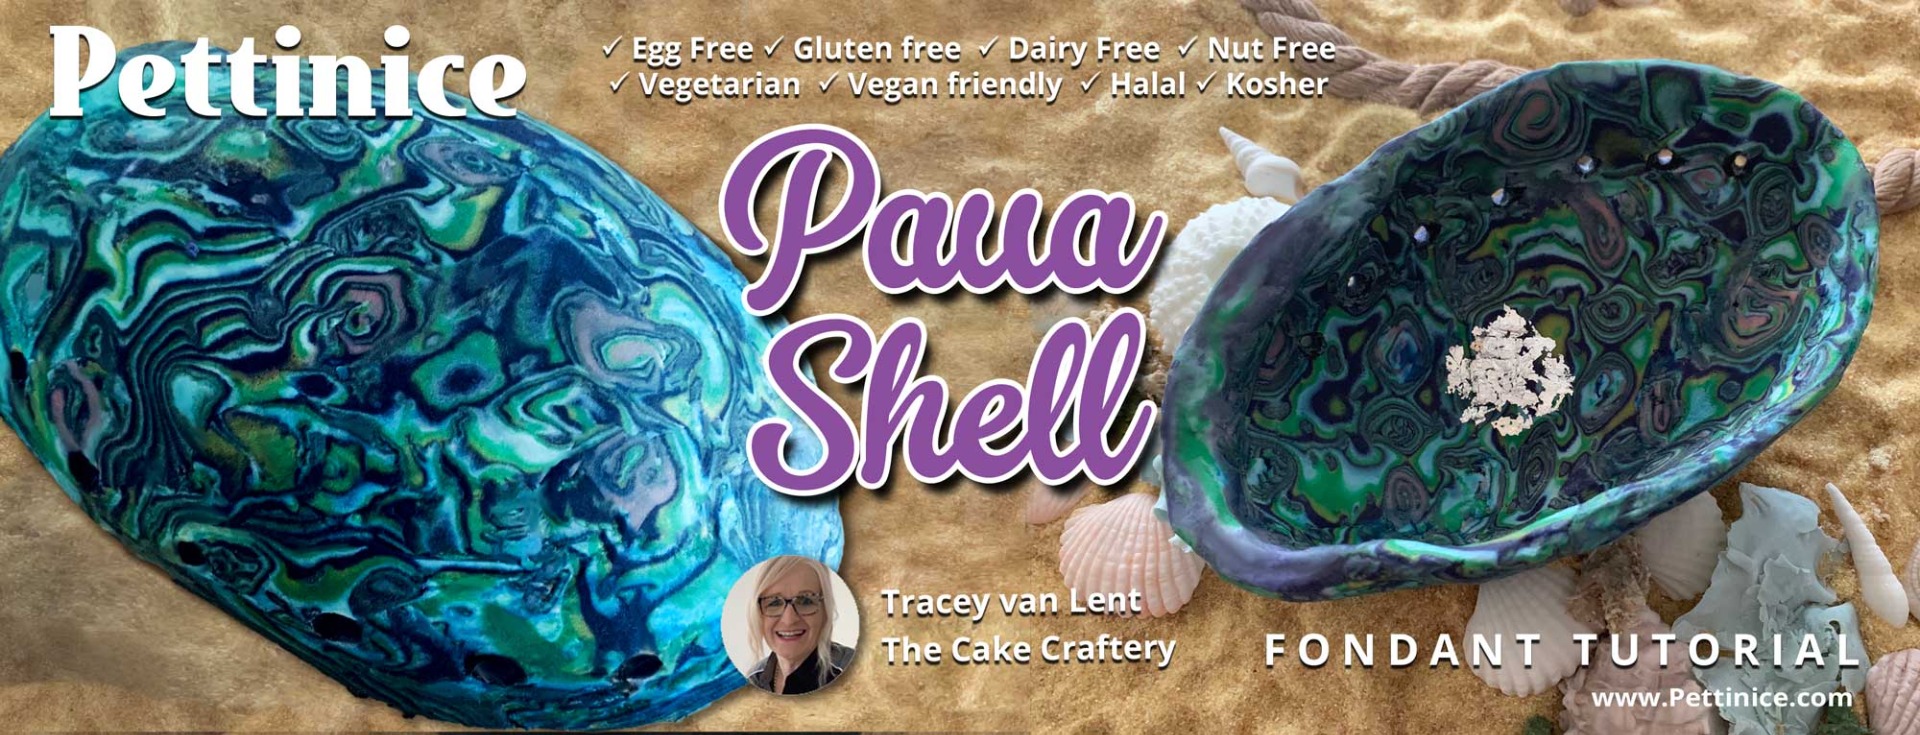
How to make a paua shell finish with Tracey van Lent
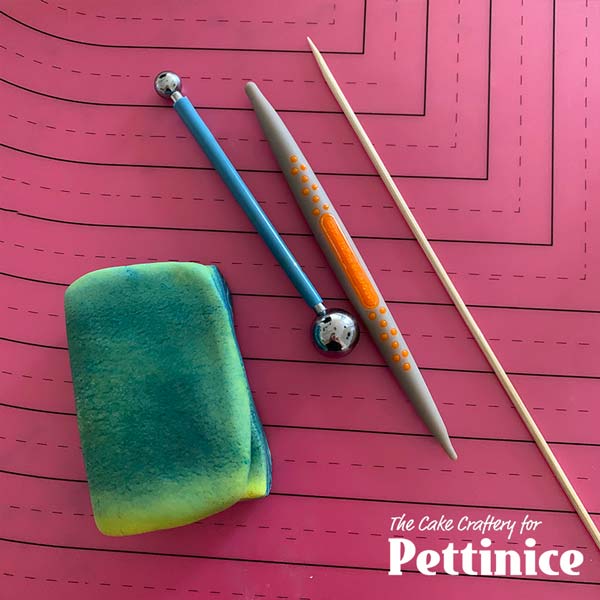
Equipment
- Ball tool
- Piercing tool - a bamboo skewer is fine
- A tissue blade or box cutter blade
- An Exacto/ craft knife Rolling pin
- A cake board or card
- Fine water spray bottle
Edibles
- Blue, purple, yellow, pink and white Pettinice
- Tylose powder or CMC
- Lustre dusts (optional)
- Edible glue
- Silver leaf (optional)
- Black edible marker with fine tip (optional)
- Food varnish
In this tutorial, I am sharing the technique I created for achieving the beautiful shades and patterns found in a paua shell.

Practice by creating a paua shell topper, and once you have the hang of it, scale up fondant amounts and experiment with colours to wrap an entire cake using the same technique. Enjoy!
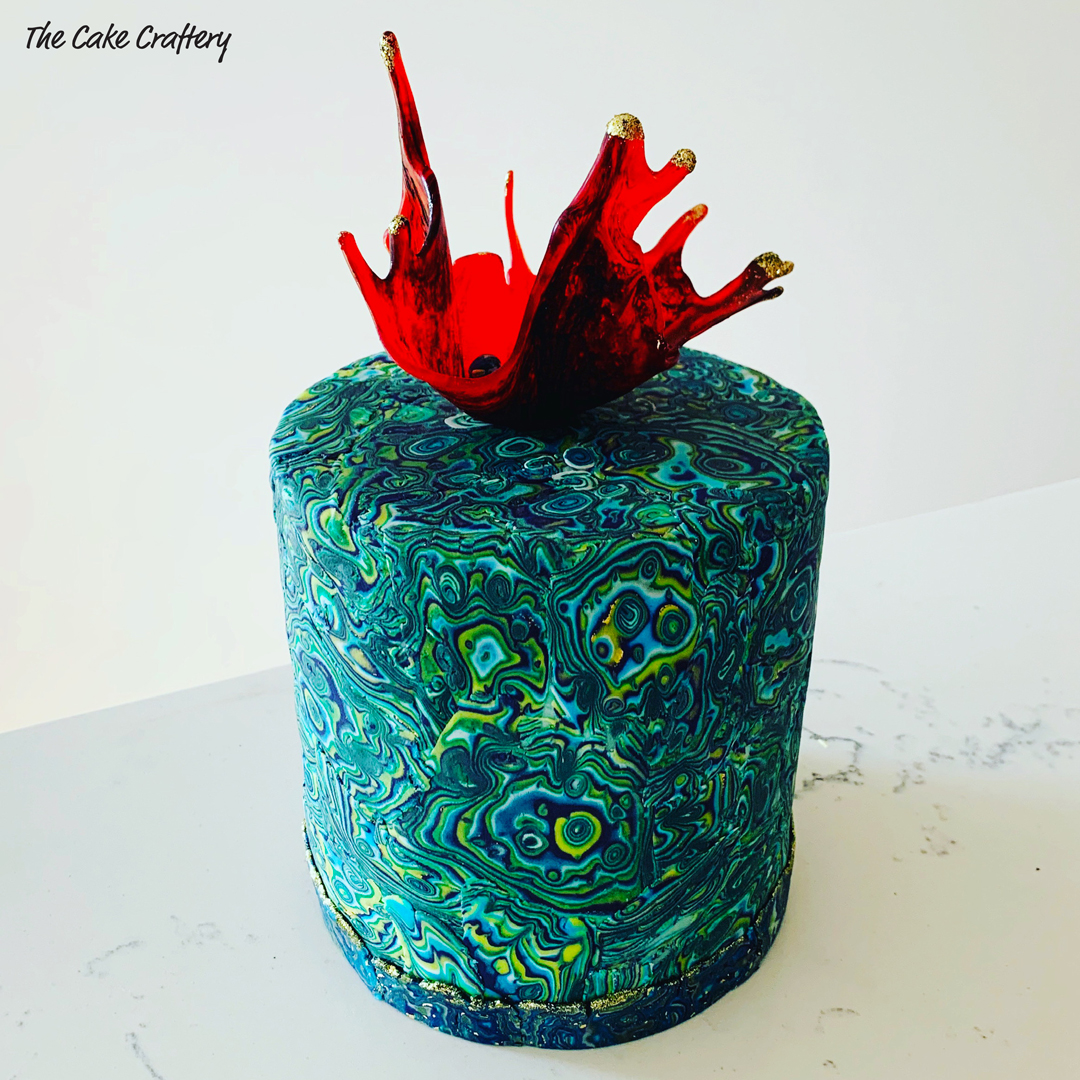
Here is the same technique, but covering a cake.

Creating the base for the shell
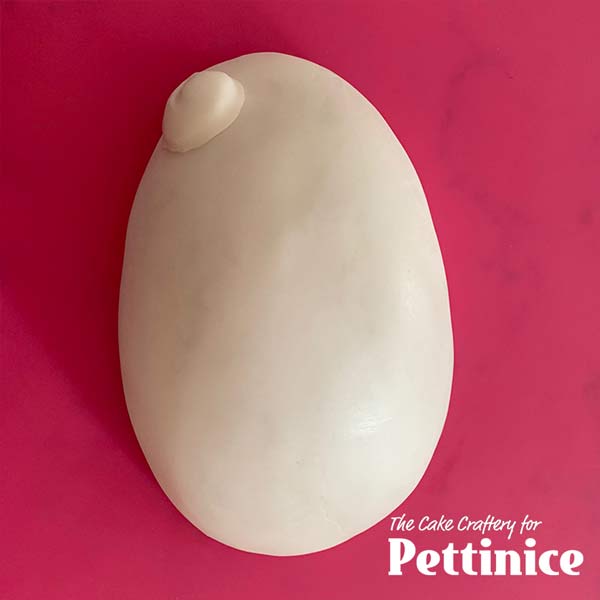
The first thing you need to do, preferably at least a day ahead, is to make your mold. I used 300g Pettinice mixed with 2 tsp tylose powder. I hand-formed a solid paua-shell shape 5”/13cm long, 3.5”/8.5cm at the widest point, and about 2”/5cm high.
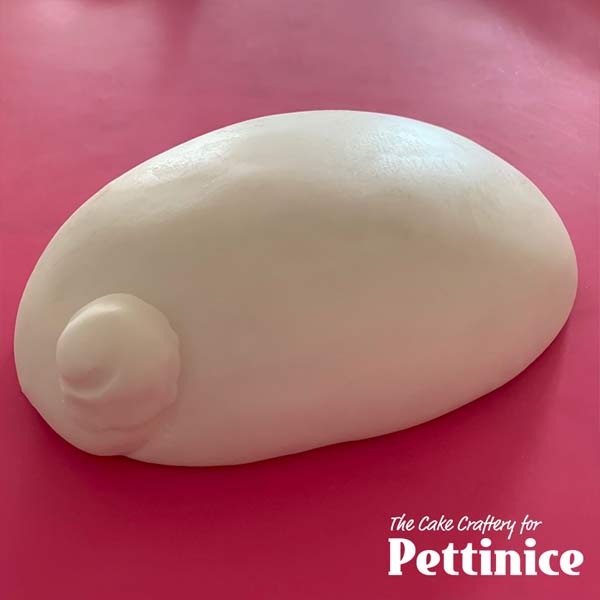
It is basically a half egg shape. I added a small, rounded knob of fondant at the narrow end. By making your own mold you can choose whatever size shell you want to make. You can use up clean off-cuts and scraps of Pettinice to make the mold, mixing them all together with the tylose - no-one is going to be eating it! If you have a real paua shell that is polished on the outside, you could put some cling film over it and use that as a mold instead, skipping this step altogether. For an even simpler version you could use an Easter egg mold.
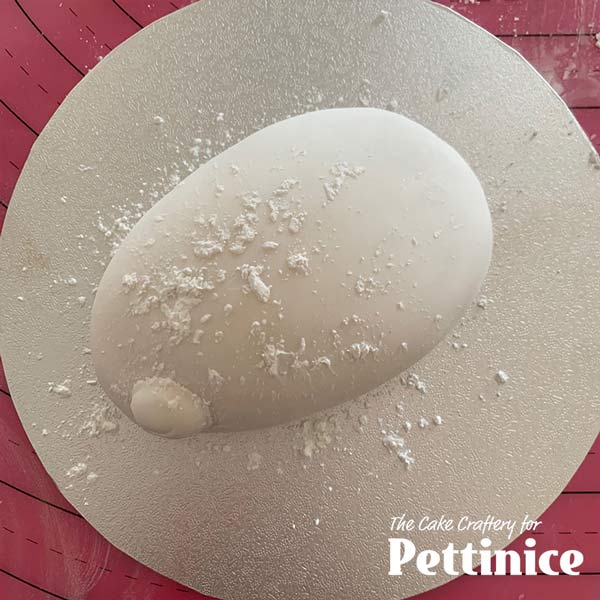
Once the mold has hardened, dust liberally with cornflour/cornstarch to prevent the prepared Pettinice from sticking to it. I placed mine on a cake board so I could move it around easily.

6. Take 100 g of a dark colour like purple, black, dark blue or green Pettinice and add 0.5 - 1 tsp of tylose a’” powder and work it in well.
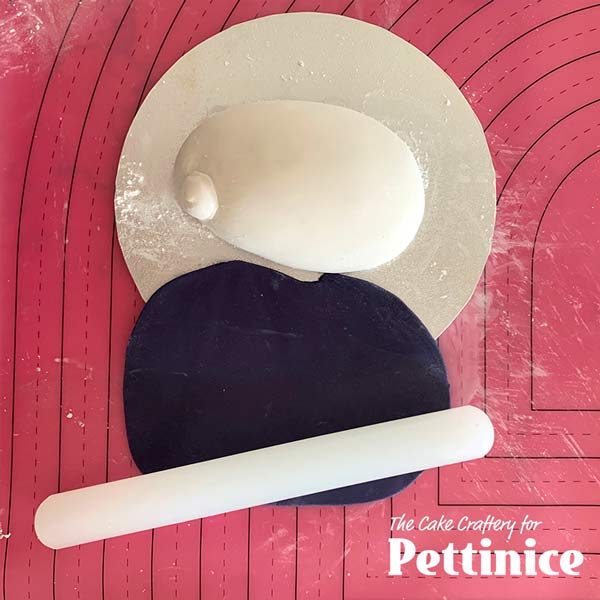
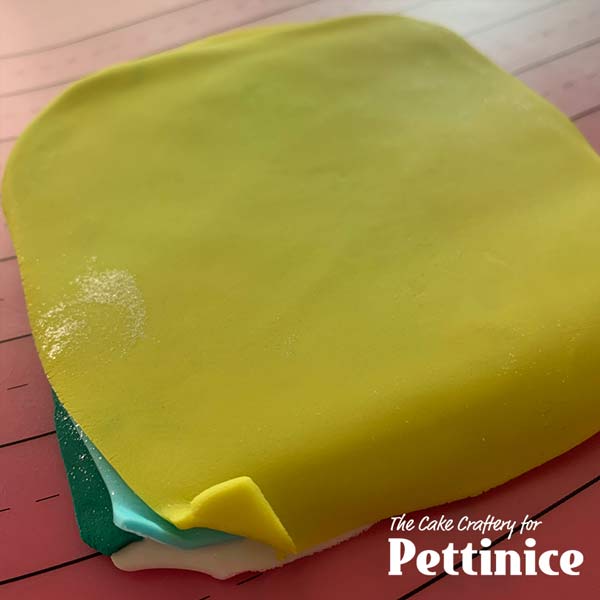
7. Roll out to 2mm thick and lay it over the mold.
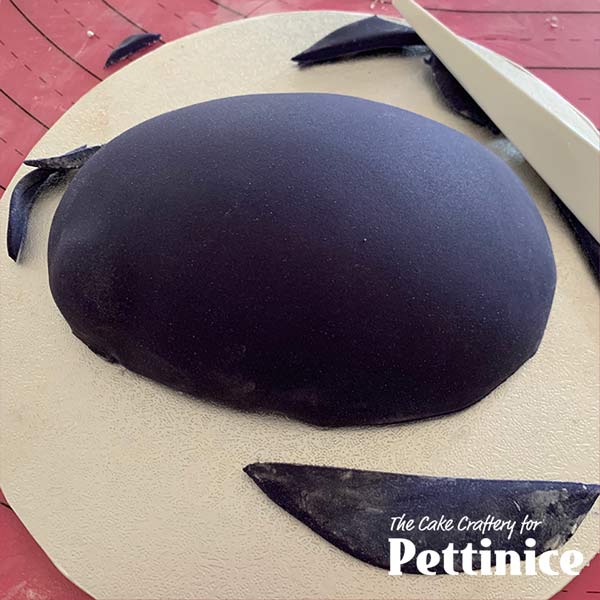
Smooth it down with your hands or another piece of fondant wrapped in cling film. Trim the excess off with a sharp, clean craft/Exacto knife.Set aside to firm up while you mix your colours.
Colour Mixing
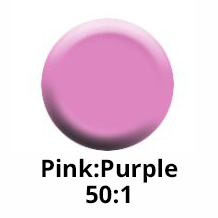
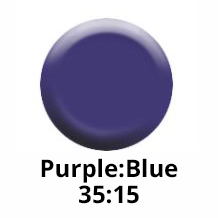
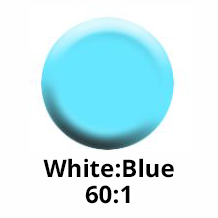
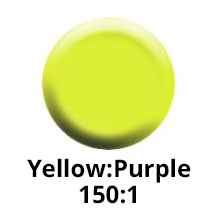
Make approx. 50 grams each of the following colours as per the Pettinice colour charts:
- Pink:Purple 50:1 ( I left this combination a bit marbled, rather than fully mixing)
- Purple:Blue 35:15
- White:Blue 60:1
- Yellow:Purple 150:1
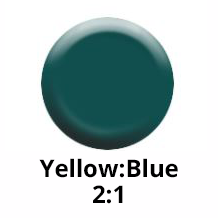
- Yellow:Blue 2:1
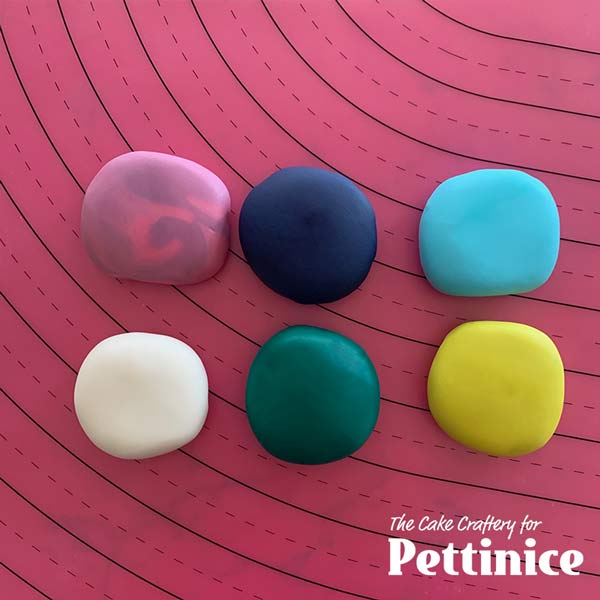
Take approximately 50g of each of your prepared colours.
Roll each colour out into 4” or 10 cm squares.
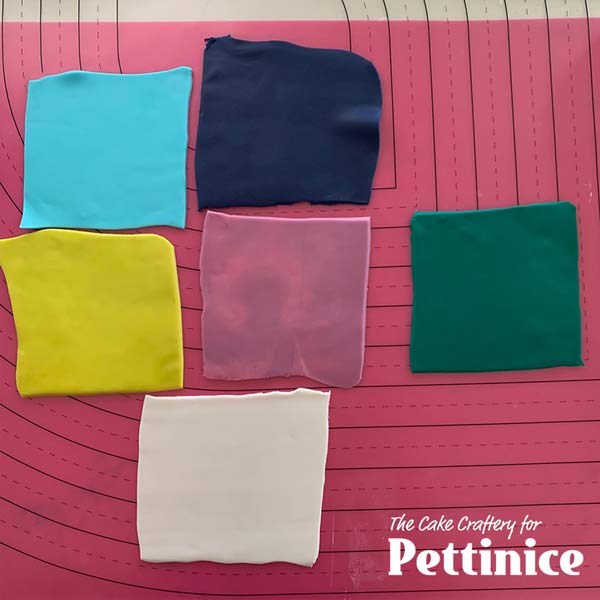
If using lustre dust, dust onto one side of the white. You can add any corresponding lustre dust to any colour if you wish.
Stack the colours in this order - purple, pink, white, green, light blue, light green. Spritz each sheet very lightly, with water spray bottle, to adhere if necessary. This 6-layer stack is the beginning of your loaf.
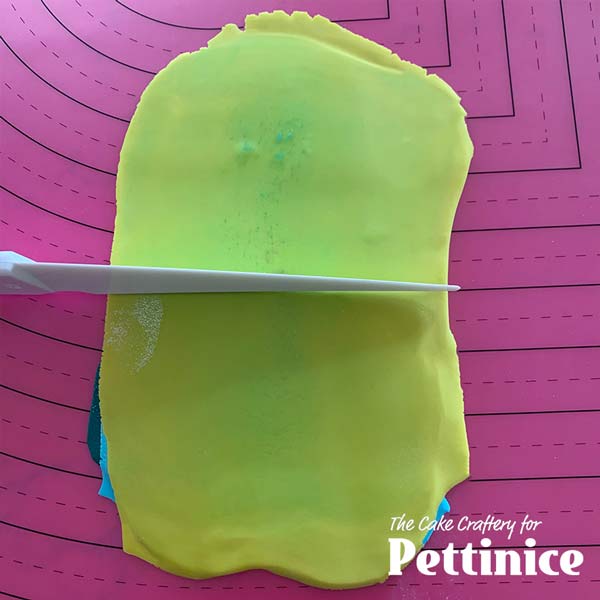
Roll out into a sheet that is double the original length i.e. 8”x4”/ 20cmx10cm. Cut the sheet in half to make 2 4”/10cm squares
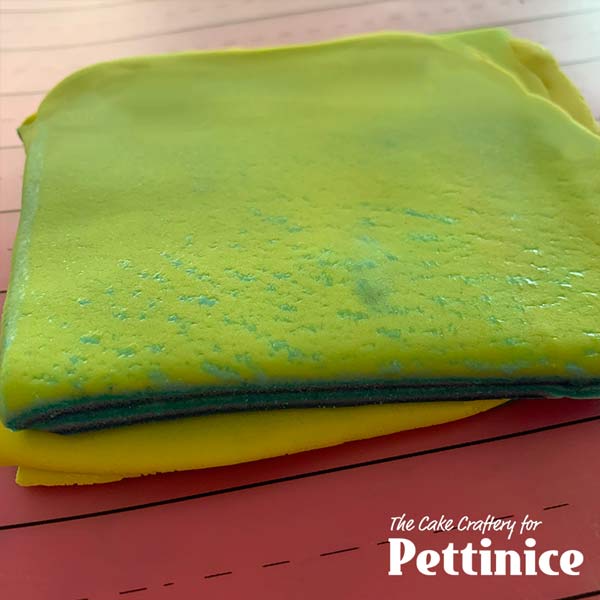
Stack one half on top of the other, keeping the yellow on top of both halves. NB Don’t stack as though closing a book or you will get 2 layers of yellow together, joining into 1 thick layer. Spritz if needbe to stick. Now you have 12 layers in your stack. Repeat this rolling, cutting and stacking 3 more times. By this time, you will have 96 very thin layers although it doesn’t look like 96 layers as some colours blend into each other.
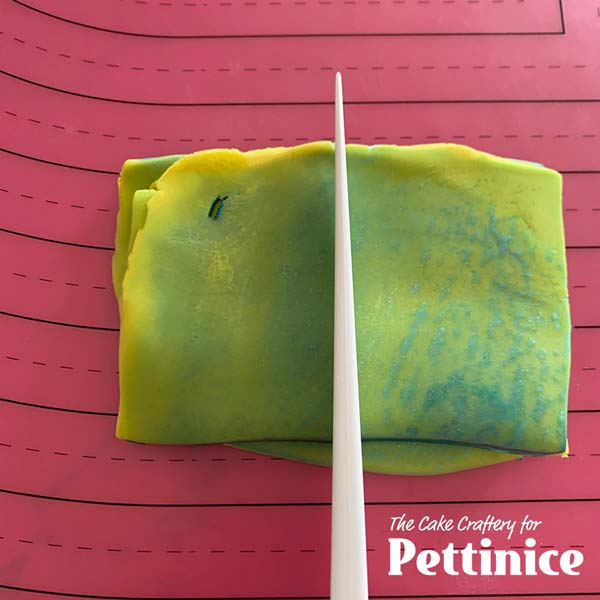
Don’t roll this last 4”/10cm stack this time, but cut it in half and stack to make a 4”x 2”/10cmx5cm final block.
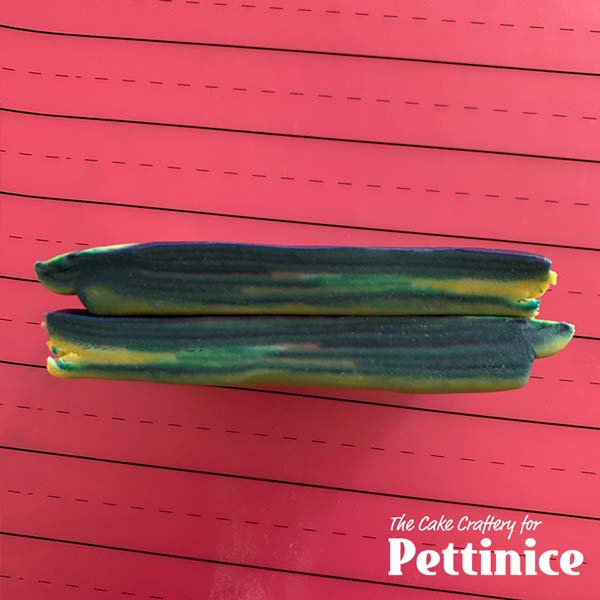
Trim the sides and keep the trimmings.
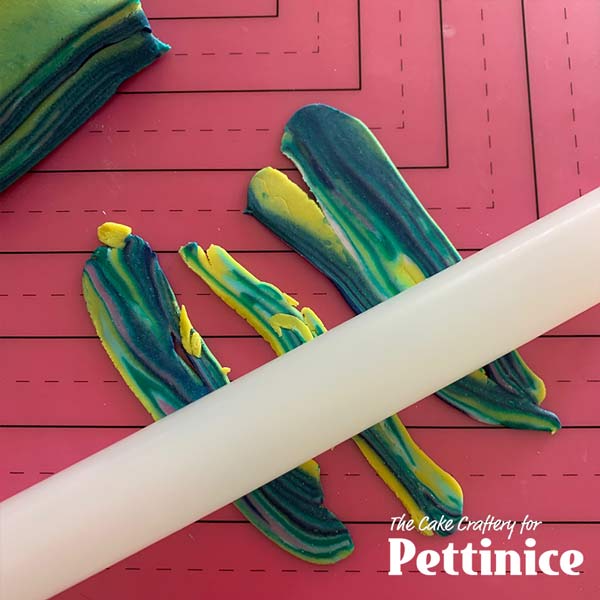
Roll some of the trimmings to1mm thick
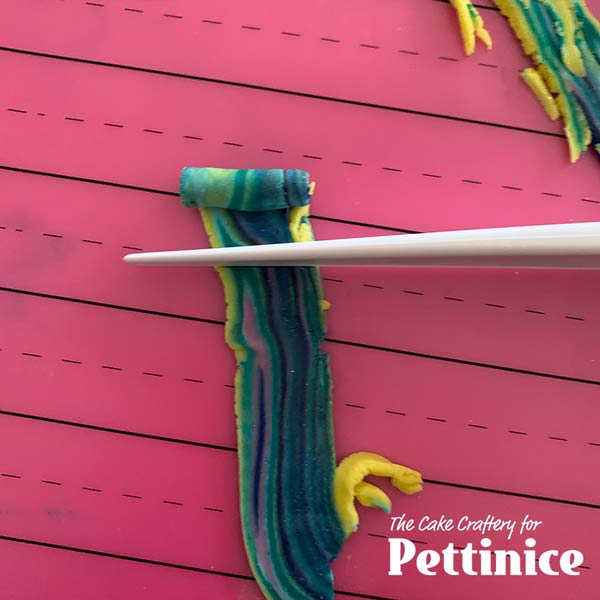
Cut into short lengths and roll those up
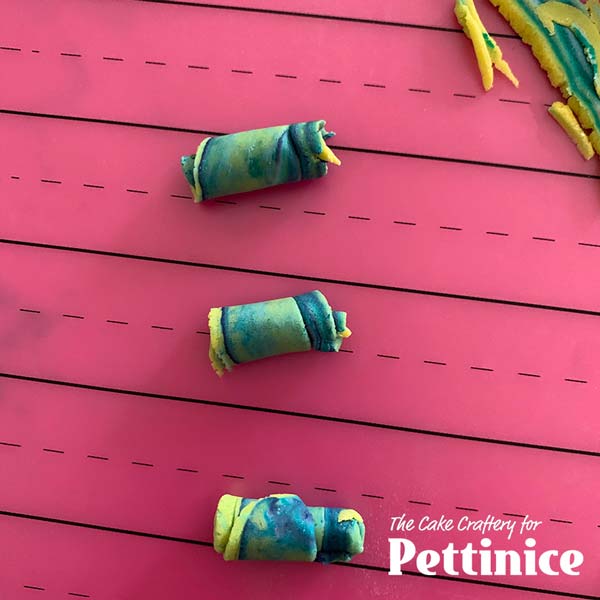
Continue rolling up the lengths.
Now for some fun! Get your tools ready.
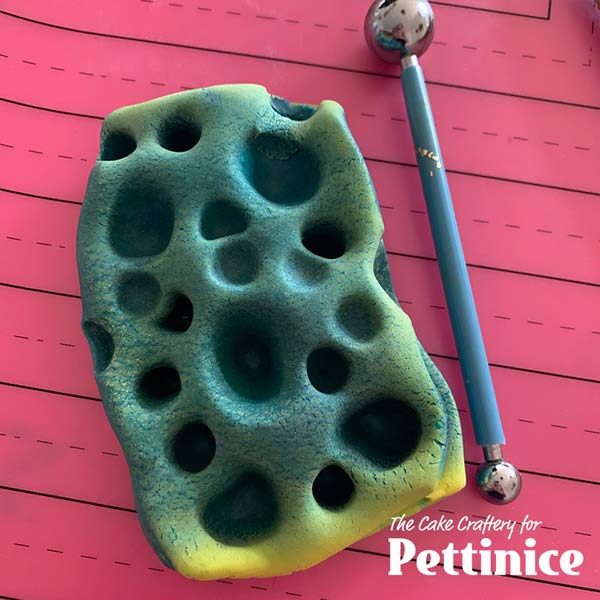
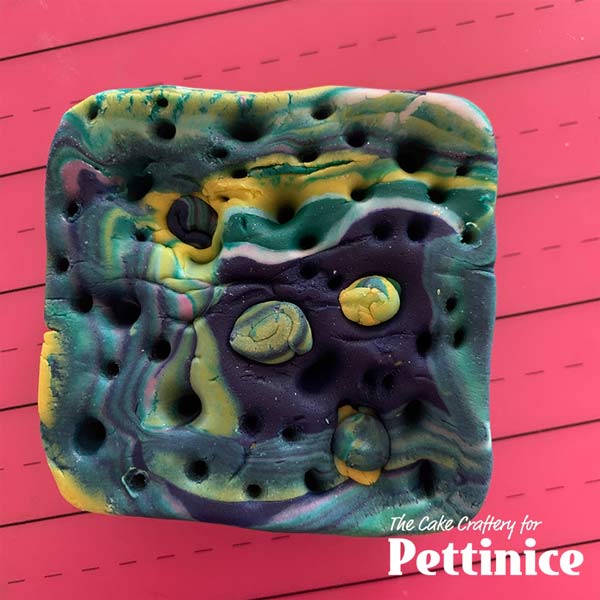
Press your ball tools firmly down through the layers making random craters all over the stack, some deep, others shallow, some in between. You are going for randomness here, not neat rows. Start with the larger ball tool. Then the smaller one.
Now use your piercing tool or skewer and make holes in the spaces between the craters, poking into some of the craters, too.
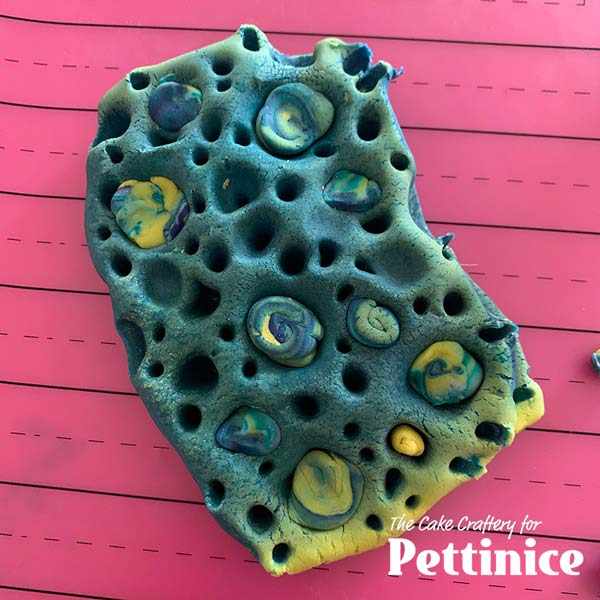
Plug some of the bigger craters with the rolled pieces, spritzing first if not tacky at all, to ensure sticking.

Compress the sides of the stack again to push the holes and craters closed, “healing” the stack. Don’t be afraid to push really firmly together with your hands.
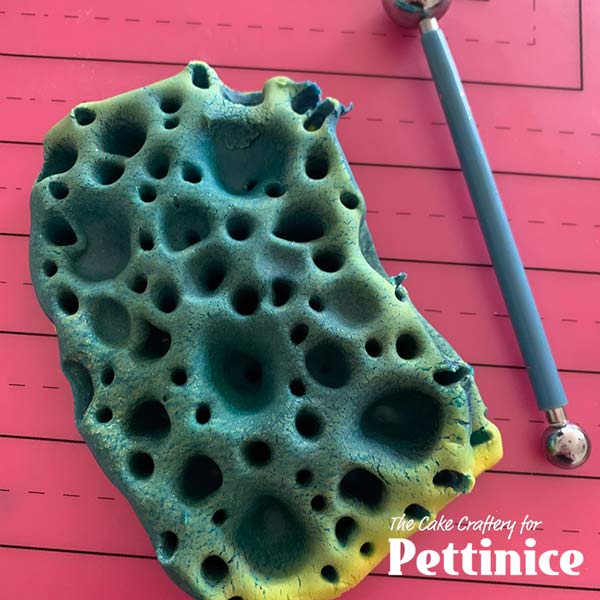
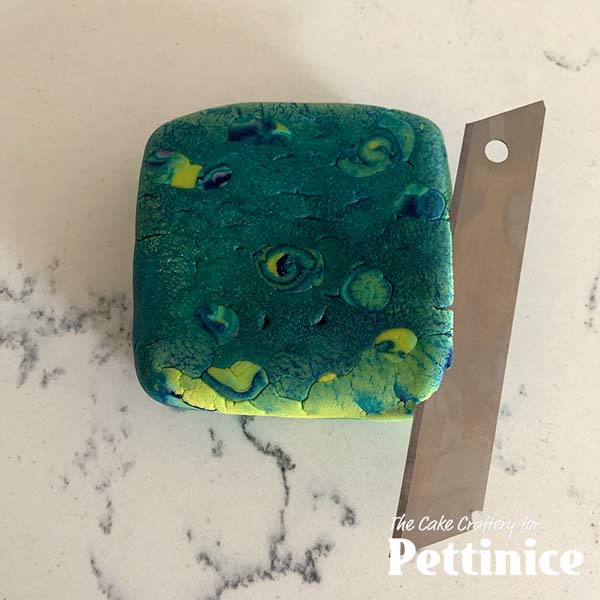
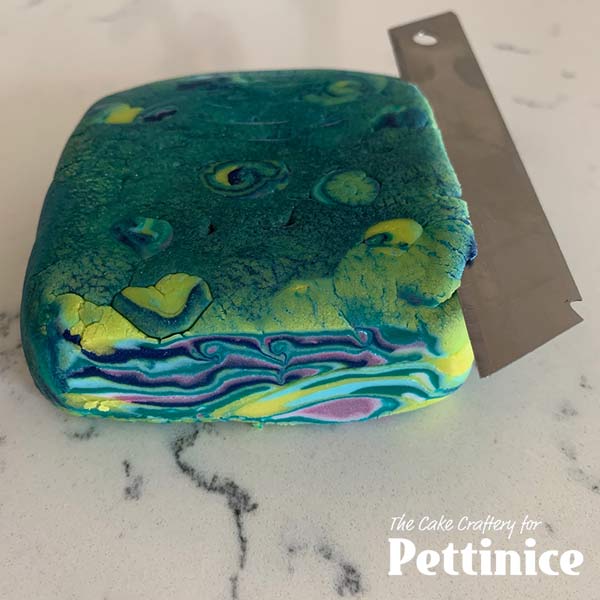
Turn the stack over.
Repeat the whole process on the other side, but not making as many holes. Compress sides in again to close up the holes. The fondant will be looking very stressed by now but Pettinice is strong and flexible enough to withstand the pressure! Wrap the stack and place in the fridge for at least 15 mins. Longer if it’s very soft.
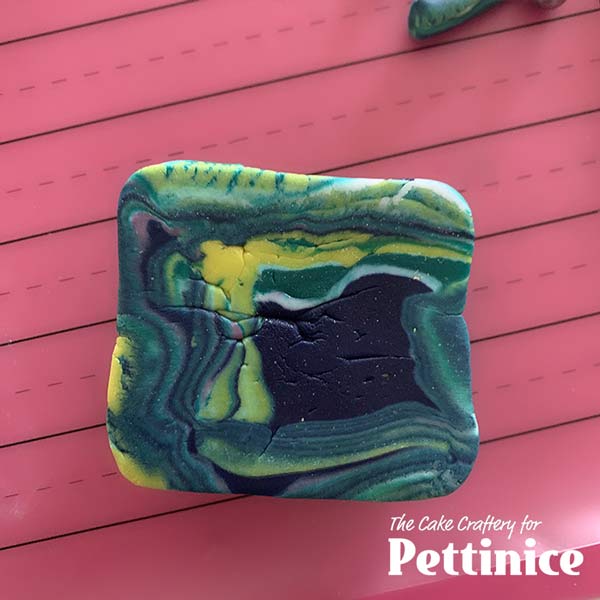
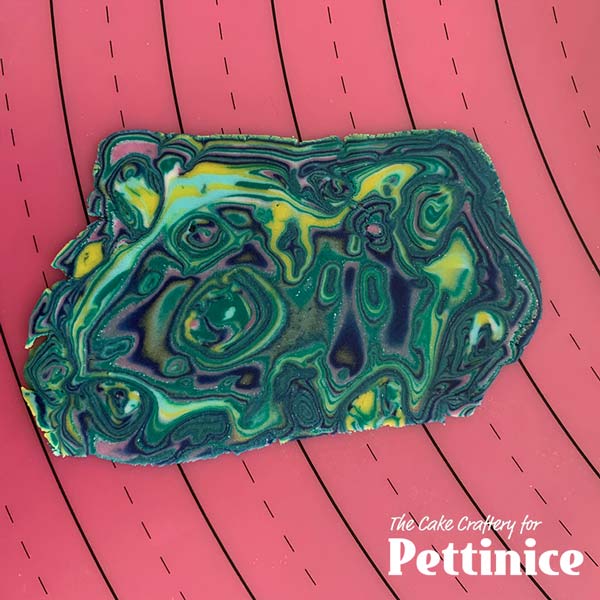
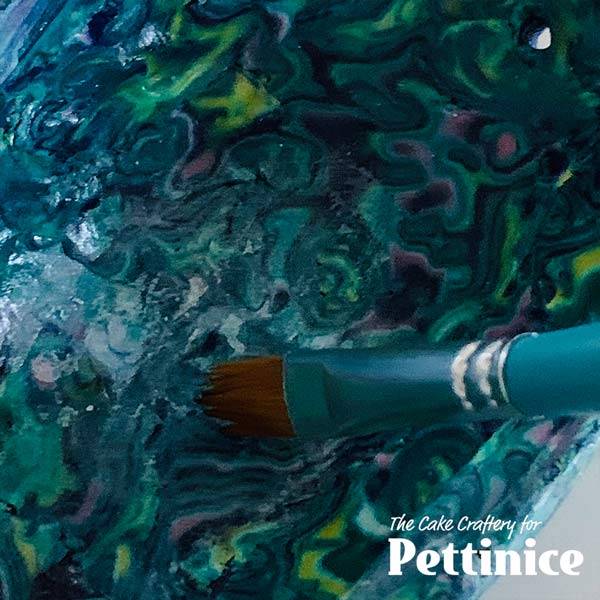
Now for the big reveal. This is my favourite part! Take your sharp blade and slice very thin sheets in the same direction that the layers run.
Cut ‘with the grain’, not against it. This is a key point. Wipe your blade clean between each slice.
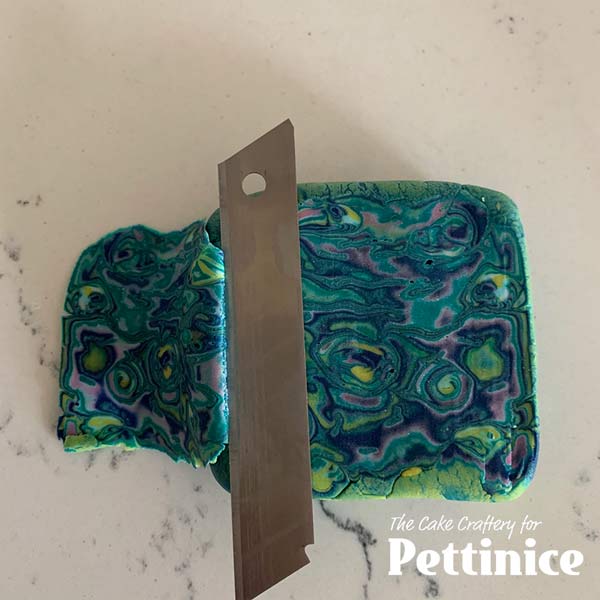
As you slice, you will see wonderful patterns in the fondant.
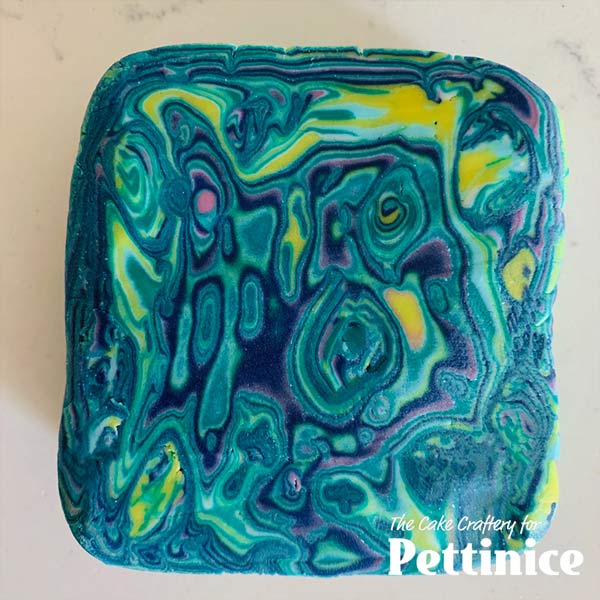
Close-up. You will see a different pattern on the back and front of each slice, and each slice will be different.
This is the front.
This is the back.
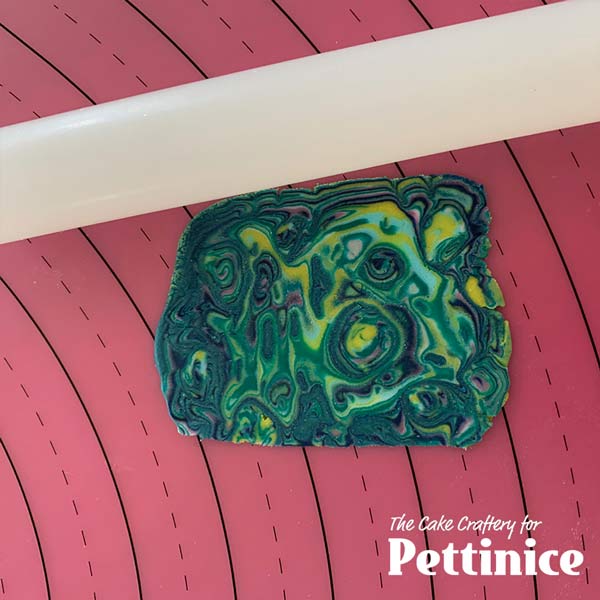
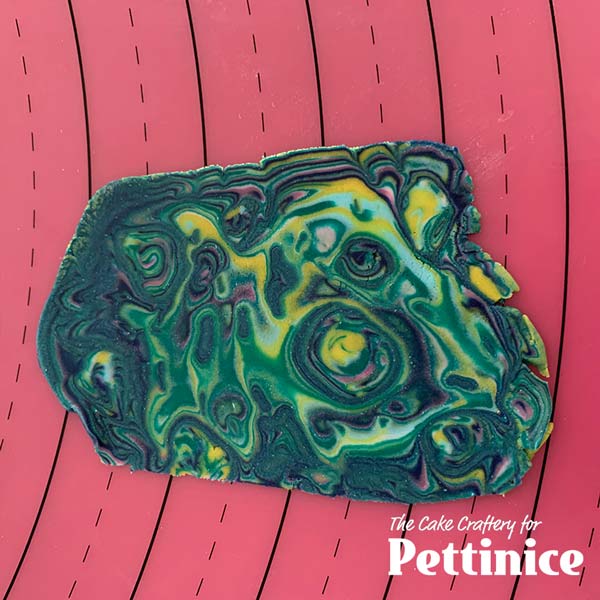
You can gently roll any thicker pieces to even out the slices.
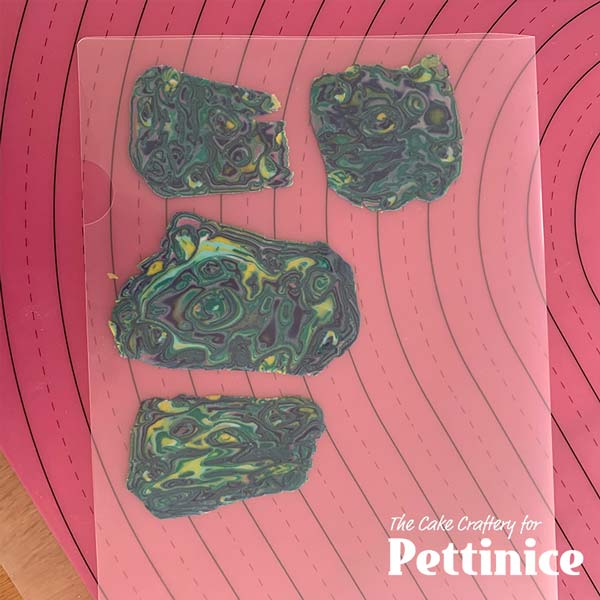
Keep your slices flat between plastic sheets or in snap-lock bags. You need them to remain soft and flexible.
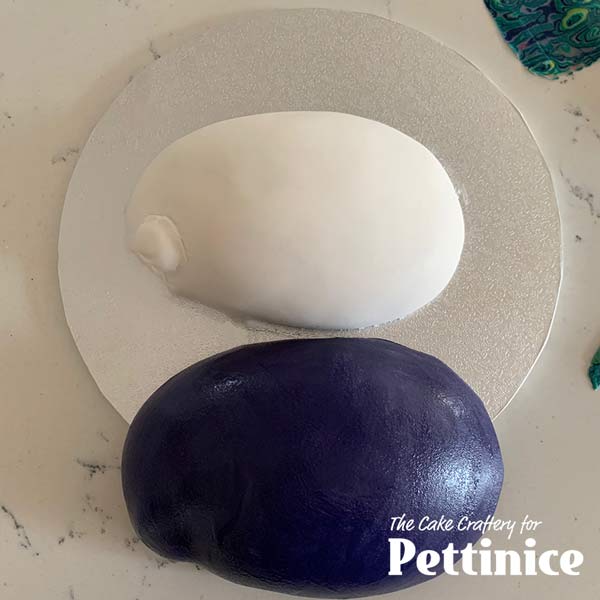
Check that your shell lifts easily off the mold. Dust mold again and re-place shell on top.
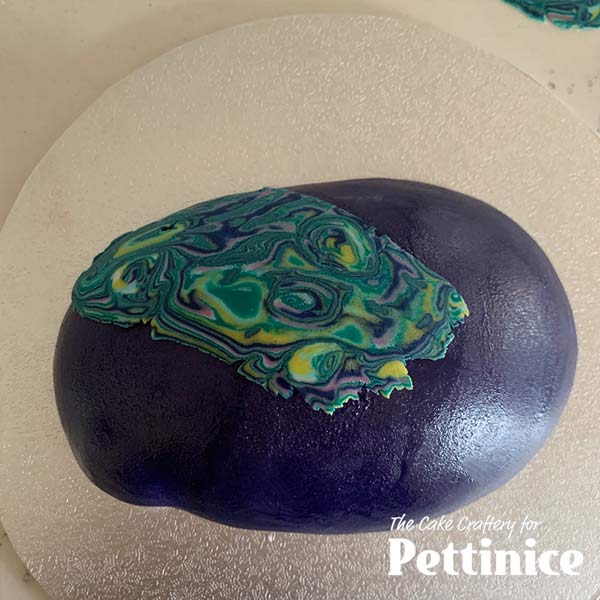
Leave your shell on the mold and paint it lightly with edible glue. Start laying your slices all over the outside of your shell, piecing them together and smoothing the joins. It’s best not to have straight edges -think crazy paving, not neat tiles (but without gaps in between)!
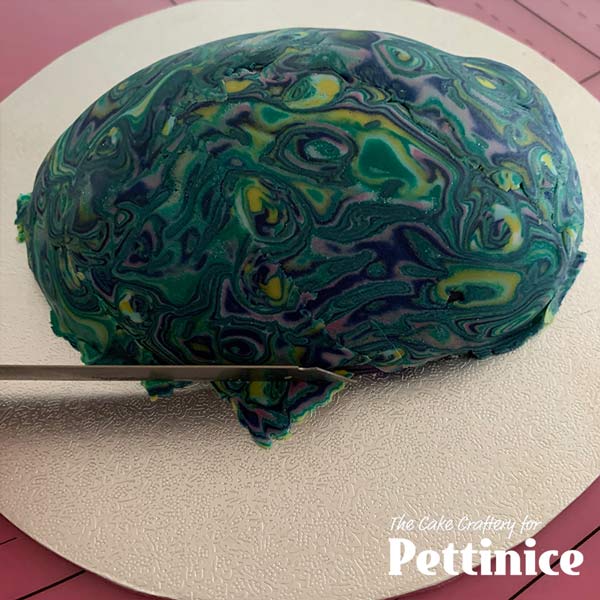
Trim off the excess around the edges.
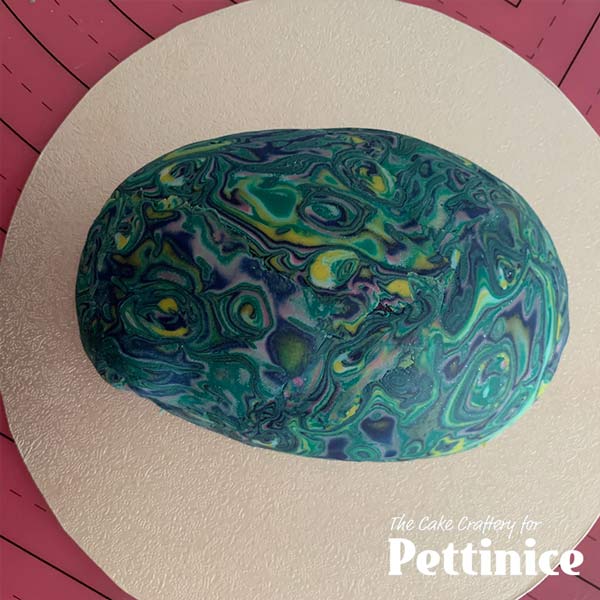
Leave a couple of hours to firm up
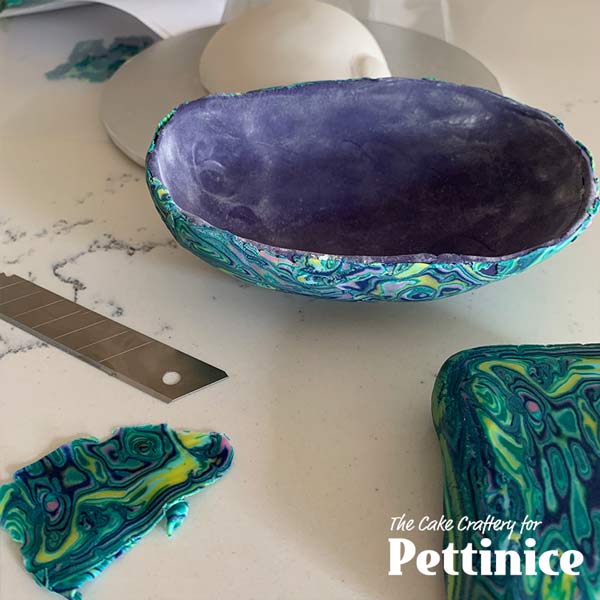
Now lift shell off the mold to work on the inside.
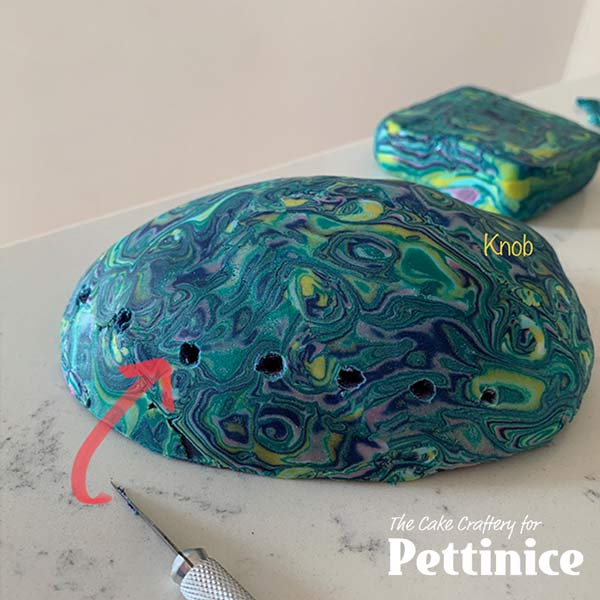
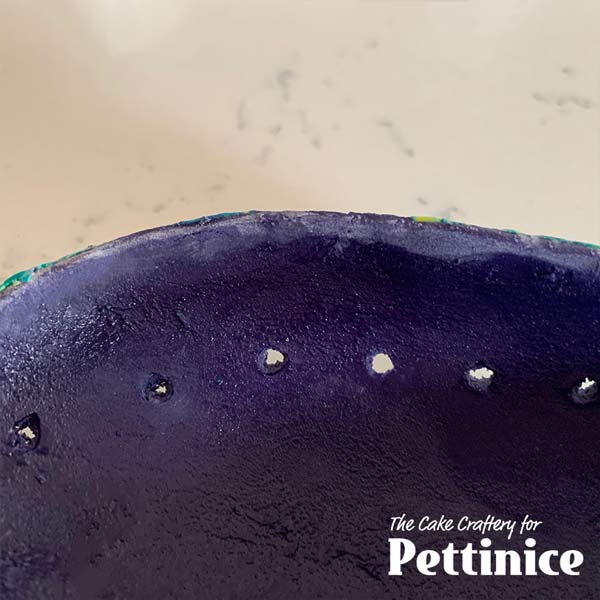
Using the tip of your craft knife, make a row of holes through the shell. Carefully poke the point into the shell and rotate to make each hole. This row is about 2cm in from the edge, diagonally across from where the ‘knob’ is.
Paint the inside of the shell with edible glue.
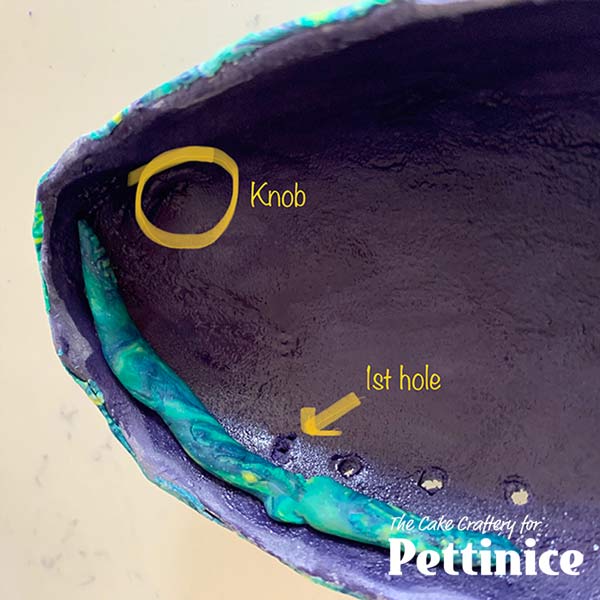
Make a 1cm wide by 10 cm long sausage out of your offcuts and place it as shown. Mine was a bit short so I added to it later.
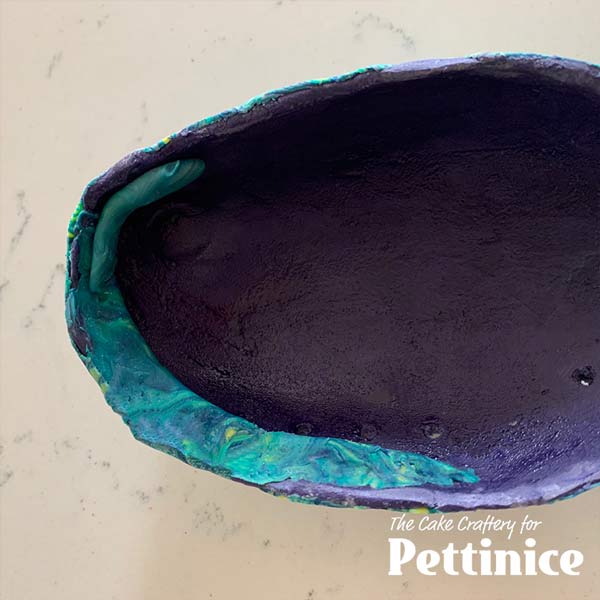
Use your finger or your dresden tool to smooth the top edge of this roll up to the edge of your shell, to make the little ‘ledge’ that is typical of paua shells.
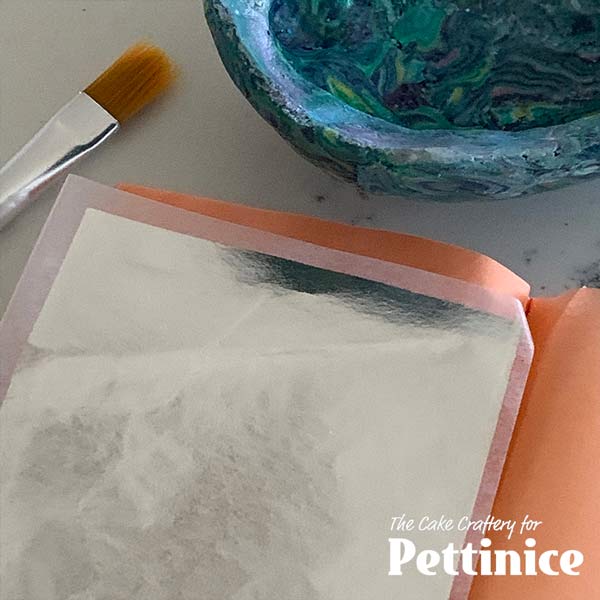
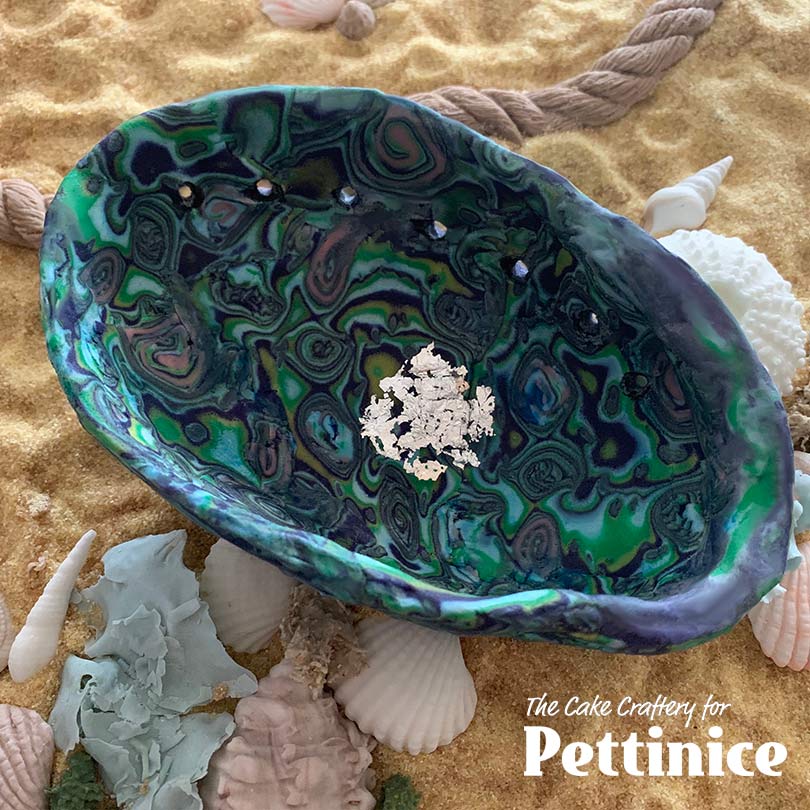
Take a small sheet of edible silver leaf.
Dampen an oval in the bottom of your shell very lightly with water.
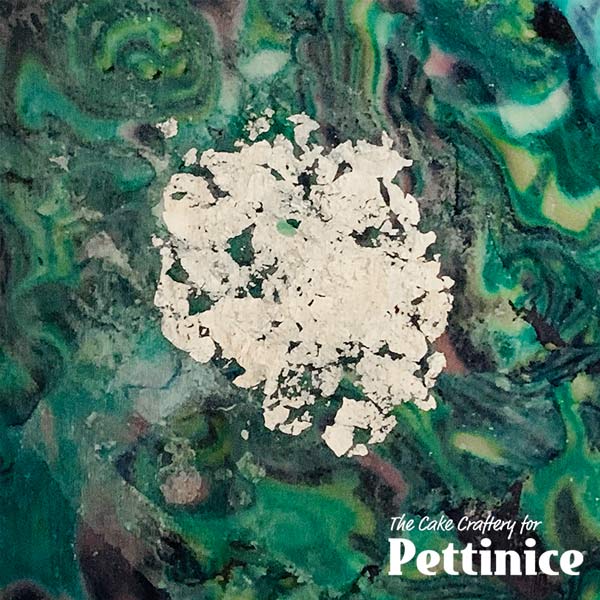
Press your silver leaf onto it. You don’t need a perfect finish because paua shells have a little rough, but shiny, patch in their bases. This is just a suggestion of that effect.
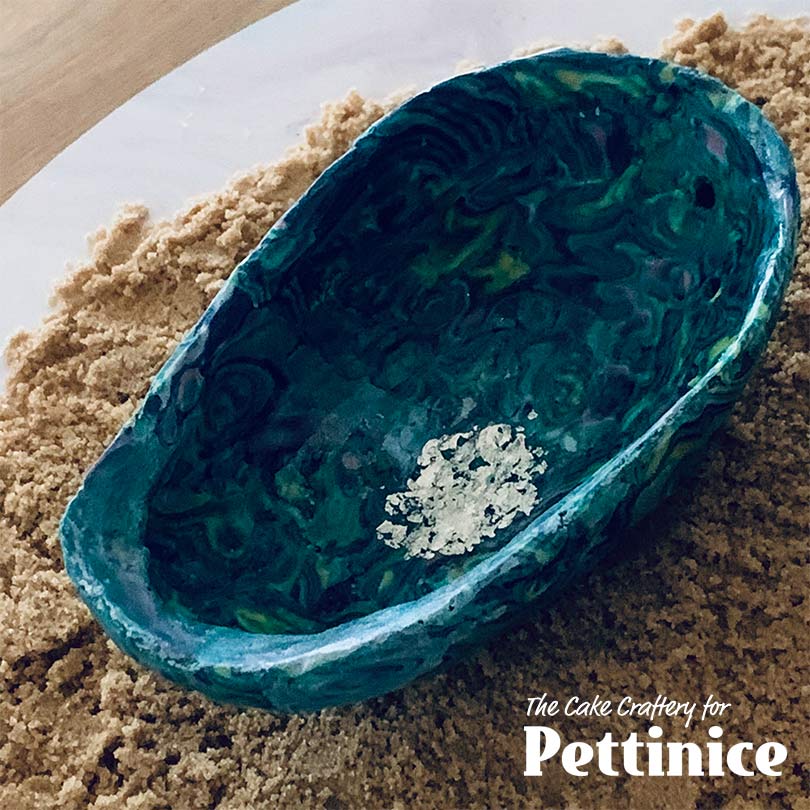
The finished shell. If you like, you can go one step further and use a black edible marker to trace around some of your lines and whorls to accentuate. This is completely optional. Finish off with a coat of food varnish, either sprayed or brushed on.
I presented my shell on sand made by mixing fine polenta with soft brown sugar. You could also use crushed biscuits/cookies. I used a bought mold to make some smaller shells and a length of rope. The rope was white Pettinice with a tiny bit of Chocolate and Yellow marbled into it. The grey-green seaweed is extremely thinly rolled Pettinice. I tore the edges and ‘scrunched’ it gently in my hand. Please share your paua shell projects with us; we would love to see! Enjoy.

Tracey van Lent owns The Cake Craftery in Riverhead, Auckland. Tracey’s background is in art and design and she gained a Bachelor’s Degree in Visual Communications when her four children were young. She has been decorating cakes for many years and has taught classes in her local community in North-West Auckland in more recent years.
She loves working with Pettinice in every aspect of her fondant work and particularly likes the unlimited palette of colours that can be produced by just mixing together the colour range.
See more of Tracey's cakes at