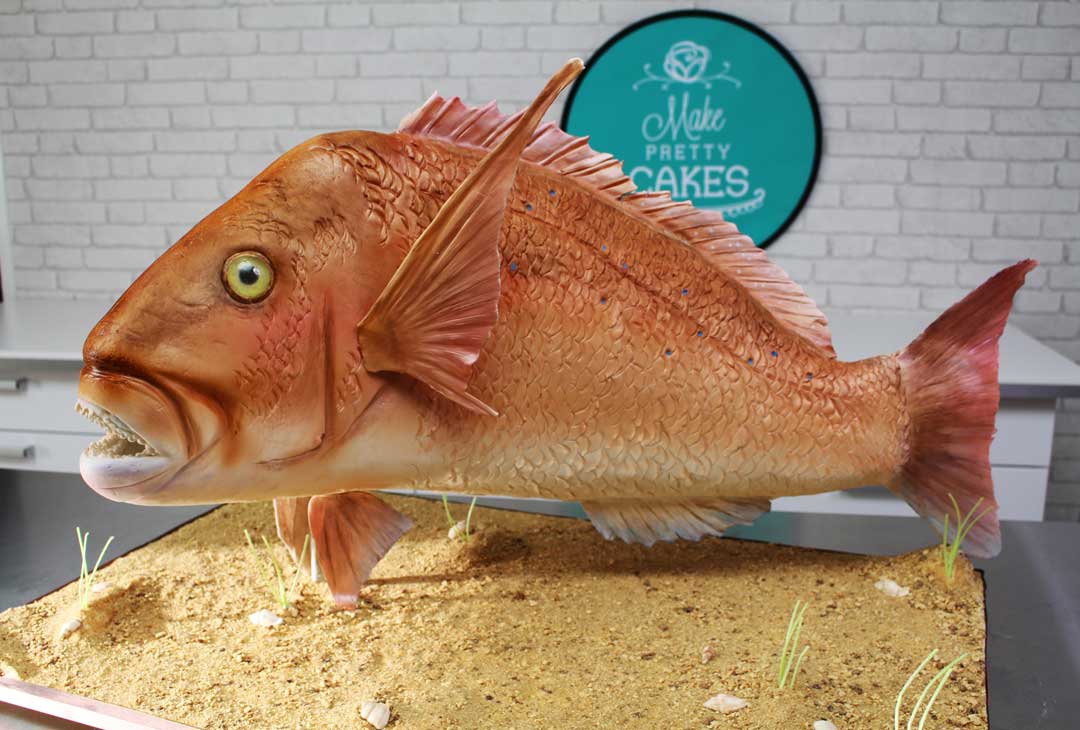
How to make a 3D fish cake
Edibles:
- Pettinice Ivory
- Wafer paper
- Edible paint for eye details
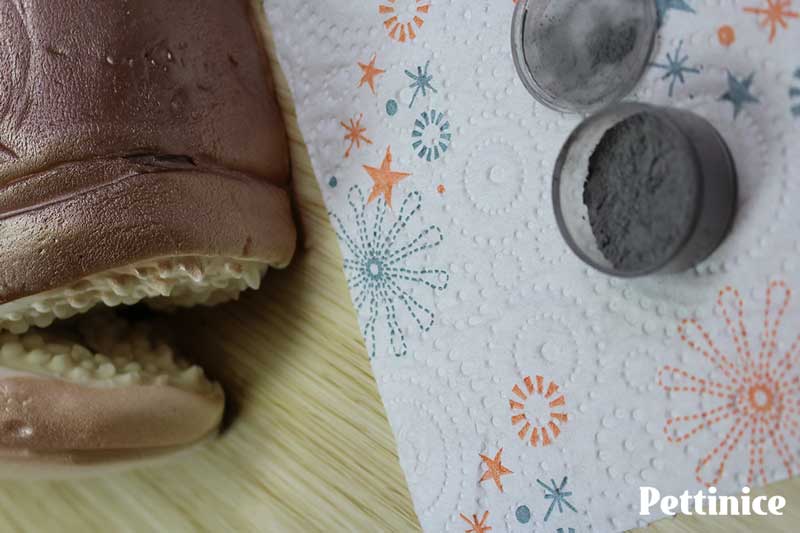
- Grey or brown and blue Edible dust for shading
- Decorators glaze for sealing wires
Materials:
- White floral wire
- Skewers
- Mini drinking straws
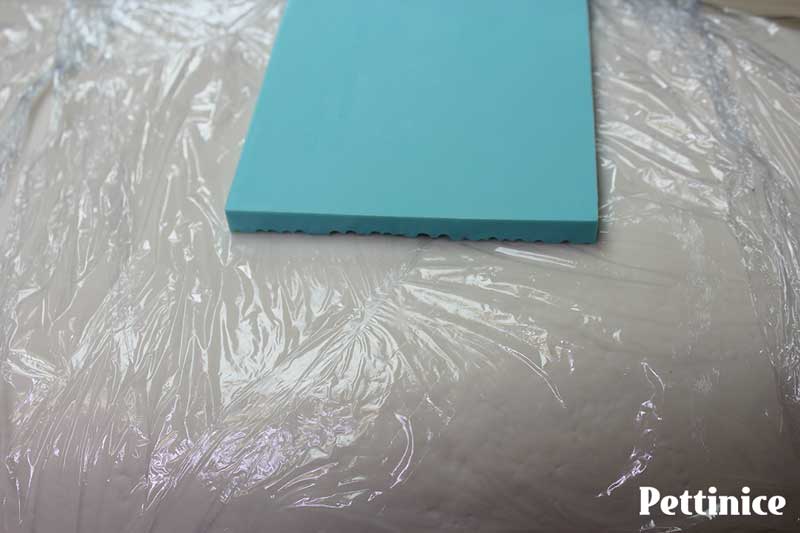
- Cling film
- 1200x600cm board
- large plastic kitchen cutting mat or thin cake card to cut up as base cakeboard
- Bakels Sno creme or Crisco
Tools
- Dresden tool
- soft brushes
- piping tips
- circle cutter
- Knife
- Sharp clay tool
- Any texture mat, or crumpled aluminum
Do ahead of time
- Click here for snapper fish template
Print, cover image with clear masking tape and trim. - Print and cut out fin templates x 2 in wafer paper OR
- Print and cut fin templates in gumpaste and allow to fully dry


My cake board was 1200cm x 600cm. Cut out the fish template and the mat, which will act as your cake board. Use the attached template to create your bottom cake board.
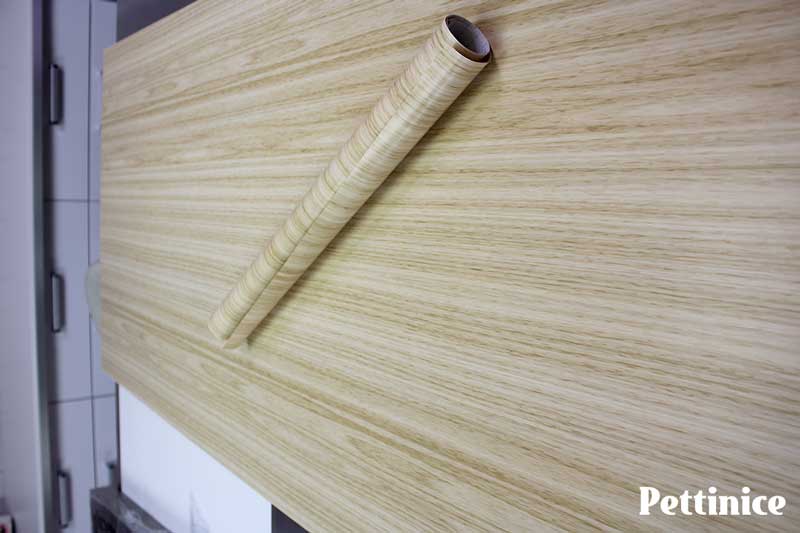
Cover your MDF board with cake paper. I used kitchen cupboard liner adhesive.
Use your template to cut out your fish shape. (I cut my cake while in the baking tray.)
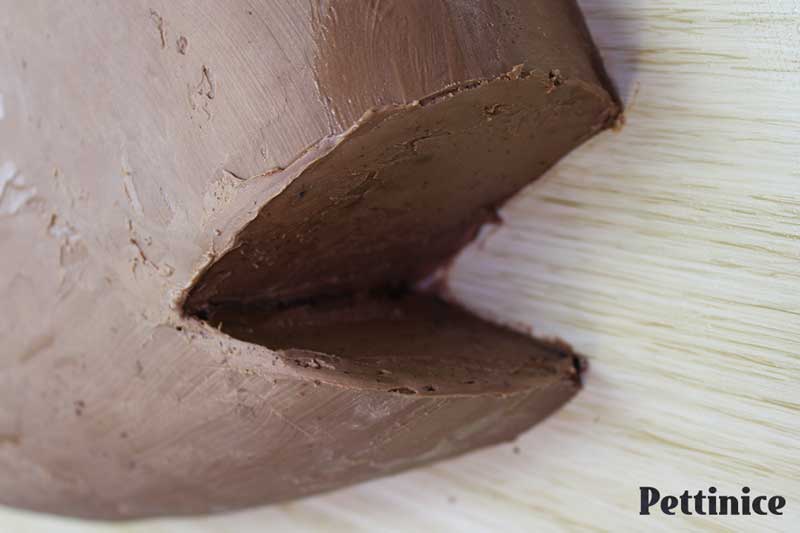
*Note, if you are going to feature an open mouth, trim your cake board now, before you flip it over.
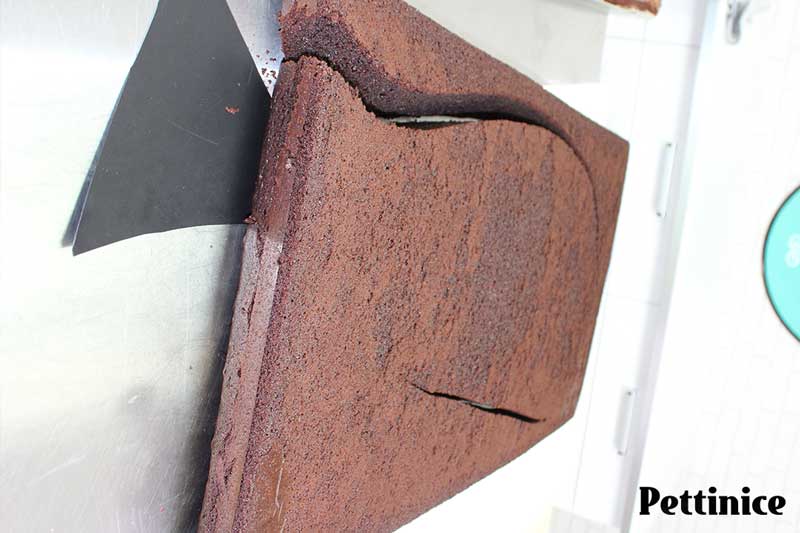
Flip the cake over onto the bench and carefully separate trimmings.
Save the trimmings, as you will need to use them for the top layer.

I split cake in to 1.5" layers.
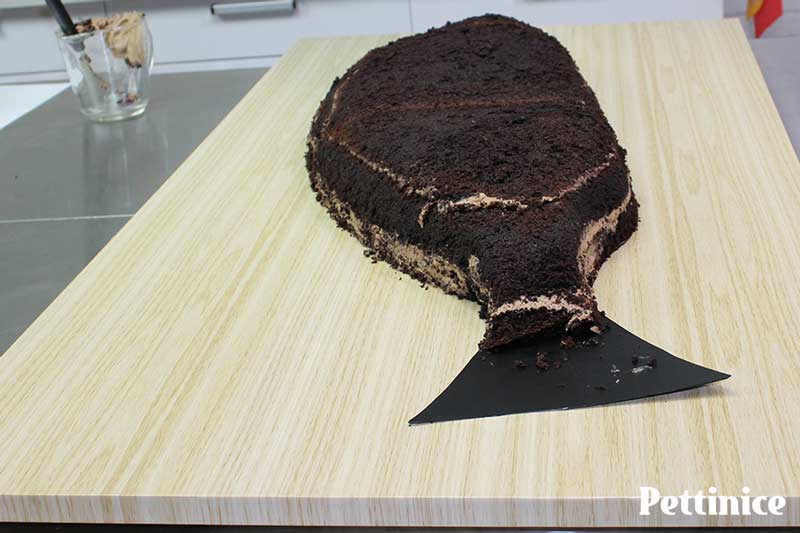
Fill, and round off the square edges by carving at a 45 degree angle.
If you decide you want to make wafer paper fins like I did, you can cut off the tail portion of your cake board.
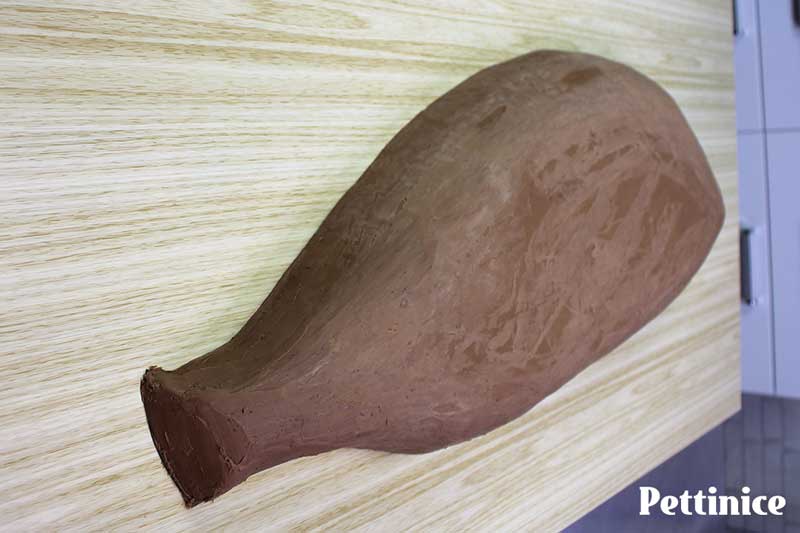
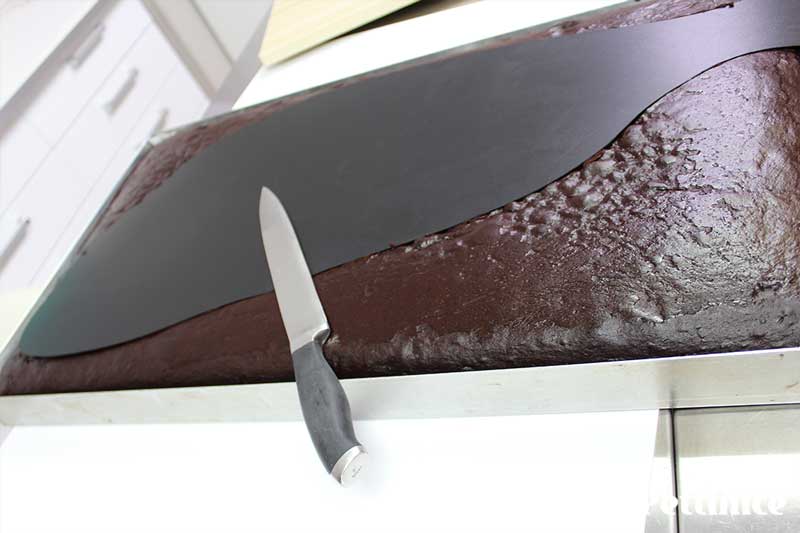
I covered my cake with chocolate truffle and melted chocolate mix.
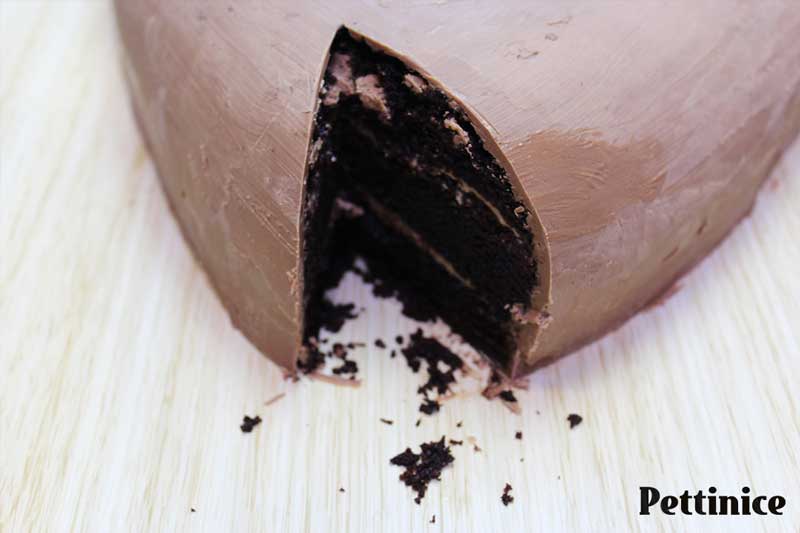
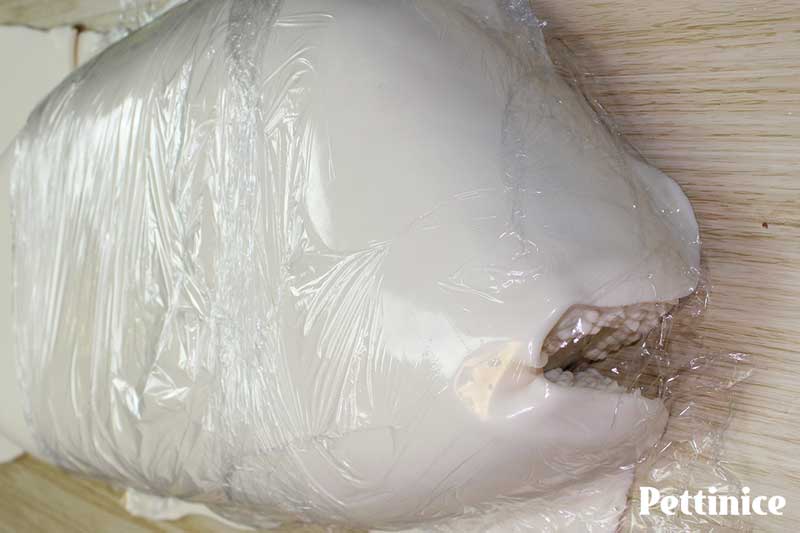
Cut out slice for the mouth. (You will be able to feel where the edges of the bottom cake board are)
Cover exposed cake with ganache.
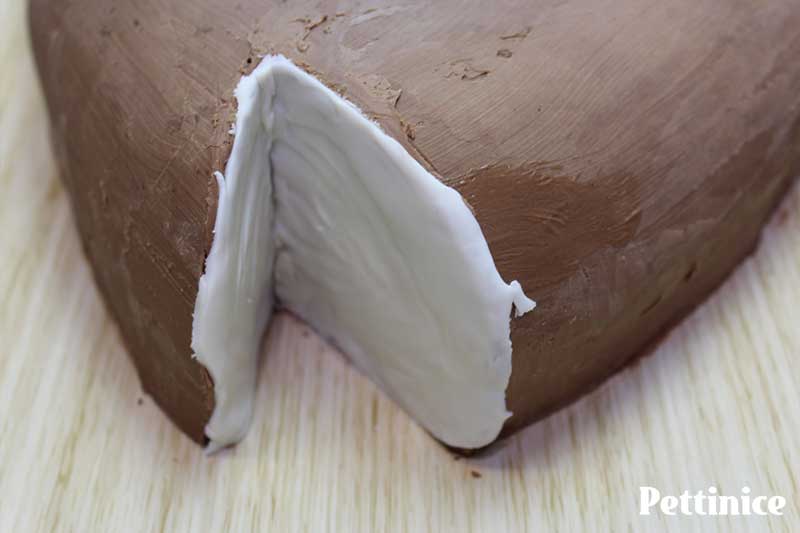
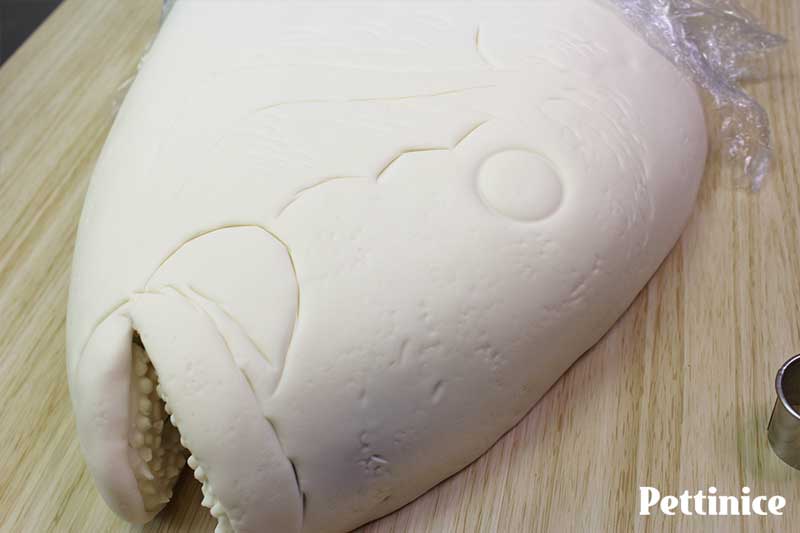
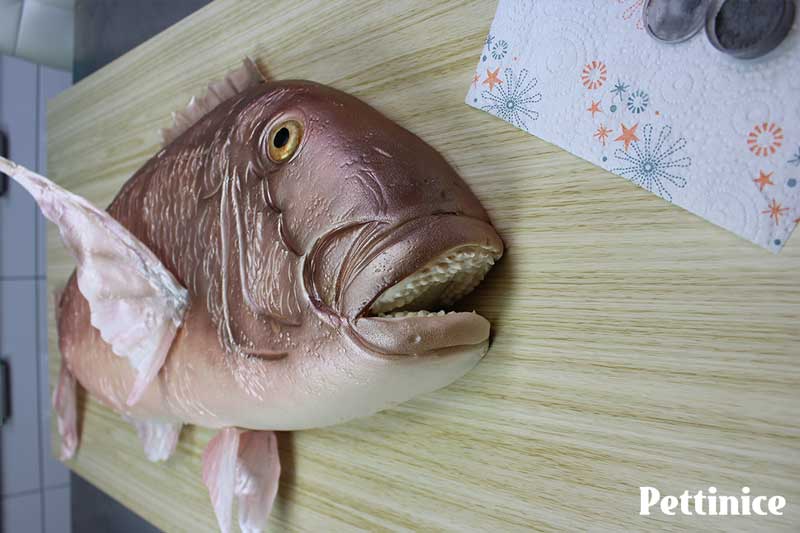
Cover mouth opening with Pettinice ivory. Use your dresden tool to emboss some texture.

Create further texture with any of your texture mats, or even a crumpled bit of aluminium foil.
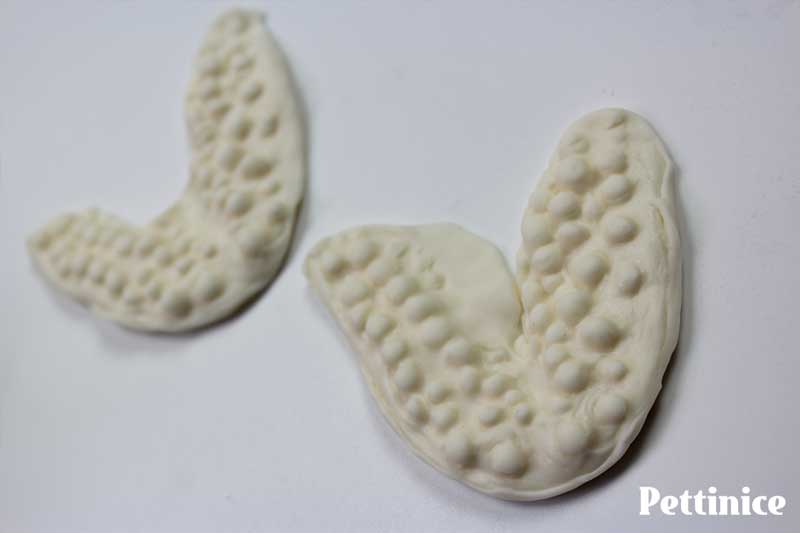
For the mouth, I made a quick U-shaped strip and rolled and pressed in circles of fondant. As this was my third fish cake, I made myself a mold out of hardened gumpaste to save time.
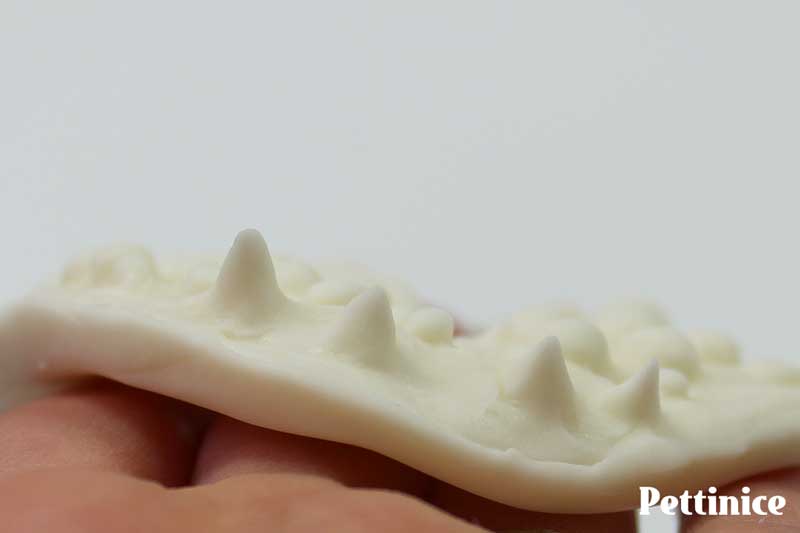
Quickly pinch and roll the fondant balls into sharp points.
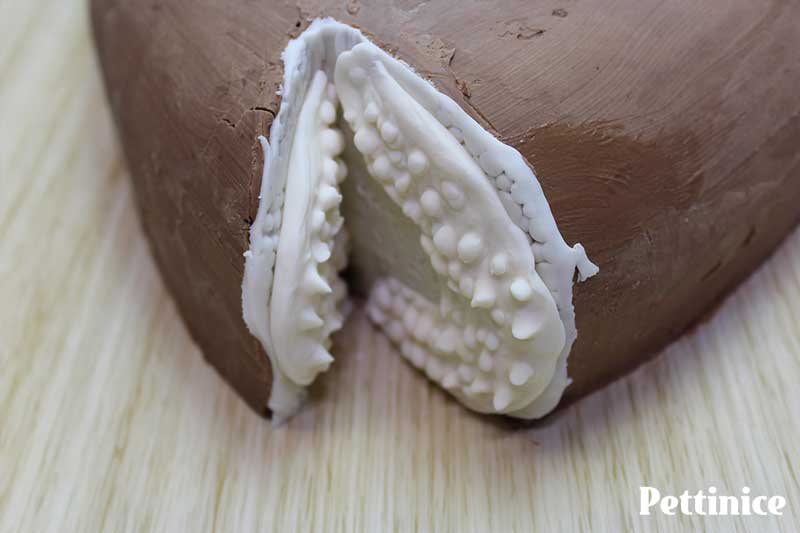
Apply with a damp brush into the mouth cavity, stretching as needed. Trim or smooth down excess fondant
Roll your Ivory Pettinice fondant and cover your fish.
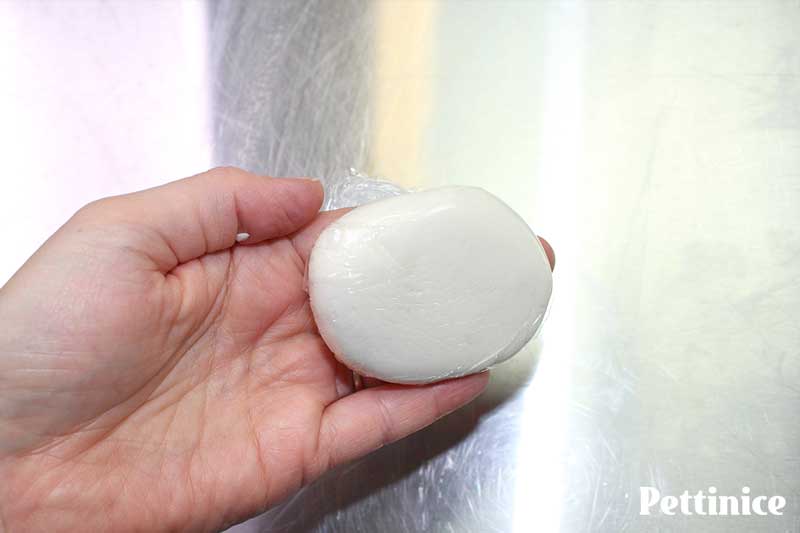
I smooth the fondant on my cake with a flattened ball of fondant. A cool little tip I received from Christine Willoughby from the Tauranga Cake Guild is to wrap my ball of fondant in clingfilm first. It's a great tip, as it glides smoothly over the fondant without needing or accidentally transferring icing sugar onto my fondant.
Cling film is a great way to protect your fondant from drying out to give yourself longer working time for making details on your cake. Margie Carter does this in her cake classes with a nylon fabric, and my friend Karin Klenner told me to just use cling film. In my cake room, it's been a fabulous game changer, as I can stop what I'm doing at any moment and come back to it without worry. School run, anyone? 😂
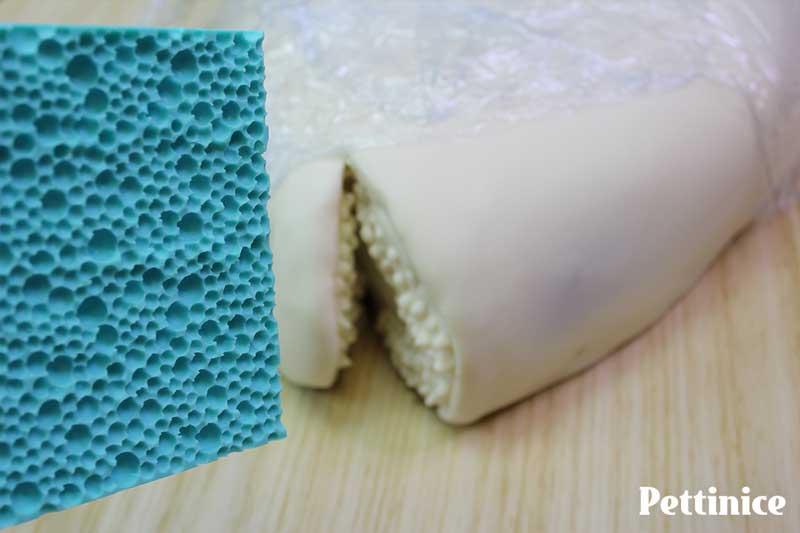
Trim fondant around mouth and smooth edges. Next, use any embossing texture mat, or crumpled aluminium foil to add texture to the skin.
If you have a deeper embosser, like the one I have here, you can even press the texture over the clingfilm.
The next step is totally optional, as you can totally just freehand the details by eye. But I'm going to show you my trick for keeping placement in the right place, with the right proportions.
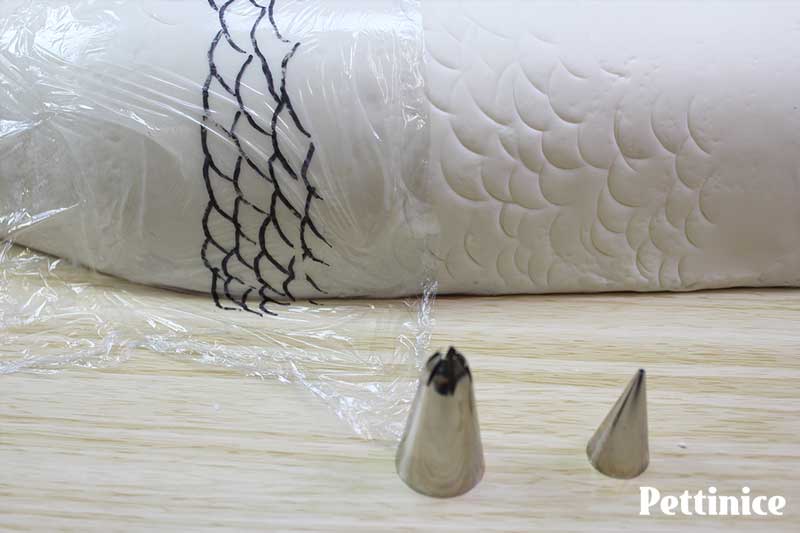
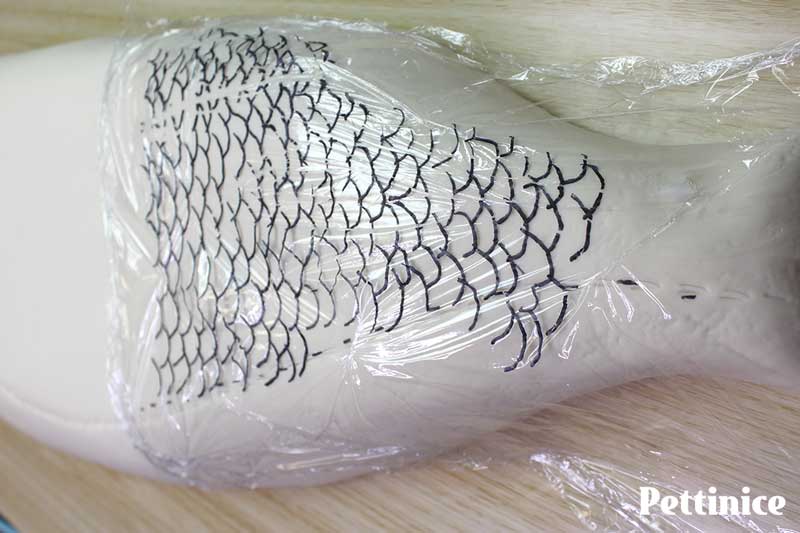
Place a piece of cling film over your A4 fish template and trace details with a permanent marker.
WARNING: Keep the marker side UP when placing cling film on your cake, otherwise you risk transferring the ink to the fresh fondant. If you want to flip the pattern, lay a fresh bit of clingfilm on the cake first, and then put your template on top.
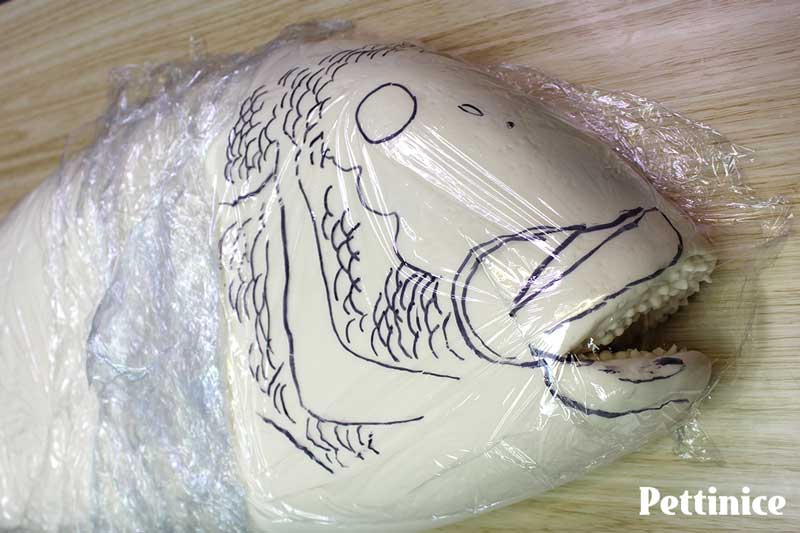
Place your cling film template over your cake and gently use your dresden tool to trace over the details.
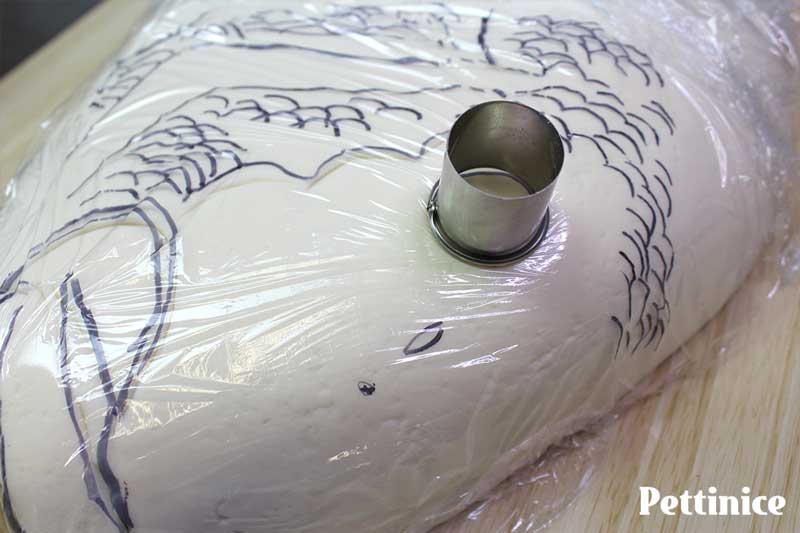
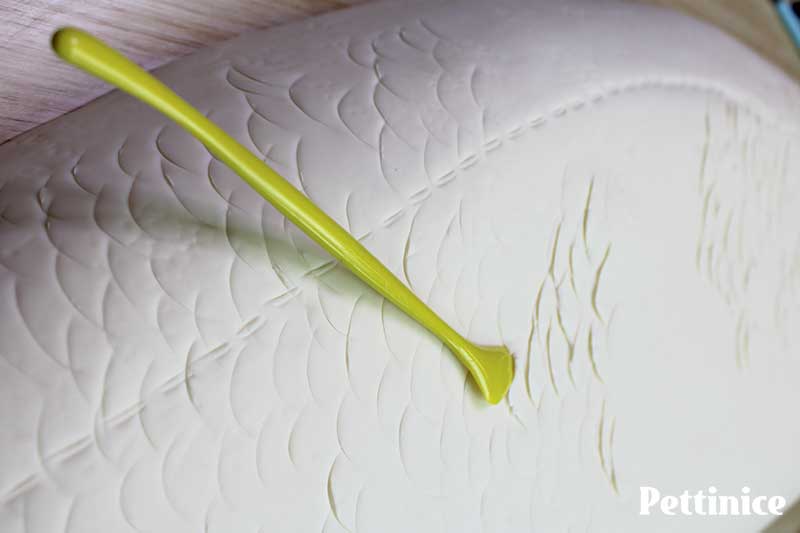
Use the soft edge of your circle cutter to emboss the eye with a bit of pressure.
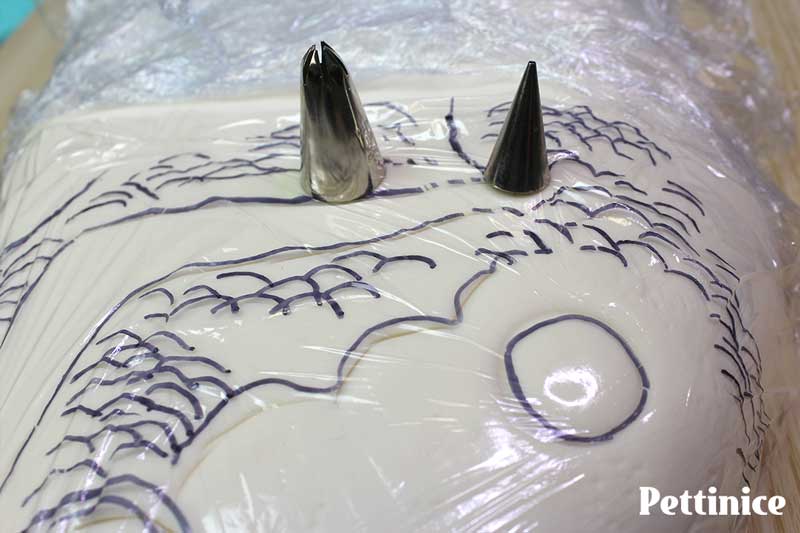
Use different piping tips to press gently and follow the curves of the scales.
Reveal the details and smooth out all the markings with your dresden tool, or clay shapers. Recover with cling film before the next step.
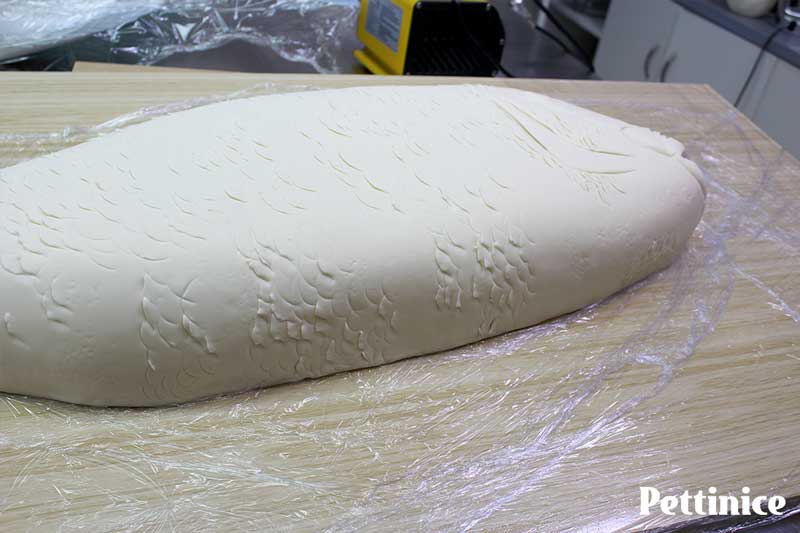
Create a little section of tighter scales for the top and bottom of the fish.
The body. One thing I have noticed, is you don't have to do every single scale. You can just do clumps of it and you still get the same great fish effect. Have another closer look at my fish and you'll now see I left a lot of empty space. Another reason embossing the fondant first is so good!
Use a thin edged cake tool or knife to gently cut in to the fondant and lift some of your scales to give it more movement. Again, you don't have to do all of them - just little grouped clumps here and there.
The first fish cake I made, I did EVERY SINGLE SCALE. All the scales!!! 🕒
After you finish your cake details, you can recycle your cling film to protect the board before you airbrush. You can leave your cake and move on to the fins.
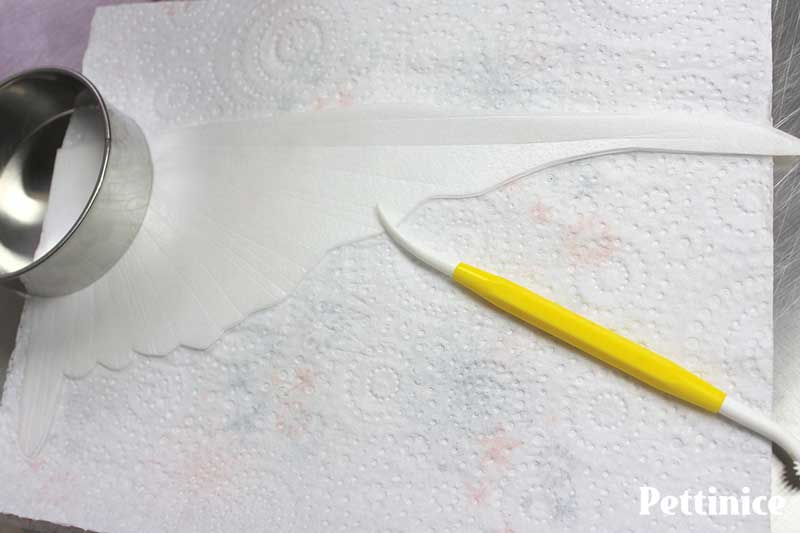
You can create your fins with Pettinice and Tylose powder, but if time is not on your side, use wafer paper! Here is a photo where I emboss my wafer paper with the dresden tool over paper towels for cushion. You want to press hard, but not hard enough to cut the paper. I used my circle cutter to designate the "no emboss zone"
Follow Sharon Wee's tutorial for creating wafer paper fins HERE.
Download Nina's fin templates HERE.
Follow Sharon Wee's tutorial for creating wafer paper fins HERE.
After airbrushing, place your wafer paper fins in to the cake.
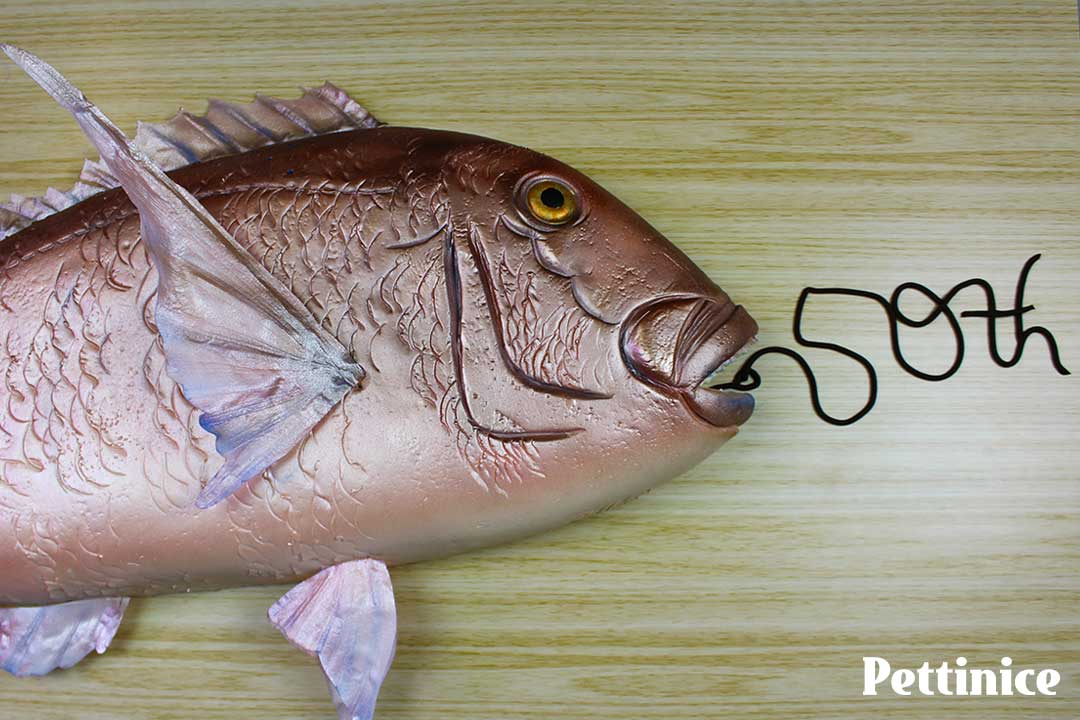
My friend Kerry Morris showed me how to create a cute fishing line message for the board. Roll out thin fondant, or use an extruder to write out anything you want - so cute! Hope you enjoyed this tutorial and it provides a few tricks for creating your next fish cake. If you would like to see the colours I mixed and process for airbrushing the fins and tails, let me know in a comment on our Facebook page. Cheers!

Nina Blackburn is an award winning cake artist who owns Make Pretty Cakes in Auckland, New Zealand. A proud Pettinice Ambassador, and self confessed cake-a-holic who not only enjoys creating specialty 3D cakes, but also hosting and teaching cake decorating classes.
You can find Nina on Facebook and Instagram.