How to make a 3D Dragon with Nina Blackburn
For the optional wings and scales, you will need:
- Shallow plate
- Rice paper
- Food colouring
- Scissors
- Toothpicks
- Silicone mat
For the dragon, you will need:
- Cake Round
- Your choice of ganache or filling I used Bakels White Truffle, mixed with compound white chocolate chips.
- Rice Bubble Cereal
- Green Pettinice
- Snowhip for sticking elements (or white fat)
- Knife
- Rolling Pin
- Dresden Tool
- Sprink (canola oil spray)
- Food colouring shimmer dust
- Small sponge
- Steamer

Make ahead: Dragon Wings and Scales
Create at least one day in advance to allow time to dry and set.
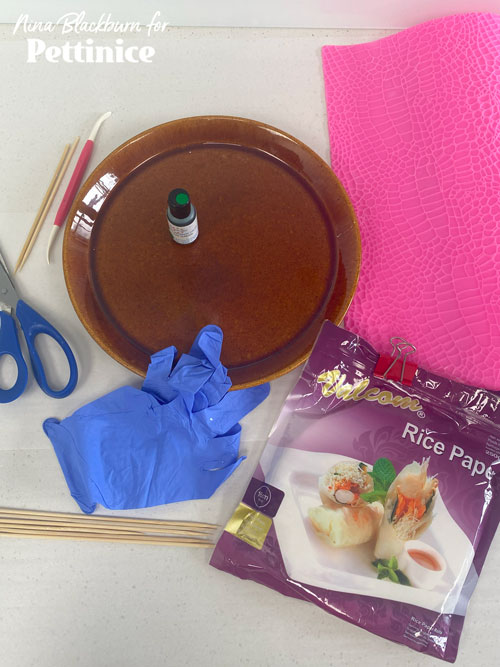
You will need a shallow plate, rice paper, food colouring, scissors, toothpicks, and a silicon mat.
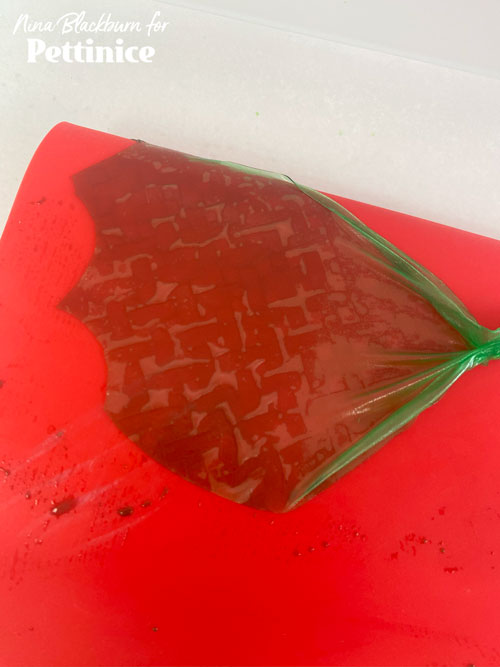
pieces in half to create some shape. In a shallow dish, add your food colouring to warm water using a toothpick to mix well. Dip your first rice paper round to colour.
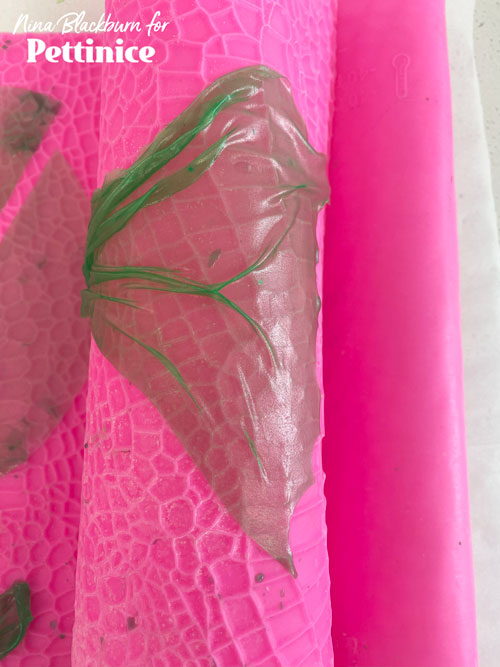
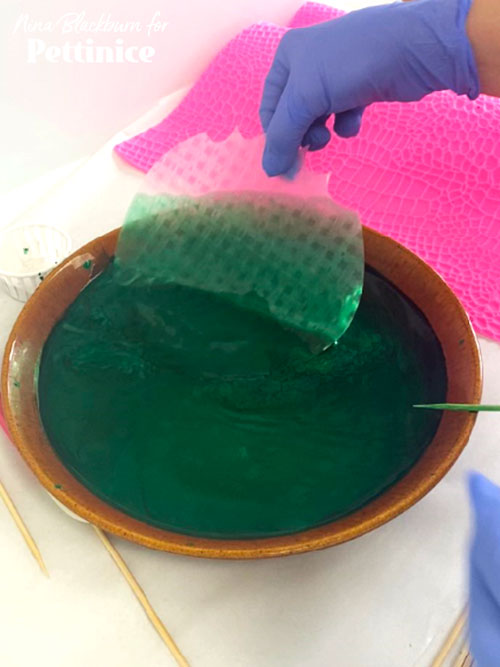
Lay your rice paper down on the rolled up mat to create a curve , then "pull and pinch" to your liking. You have a small window to do this before the rice paper starts tearing.
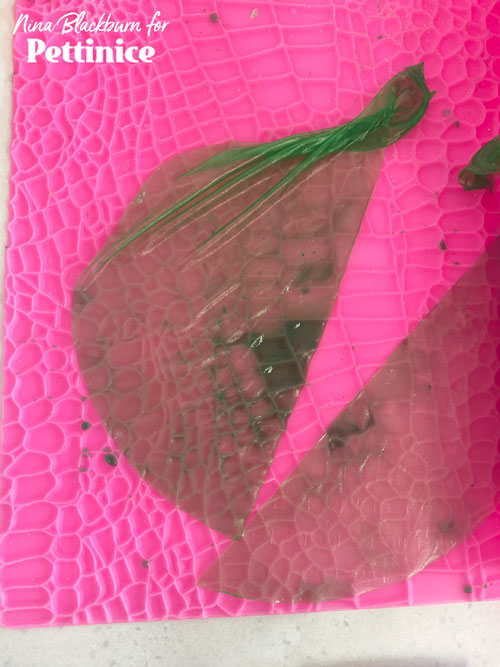
Make more than you need, and lay some flat for the scales.
Here is another example on a flattened silicone mat.
Making the Dragon body
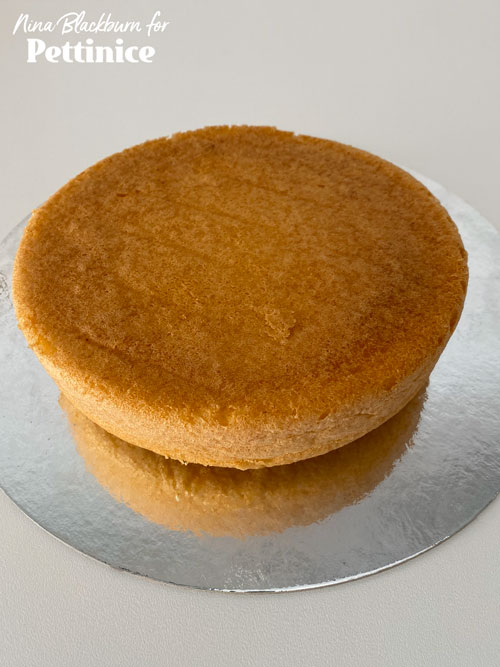
Start with your baked cake. For demonstration purposes, I used a 7" round. Scale up or down as needed.
Cut in half, slice off the "bottom" of the "rainbow" shape and reserve those scraps for making the head and leg detail. Stick together with your filling and to the board. Off set the cake to allow room for the tail.
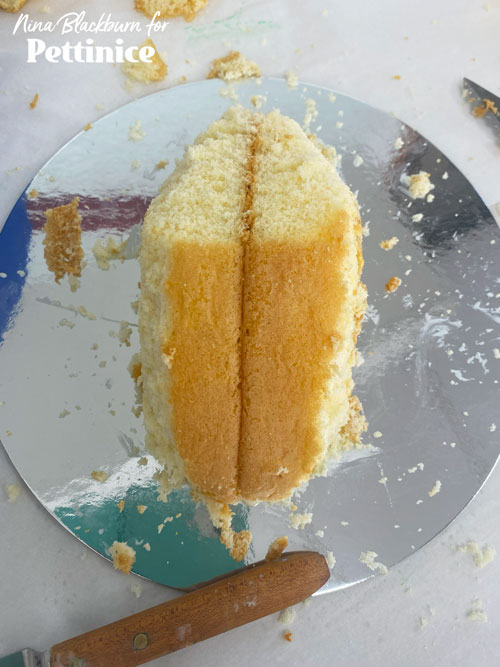
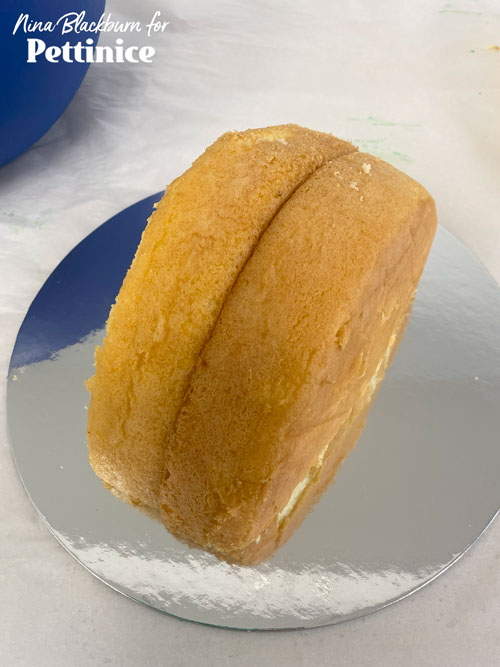
Begin carving your cake, removing and rounding the hard edges. Imagine the neck area and trim away to allow space for the head.

OPTION 1: Now, depending on the size of your dragon, you may decide the make the tail and head out of cake. If this is a smaller topper like mine, I will make the entire head from Pettinice. This is an example of a larger scale dragon, iced with white chocolate chips/Truffle mix.
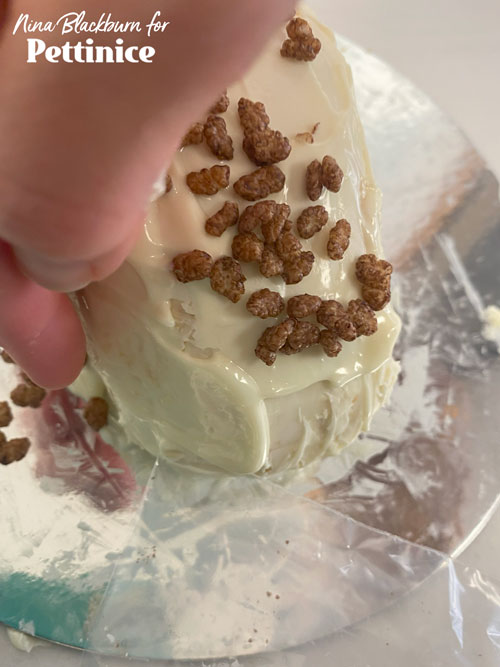
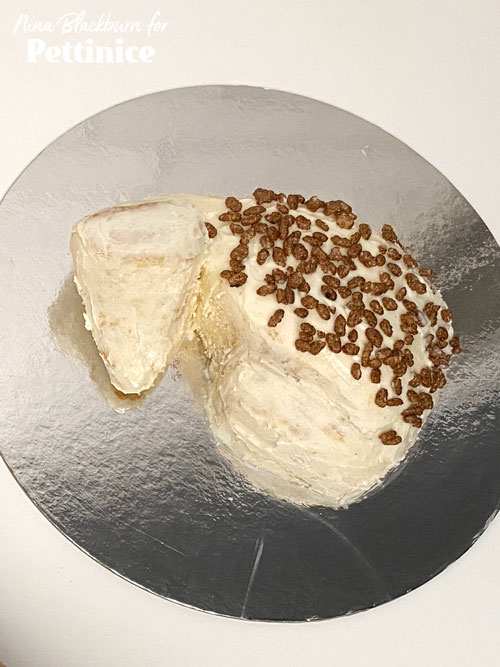
OPTION 2: On this smaller cake, I will make the head from a solid piece of fondant. So after icing the cake with Bakels Truffle, and before it sets, stick rice bubbles along the back and side for texture.
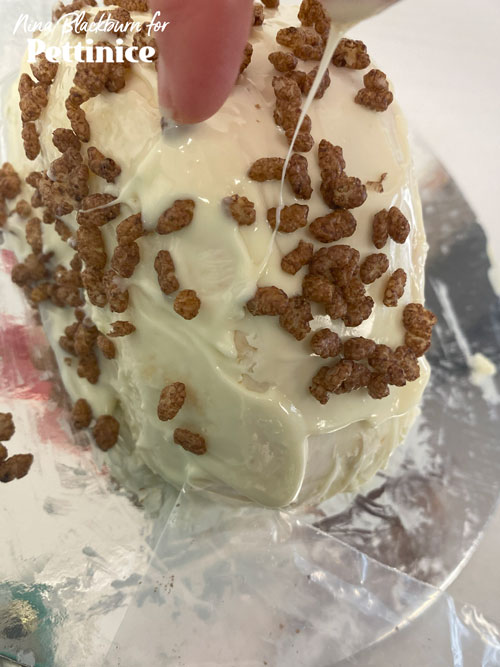
(Placing rice bubbles on the dragon side)
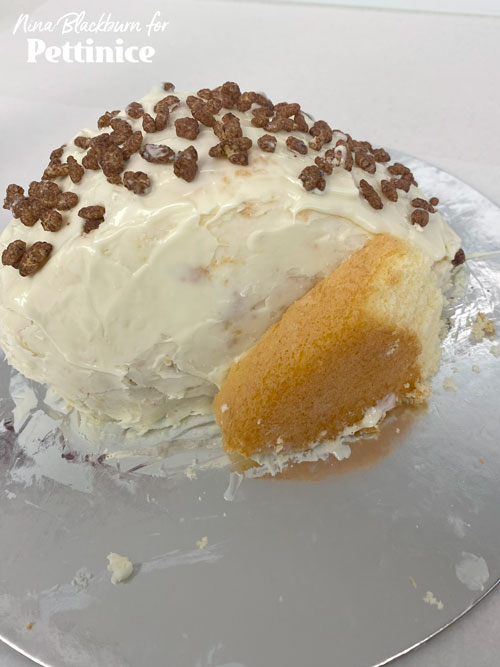
Opps, I forgot his leg so I did this out of order. No biggie, stick the reserved scrap to the side of the cake and carve away any hard edges. Cover in Truffle, as you will see in the upcoming photos.
OPTION 1: Final Truffle coating with dragon head, and rice bubbles.
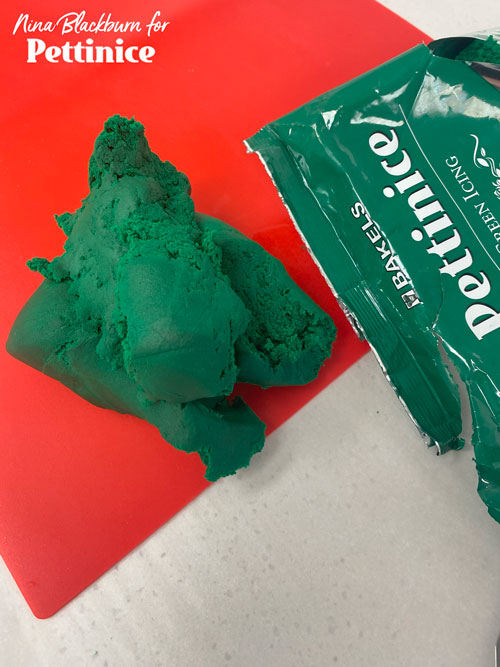
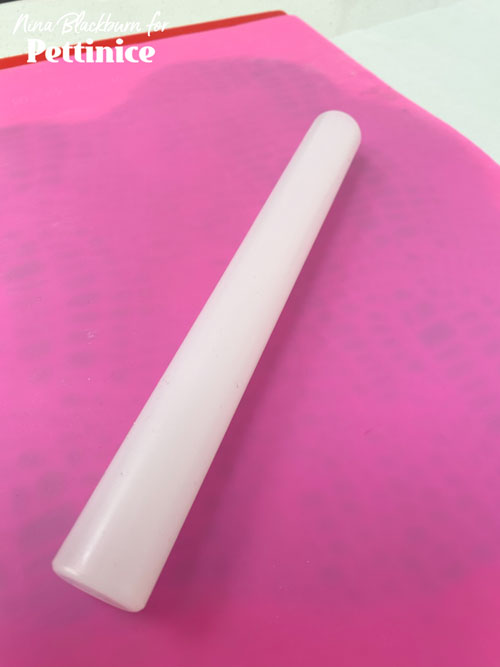
Now it's time to do the tail. Knead your Pettinice to warm it up and condition it.
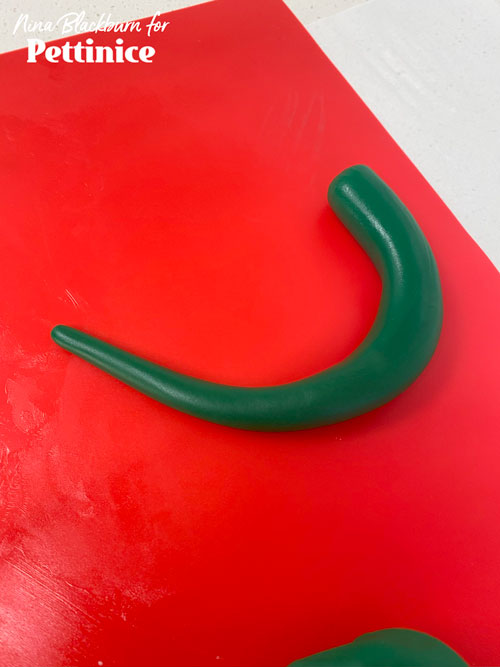
roll a ball into a sausage, then keep rolling it until it thins and tapers into a tail.

Attach the tail to the body and trim as necessary to make it seamless.
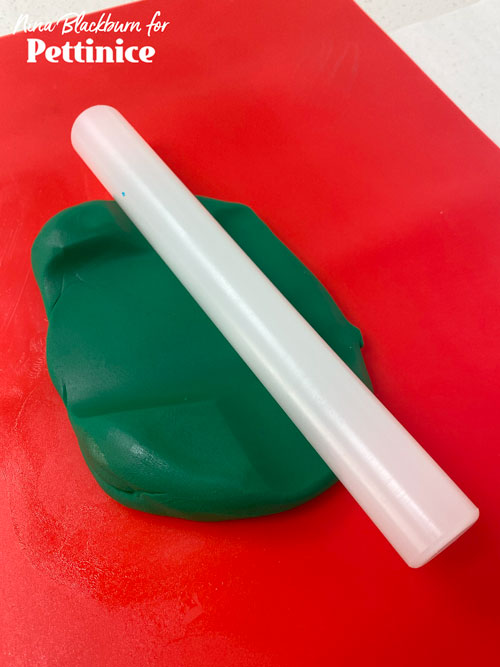
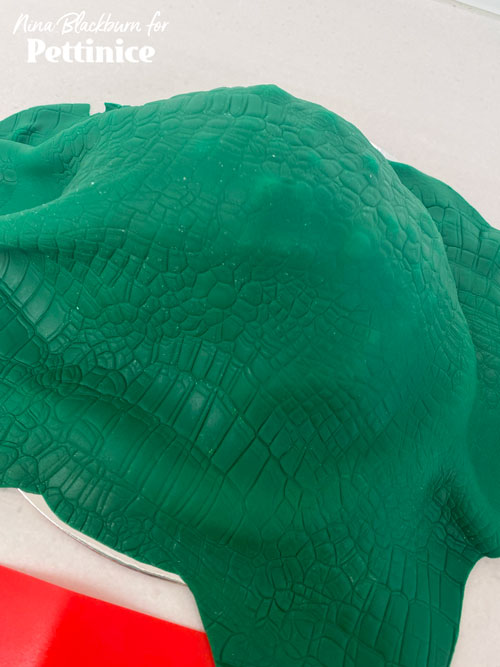
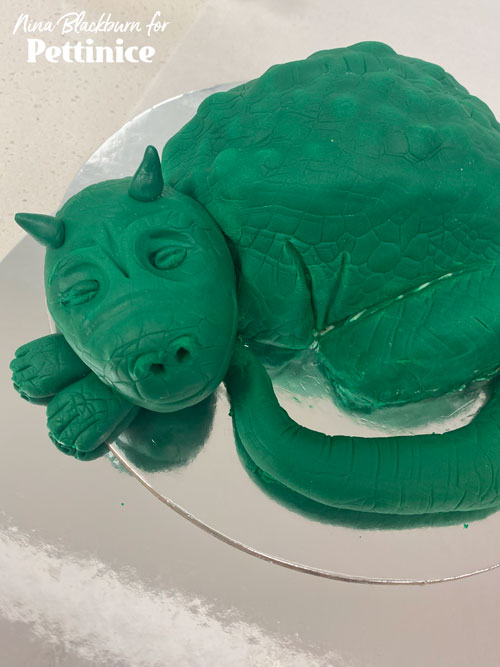
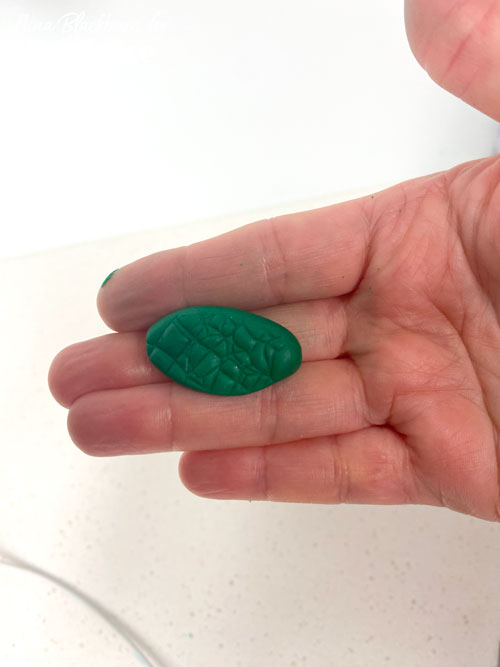
Roll out a large thin layer of Pettinice to cover body and tail.
Use your impression mat and roll the pattern onto the Pettinice.

You can use anything that has texture that can look like scales, or skin, or even cobblestone imprint.
Cover the entirety of your cake. If your cake has totally set, you can spray Sprink to make the fondant adhere..
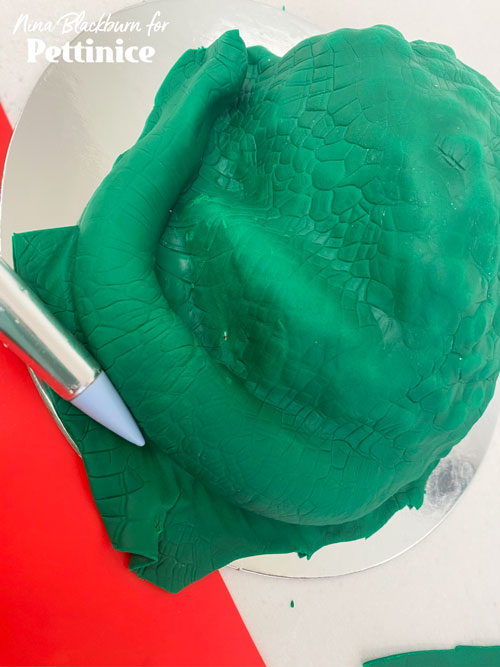
Now, start pressing to accentuate the texture and shape. I am running a tool to further define the edge.
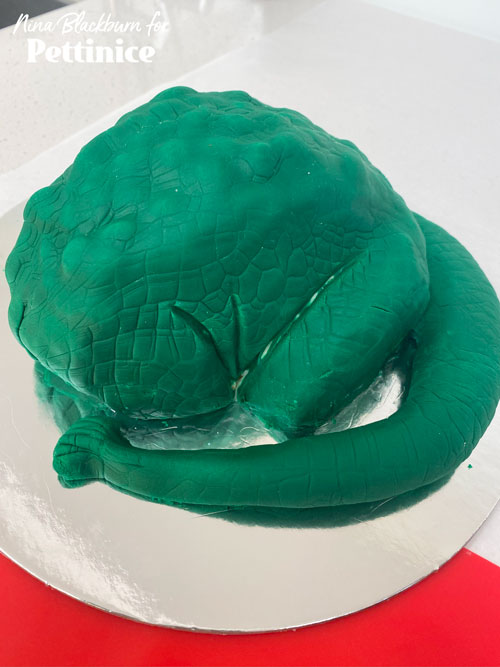
Use your tool to define the tummy wrinkles and leg. Use your knife to cut away all the excess fondant. Note: I ended up trimming the tip of the tail to a point, as I didn't like this weird frayed end I originally created haha.
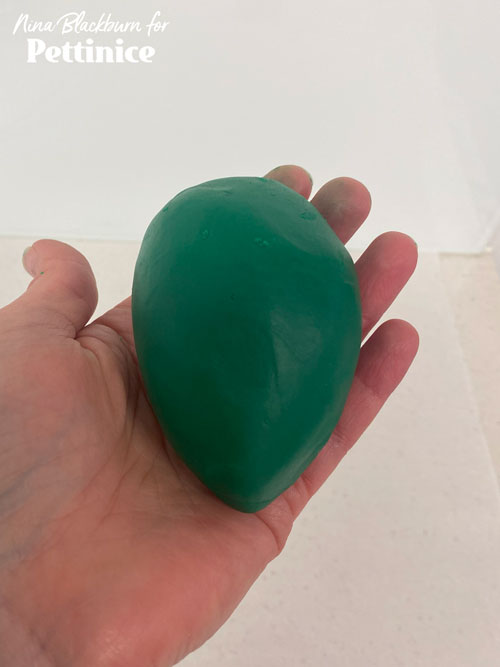
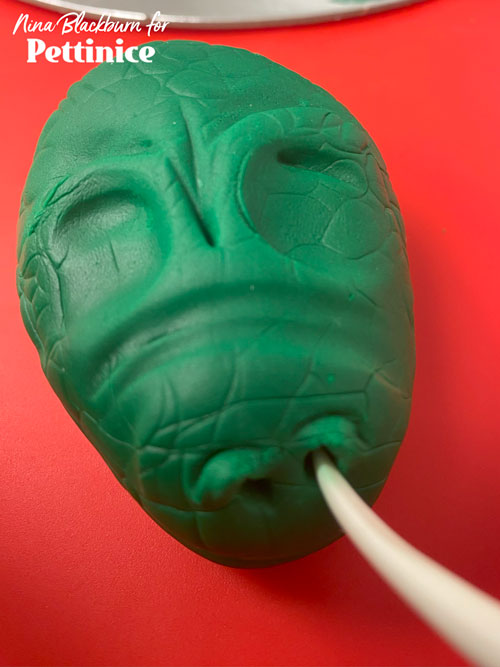
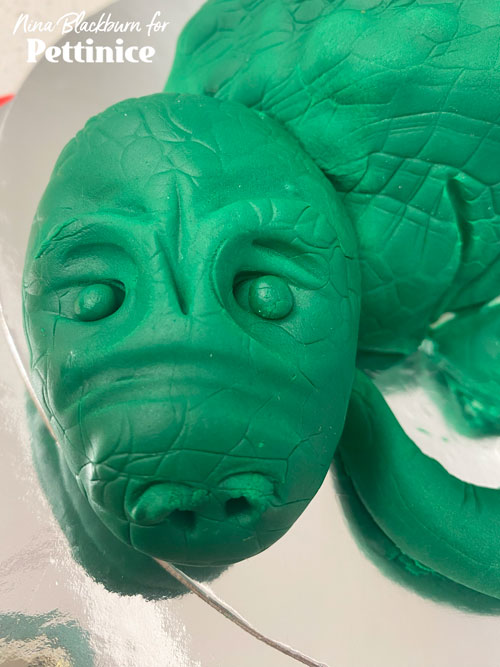
Next, I am going to create the head. Roll a large ball of fondant (to match the scale of the body) into an egg shape.
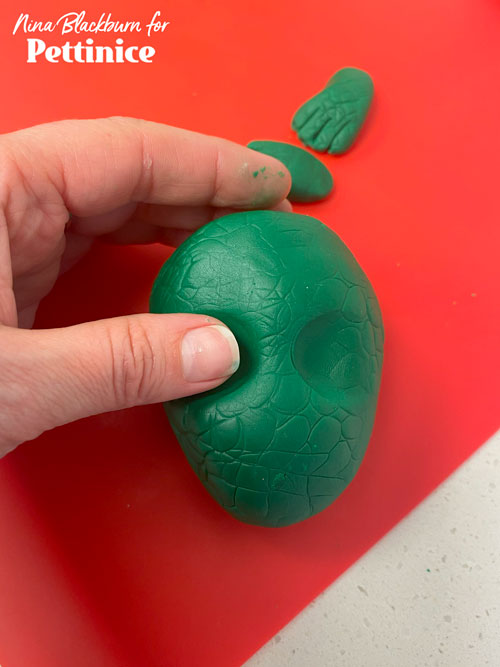
Imprint the egg shape with the same mat used for the body. Press to define the eyes with your thumb.
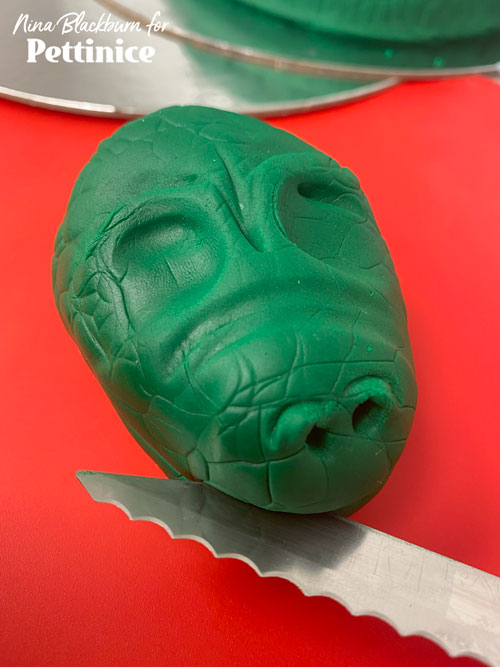
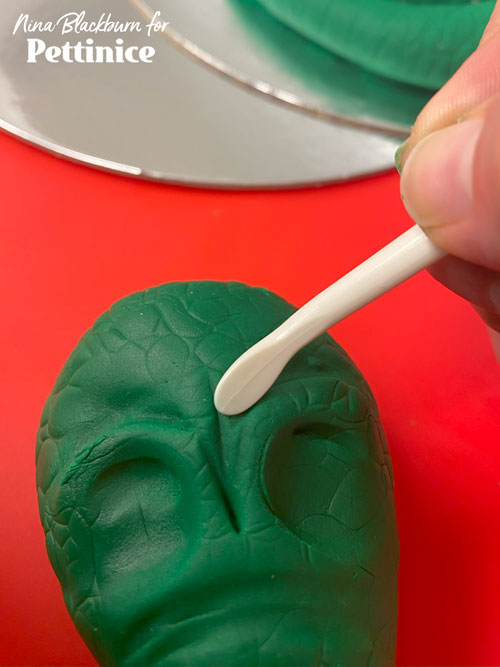
Keep pinching, and using your dresden tool define the areas around the eyes to create brows. I will show photos of creating the nostril next. Here I am using a knife to cut a mouth into my dragon.
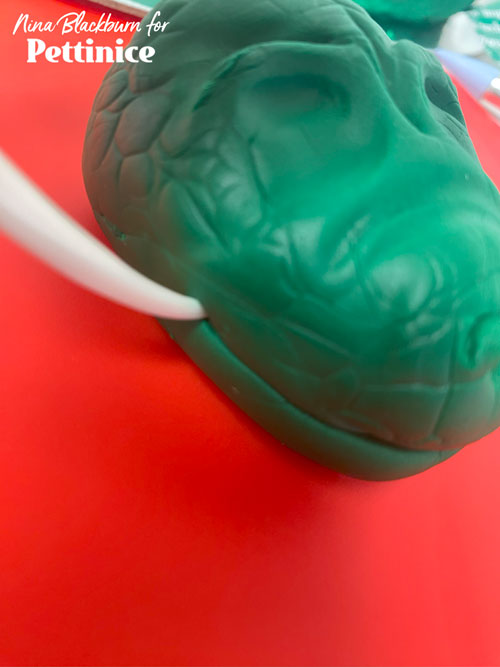
Use your dresden tool to pull up the edges of the "smile"
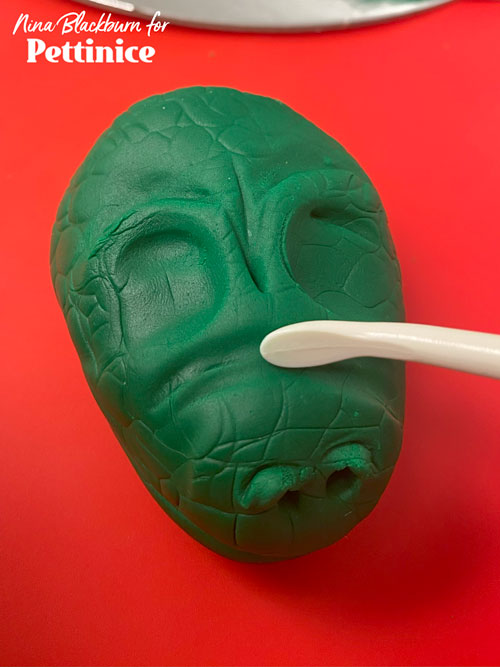
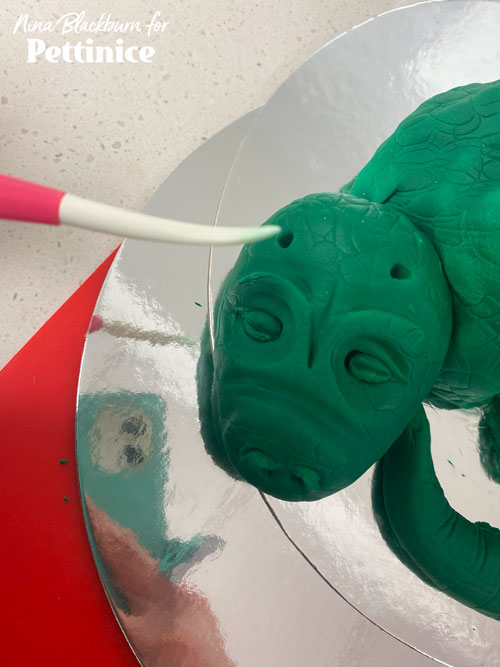
Poke holes for the nostrils with your dresden tool, and pull upwards and out to create the nostril.

Use the edge of the dresden to further define the shape of the nostrils.
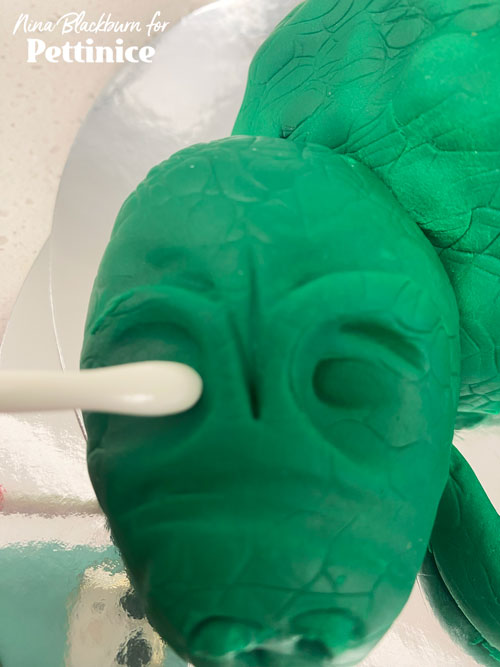
Continue using your dresden tool to further shape and smooth any areas you want to define.
Smoothing and defining. After you have finished, melt white chocolate and stick the head onto the body and cake board and allow to set.
Press the dresden in (not too far as I did! EEEP!) for the eye area. now, if I had left this alone, I could have just created slits for the closed eyes and been fine. As I went too far, I'll show you how I fixed it.
I rolled two balls...
Used Snowhip to stick the new eyelids in place...

Then used the dresden to flatten out the lids and imprint a slit.
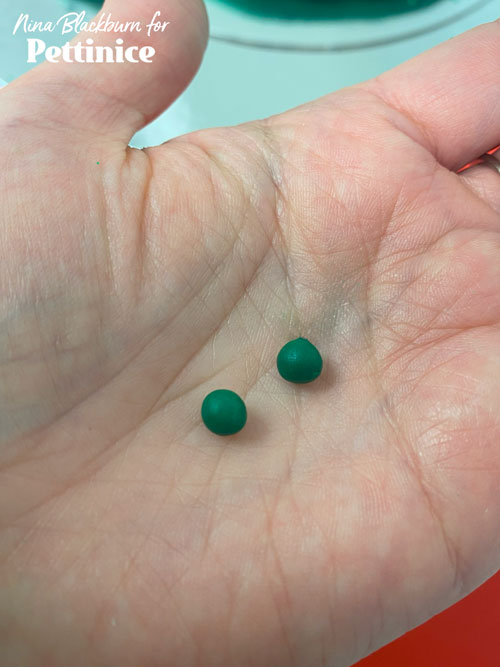
Next, poked holes where the little dragon horns will rest.
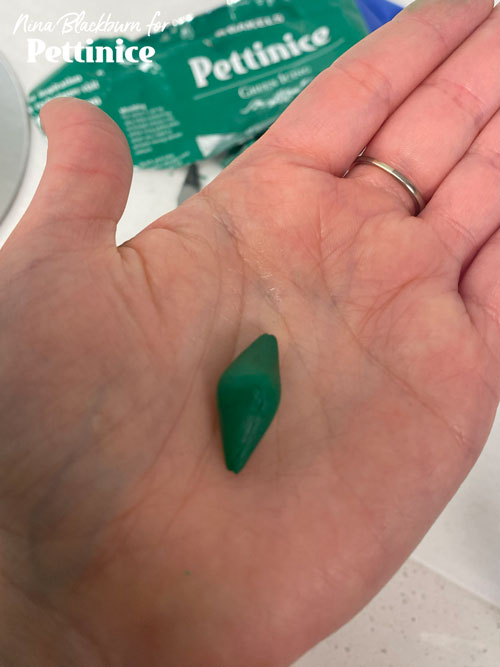
Roll a small double cone shape as so, and cut in half for two identical horns.
Place the horns. I last minute created the dragon paws, but I don't know that it needs them? I will stick rice to create claws.
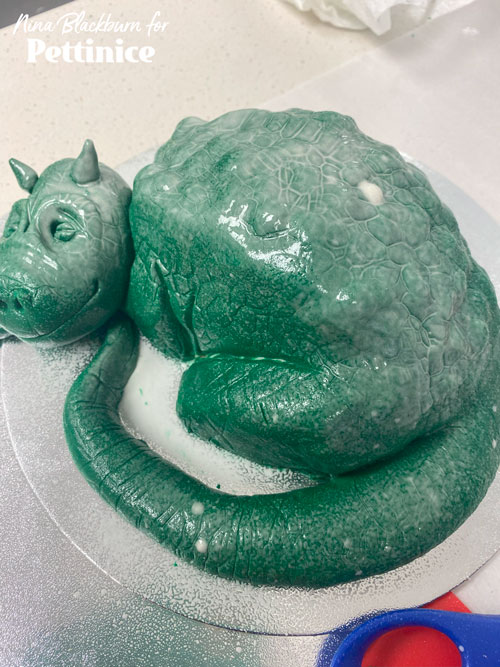
Spray your entire dragon with Bakels Sprink.
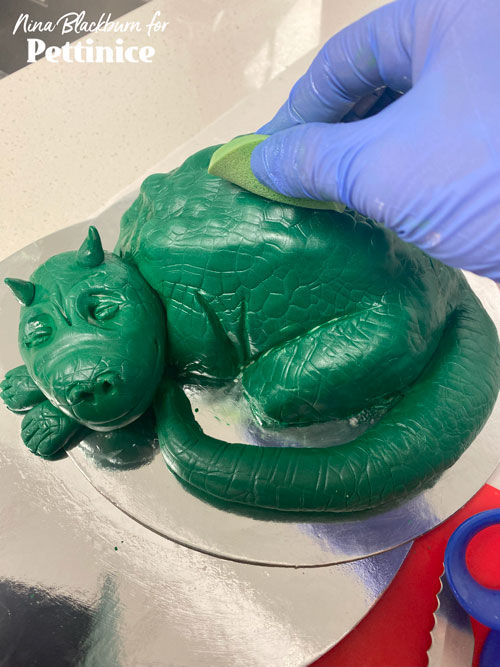
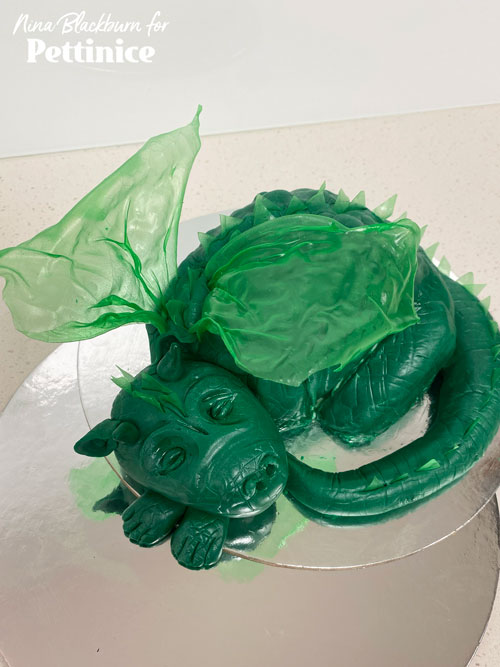
Now you will buff your green shimmer powder using a new make up sponge all over your cake.

Before applying the wings, steam your cake to set the powder.
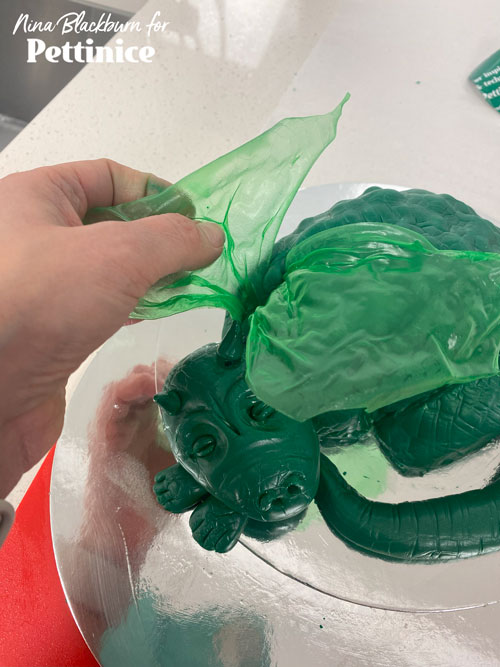
Press in your hardened dragon wings, which you dried overnight.
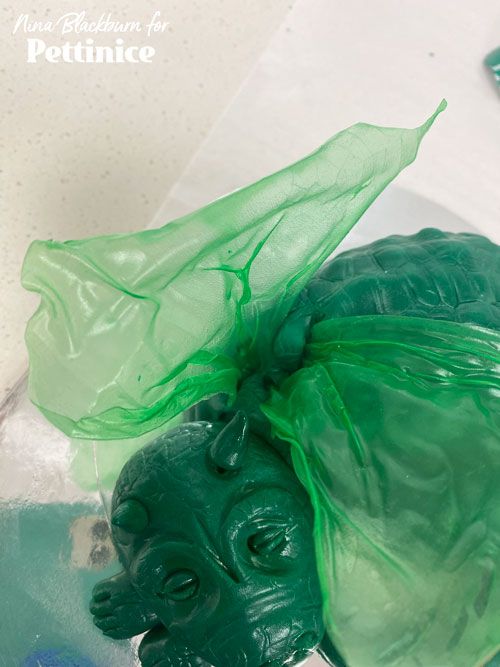
To help set the wings in place, I will fill the gap with a bit of fondant.
Roll a small piece of fondant and texture it if yo uwish.
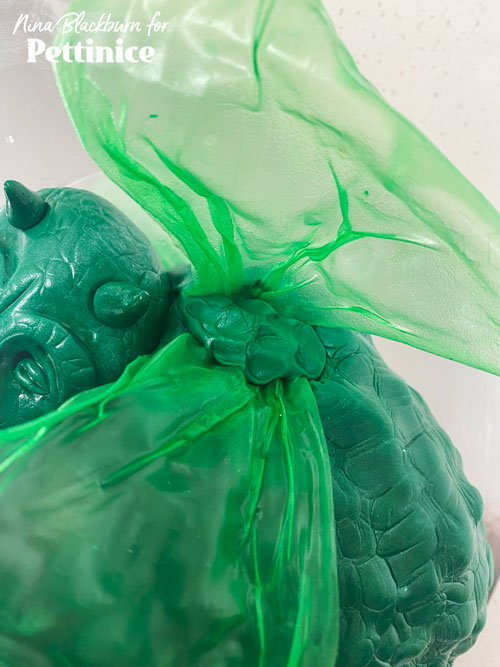
Use Snowhip to stick in place.
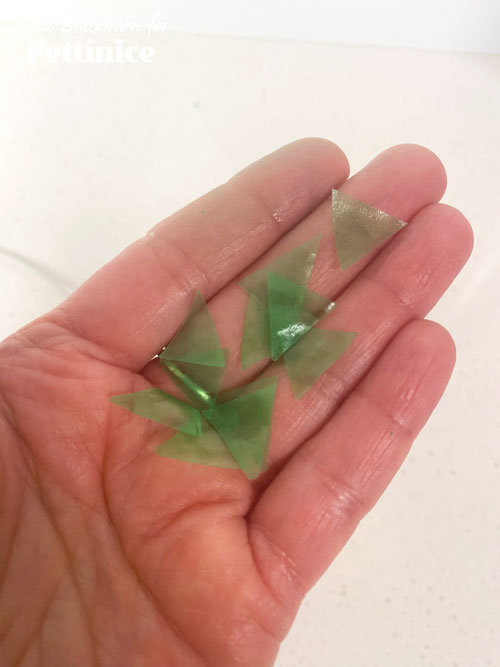
Finally, with the flat rice paper sheets you made, cut up triangles to stick into the fondant.
The main thing is speed, and that you do your elements before the fondant is allowed to set.
I hope you enjoyed this tutorial as much as I enjoyed making it for you. Scale your cake up or down. If you need to create more servings, make the base a big rectangular cake, and cover it with biscuit sand and gold coins for a simple and quick design. Have fun! xxx

Nina Blackburn is an award winning cake artist who owns Make Pretty Cakes in Auckland, New Zealand. A proud Pettinice Ambassador, and self confessed cake-a-holic who not only enjoys creating specialty 3D cakes, but also hosting and teaching cake decorating classes.
You can find Nina on Facebook and Instagram.


