How to make a 3D Goldfish shark
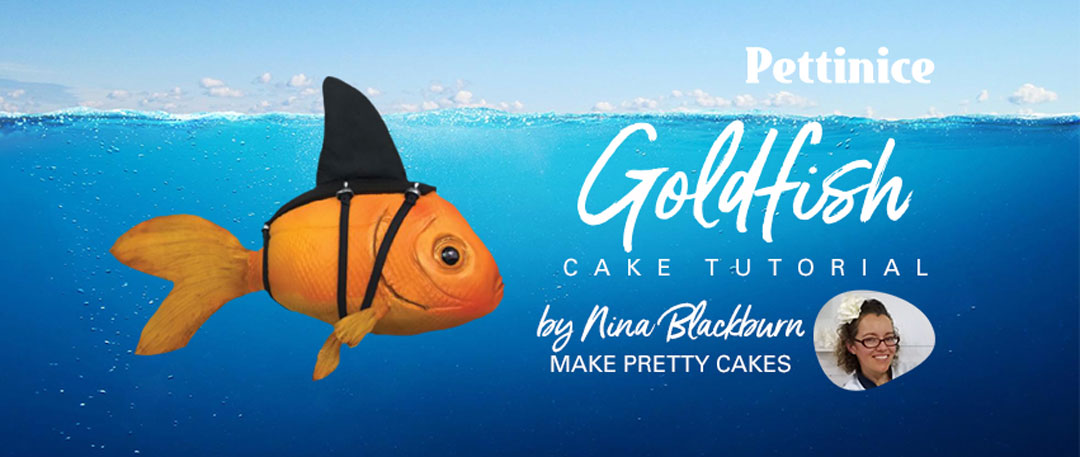
When I saw this cute meme, I knew I had to cake it. 🦈
You will need:
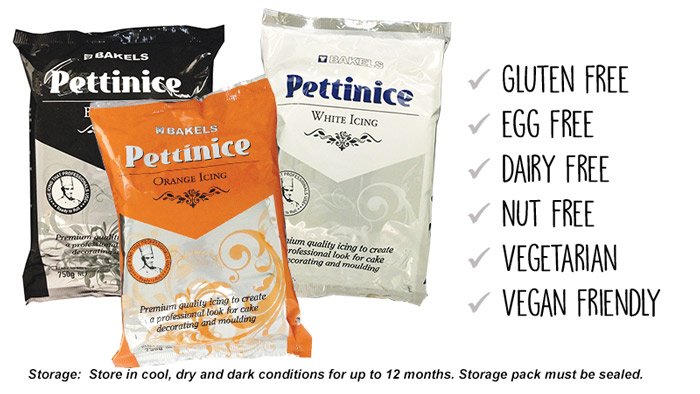
- Orange, Black and White packs of Pettinice Fondant
- Rice paper or wafer paper for the fins. For this tutorial, I will show you how I made the fins with rice paper.
- Square cake, cut in half and stacked to match your template for desired
- Buttercream or Ganache to fill and mask your cake
- Large Wooden cake board for bottom (to offset the top heavy design).
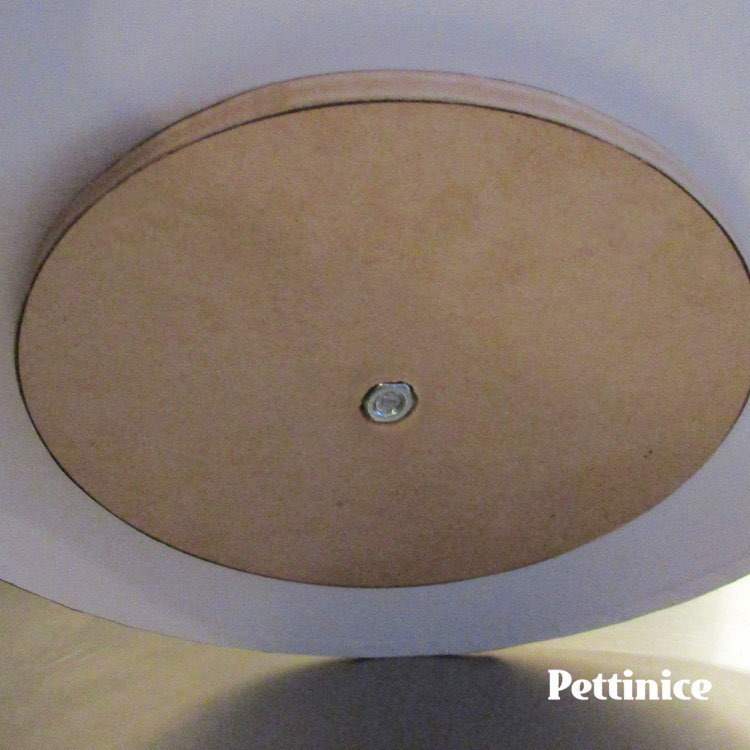
- Cake board for cake. This is small cake, so a hard cardboard cake board is sufficient, but anything bigger than A5 needs to be in wood.
- Threaded rod, and 4 x nuts and 4 x washers
- 4-6 Wooden craft blocks hot glued to bottom board
- Print out of the Fish Template
- Option 1: Wafer paper dusted orange for the goldfish fins
- Option 2: Ricepaper and orange food colouring for the fins (I used airbrush colouring). Shallow bowl and boiled water. Optional shimmer dust too.
- Silicon sheets to set the wafer paaper
- Dresden tool
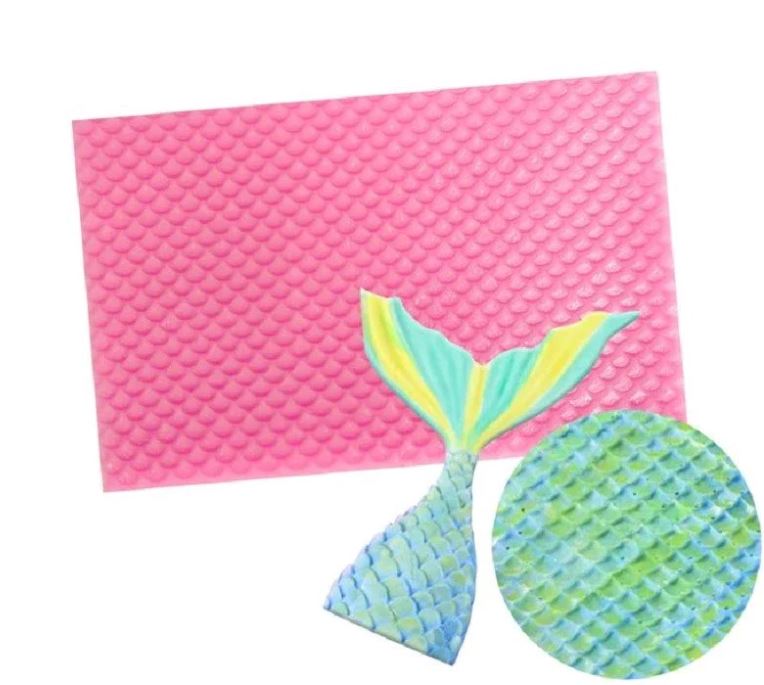
- Optional fish scale imprint mat for additional detail
I love cakes with humour, so this one was a favourite. I have provided all the templates and notes needed to make your own. Simply scale up, or down depending on the amount of cake serves. If you need to feed heaps of people, consider decorating a sheet cake into the "seafloor" your fishy swims above. Have fun!
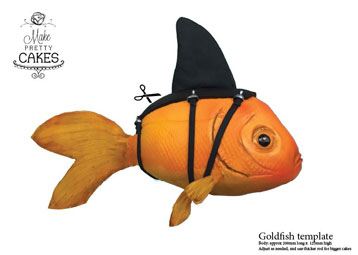
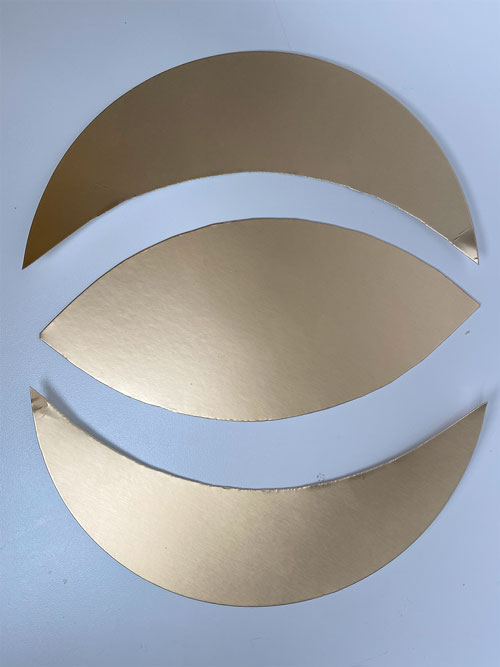
Print out the fish template provided and cut the shark fin to use as your cutting template.

Make all the fins ahead of time.
Goldfish fins
For the goldfish fins, Option 1 is to use Wafer paper, coloured orange for the fins. That is what I used for the fish template shown here. I wanted to show you a Option 2, which uses rice paper to achieive a more translucent fins.
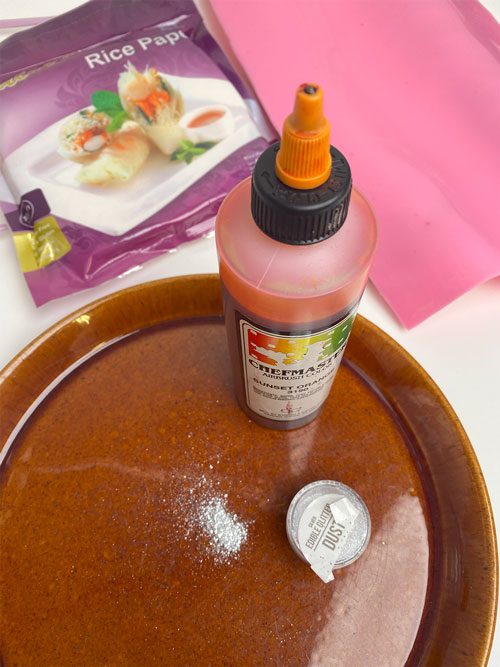
Gather your supplies before beginning.
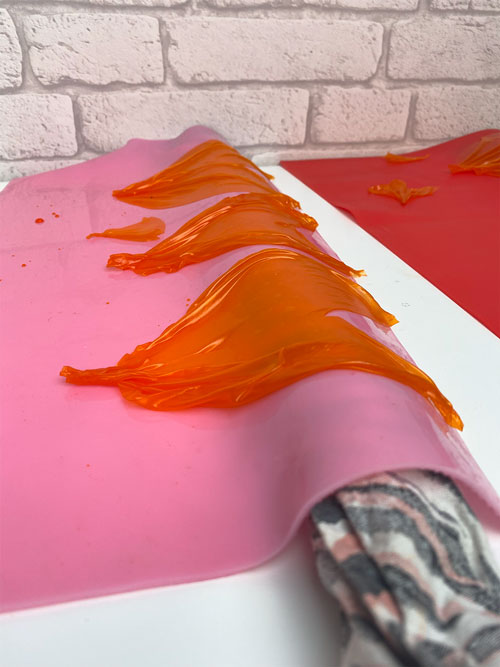
Allow to dry on the bench. It will be fully dry by the time you finish carving your cakes.
Watch the process here. Use the triangles you cut out for the smaller fins.
One extra tip to is to wrap the end around a toothpick while rice paper is still slightly damp. That will make it easier to insert into the cake later.
Shark fins
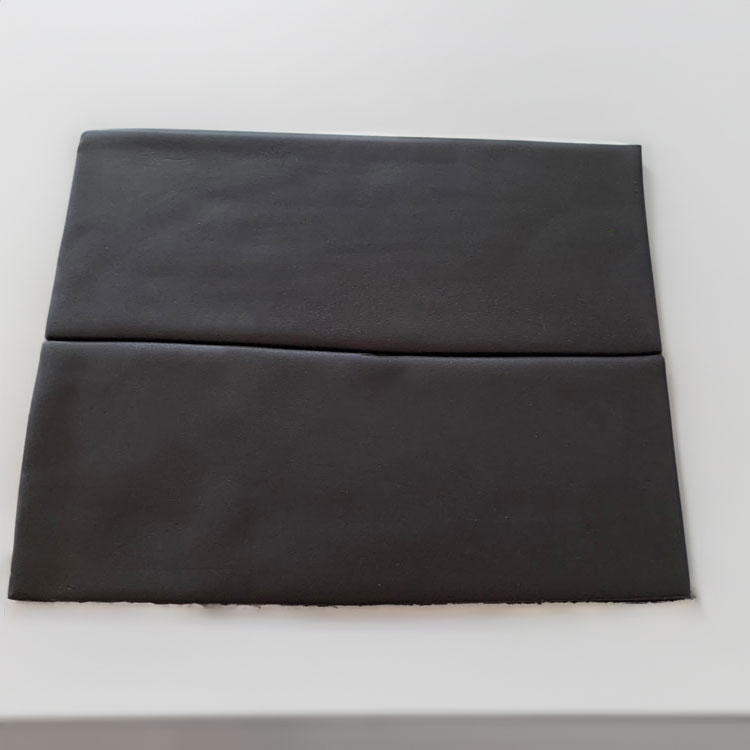
For the shark fin, Option 1 would be to shape and make it at the end with freshly kneaded Pettinice Black fondant, and placed a top your cake. At a small scale, the ready-to-roll icing is strong enough to handle a shark fin that is thick at the base, and gradually thins at the tip without needing to add Tylose. Option 2 would be a thinner straight fin, but this will require you to add tylose and make it ahead of time so it dries. I will show you this option with a little trick for easy slicing.
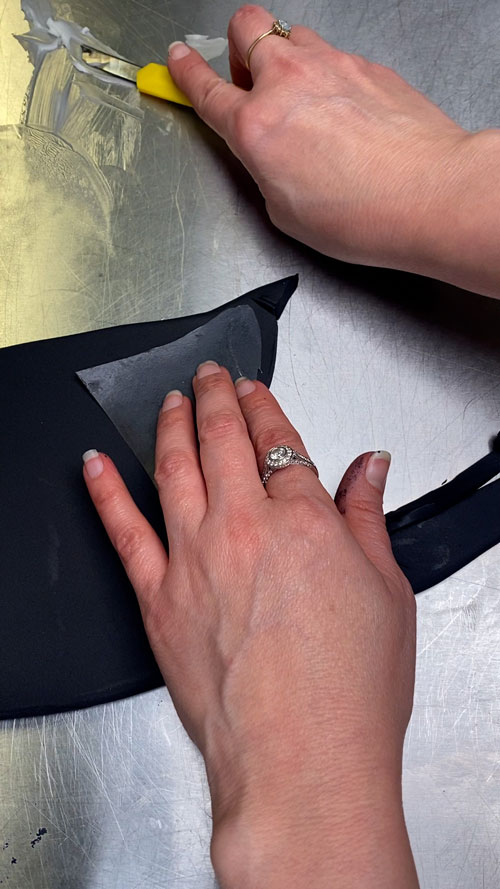
Roll our your Pettinice to 1cm thickness. Dip your blade in fat for easier gliding when cutting.
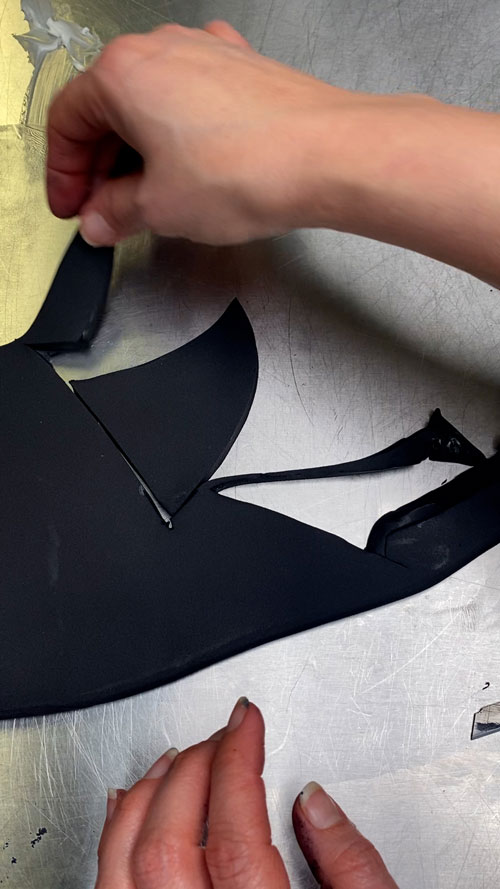
Cut following the template provided and remove excess fondant.
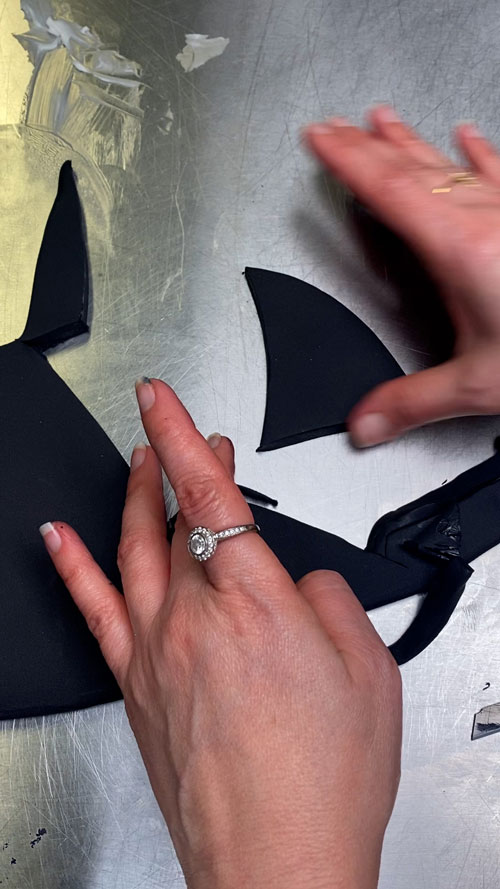
Smooth edges and insert toothpicks to the bottom edge for easy placement. Allow to set, either overnight or at a very low temperature oven (under 70°C) for 10 minutes, remove and allow to cool and harden for an hour.
Building the Structure
The most important thing to note is this design is top heavy. The bigger the cake, the bigger and heavier the base needs to be to compensate. This tutorial cake is a 6" round with a 10" wooden base board, using 8mm stainless still rods. Anything bigger, you can "add" weight to the baseboard by including a secondary thicker MDF board under the main cake board (shown here). I countersink a hole big enough so the nut doesn't poke out the bottom. So that's your rule of thumb: Bigger the cake, bigger the rod and boards underneath to support the top heavy design.
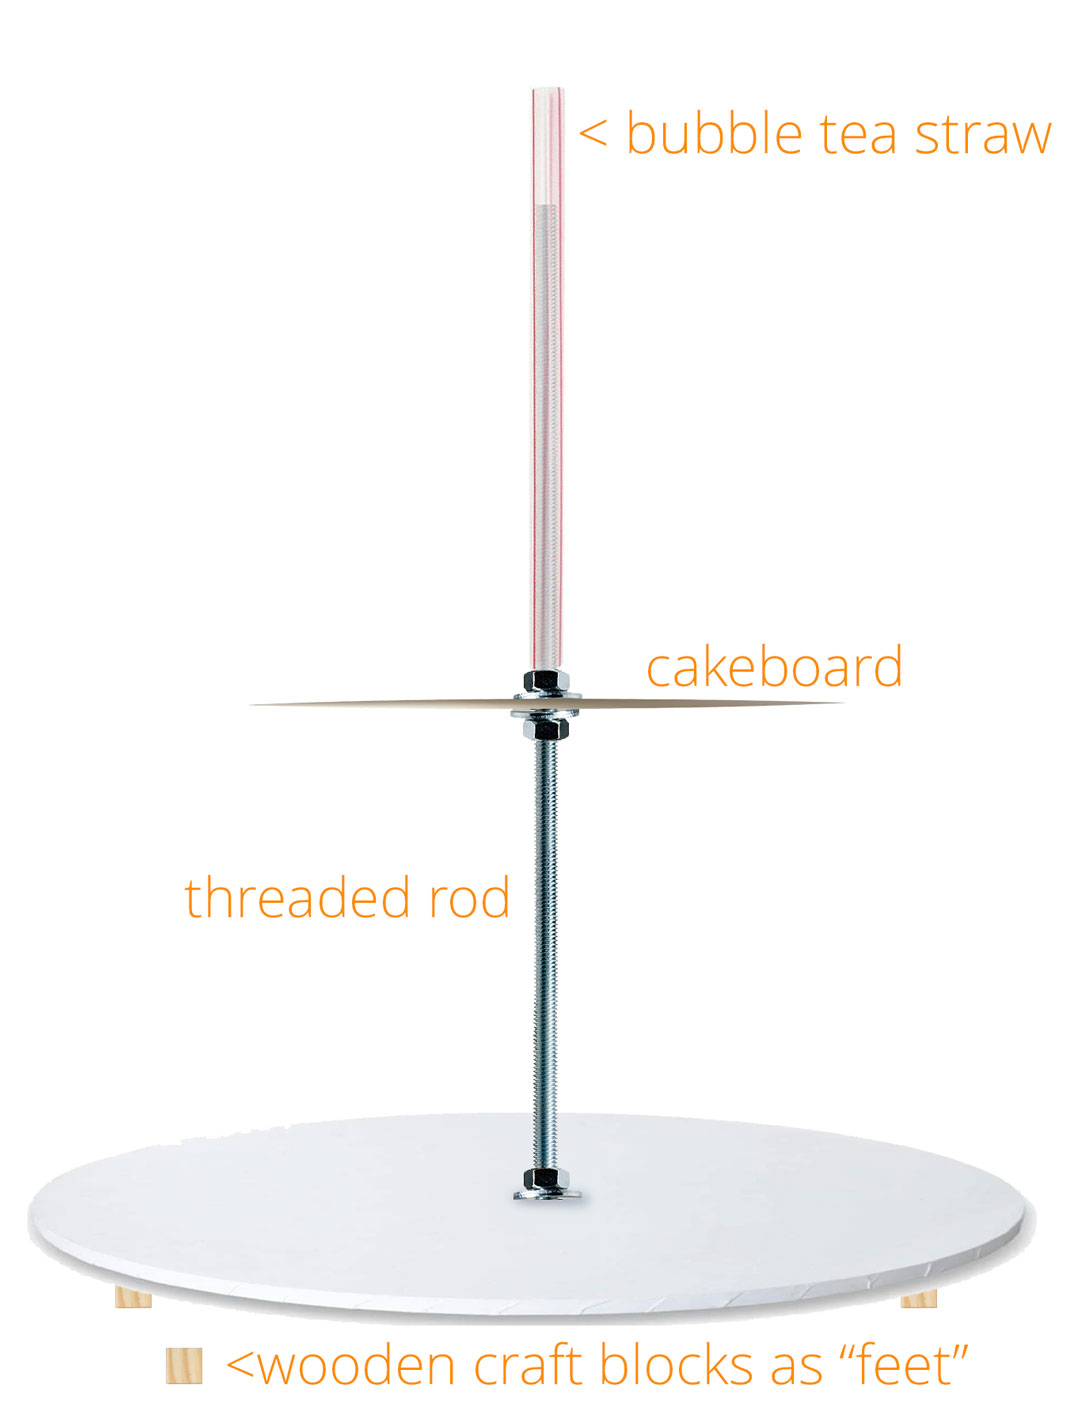
This example is for a larger fish, as explained above. If you are creating the 6" cake, follow the structure to the left, as no additional cake board is needed - but you will need to use wooden craft blocks to clear space for the washer and bolt.
A sturdy cake card (not the light flimsy ones) is sufficient for a 6" cake. Anything bigger, cut from thein plywood.
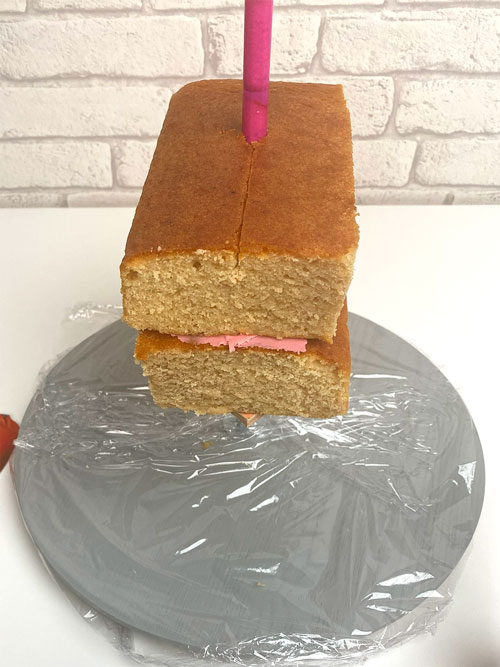
Build and carve your cake
Onto your cake board, smooth a layer of filling, then stack and fill your cakes as shown. Lightly mark a centre line on the top layer to use as a guide so you can trim the cake in two halves.
*Note, I don't add the filling to the edge, since I will be trimming most of it off
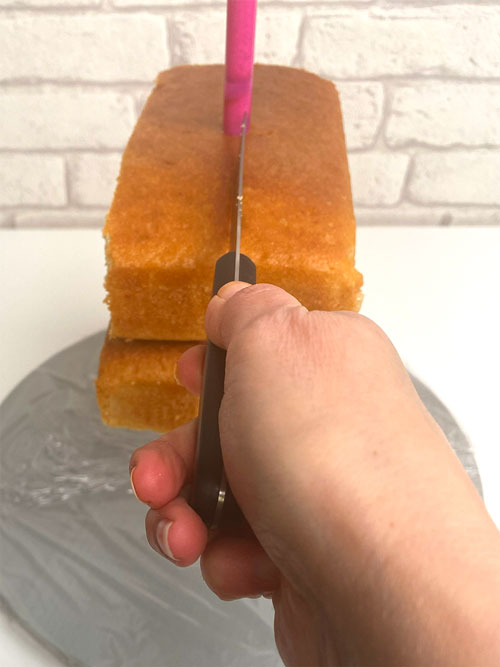
Carve your cake in two halves as it helps control even shaping
Start trimming off all the hard edges, both top and bottom.
Use your bottom board edge as a guide. Keep knife at sharp angle to avoid trimming too much.
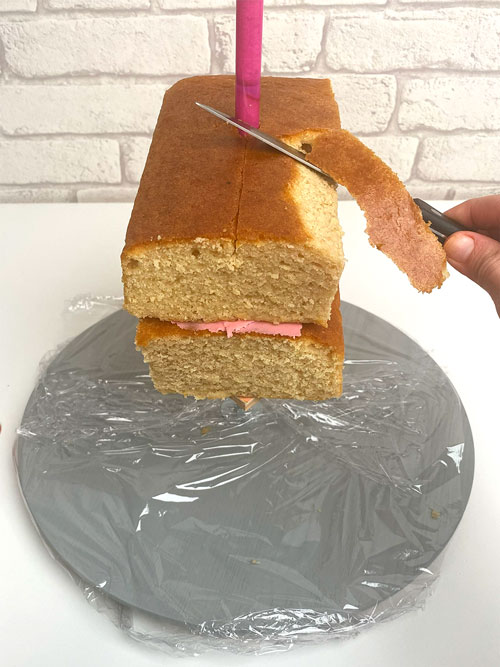
Next, carve around the template on one half of the cake
Keeping following your template, carving on one side of the cake
Flip both the cake and template to carve the remaining side
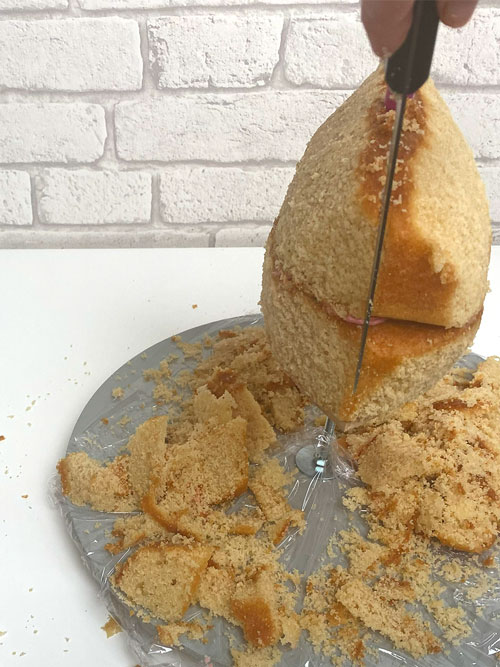
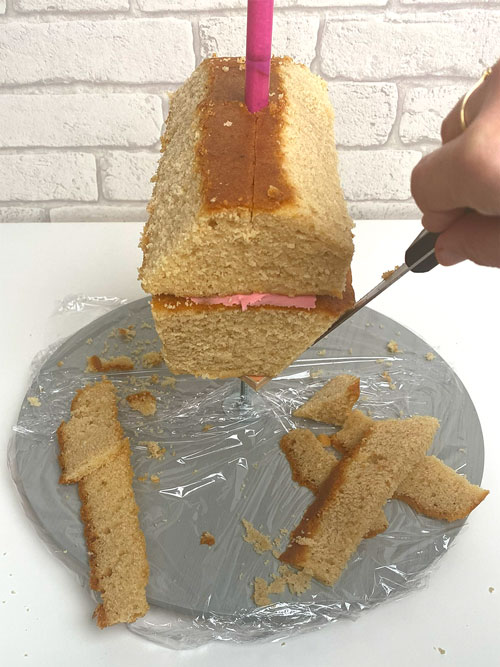
Now you have finished carving, you need to carve both flat ends in to a point
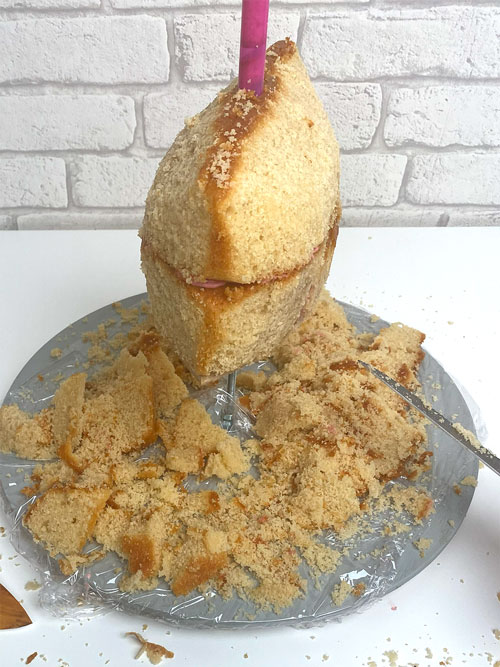
Save all the cake scraps, which you will use to build the rock below the fish
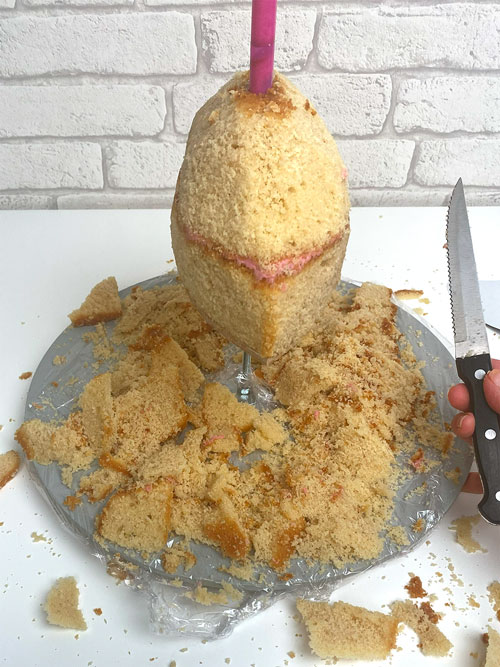
Repeat on both sides, using your cake board as a guide for the point.
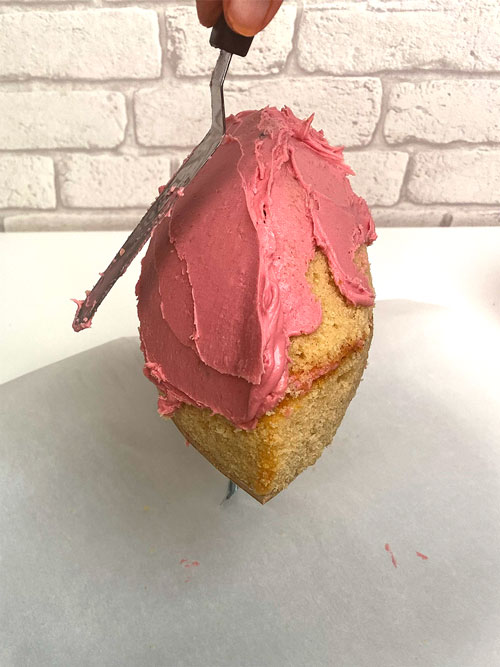
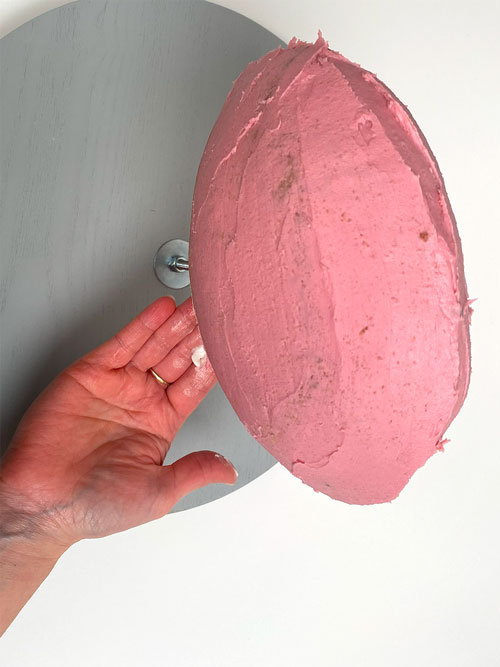
Crumbcoat with icing
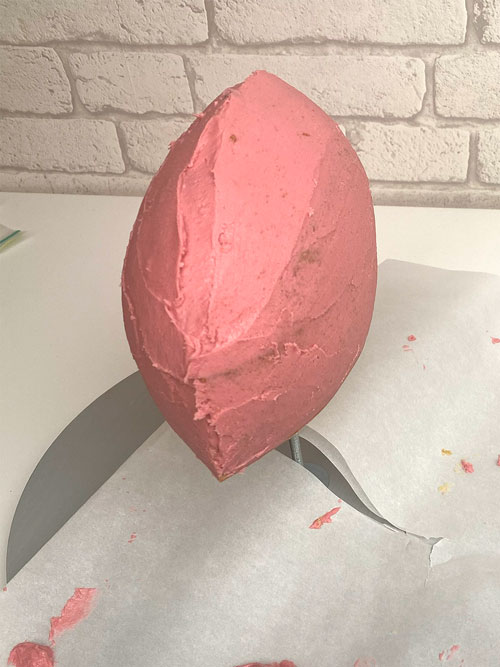
Put your cake in the fridge to set before coving in Pettinice
Once your cake has firmed up, you can then prepare surfaces by rubbing with Snowhip, or other smooth fat
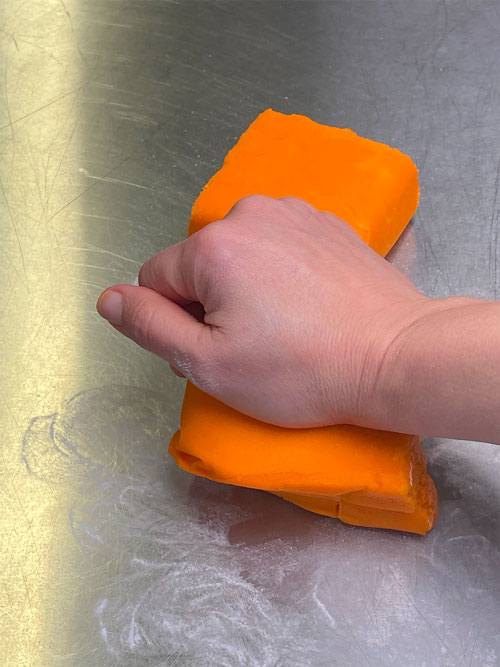
Knead orange Pettinice, I use Snowhip or canola spray on the bench to prevent it sticking

(I leave the end a bit thicker for the tail)
PLEASE NOTE: For this size, the cake can easily be covered in one large piece. However, I will demonstrate the technique as if you are covering a larger cake below...
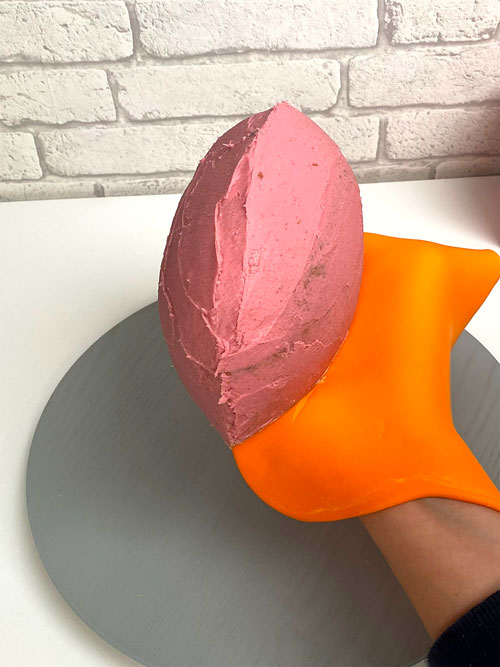
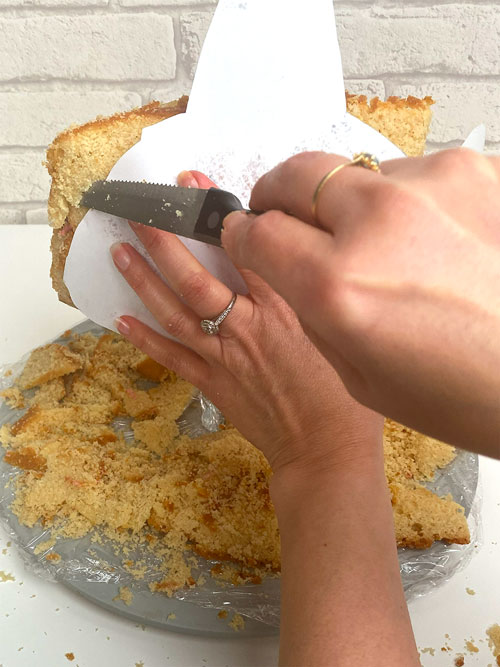
Cover the cake in two halves. Normally I cover from the top first, but that was hard while holding a camera haha
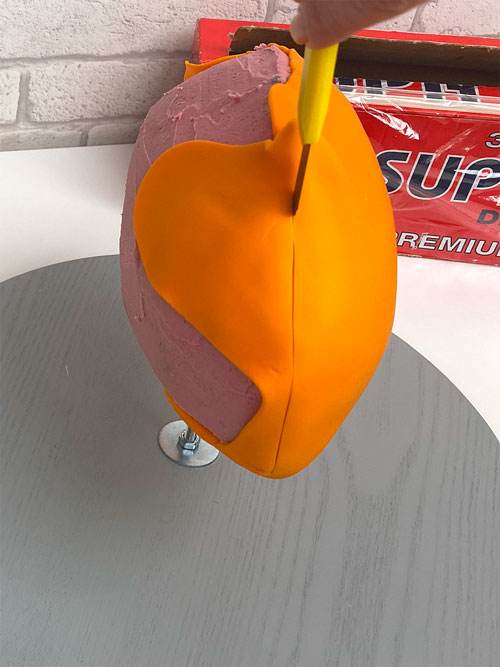
Trim the excess to the centre line.
Repeat for the otherside and trim at the centre again, removing any overlap from the bottom layer if needed.
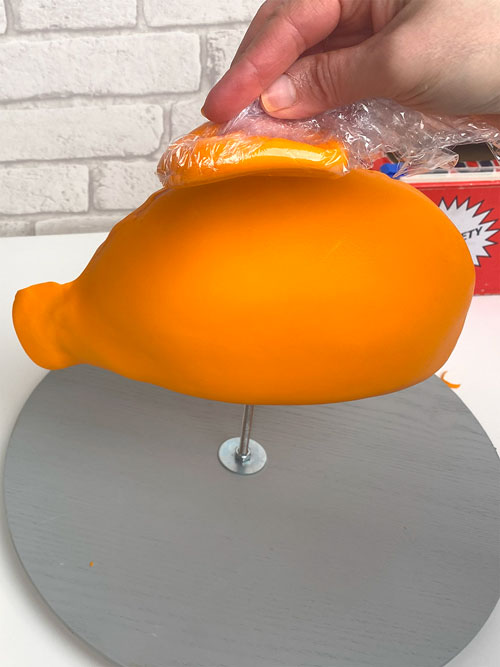
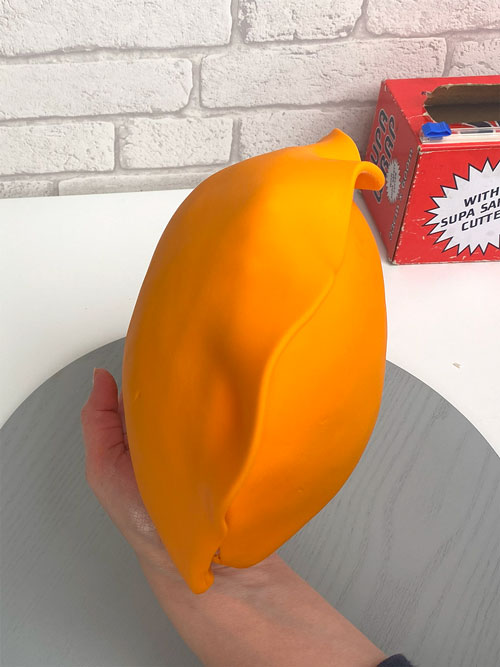
Smooth edges together with a cling film covered piece of flattened fondant. (Note the thick tail I left
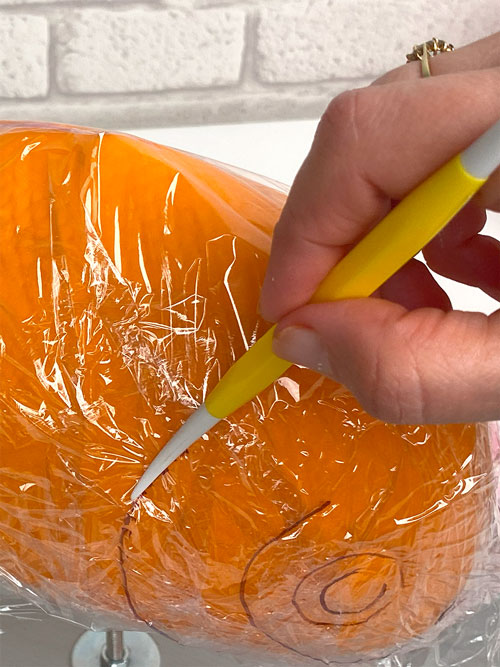
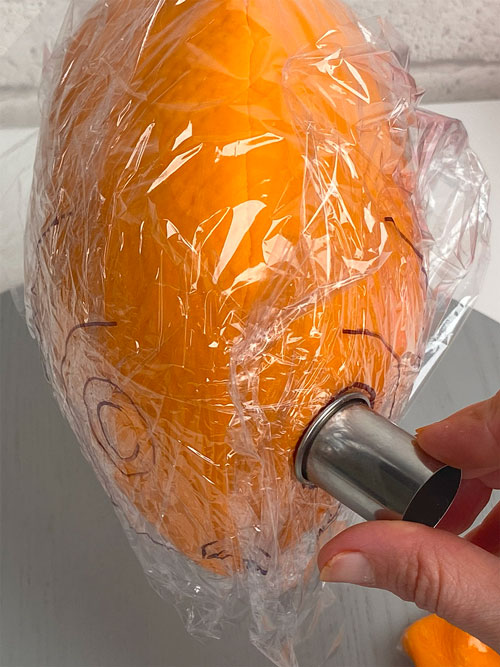
I use the top of a circle cutter to imprint the eyes.
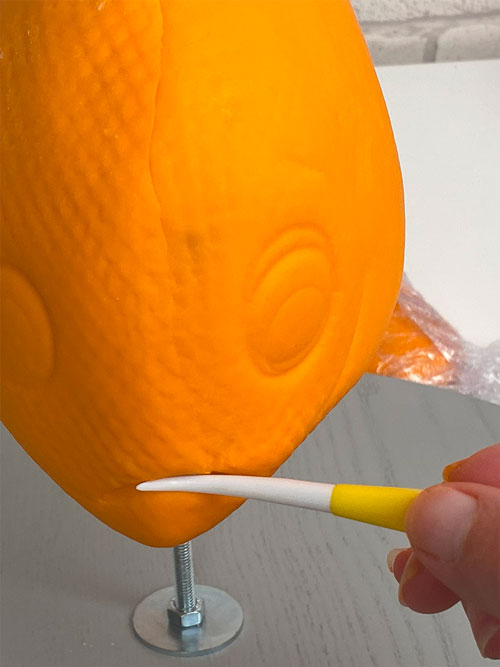
Remove the clingfilm and deepen any marks. Optional to use a scale imprint mat too.
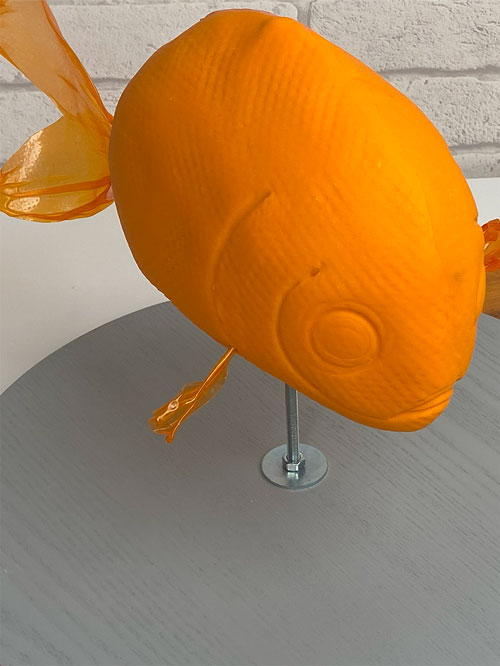
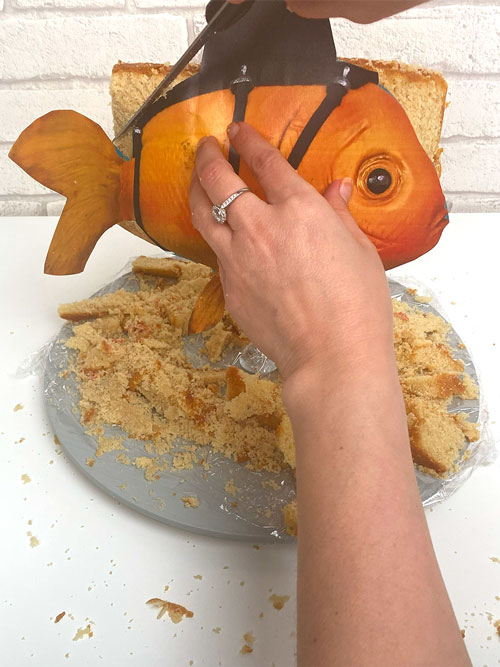
Next, insert the all the fins, which should be now be dry and set. If they are still a little damp, be sure to gently lift them and continue to allow to set.
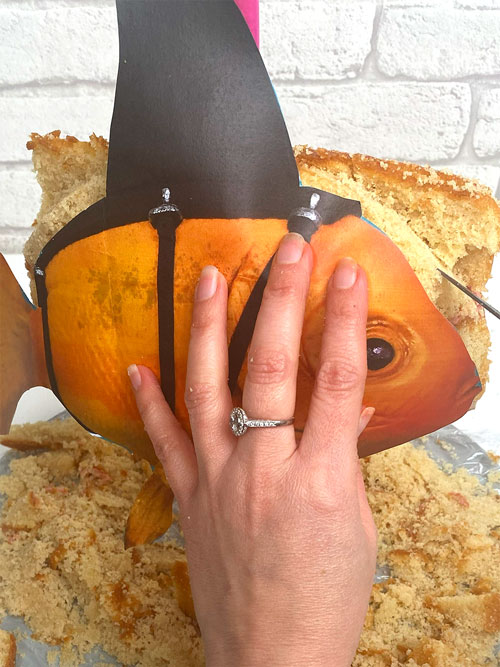
Roll out your Pettinice and cut to size for the top of the cake and the three straps, and two circles for the eye.

Use your template as a suggested guide for straps. Finally, insert your shark fin, paste your pupil and you are done!
Hope you enjoyed this tutorial as much as I enjoyed making it!

Nina Blackburn is an award winning cake artist who owns Make Pretty Cakes in Auckland, New Zealand. A proud Pettinice Ambassador, and self confessed cake-a-holic who not only enjoys creating specialty 3D cakes, but also hosting and teaching cake decorating classes.
You can find Nina on Facebook and Instagram.

