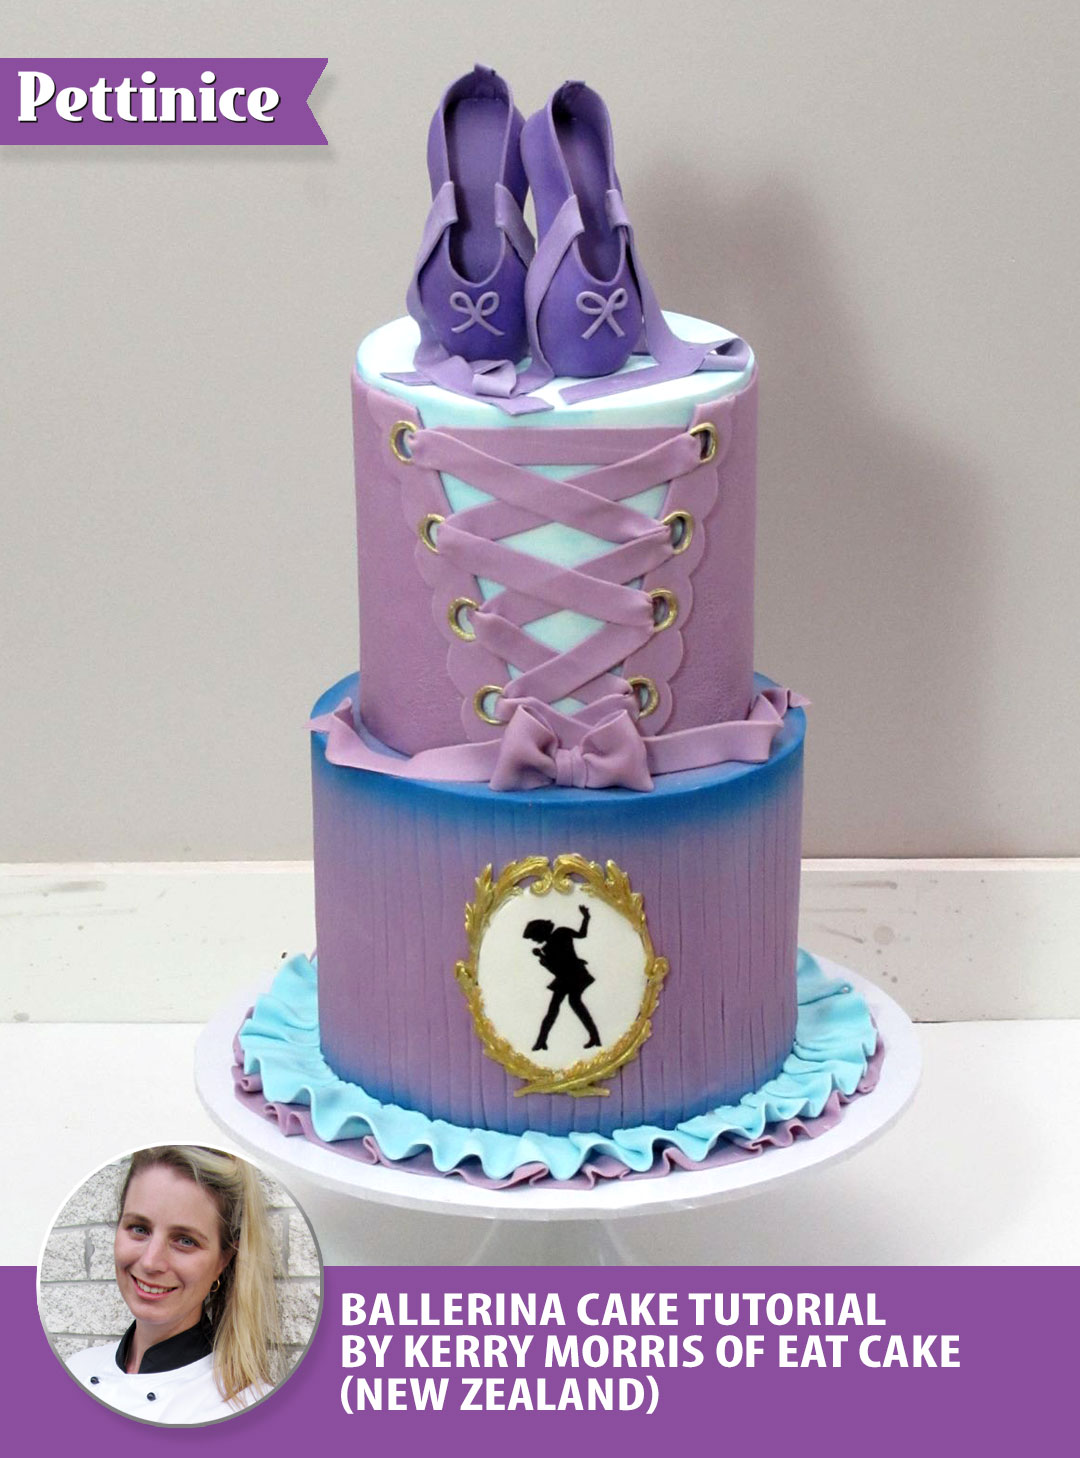
Two tier ballet cake tutorial by Kerry Morris
Equipment:
- Pettinice Purple, Pink and White fondant
- Tylose
- Sugar Glue
- Paint brush and paint sponge (or larger brush)
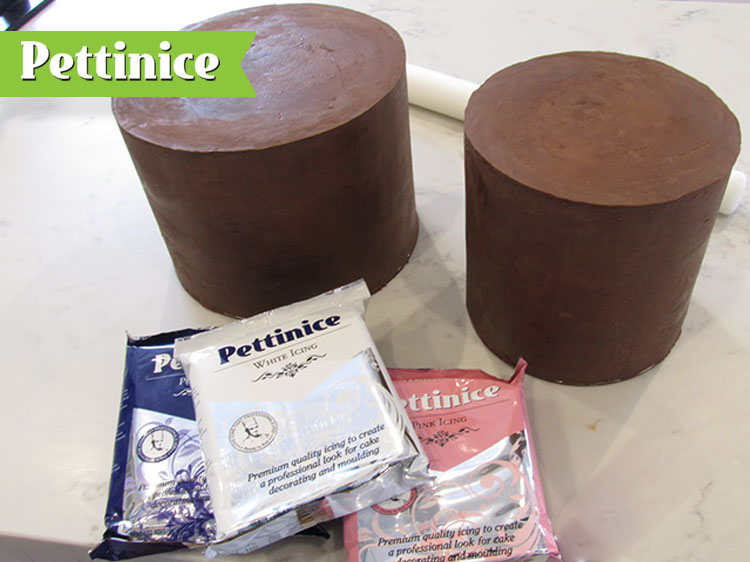
- Two ganached cakes – I have used a 9 inch base at 6.5 inches tall and a 7inch top tier at 7 inches tall
- Blue and black food colour
- Blue airbrush colour
- Edible Gold Paint
- Fondant smoothers
- Rolling pin
- Oval cutter
- Lace impression mat (if you have otherwise no impression is also fine)
- Small Circle cutter
- Ribbon Cutter
- Scroll and/or leaf moulds
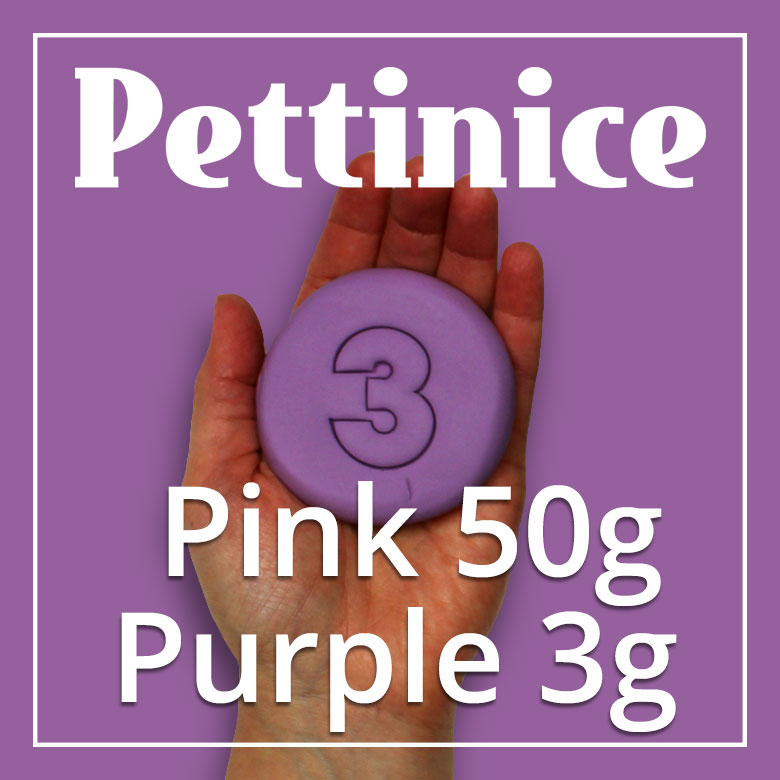
Check out our colour recipes for shades of purple here. You can add white to any of these amounts for a paler version.

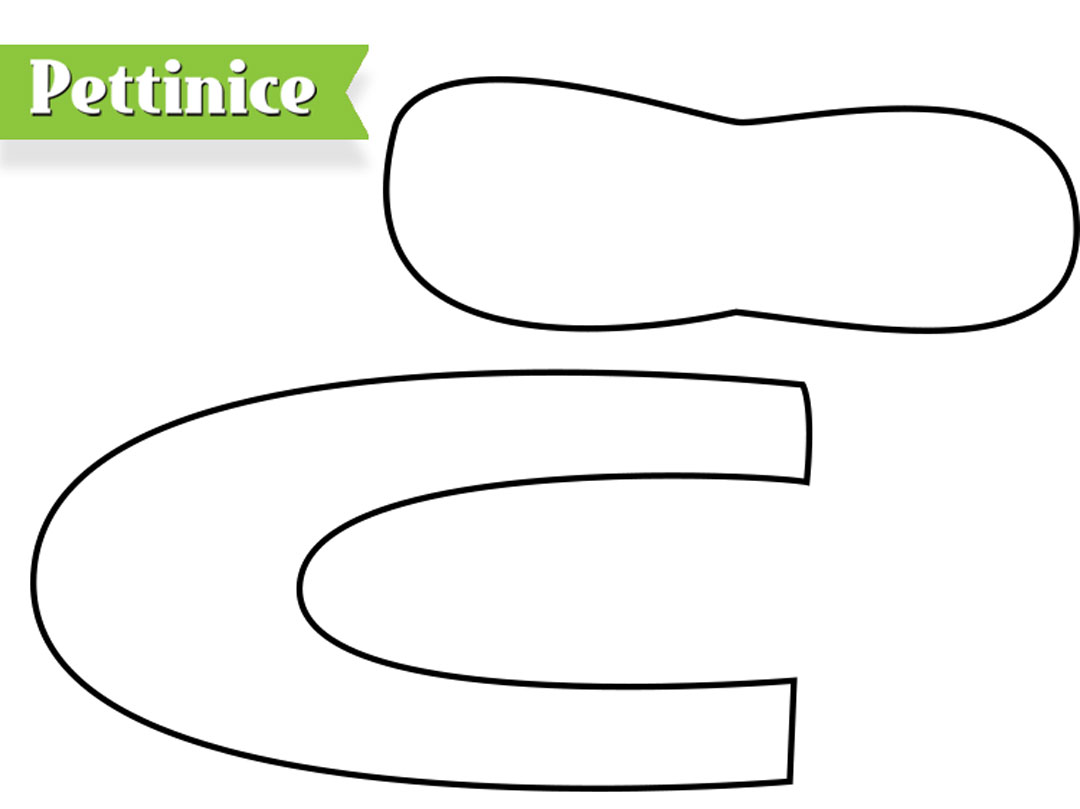
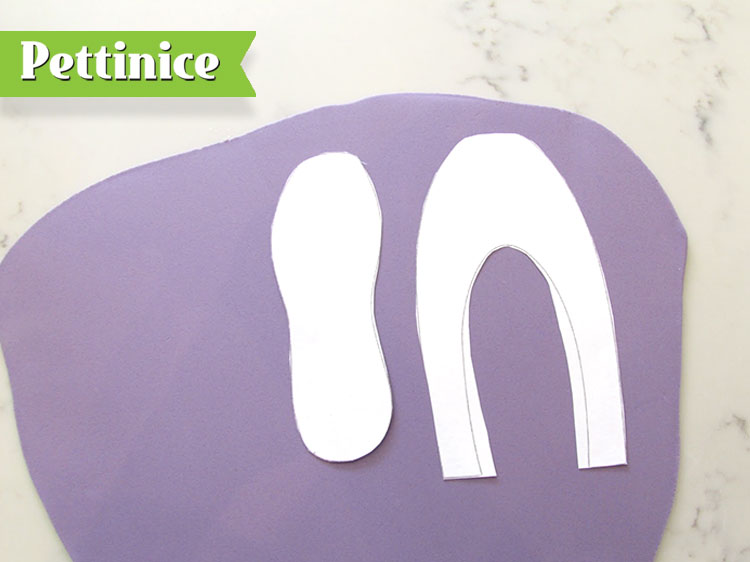
Use your template to cut out your slippers
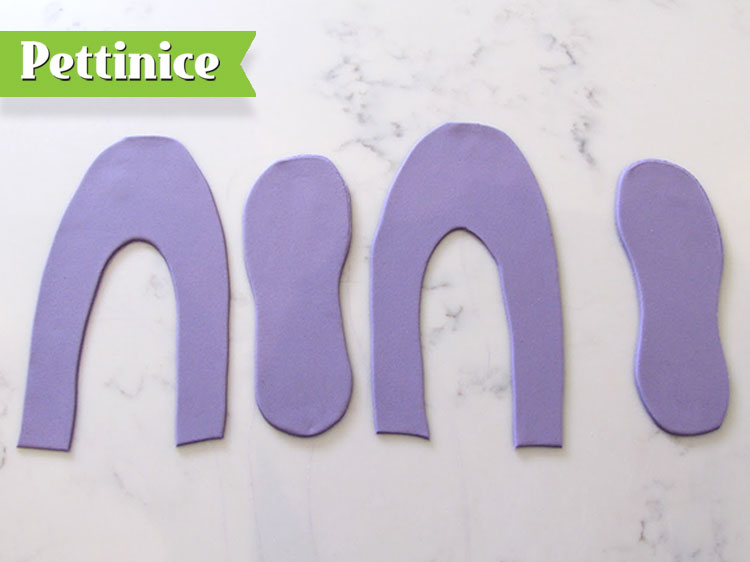
Flip the template over for the right and left shoe.
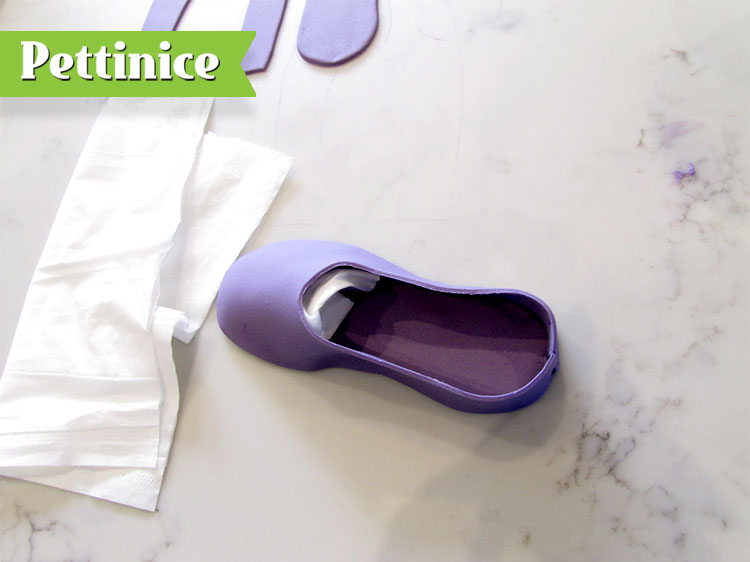
Use sugar glue to attach and use folded tissue paper to hold shape while it dries.
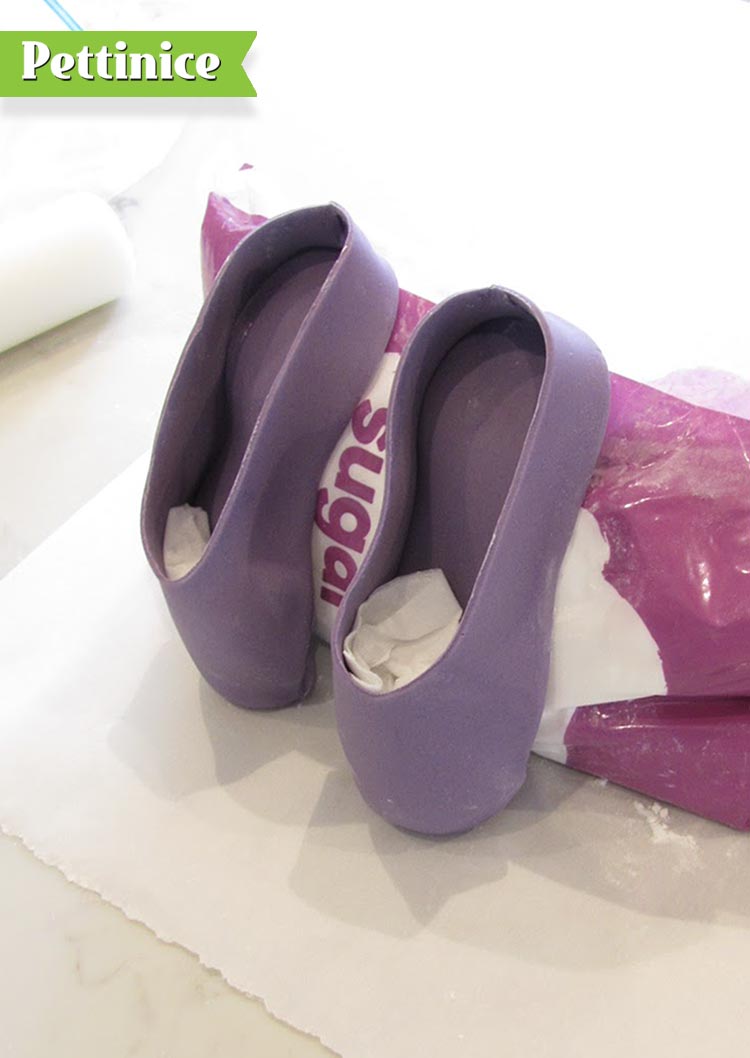
Shape the shoes over a bag of icing sugar or similar and leave to dry.
Tip: Use Tylose in your Pettinice for the shoes. Give yourself at least 5 - days in advance for the ballet shoes to dry completely.
.

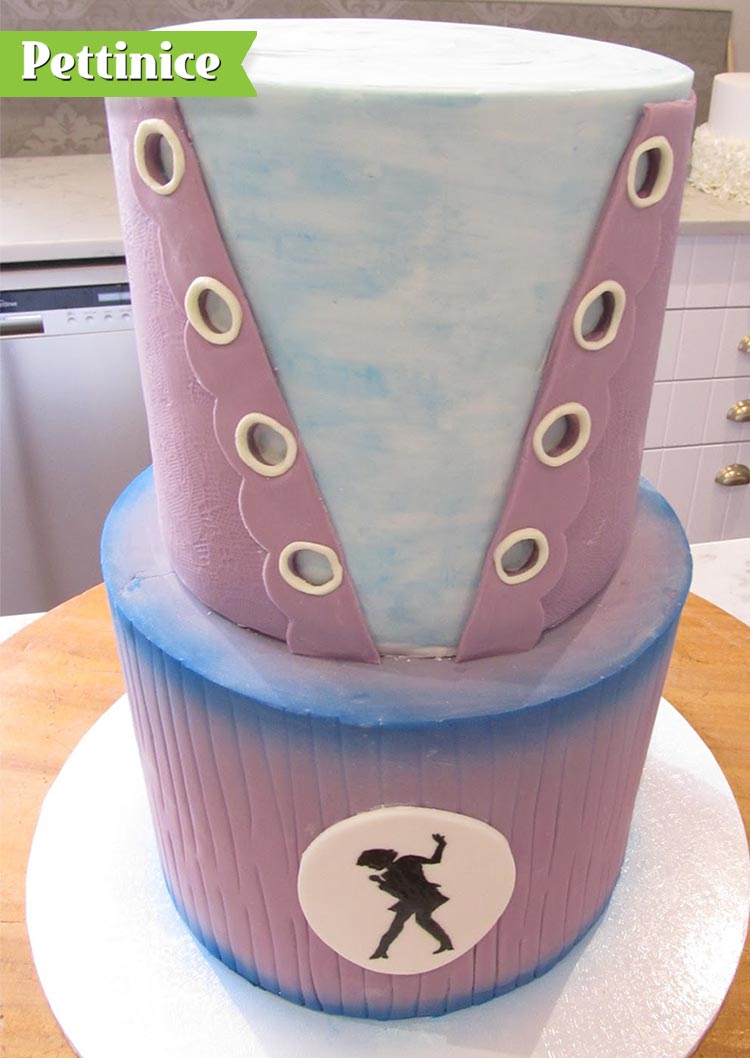
Cover your cakes. I covered the top tier in Pettinice White and the bottom tier in a blend of Pettinice Purple, Pink and White ratios. For this shade, I mixed:
- 1kg pink
- 450g purple
- 200g white.
Have a look here to see a full tutorial on how to cover a cake with sharp edges.
Next, use melted chocolate to attach your cake to the board.
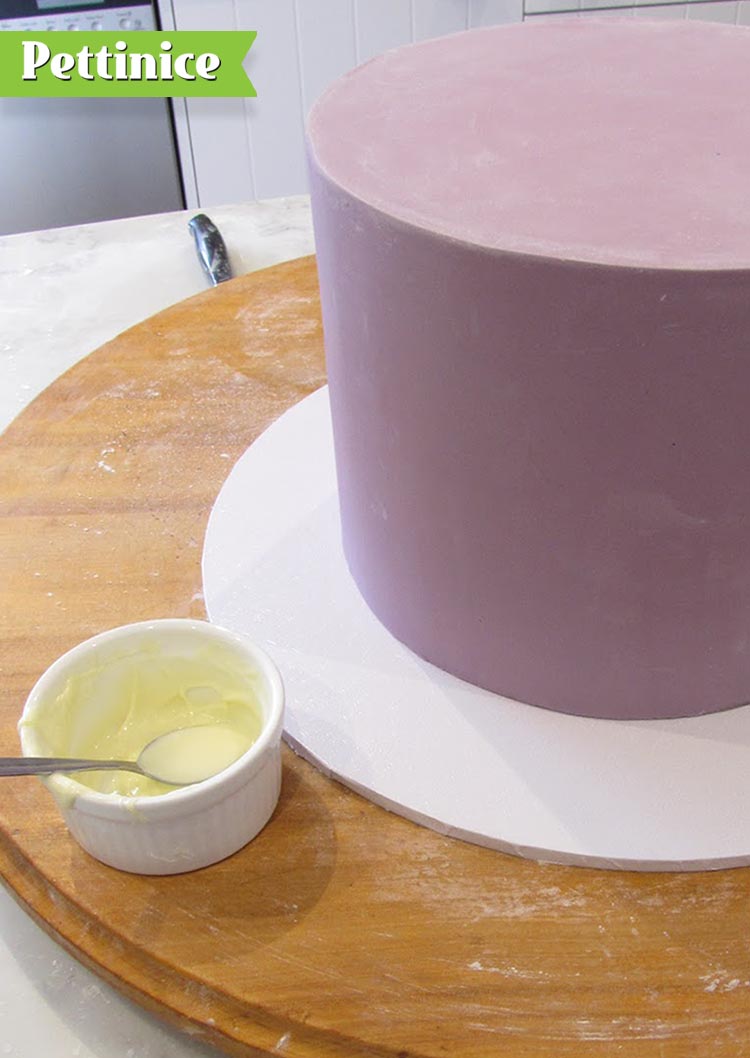
Use melted chocolate to attach your cake to the board.
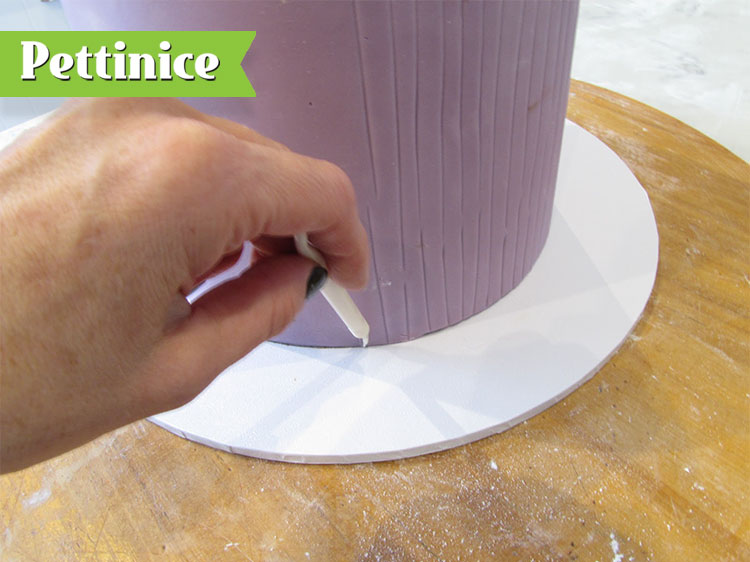
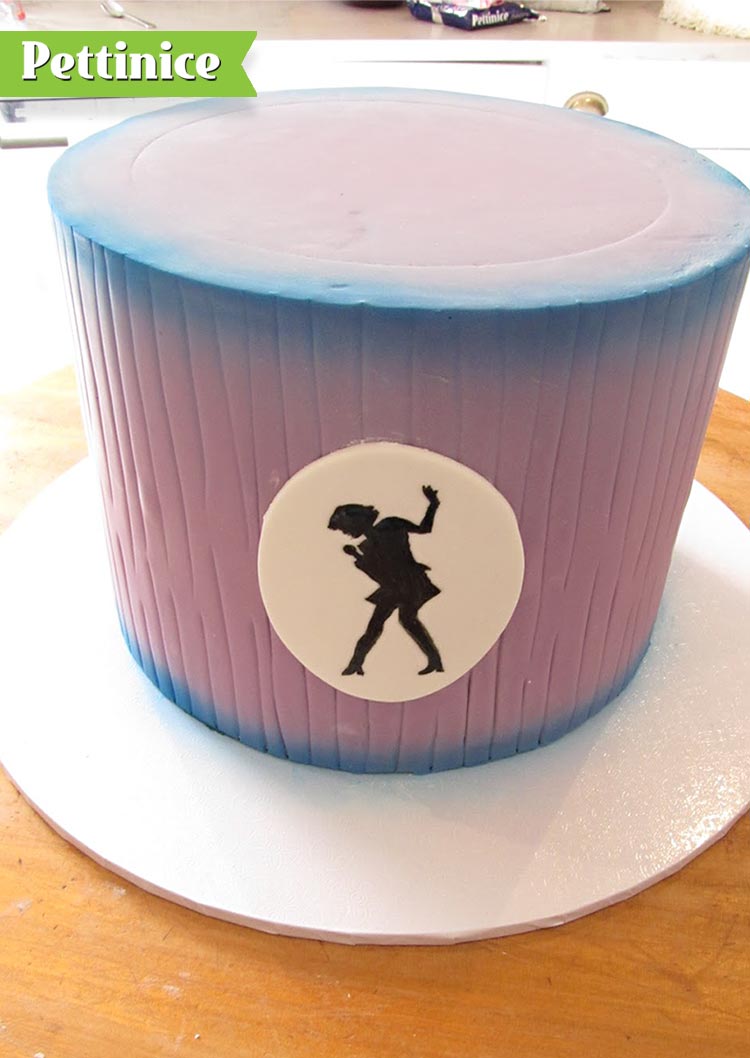
Then using a Dresden tool, score lines up and down the bottom (purple tier of the cake), if you would like them to be more precise you could use a ruler, I did them freehand for a more organic look.
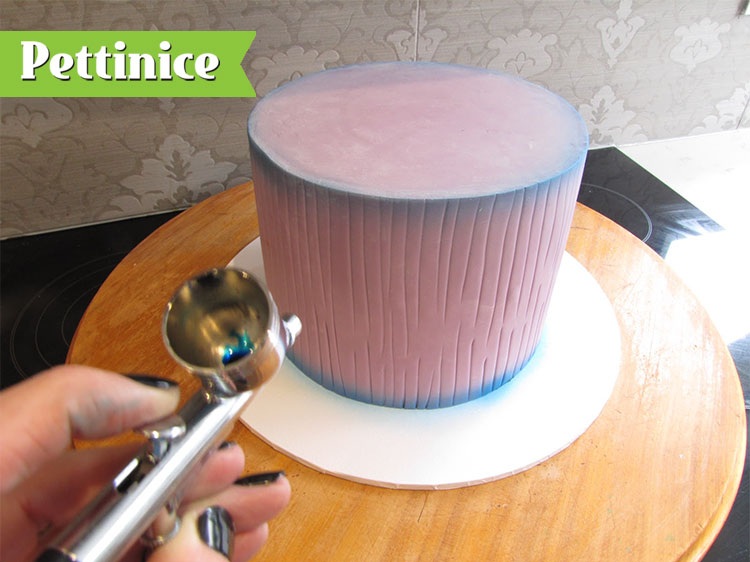
Using the blue airbrush, lightly spray the top and the bottom of the tier in blue. If you don’t have an airbrush you could use a can of coloured spray or use dusts and dust the colour on.
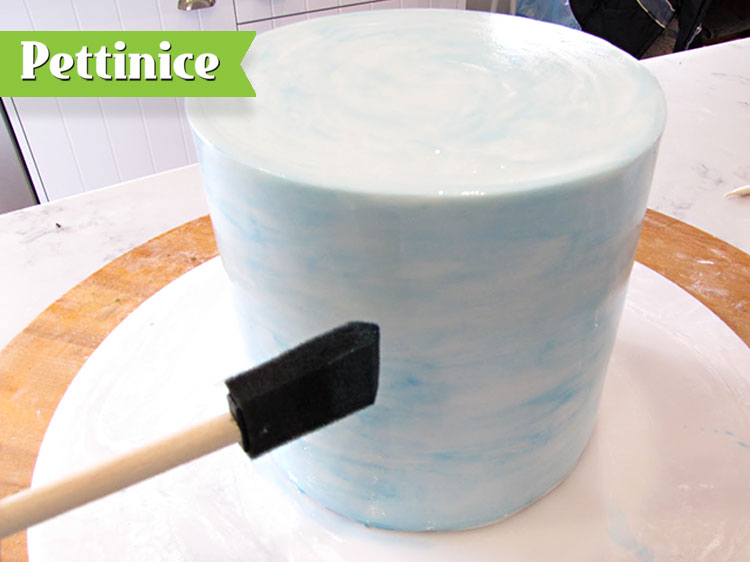
For the top white tier use a sponge or a wide soft brush and brush a little blue food colour mixed with rose spirit or alcohol or lemon extract around the cake to give a watercolour effect look.
There are so many beautiful lilac shades you can achieve by using pink as your main base tone. Click on our colour guide to see all the colours.
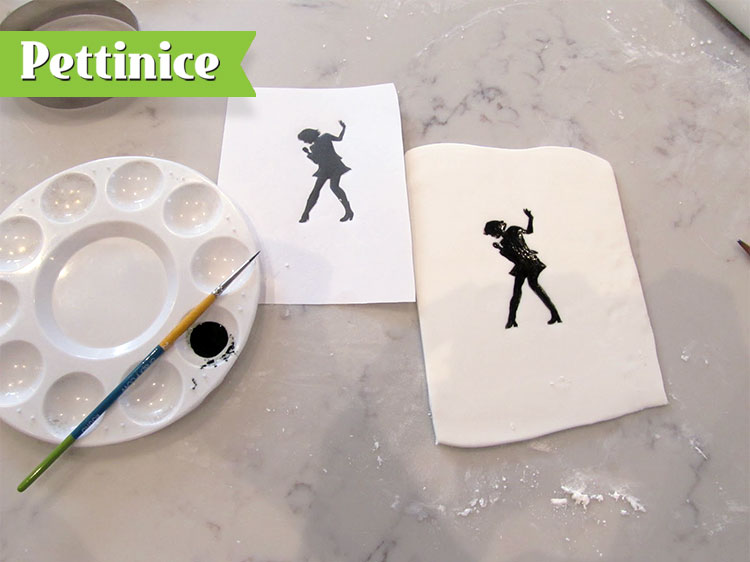
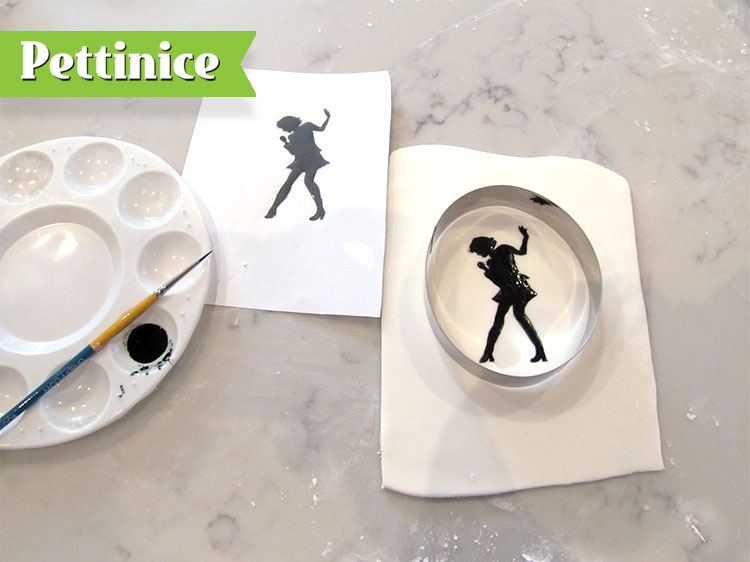
For the painted image on the bottom tier I printed out a silhouette I liked from google and then using it as a guide, painted it onto a white piece of fondant.
If you didn’t want to paint it you could also cut it out of black fondant with an exacto knife. I always paint the image first and then cut around it with my cutter to ensure it ends up in the middle of the cut out piece.
Allow to dry for 5 minutes and attach to your cake with a little sugar glue.
Creating the corset:
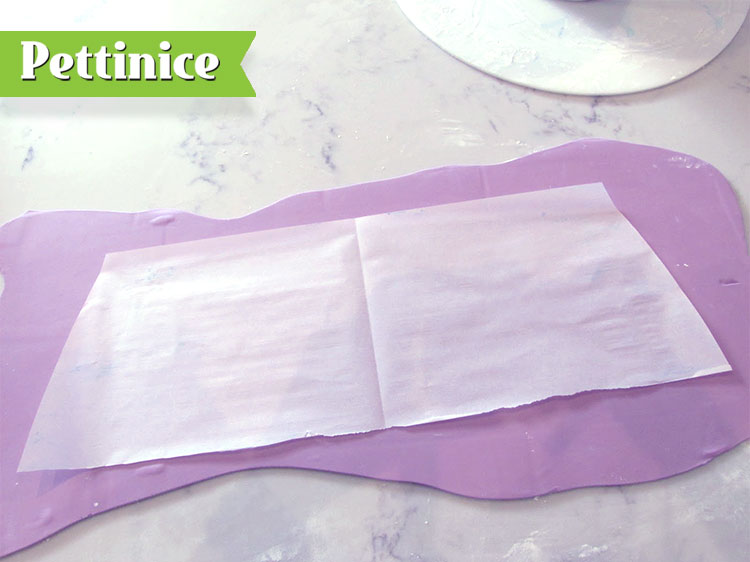
For the top tier, cut a piece of baking paper into the shape you would like for the ‘corset’ piece to go around your cake and then use this as a guide to cut the correct size piece of fondant.
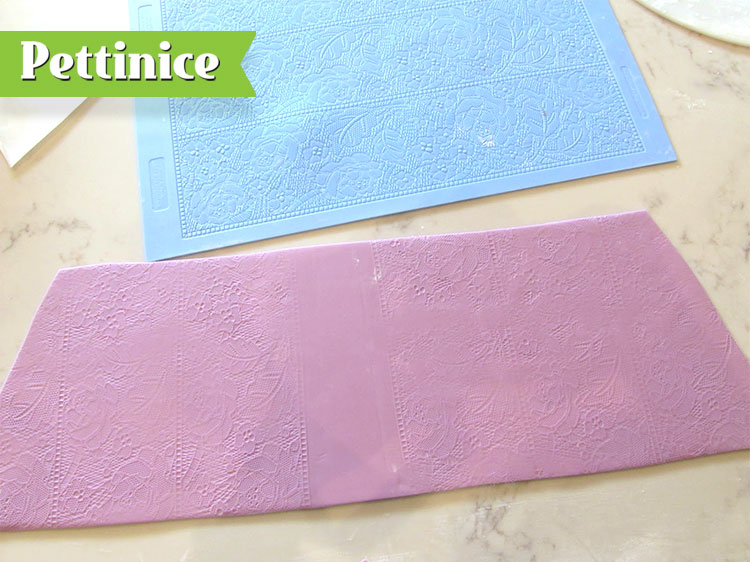
Using your mat, press the lace impression onto the fondant.
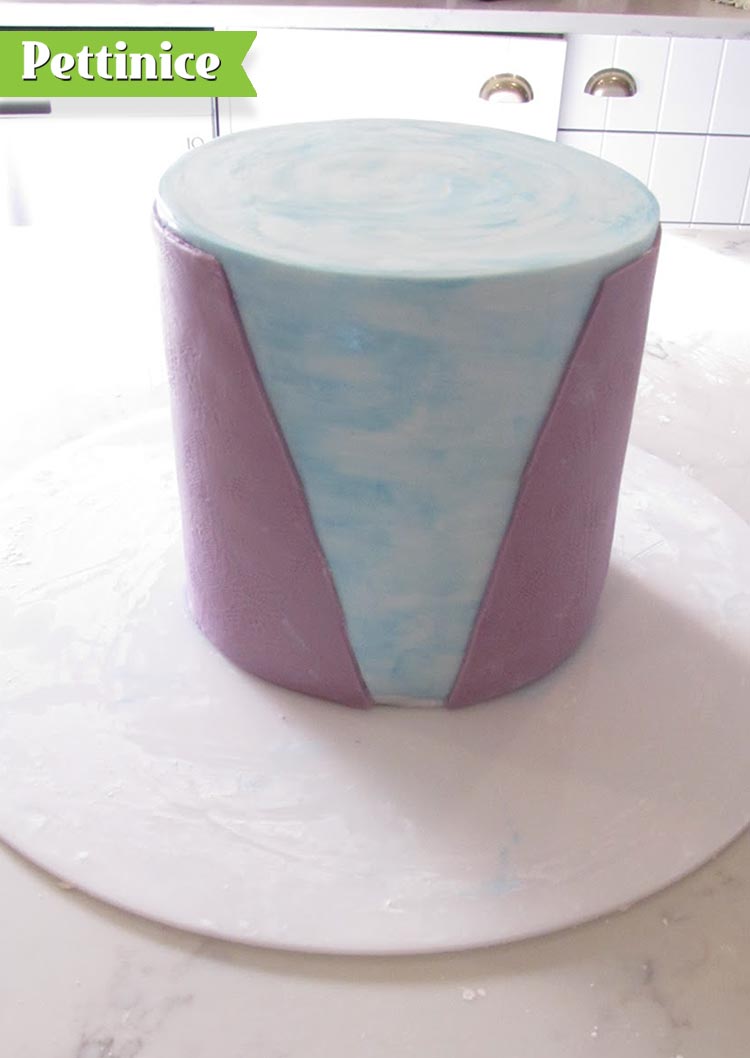
Once the painted surface of the cake is dry, attach the fondant piece you have cut out around the cake with a little sugar glue or water.
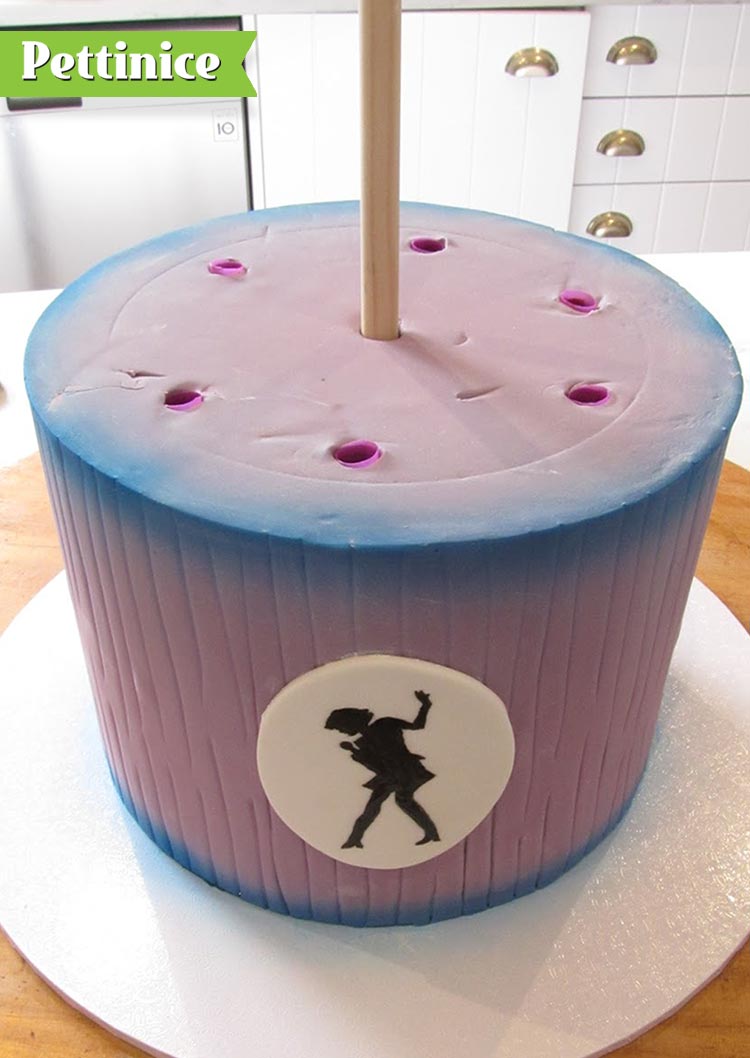
I use a centre dowel and bubble tea straws for support.
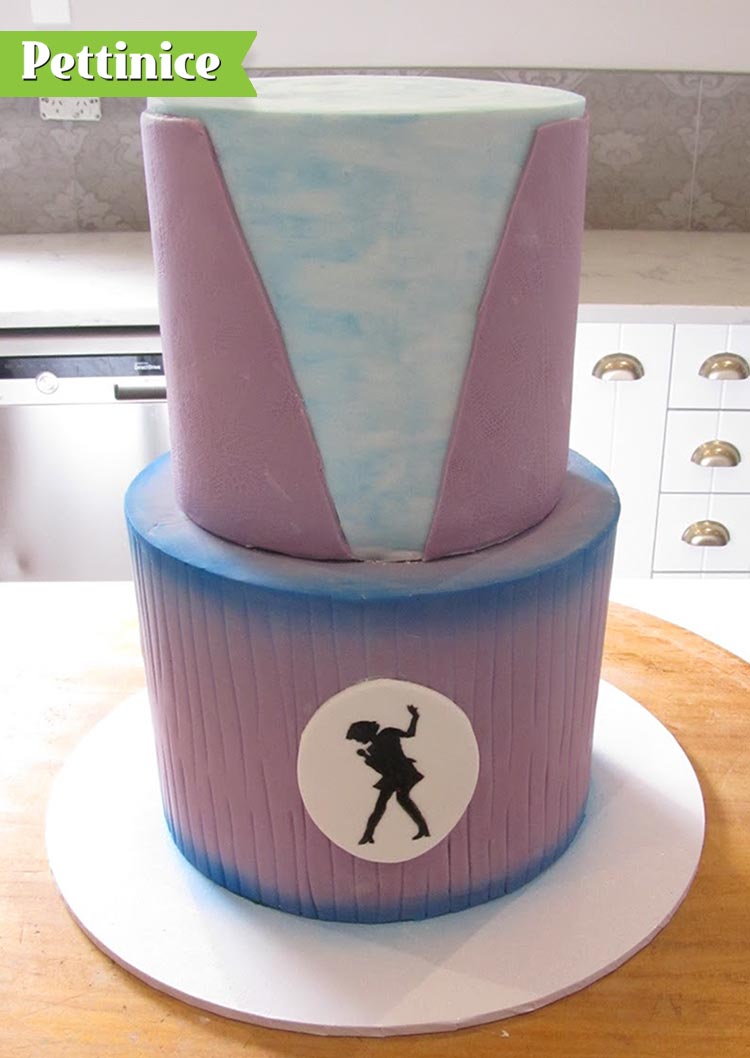
Stack the cake. My top tier cake board has been pre-drilled.
Using a curved edge strip cutter as shown next, create a strip long enough to cover each of the front edges of your corset and secure to your cake.
Then using a small circle cutter, cut circles all the way down and line these with a strip of white fondant (use your circle cutter to cut a circle and then a smaller one to get a thin circle of fondant).
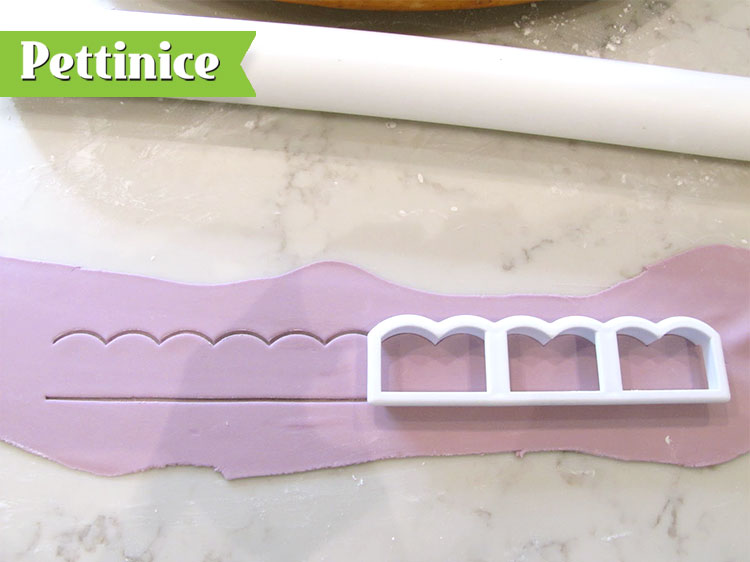
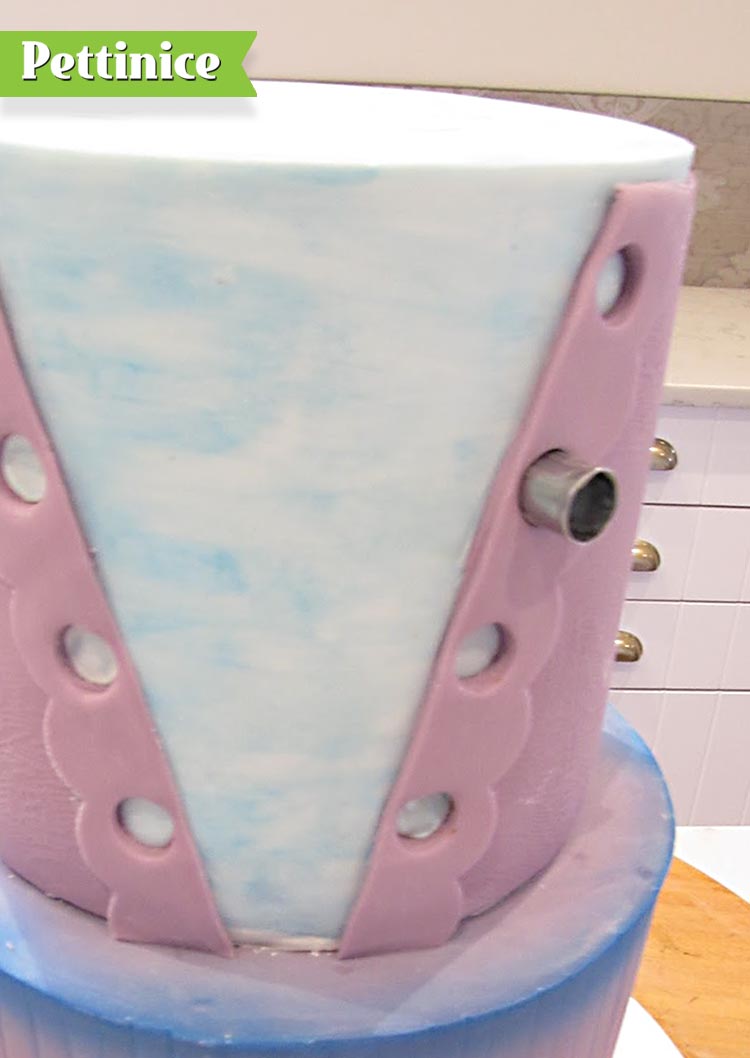
Using a small circle cutter, cut circles all the way down .
Next, cut a small circle out of the white and then using a slightly smaller cutter, cut the centre out - this will give you the thin circle of white to attach to each hole.
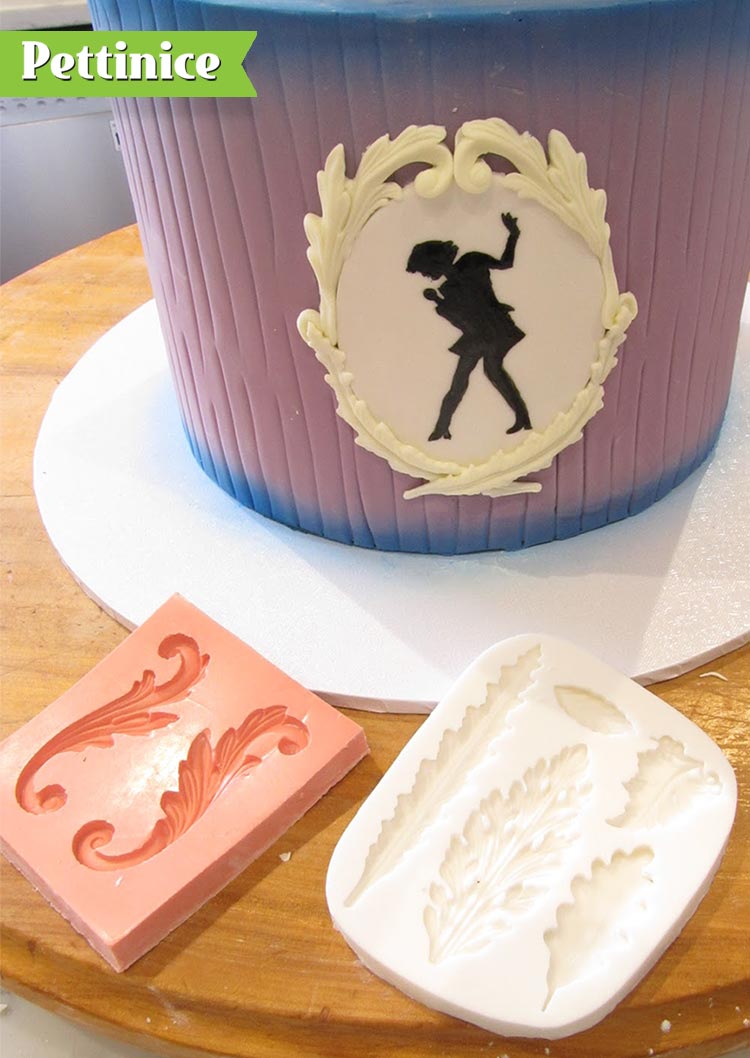
Using your scroll and or leaf moulds, mould the framing for the painted oval on the bottom tier and stick around the edges to hide them.
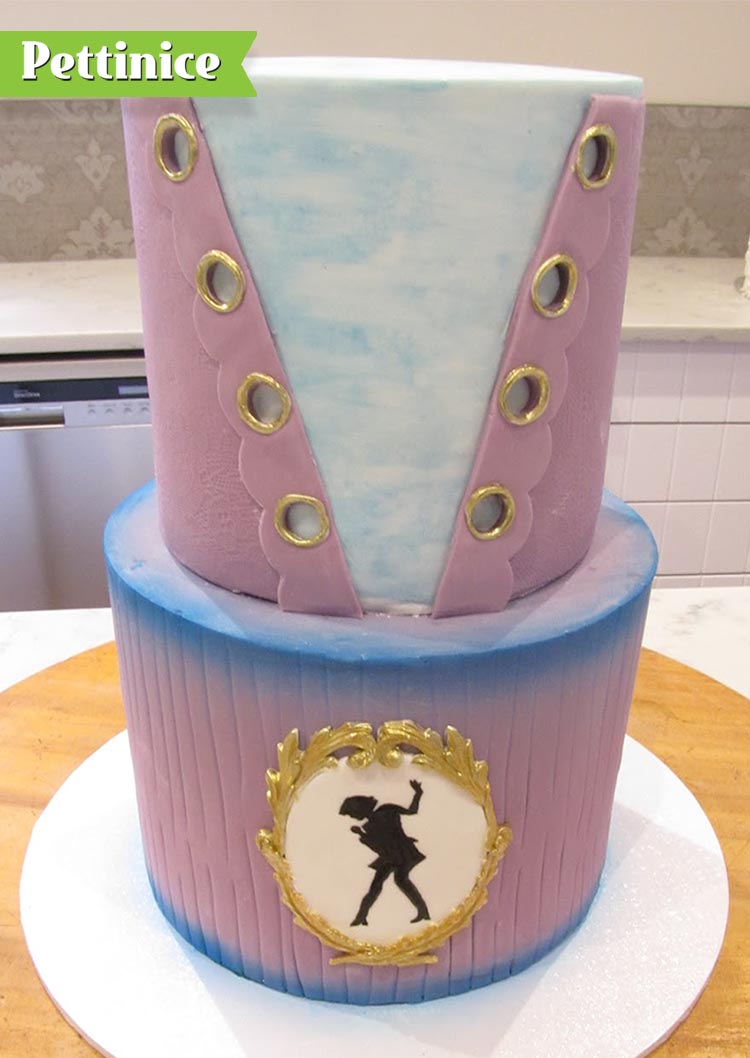
Then paint them and the circled edges of the top tier holes in gold.

Using your strip cutter, cut ½ inch strips and attach them to the top tier in laced up pattern as per the picture.
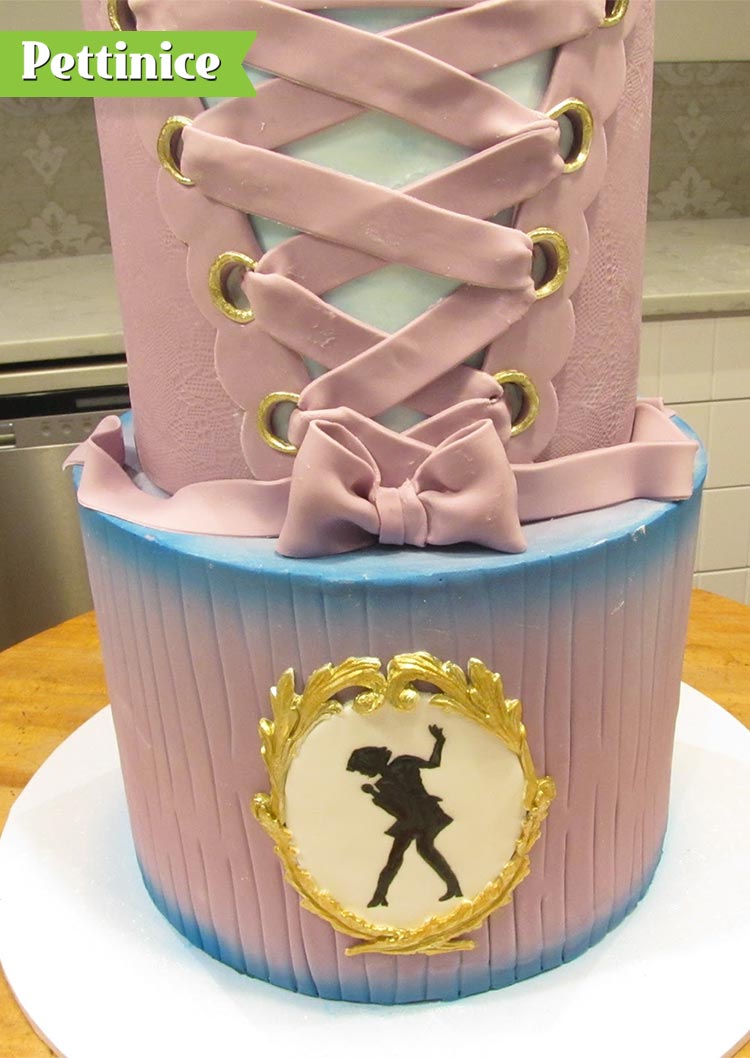
Make a bow to sit at the bottom.
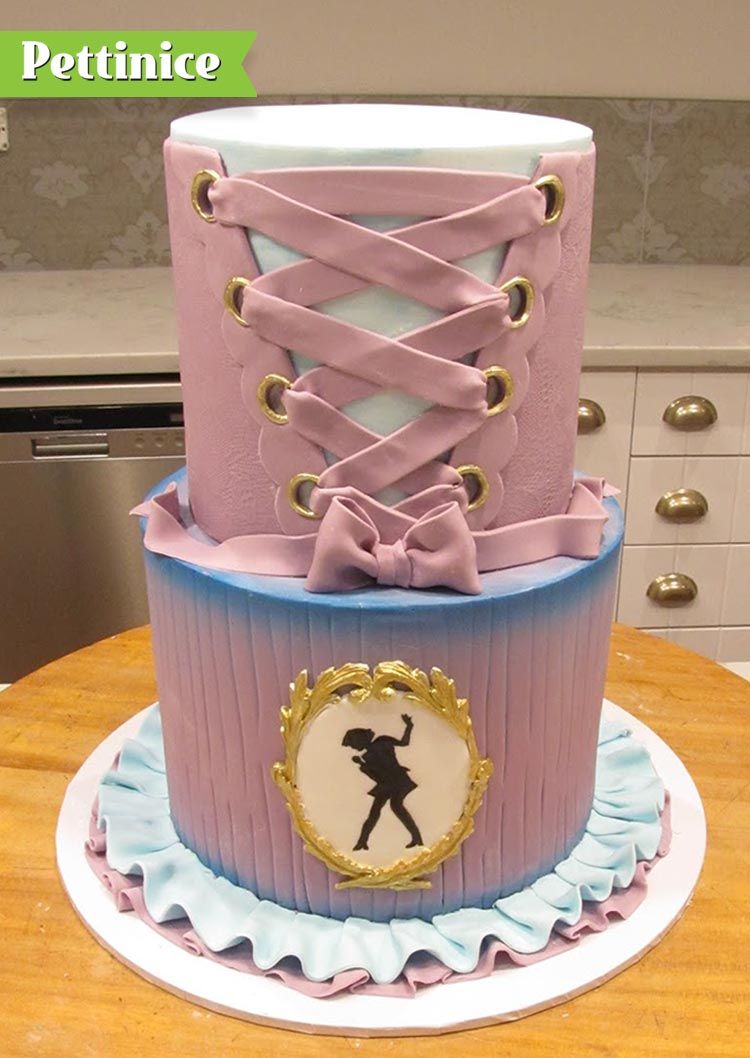
Optional: Using your strip cutter again, cut 1 inch strips and ‘ruffle’ around the base of the bottom tier in alternate colours – purple and blue.
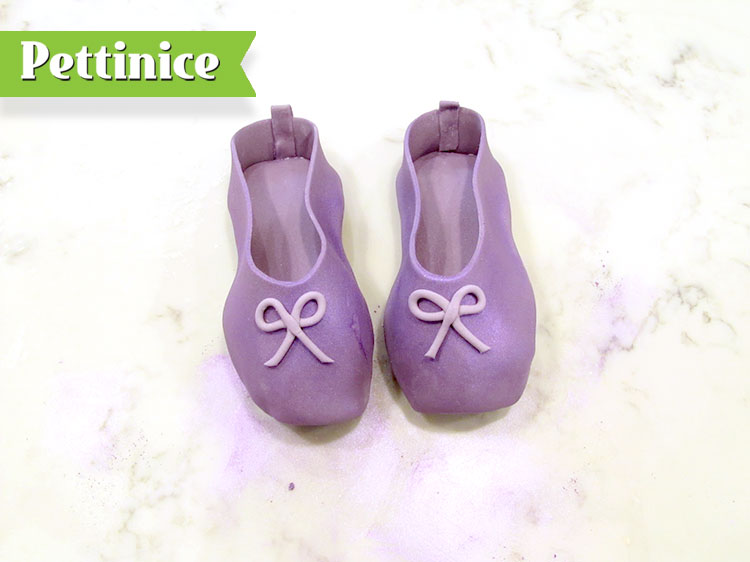
- Directions for the ballet slippers: Once the slippers are completely dry, you can dust them with a lustre as I have here.
- Cut a small strip of fondant to cover the back seam and make a small bow for the front.
- Then using skewers, poke through the base of the shoe and attach to the top of the cake. You can also use a little chocolate on the toe point to secure them to the cake.
- Using your strip cutter once again cut ½ inch strips and attach to the ballet shoes with a little sugar glue or water and place around the top of the cake.
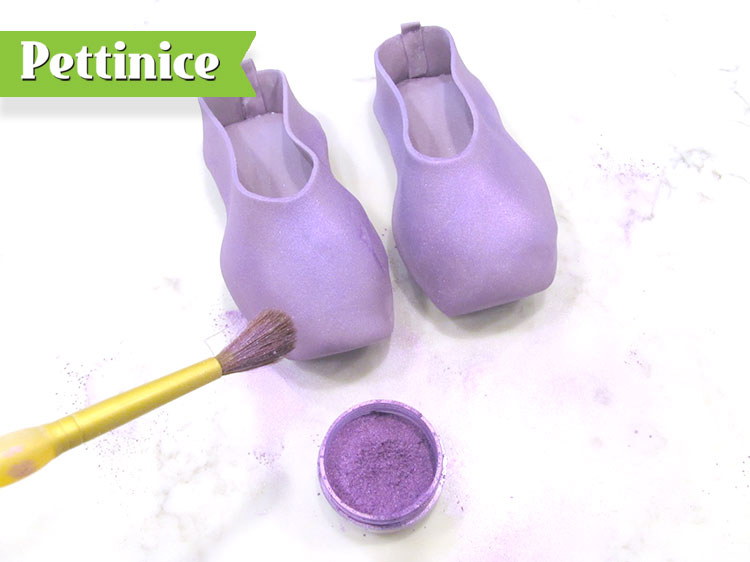
Dusting is optional, but a lovely way to add shimmer or shadowing.
Add additional detailing as desired.
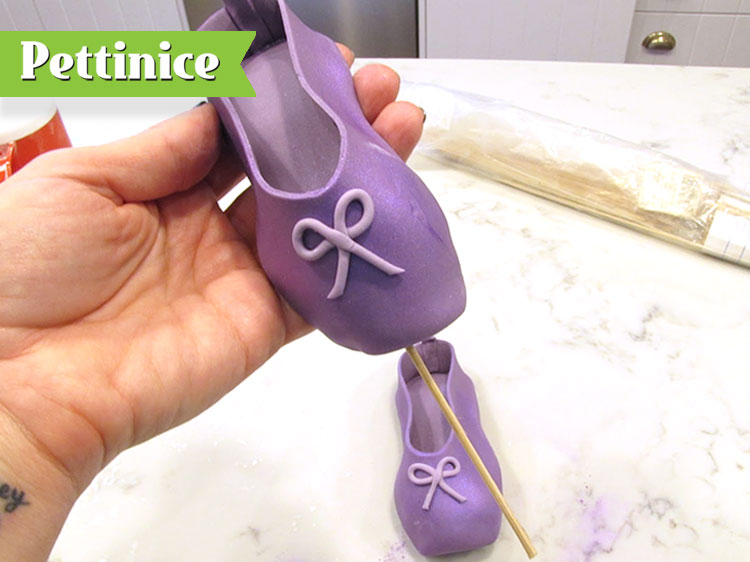
Using skewers, poke through the base of the .
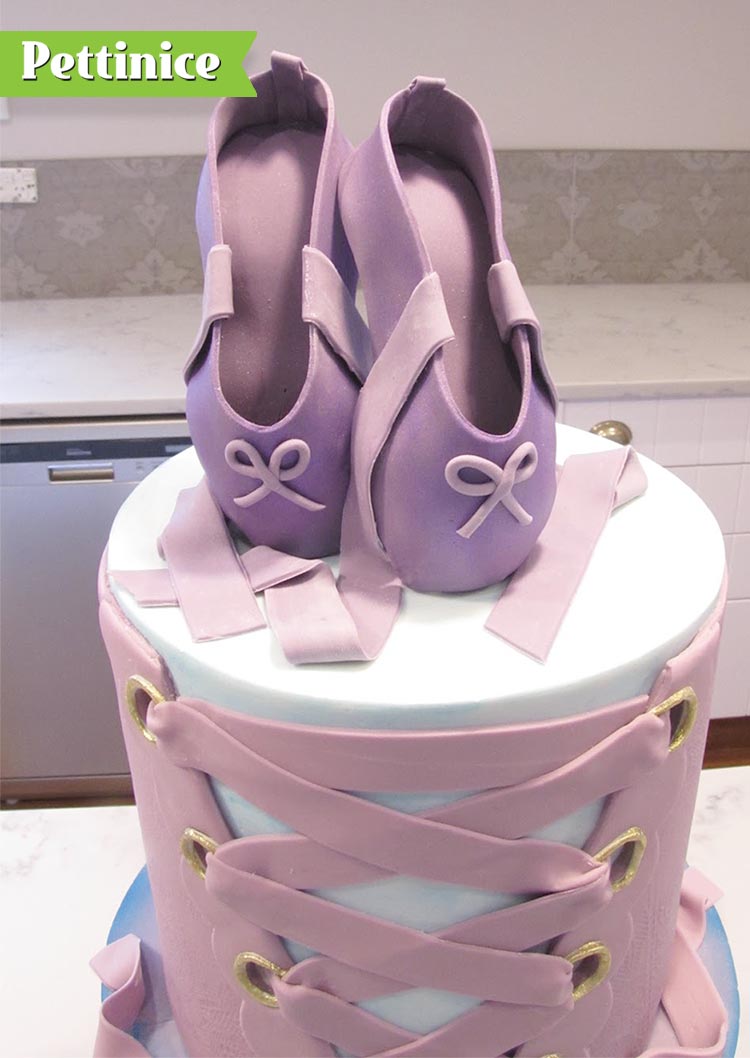
Attach to the top of the cake. You can also use a little chocolate on the toe point to secure them to the cake.
I love Pettinice for its superior flavour. Covering my cakes with fondant is my favourite step, and achieving sharp corners on my tiers is a breeze. I've created a little video to show you how.
Want to see more tutorials?

Kerry Morris is a cake decorator and instructor running her business Eat Cake from her commercial kitchen located on Auckland's North Shore in New Zealand. Her elegant and pretty cake designs make her a bridal favourite, and the wedding season keeps her busy creating beautiful tiered cakes. It doesn't stop there, however, as her range of cake designs are fun and versatile. She also creates many sculpted cakes and it's fun looking through her cake portfolio for this reason.
You can find Kerry on Facebook and Instagram. ![]()
![]()