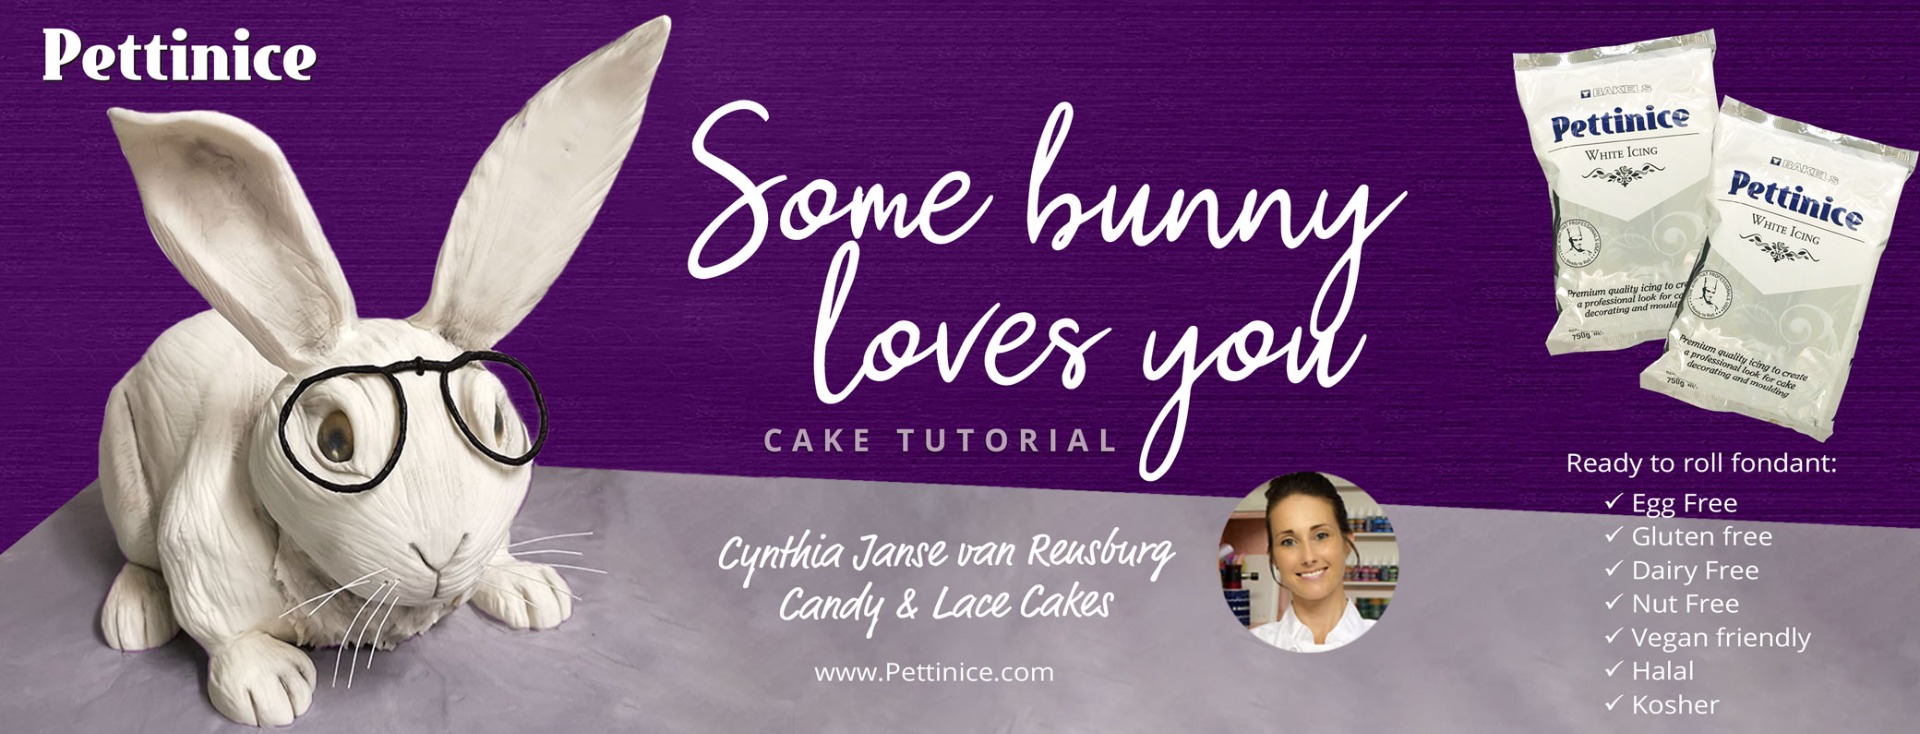
Some bunny loves you! Cake Tutorial by Cynthia Janse van Rensburg
Who doesn't love bunnies?? This cute little guy is so versatile and can be made in any color with any accessories you want!
What you need:
- Bunny template
- Rectangular chocolate cakes
- Chocolate buttercream
- Chocolate ganache
- White Pettinice fondant
- Tylose (for the ears)
- Brown or grey dusting powders
- Dusting brush
- Dresden/veining tool
- Rolling pin
- Sharp small knife
- Optional: Isomalt and edible print eyes (Otherwise just use fondant!)
- Optional: Florist wire and Black florist tape for glasses
“My baking studio is my happy place where imagination runs wild and there are no limits as to what can be achieved with cake and Bakels Pettinice!”

Make in advance:
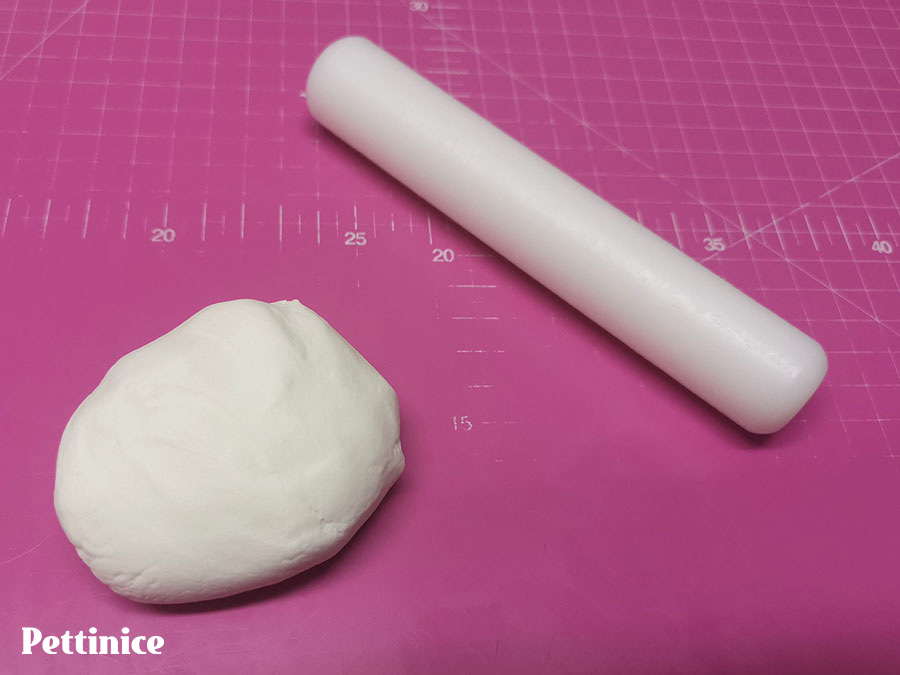
Add Tylose to a small batch of white Pettinice preferably a day in advance. Keep this airtight and covered overnight.

Carving the bunny body
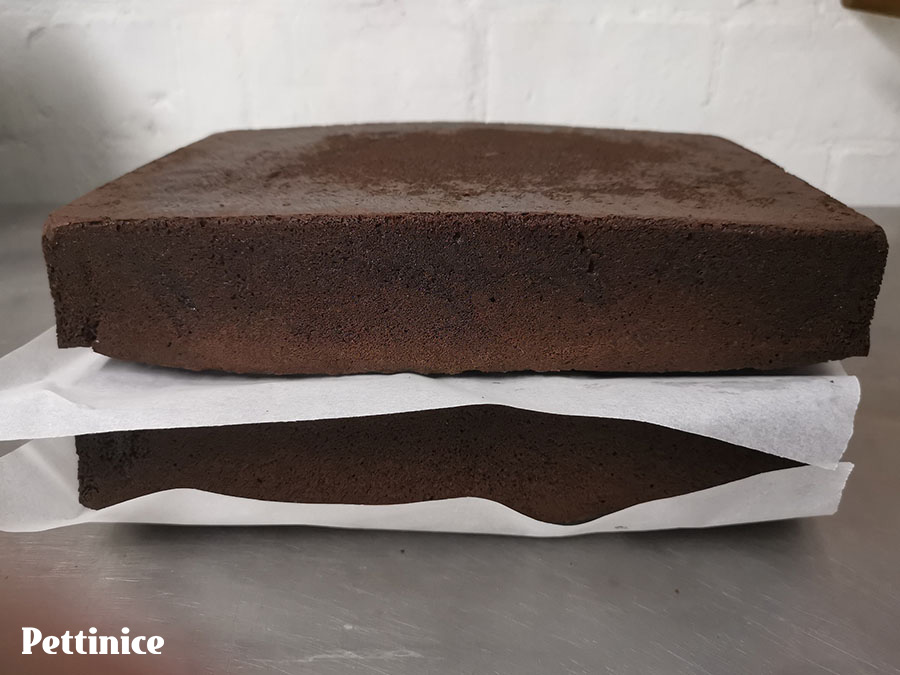
Start by levelling, filling and stacking your cakes.
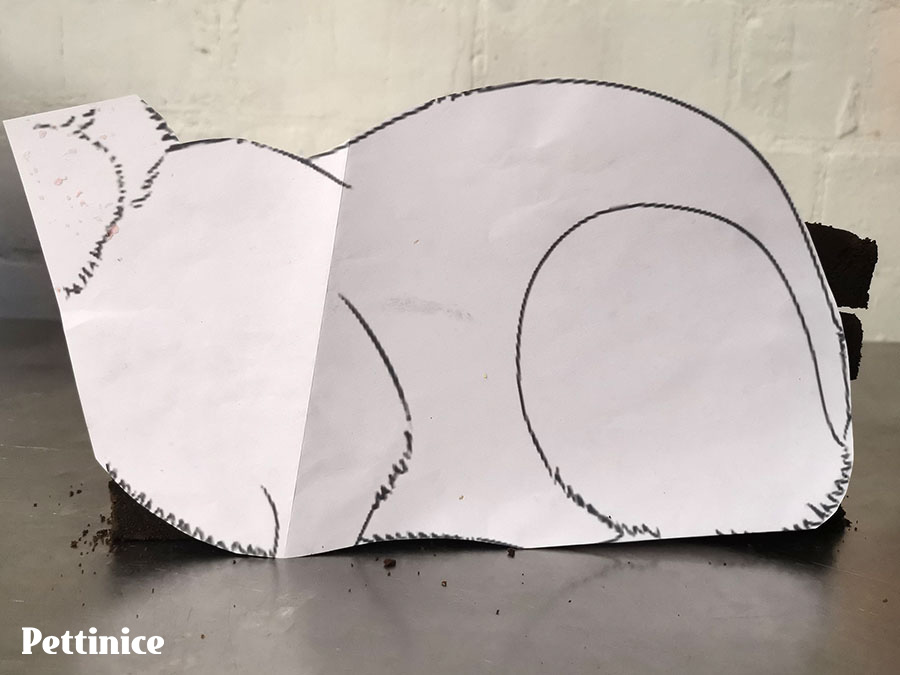
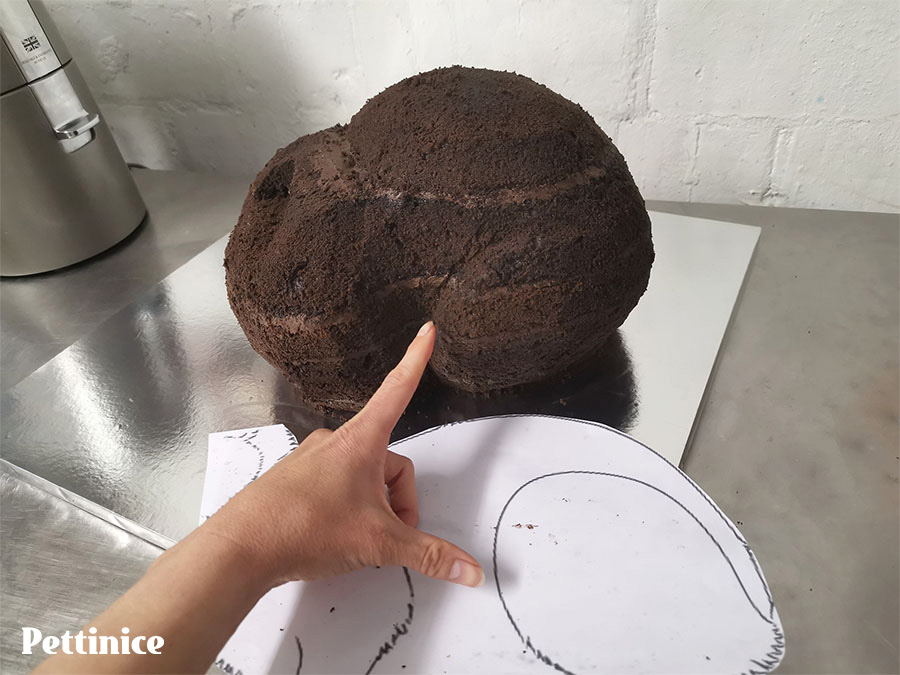
Once ready, use your template to start carving your cake to the shape of the bunny's body
This usually takes a while depending on how advanced your carving skills are

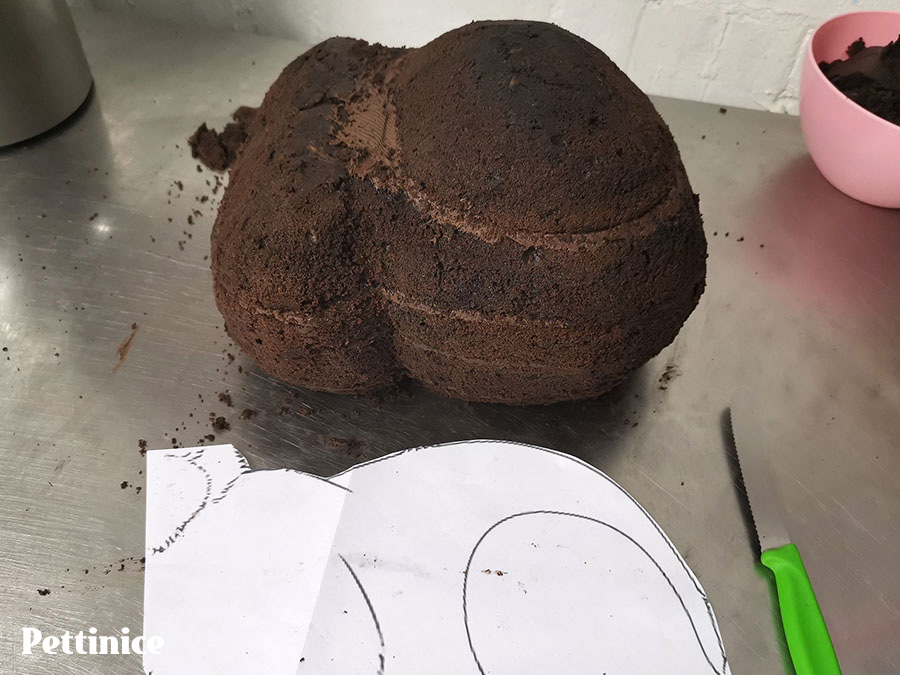
Don't take off too much in the beginning and rather keep doing small bits than cut off too much.
Little and often is a good way to carve when you begin 3D cakes.
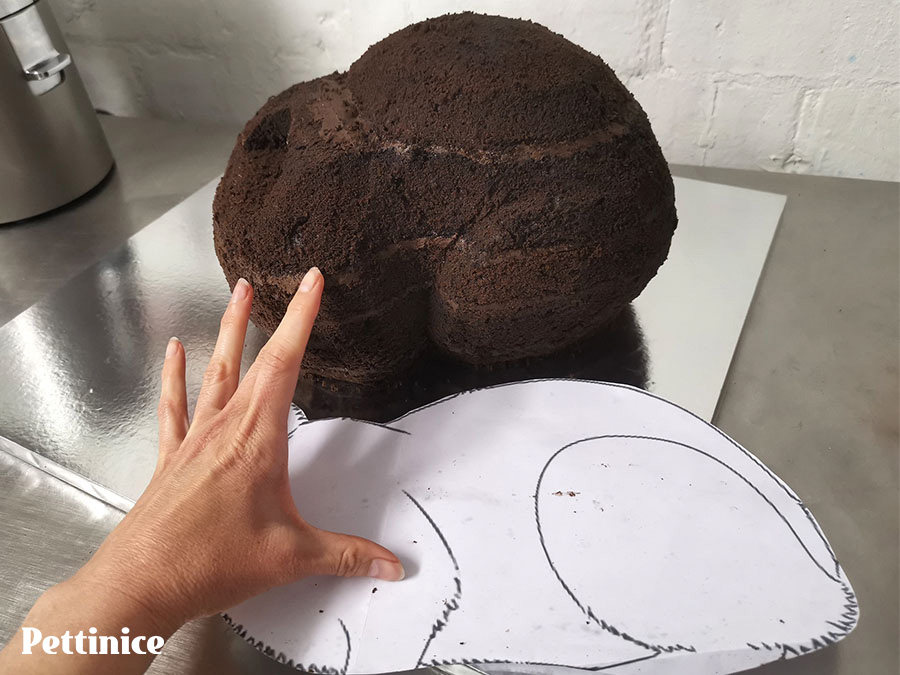
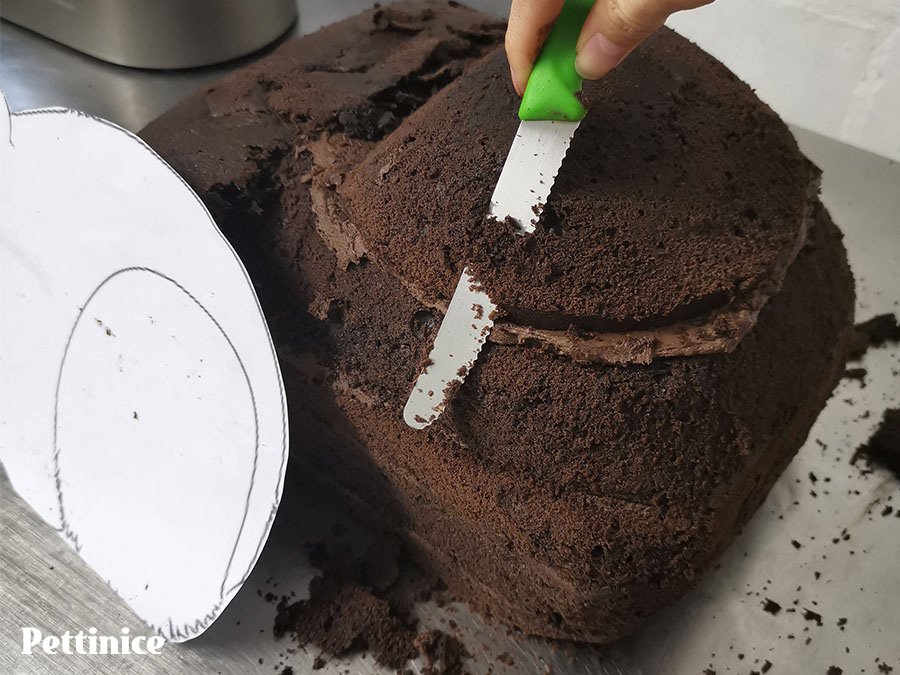
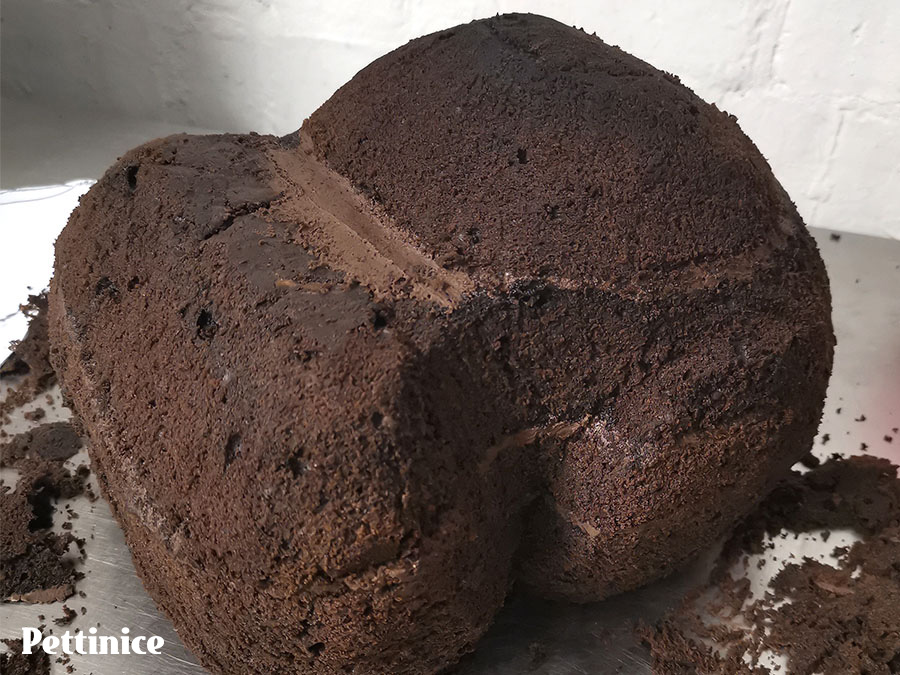
Make sure you have the shape of the bunny but also the rounded parts of the front and back legs
Good carved legs!
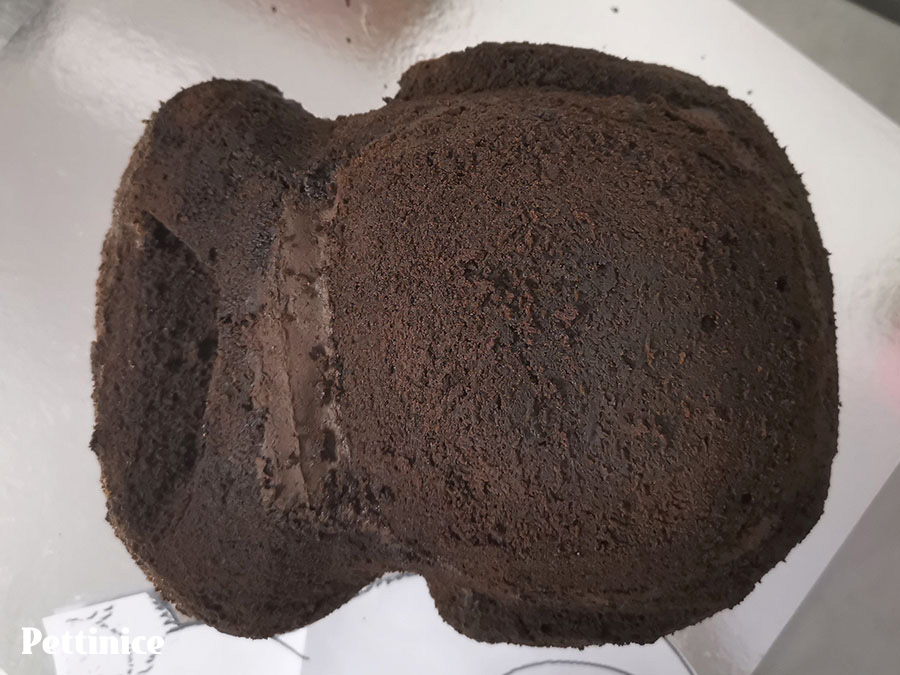
Again, take your time with this step!
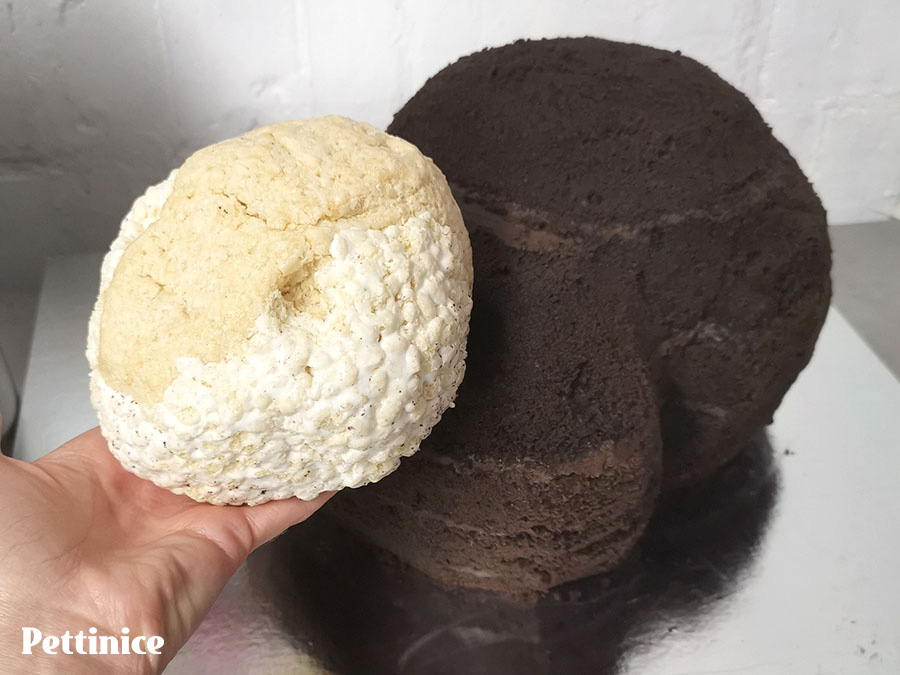
Carving the bunny Head
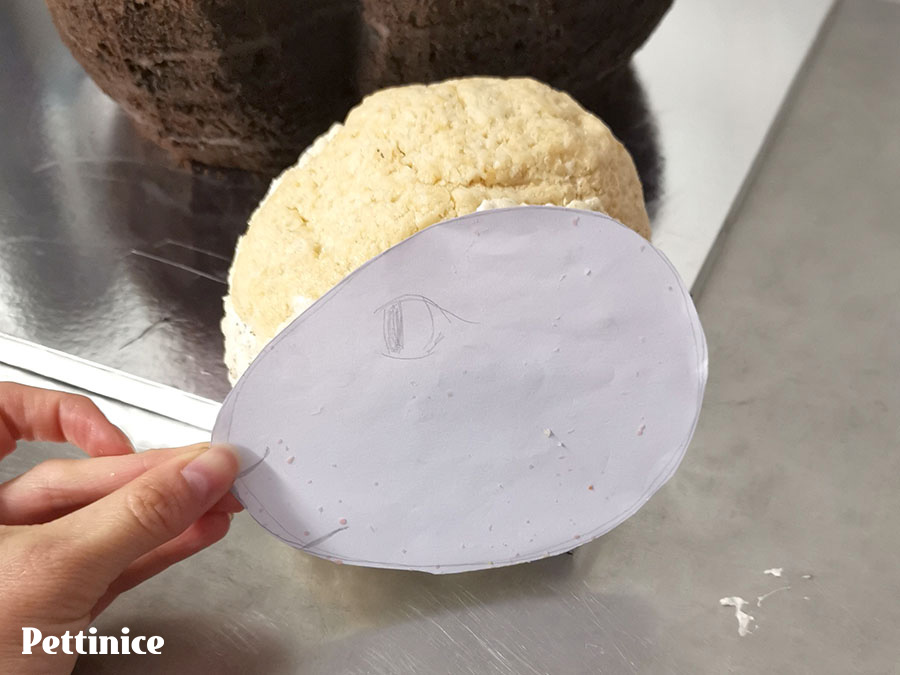
Now begin to carve and shape the head from rice krispie treats.
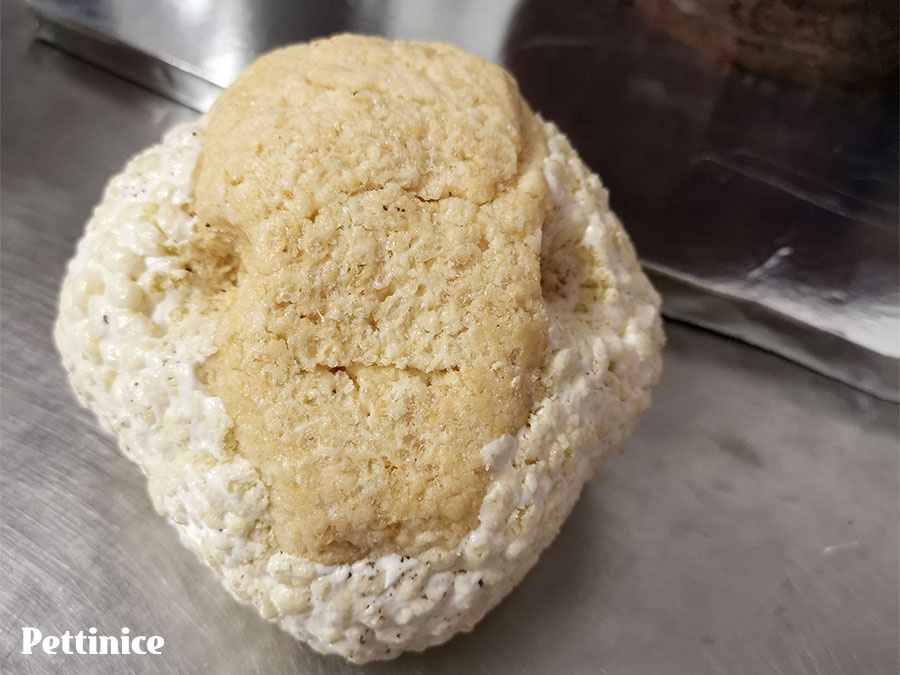
I made it in advance and realized it needed more puffy cheeks, hence the color difference on my bunny's head!
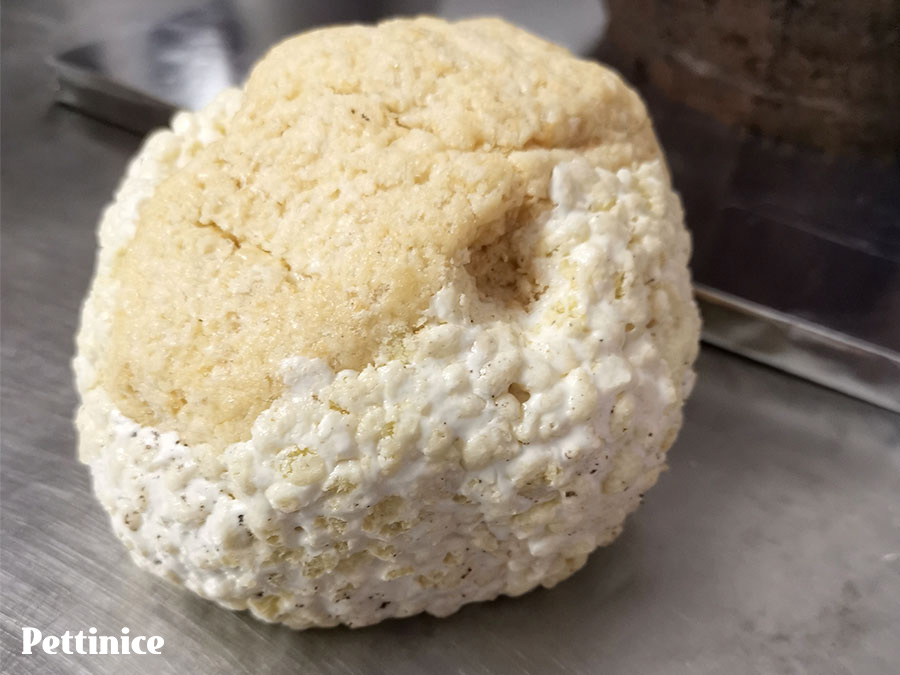
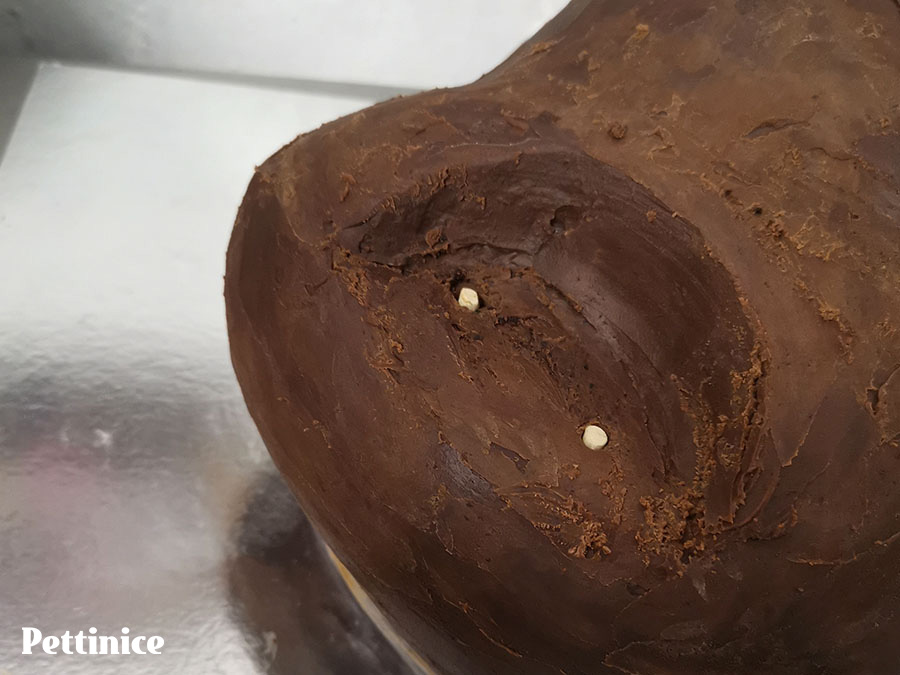
Hollow out the eye sockets before ganache and covering in fondant.
Now your bunny is ready for the next steps!
Sealing with chocolate ganache
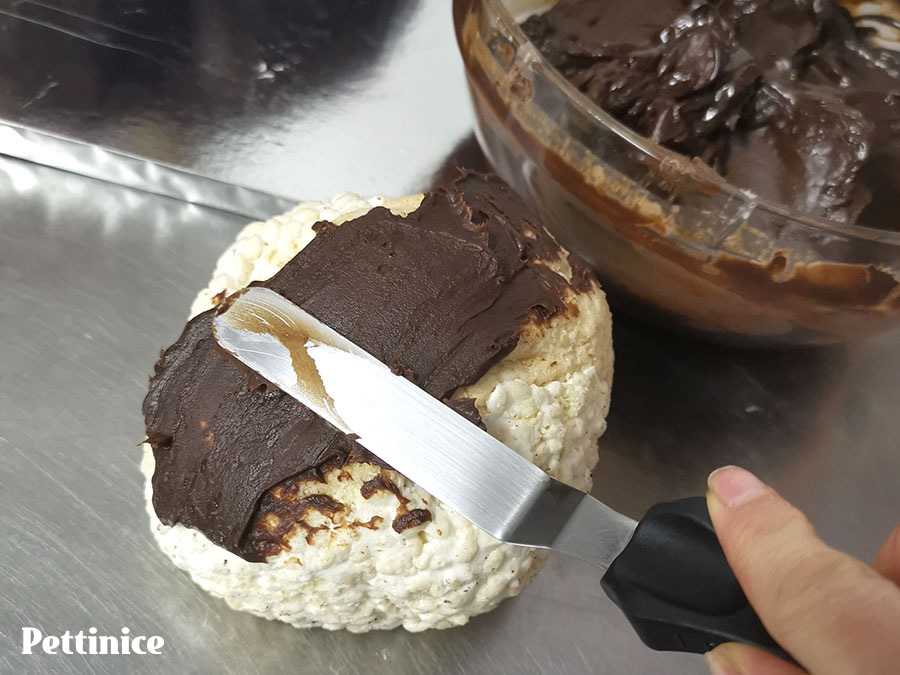
Cover the head and body in smooth ganache
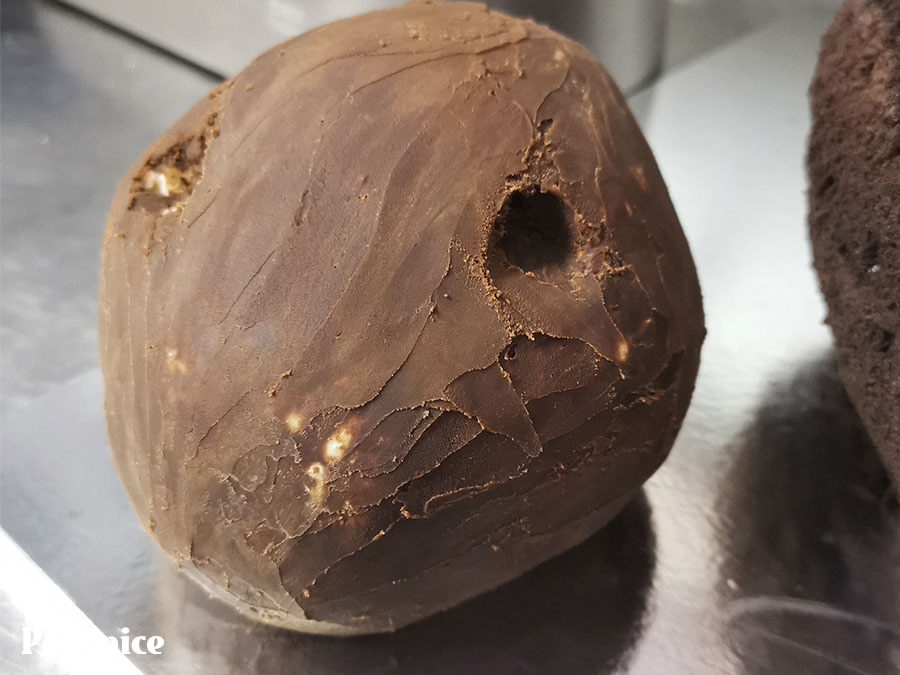
This helps fill the gaps and give a smoother surface.
Peanut butter consistency is always best as you don't want it to be too hard and pull chunks out of your cake or too runny that it makes a mess.
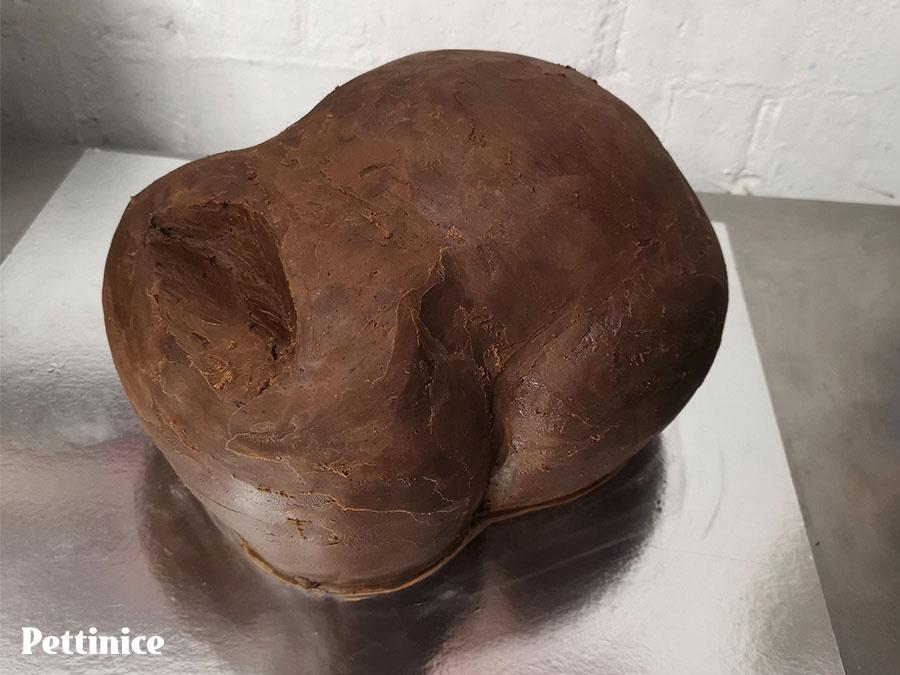
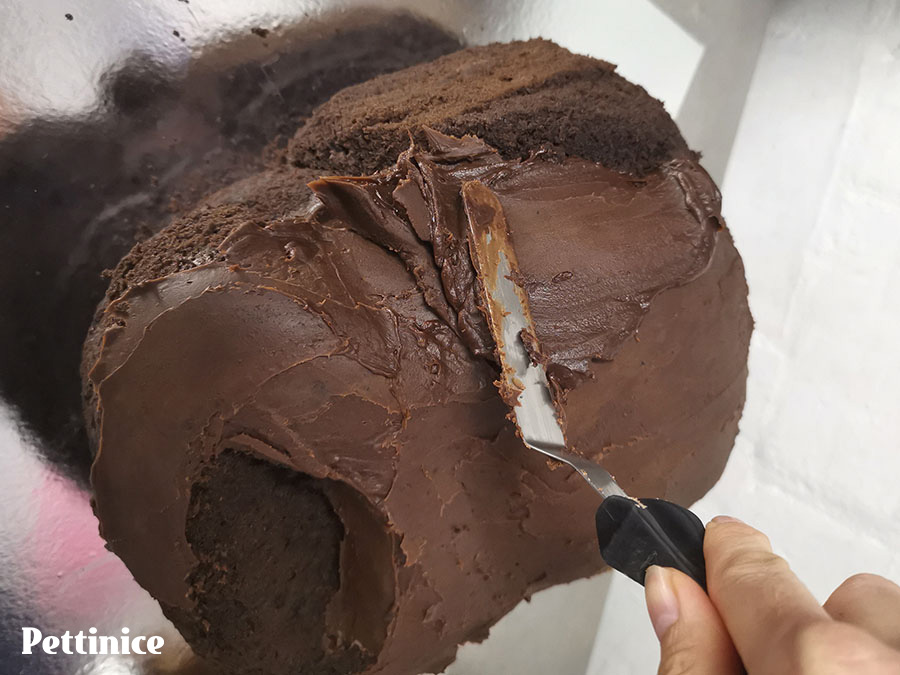
Final smoothing for the body
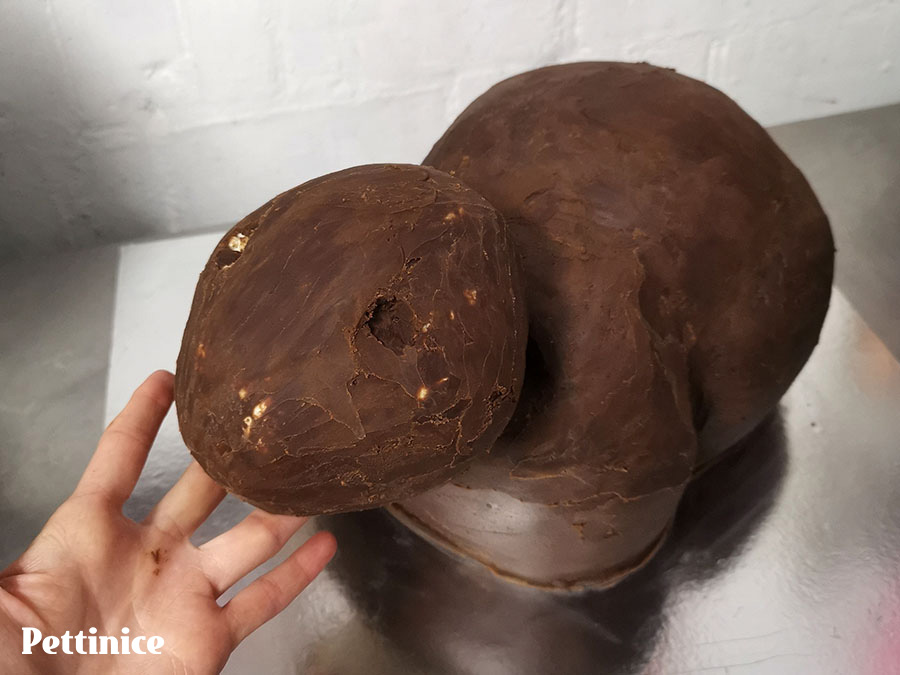
Make sure the head fits on the shoulders. If not, carve a bit of cake out of the way and ganache again. Place the head on a thin cake card cut to exactly the size of the head.
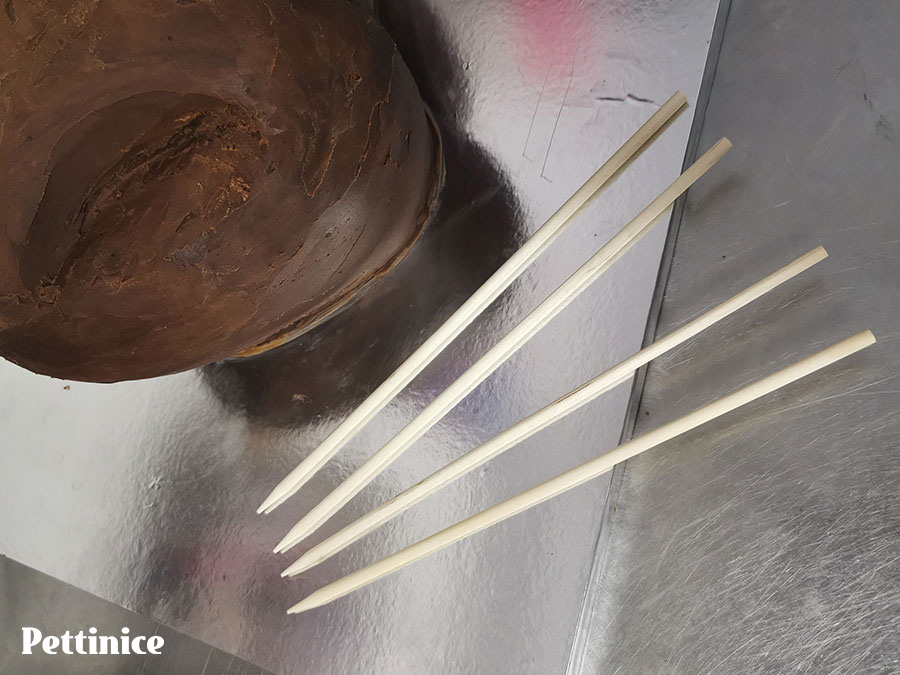
Measure two wooden dowels by inserting them into the space where the head will be resting and cutting them level with the cake.
Mark where you will cut.
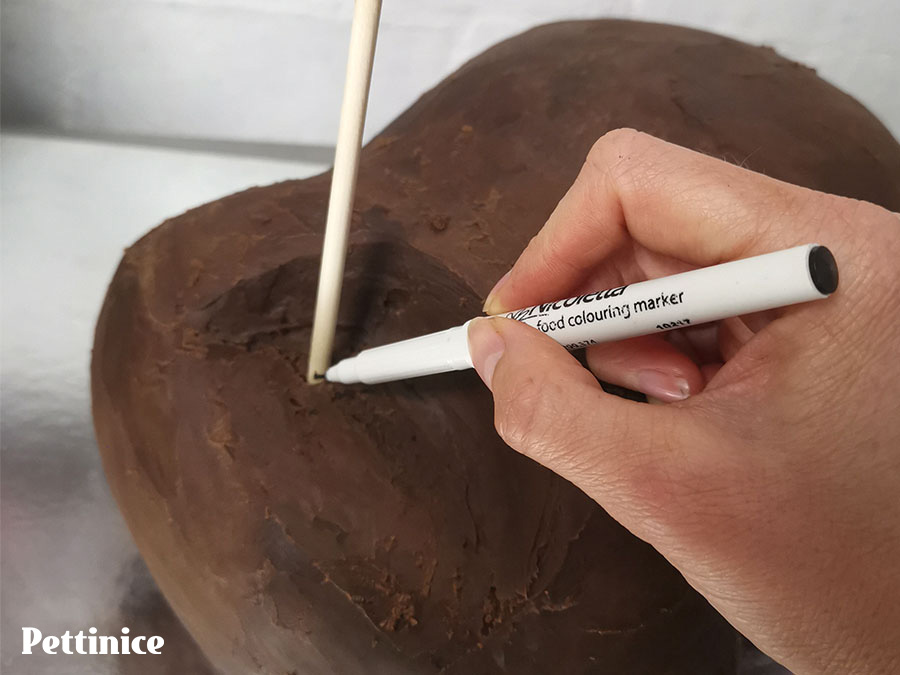
The dowels are level to the cake.
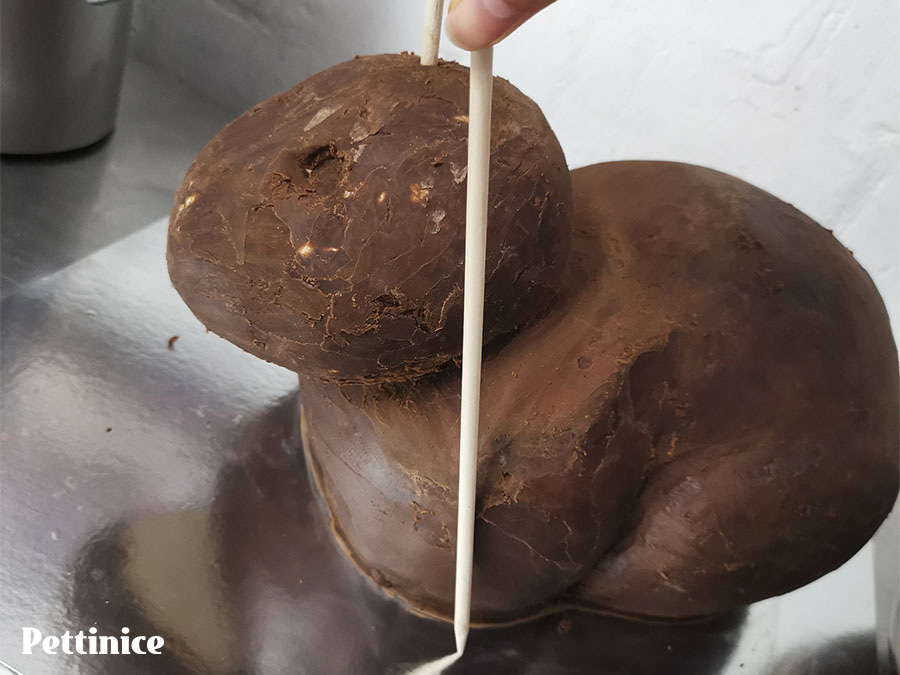
Immediately insert a long sharp dowel straight through the head, the thin cake card that the head is resting on and the rest of the bunny's body, into the cake board, to secure the head in place.
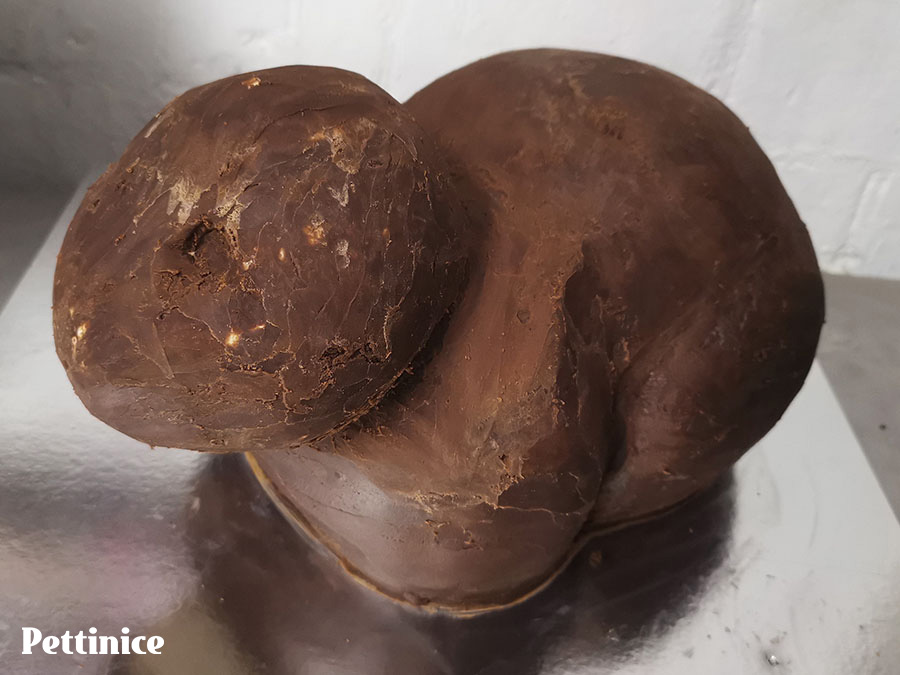
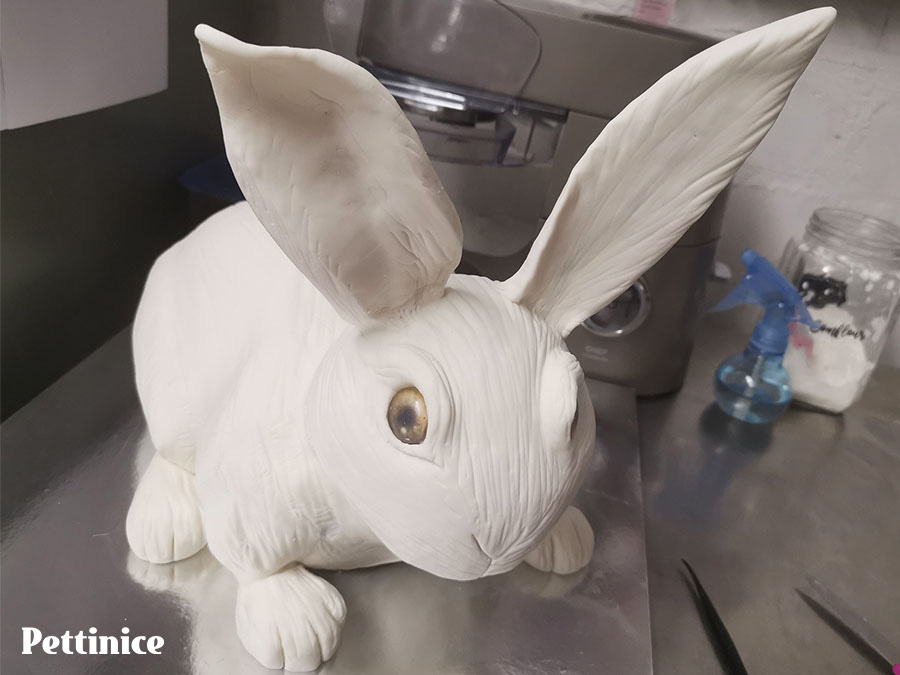
This is your bunny, ready for its Pettinice covering!
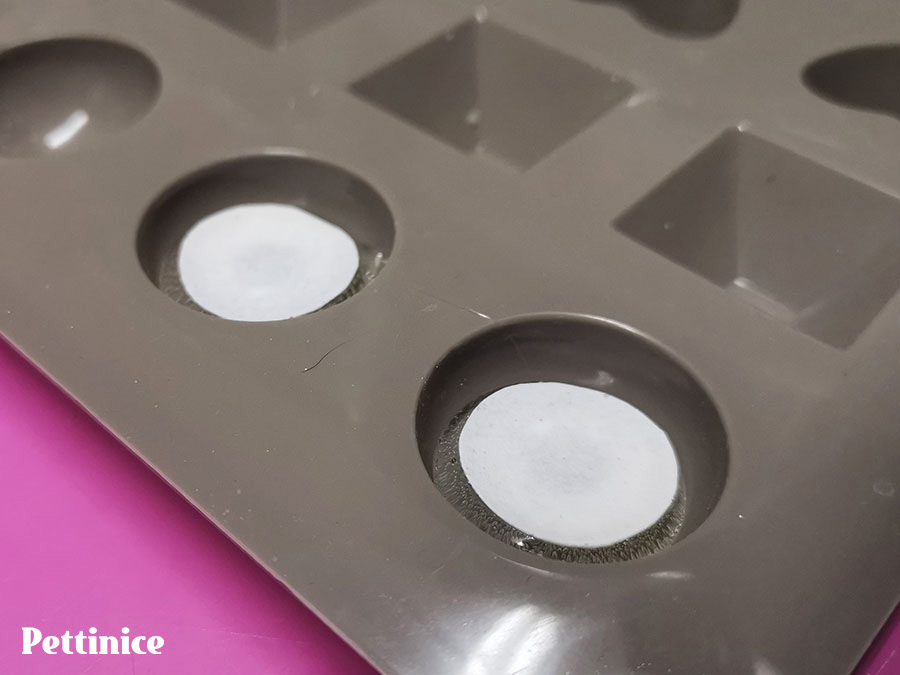
Making the eyes
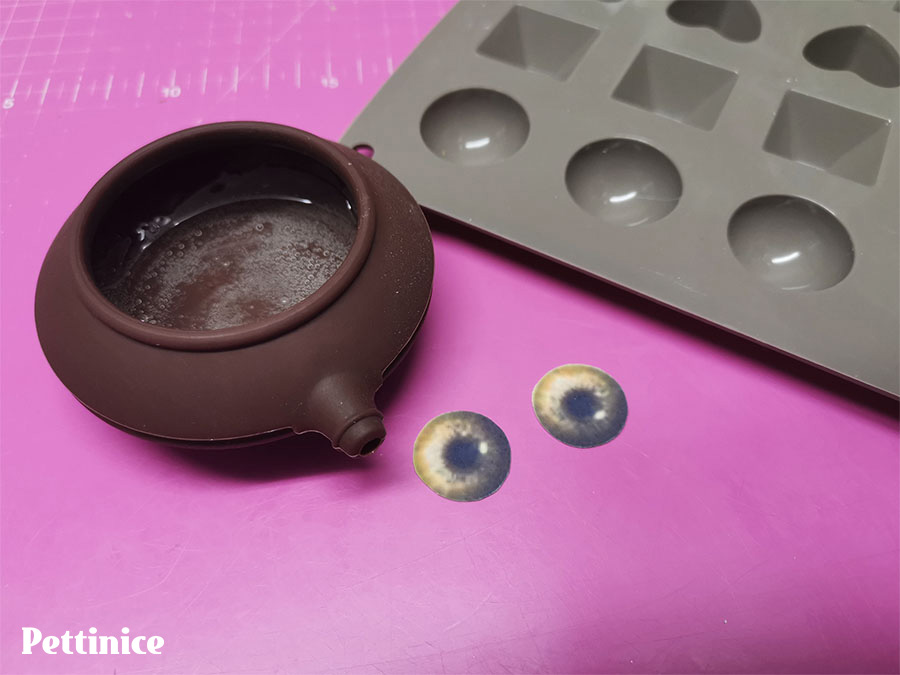
Melt down some ready to use isomalt in a silicon container in the microwave till completely melted.
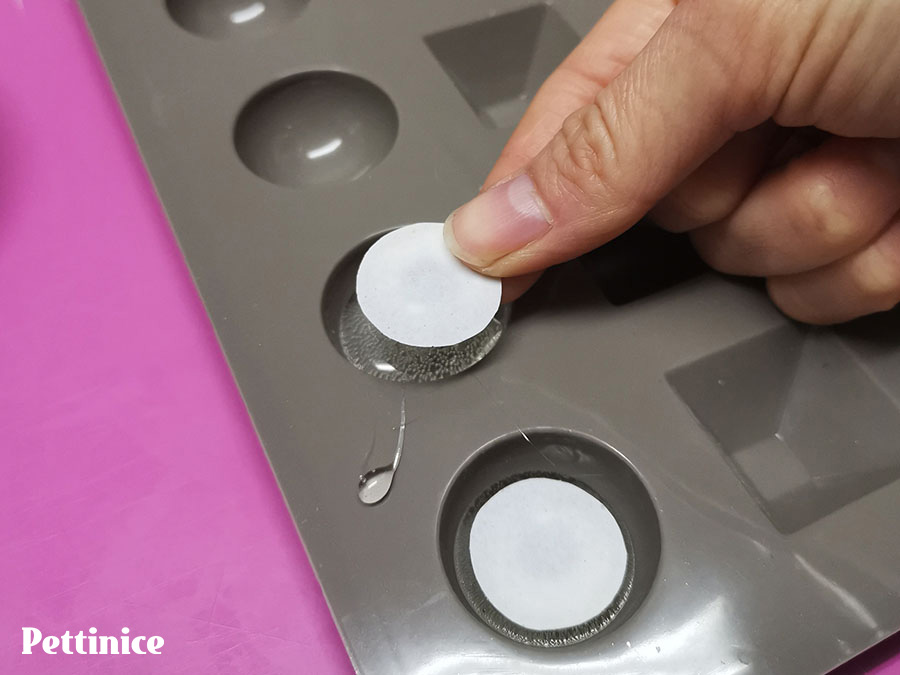
Pour into a half sphere silicon mould that is the correct size for your bunny's eye sockets. Place your edible print eyes, facing DOWN, onto the isomalt.
Be careful not to touch the isomalt. It is boiling hot and will cause extreme burns.

Allow to cool and harden completely then remove from the moulds.
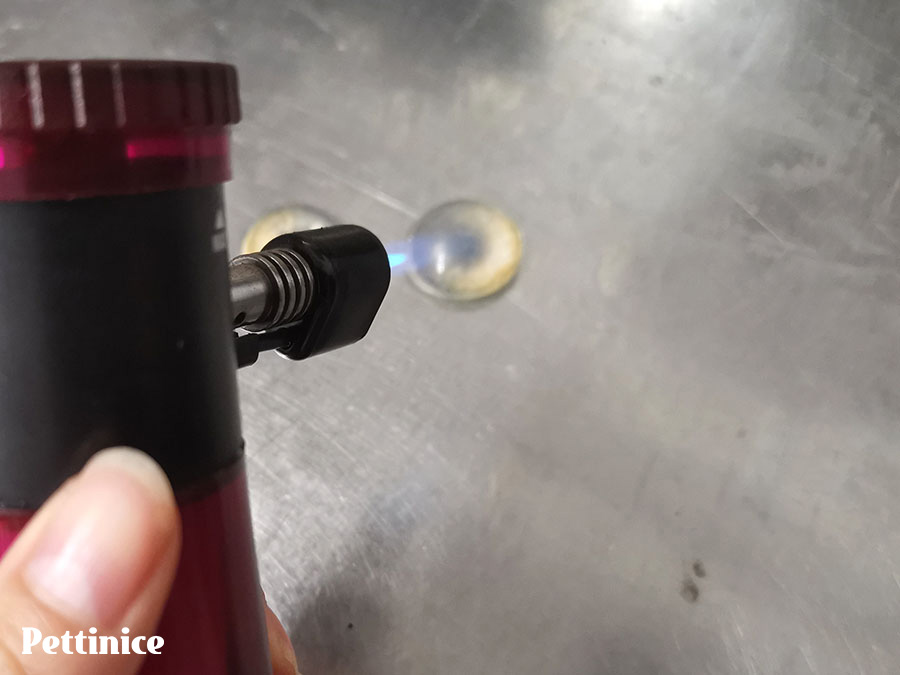
Use a creme brulee torch to quickly heat them, removing all the air bubbles on the surface. Don't do this too long as they will melt again.
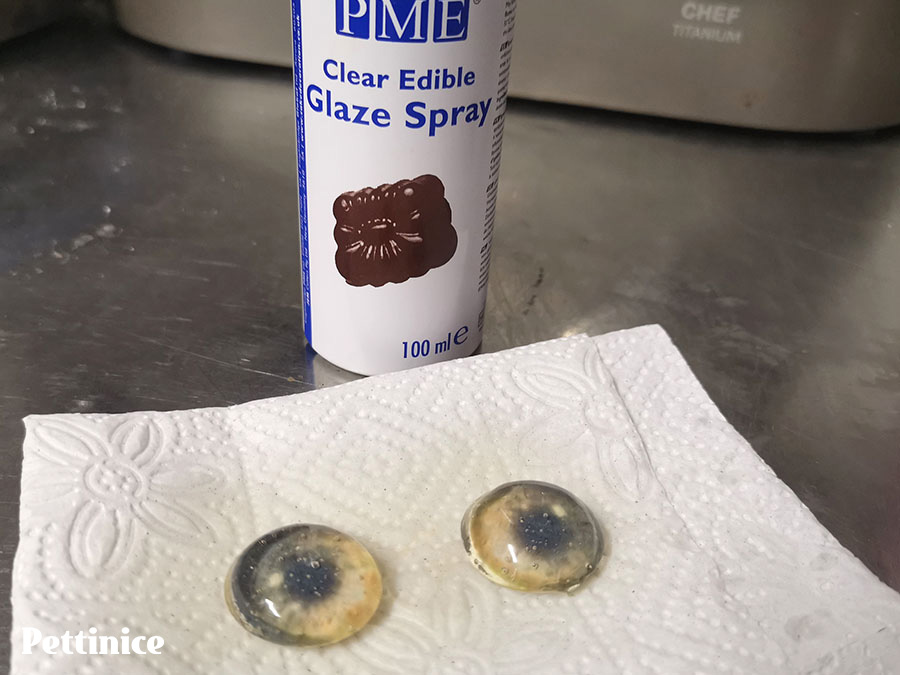
Apply an edible glaze spray to keep your eyes clear. If you don't apply this, they will become dull.
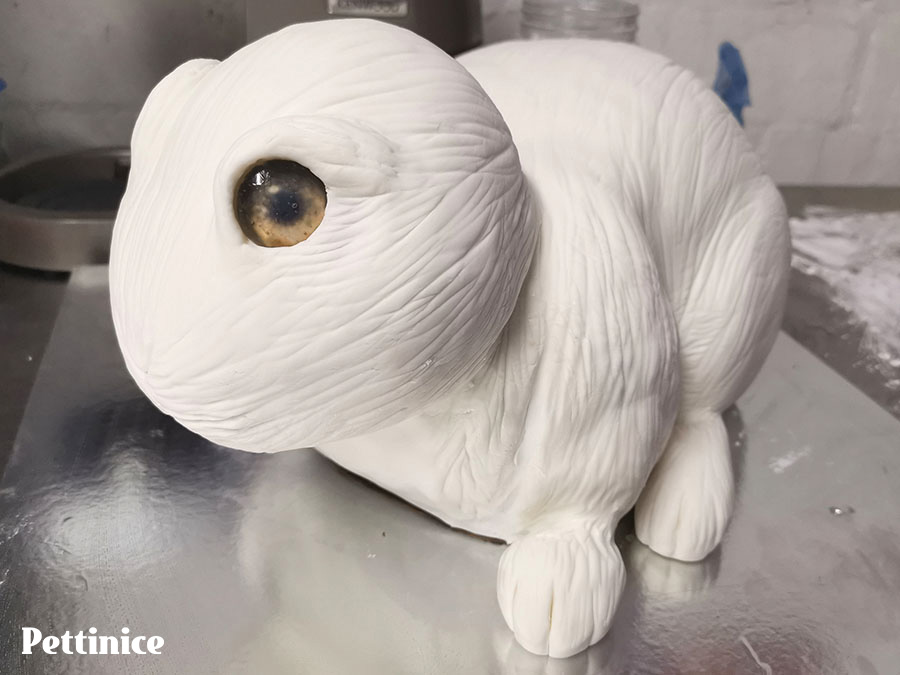
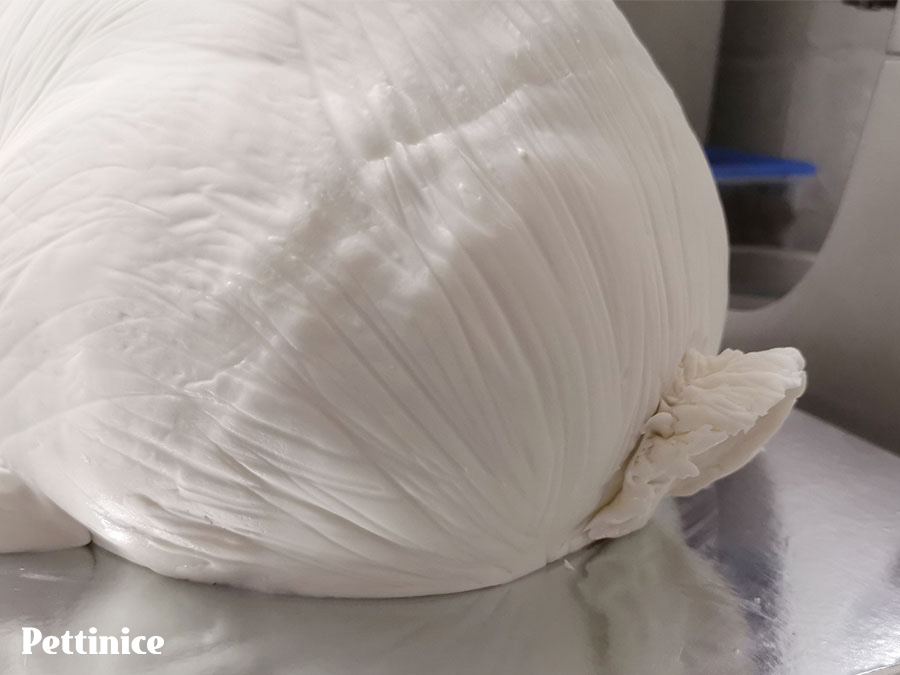
Covering the cake in Pettinice fondant
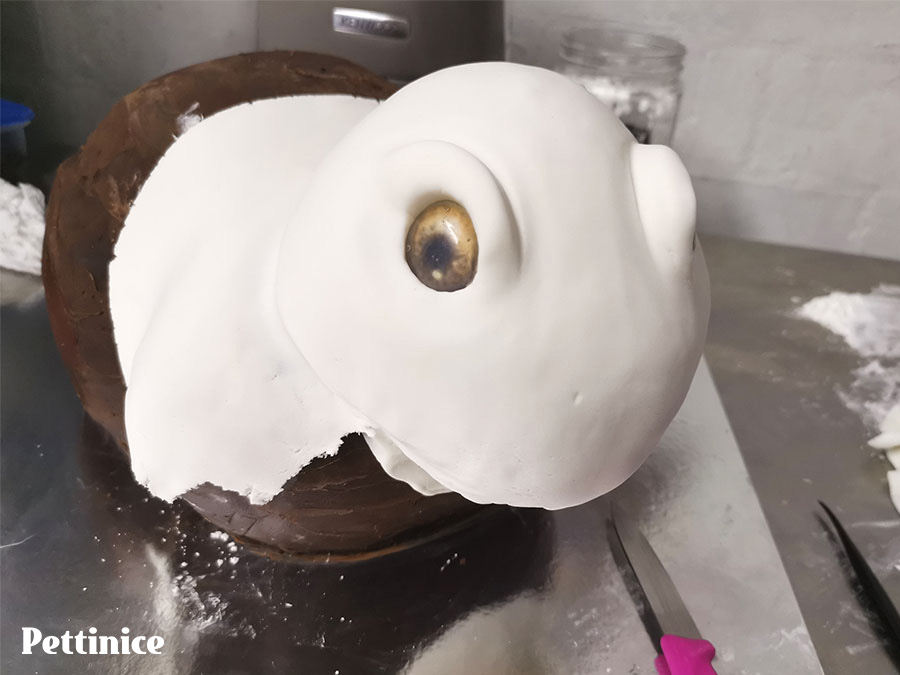
Now we are ready to cover the cake. I added some fondant sausage shapes above the eye sockets to create some arches before covering in fondant. Cover first, then add the eyes.
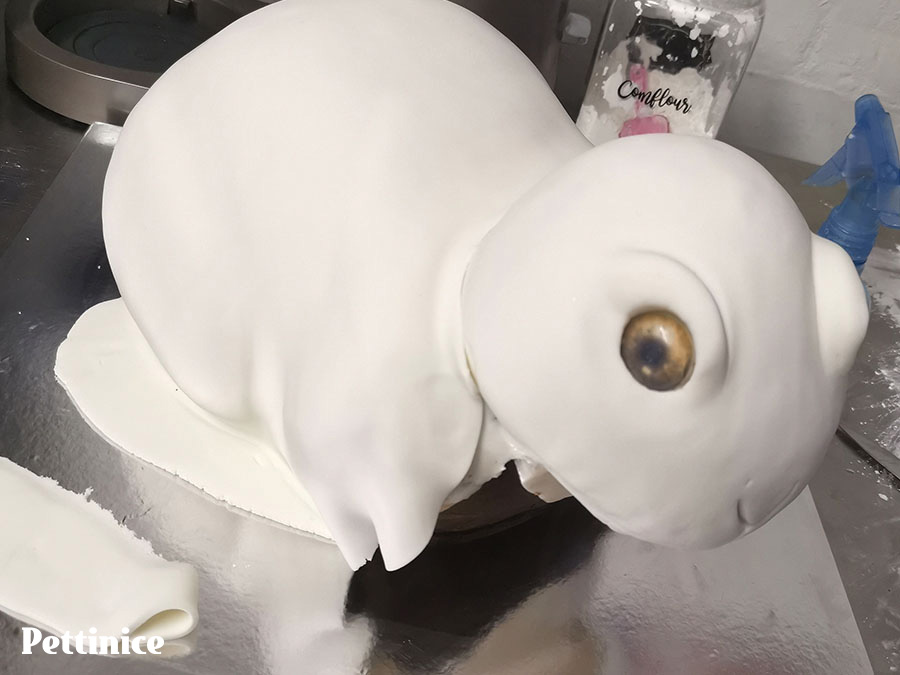
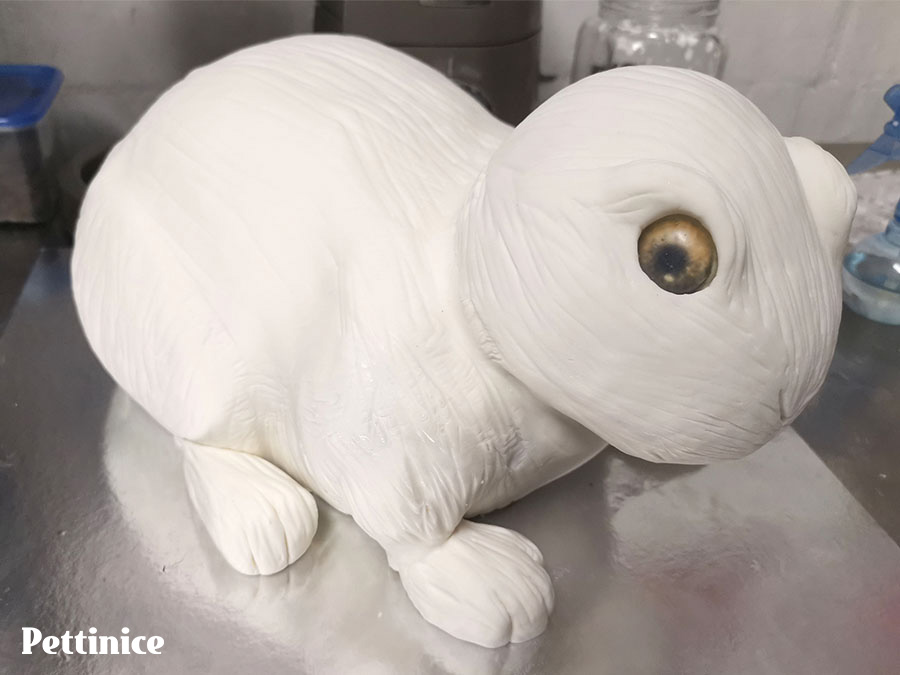
Next, I cover the body as seen and start adding a few details while fondant is still soft.
Trim excess and smooth.
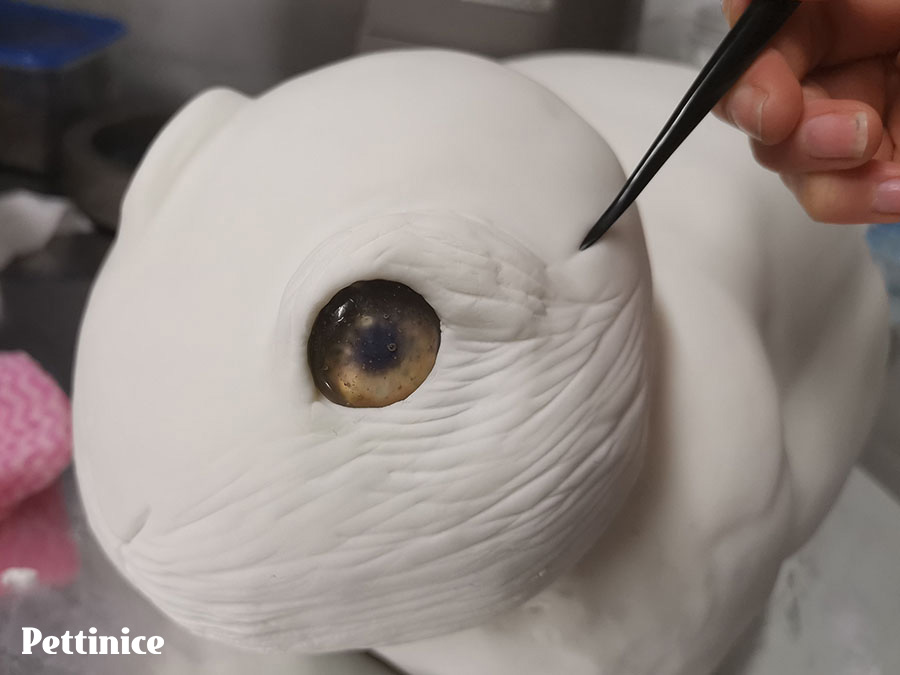
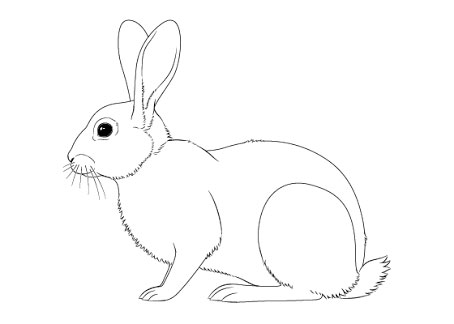
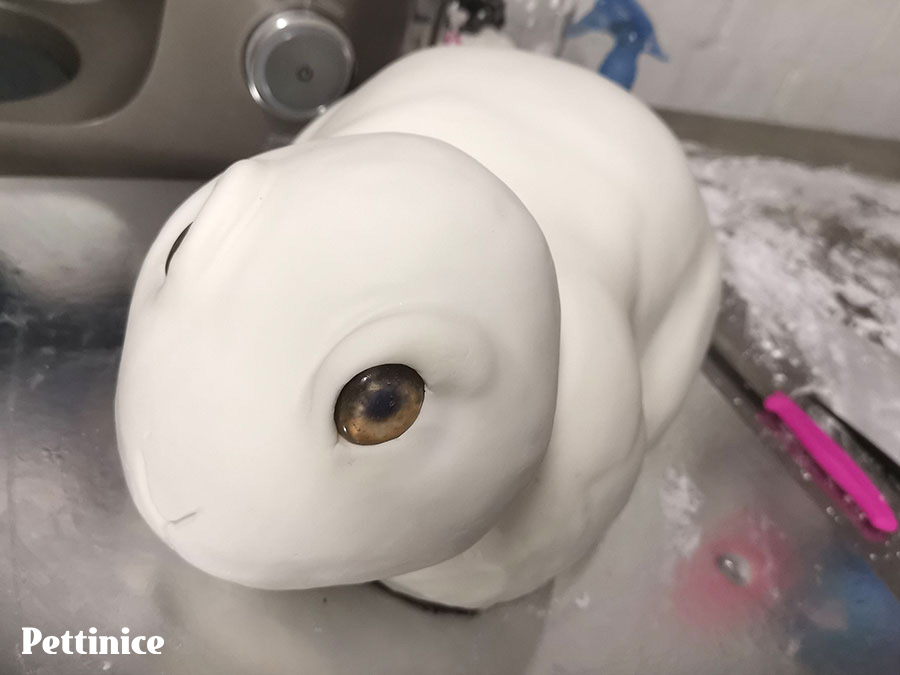
Use your veining tool and start creating fur lines all over the face and body. Use a real image as reference to see in which direction the fur lies on the different parts of a bunny's body.
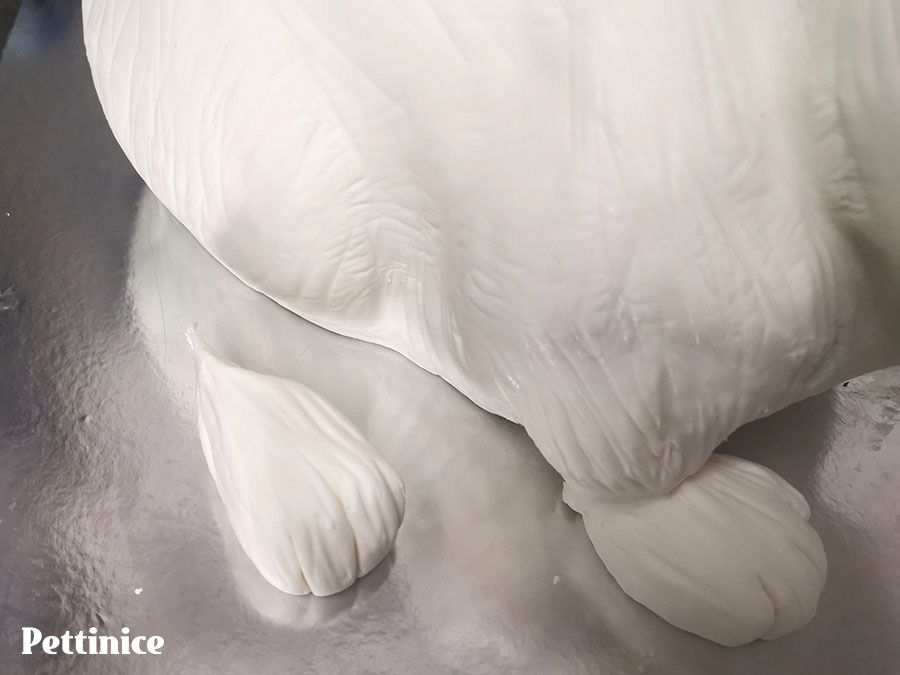
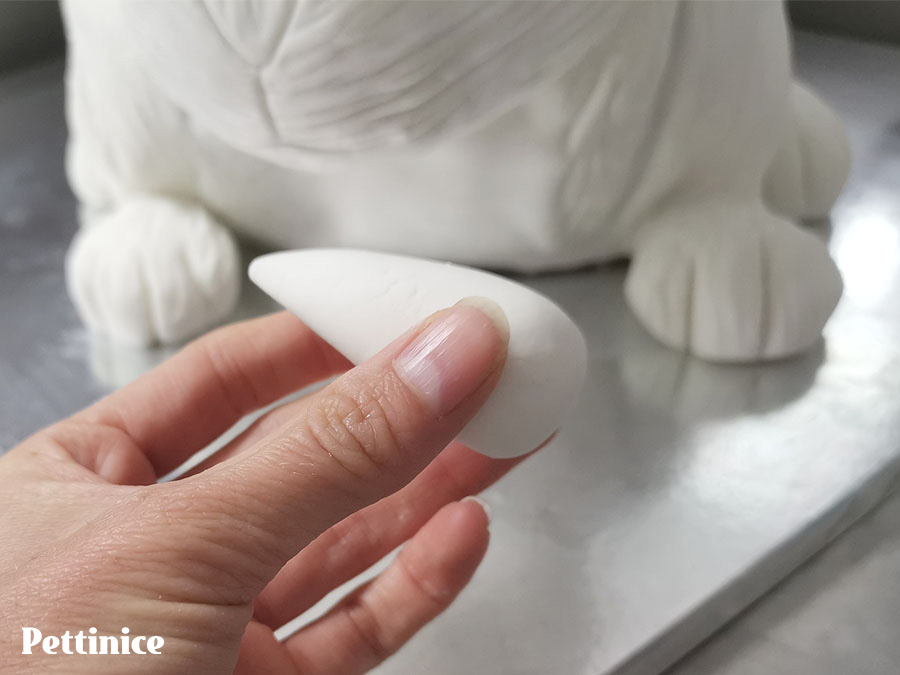
Start free hand shaping the front and back feet. Sometimes you reshape a foot 4 times before its the perfect size!
Play it by eye or again, use your template for guidance.
Remember to also make fur lines on your feet as well.
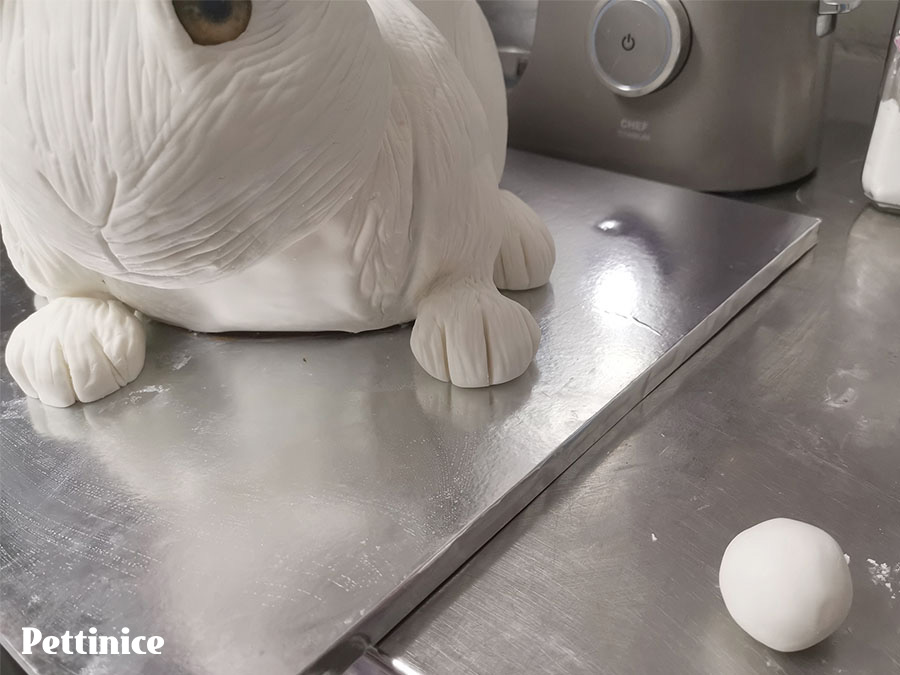
Roll a ball of fondant for the tail.
Make a sausage shape that is tapered into a point on one end.
Flatten it slightly using the palm of your hand so that it still has a rounded middle, then use the veining tool too make furry lines.
Remove from the bench.
Fold it to create a slight bend in the middle.
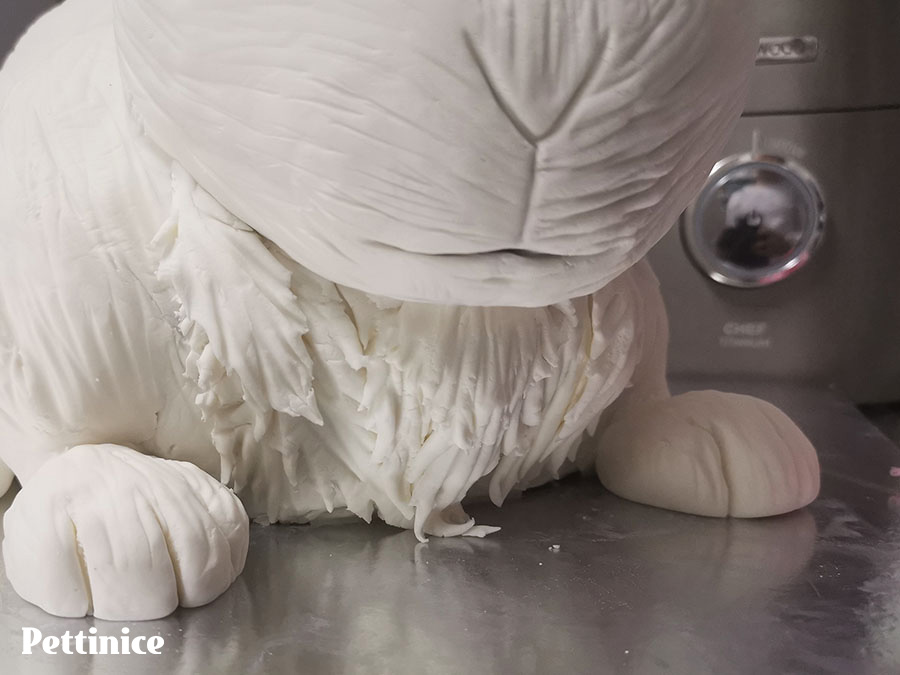
Apply to the bum, bottom centre!
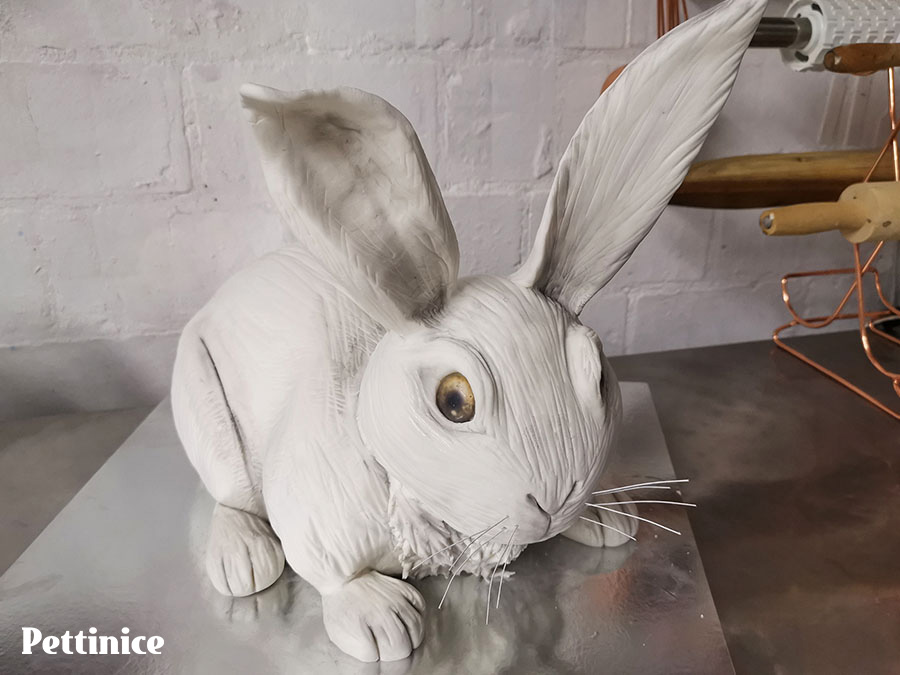
Adding the ears
Add Tylose to a small batch of white Pettinice preferably a day in advance. Keep this airtight and covered overnight.
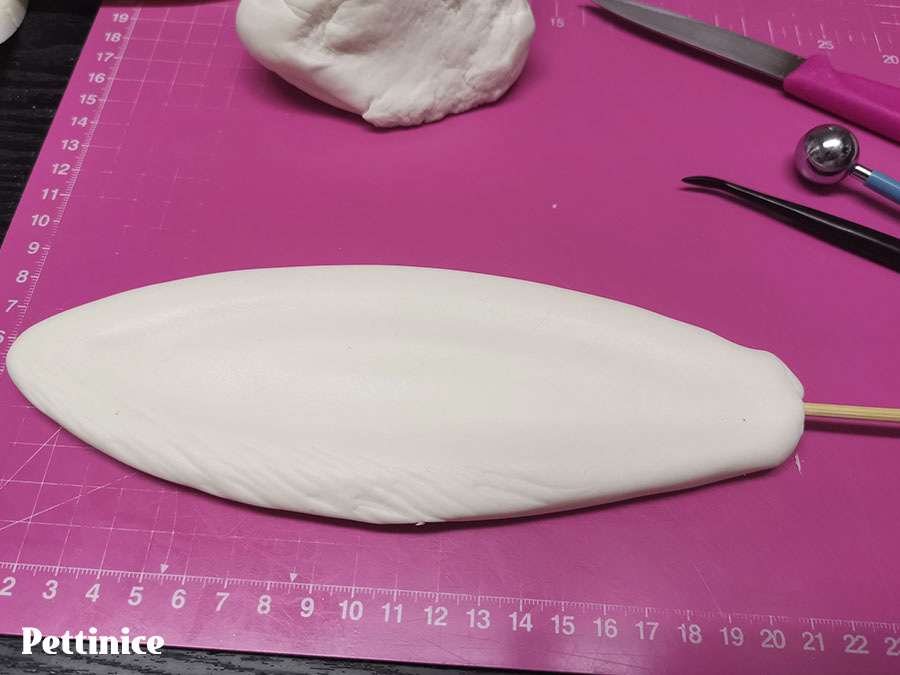
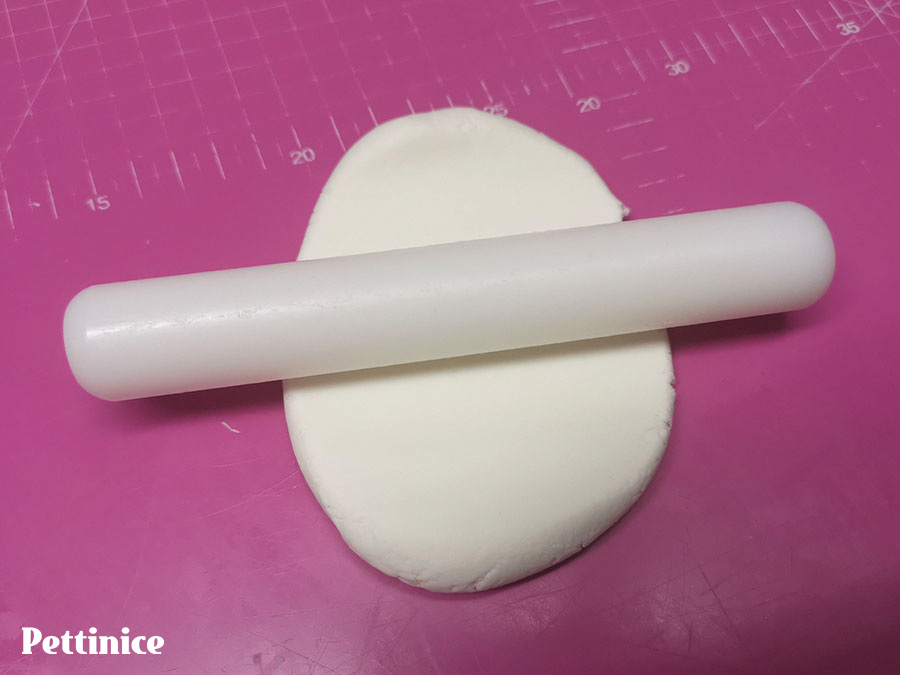
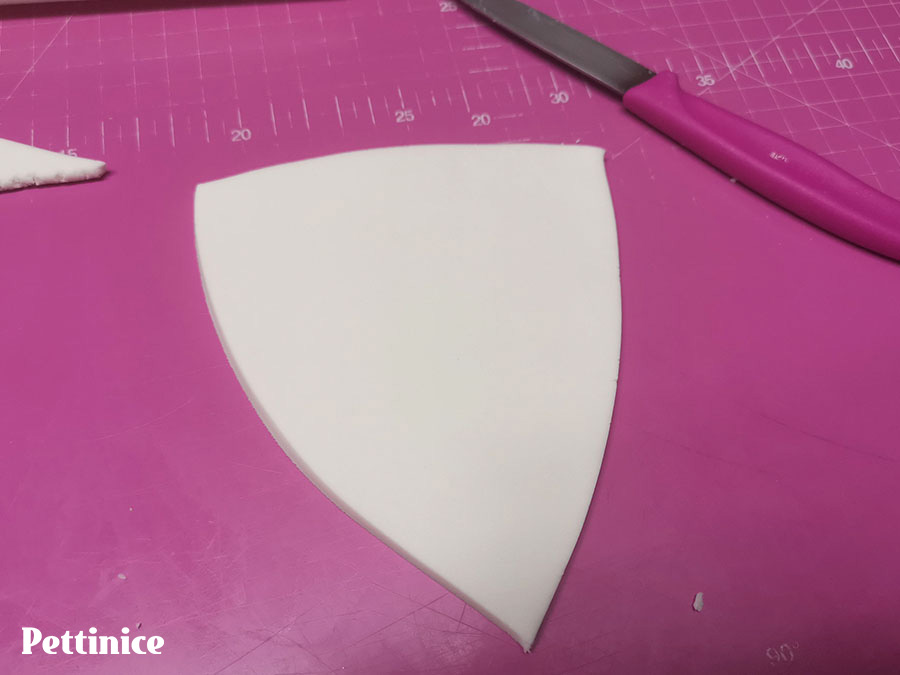
Shape the ears out of your prepared Pettinice and insert a kebab skewer into the centre of each ear.
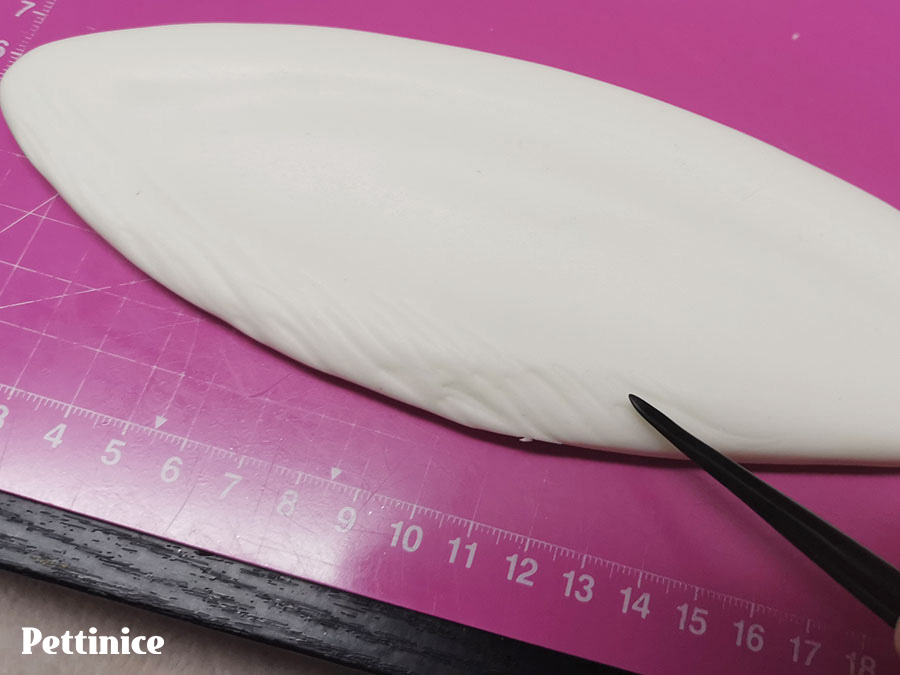
Use your dresden tool to add fur details.
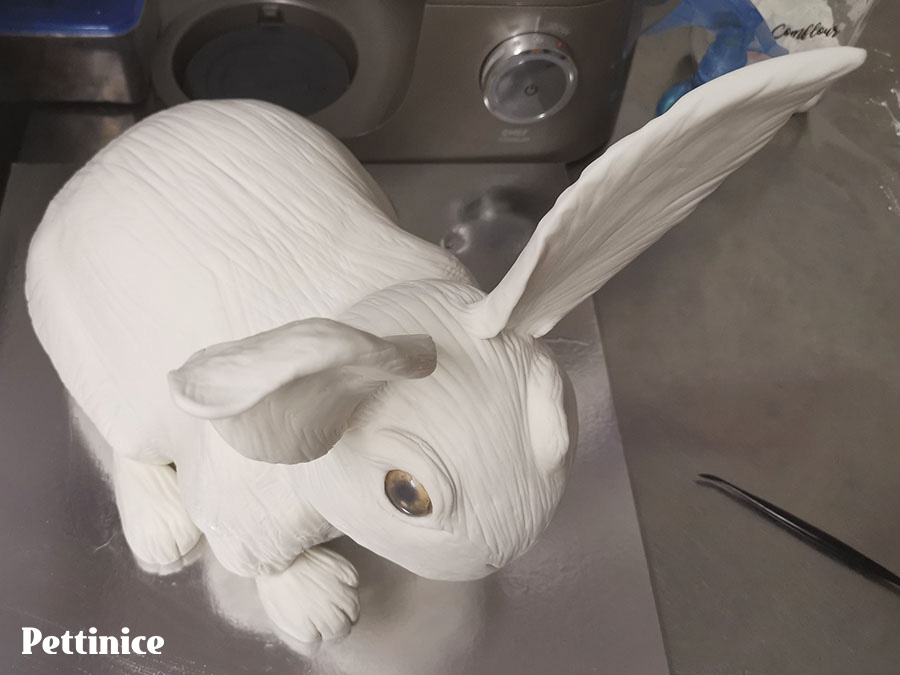
You can shape and bend them to whichever shape you prefer after inserting them into your cake.
Use a little bit of Pettinice to merge the bottom of the ears to the head.
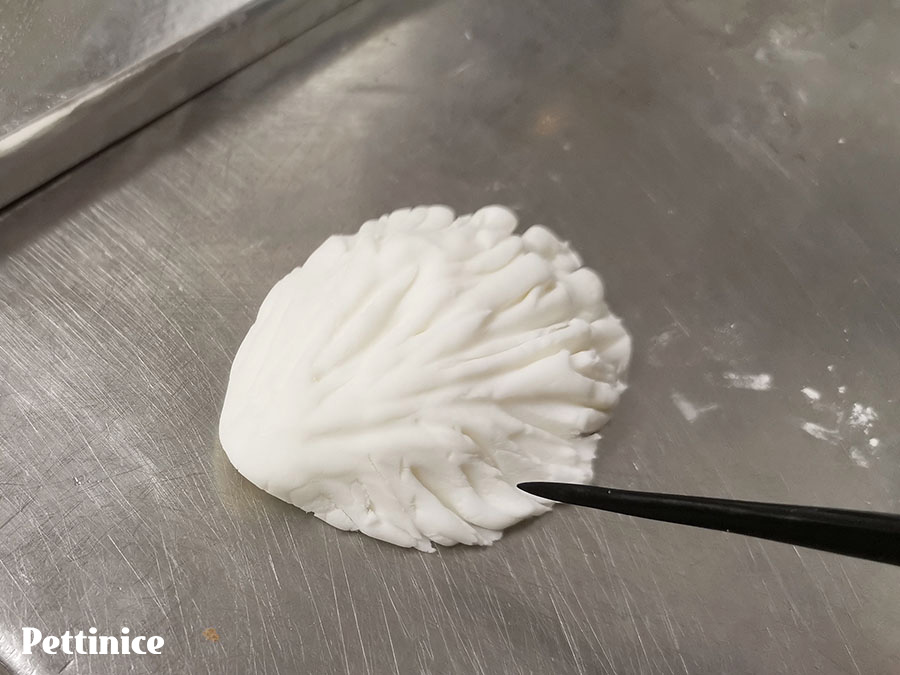
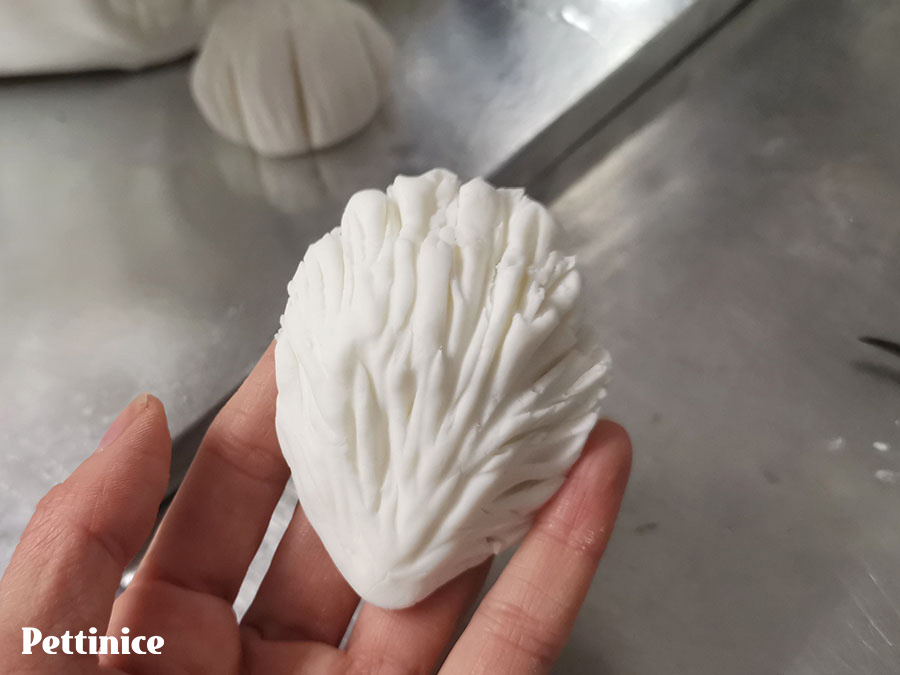
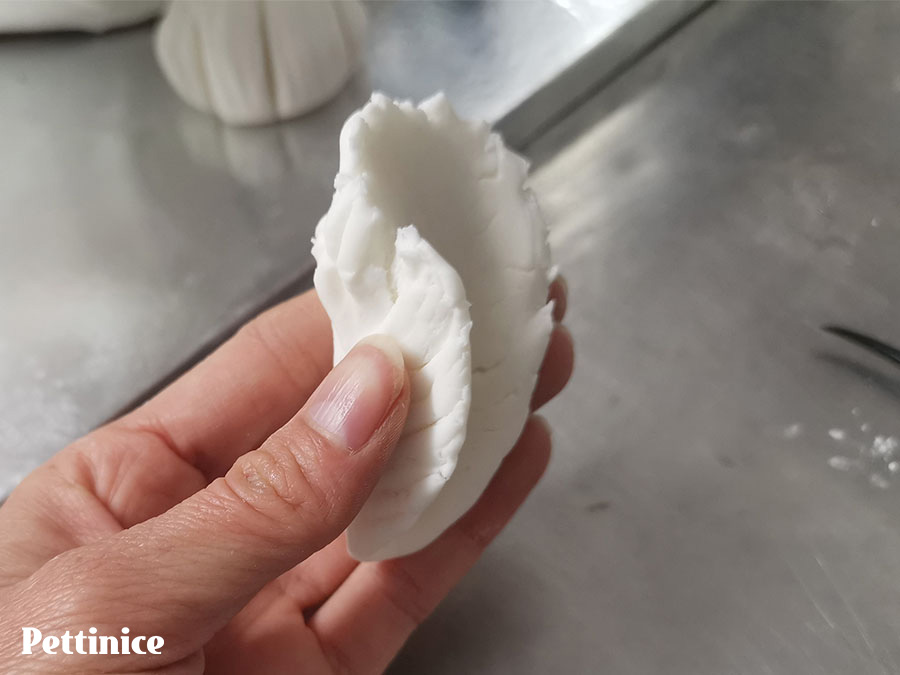
Adding the chest fur
Roll out a larger ball of Pettinice (about 4 times the size of the tail).
Cut into a triangular shape that would fit his chest. You can measure it against the cake before the next step.
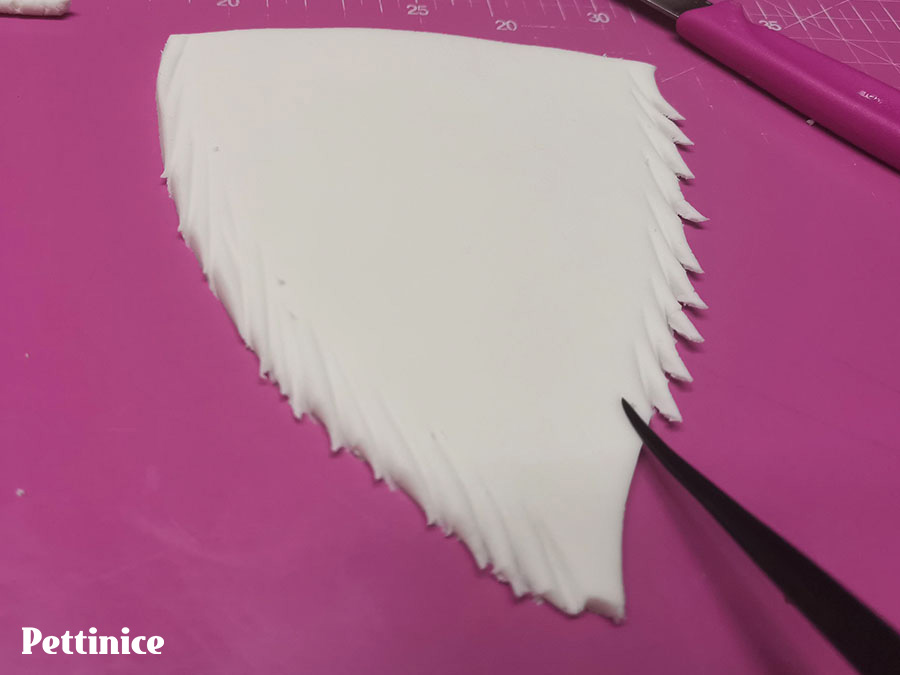
Once again, use your veining tool to apply deep fur lines around the edges.
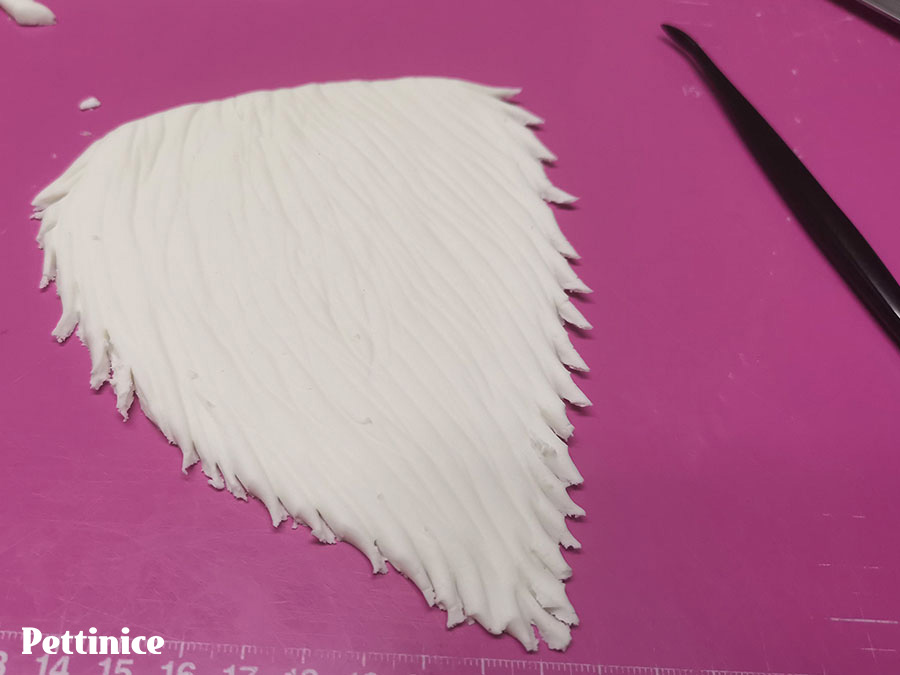
Complete!
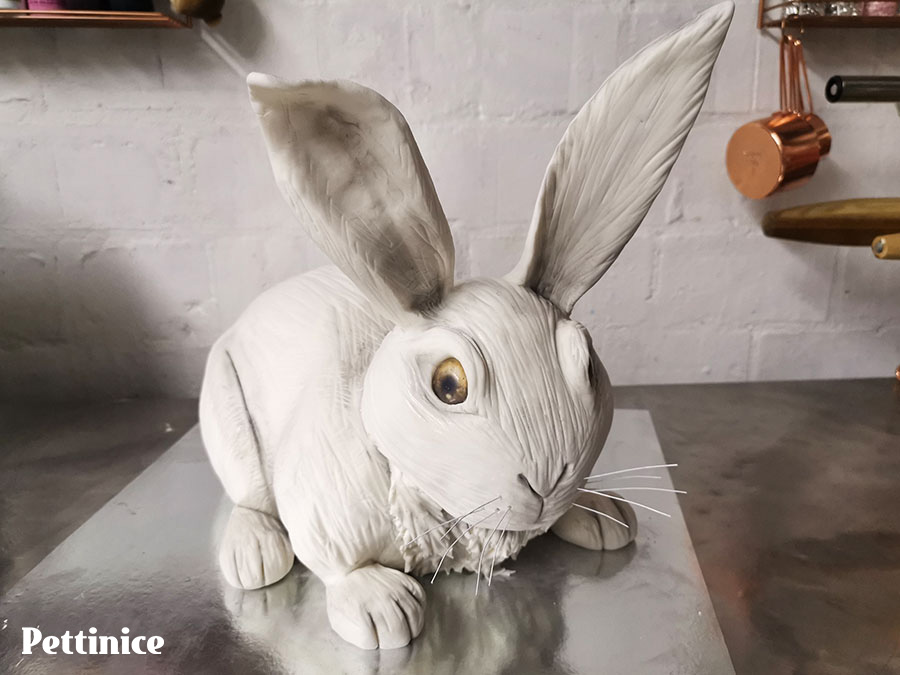
Final details
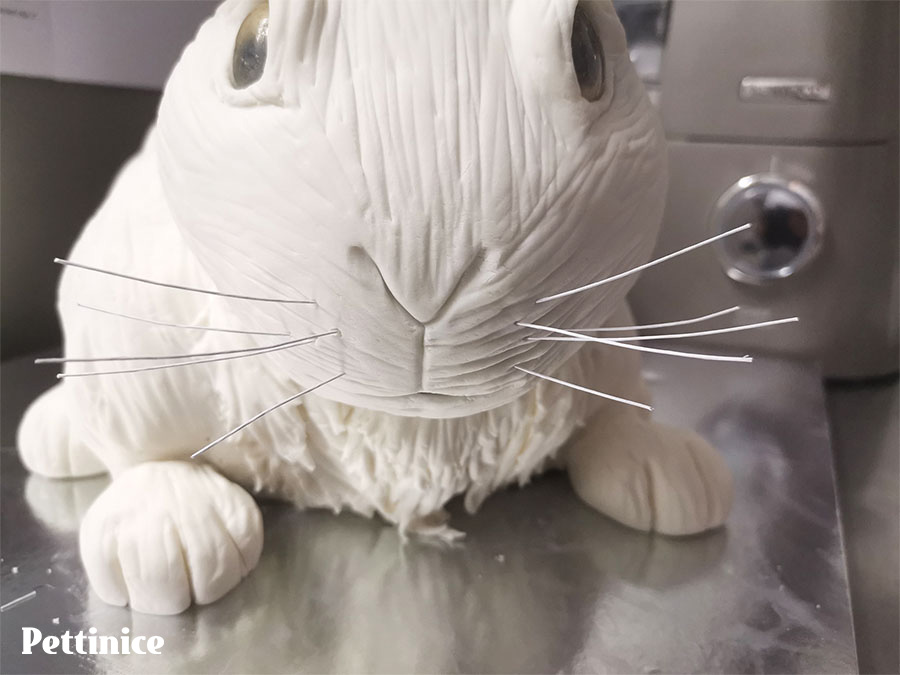
I used some florist wire for the whiskers.
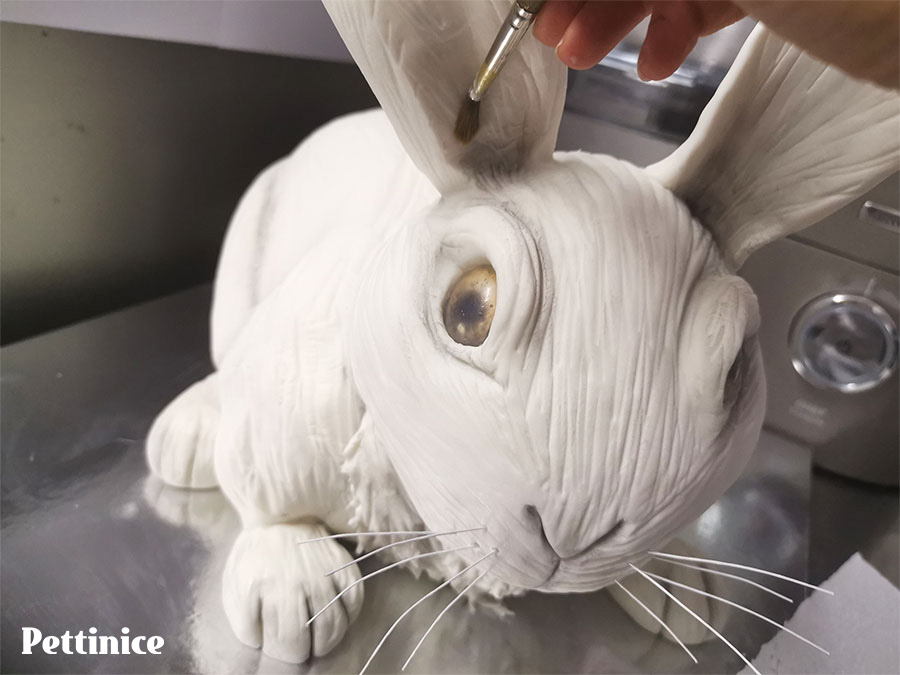
Apply your edible color powder/dust to the insides of the ears, the creases above the eyes, between the toes, and anywhere you feel it needs a bit of shading.
Shading progress.
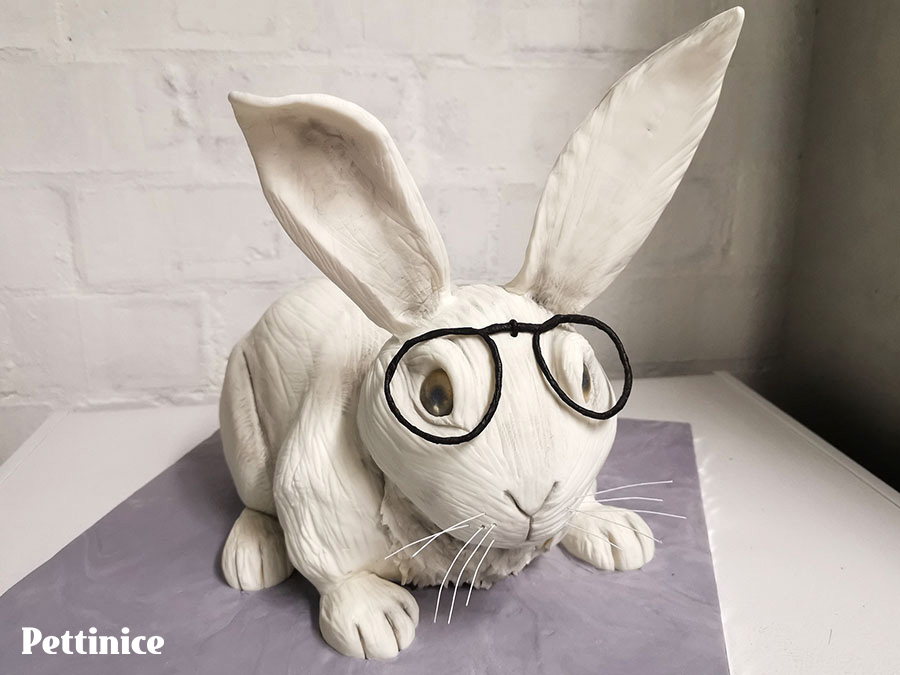
Lastly I added some handmade florist wire glasses that I covered in black florist tape.
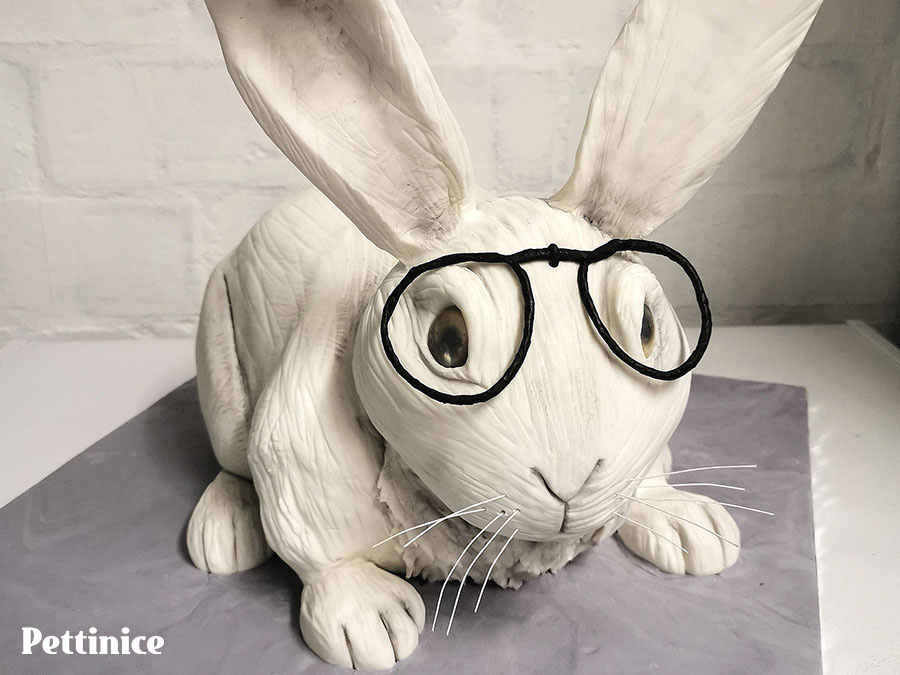
Cake board is covered in grey colored Pettinice.
And you are done! Hope you enjoyed this Petitnice tutorial and can't wait to share my next one. Until then, all the best with your sweet cake creations. Cynthia. x
Cynthia Janse van Rensburg owns Candy & Lace Cakes based in Cape Town since 1999. Her fascination began with cupcakes in 2009 and has evolved to creating celebration cakes. She cannot imagine doing anything else other than cake design. Cynthia’s passion is 3D carved and sculpted cakes, as well as gravity defying designs.
See more of Cynthia's cakes at