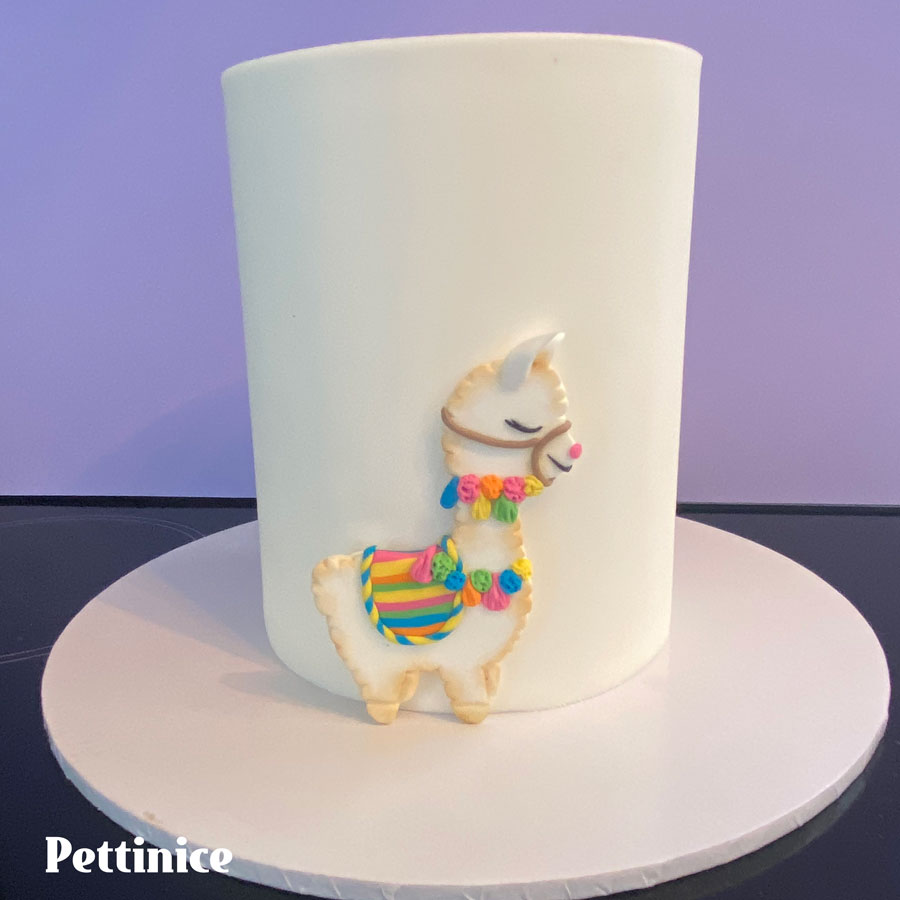
How to make a llama and cactus cake with Amanda Jull
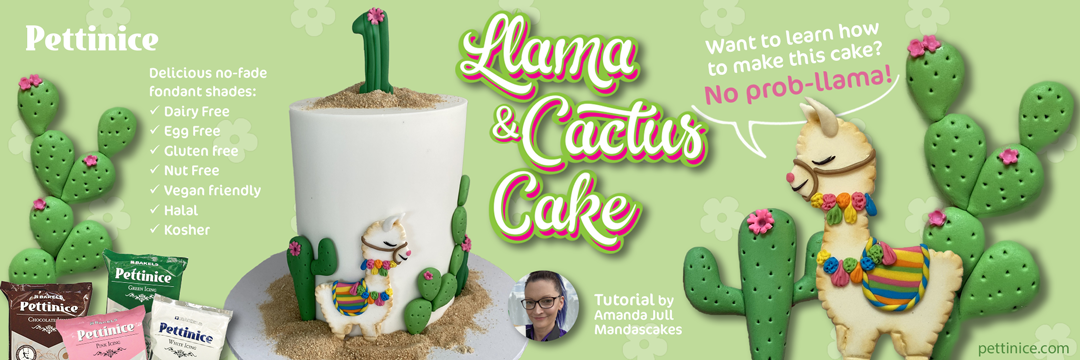

Learn how to make this cute llama and cactus cake with Amanda Jull from Mandascakes
What you need:
For the llama
- Small rolling pin
- Sharp craft blade
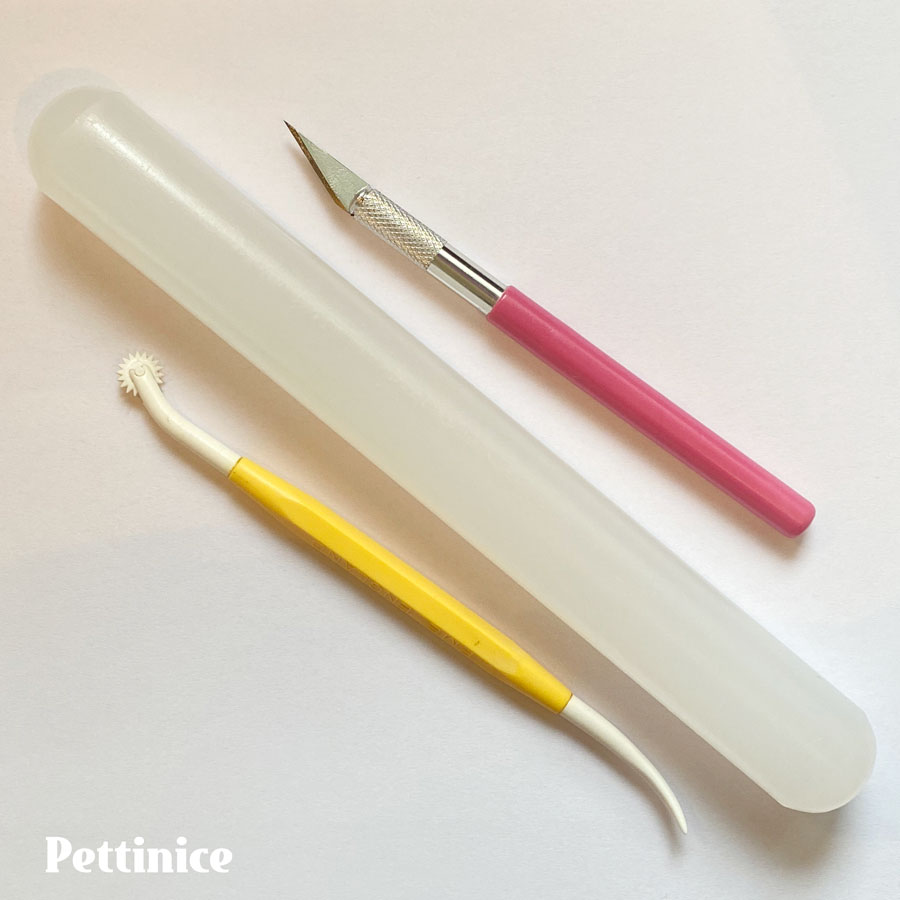
- PME quilting too (or similar like Dresden)
- Small brushes for gluing and dusting
- Sharp knife
- Printed Llama template
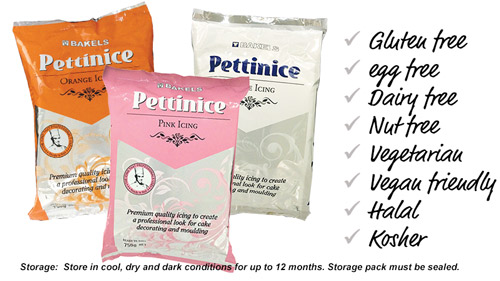
- White Pettinice fondant, and any coloured scraps of fondant (including brown and black)
- Vegetable shortening like Crisco
- Tylose
- Dusting powder
For the cactus
- Various shades of green Pettinice fondant and a little pink
- Dresden or quilting tool
- Sharp knife
- Number cutter (optional)
- Various tiny blossom cutters
Creating the llama
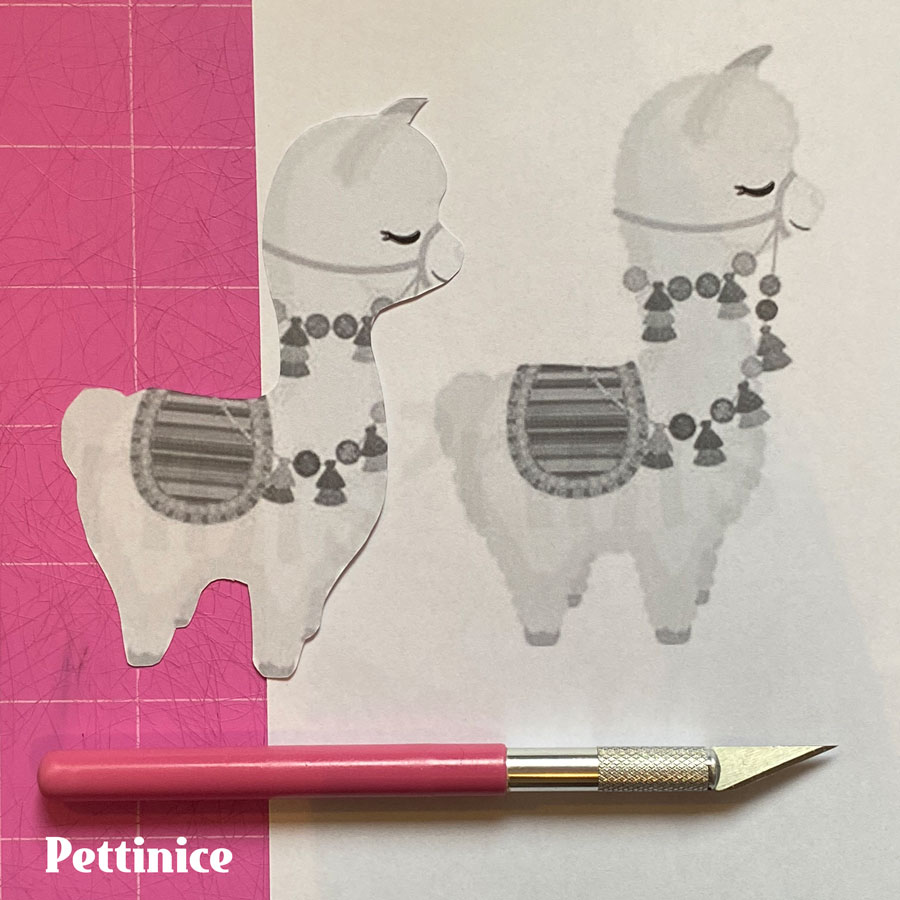
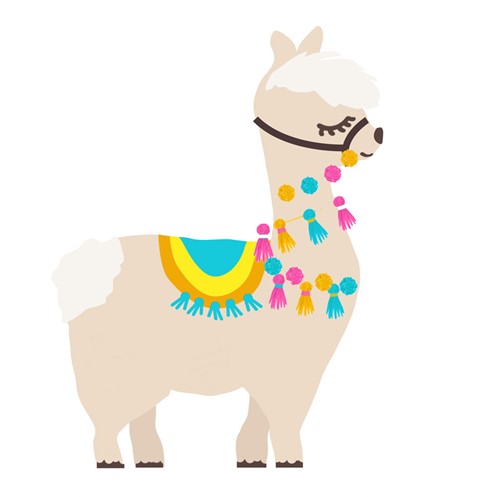
Print a llama picture. This example is 10cm tall, but anything between 10 – 15cm is perfect. I just googled llama clip art and found one that I liked. I print in black and white and cut it out using a craft knife. Don’t worry about the bumpy/curly fur edges, just cut the general shape, the fur texture will come later.
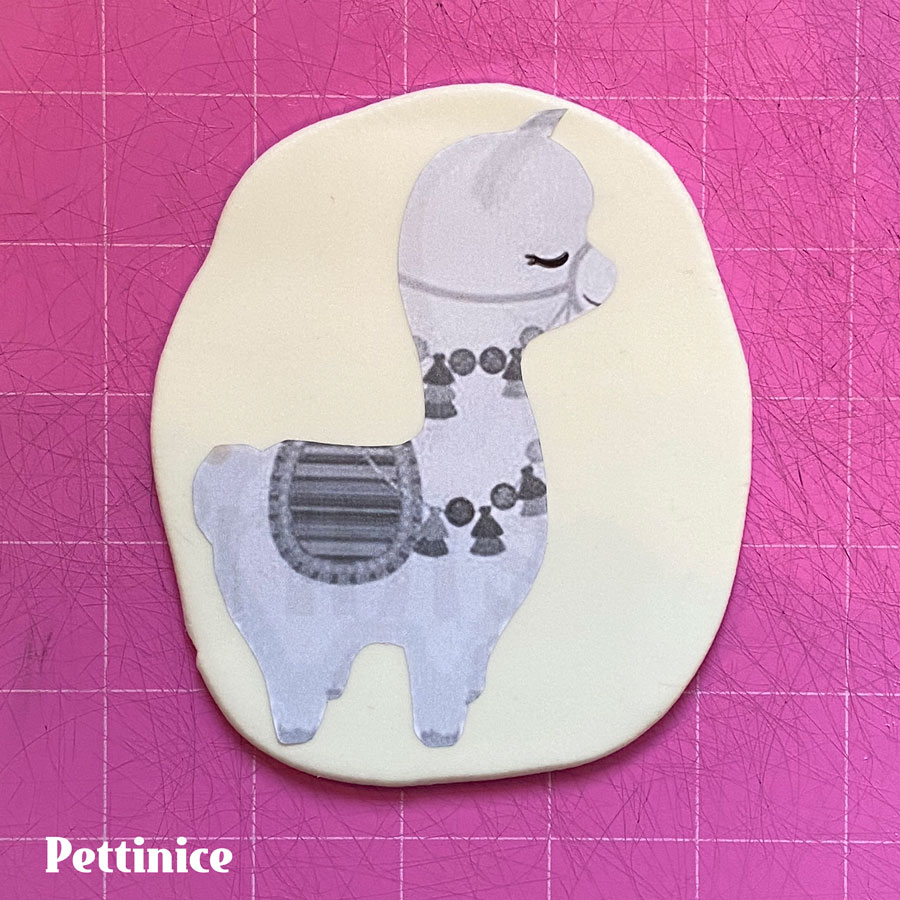
Roll out a piece of white fondant or gumpaste with added tylose (approx 50-60g), just big enough to fit the llama cut out. I smear a small amount of vegetable shortening (Crisco is my go to) on the cutting mat to adhere the fondant to the mat while cutting.
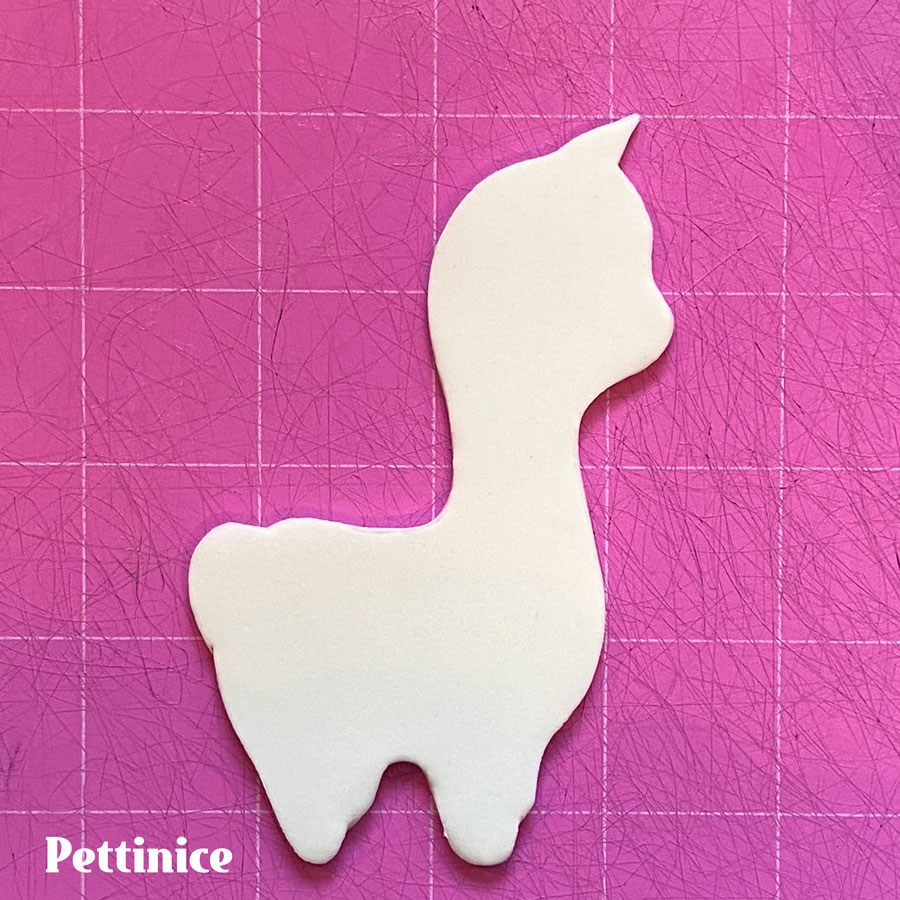
Smear a little vegetable shortening on the surface of the fondant and stick the llama template onto this. Cut around the template, again, don’t worry about the bumpy/fur edge just yet.
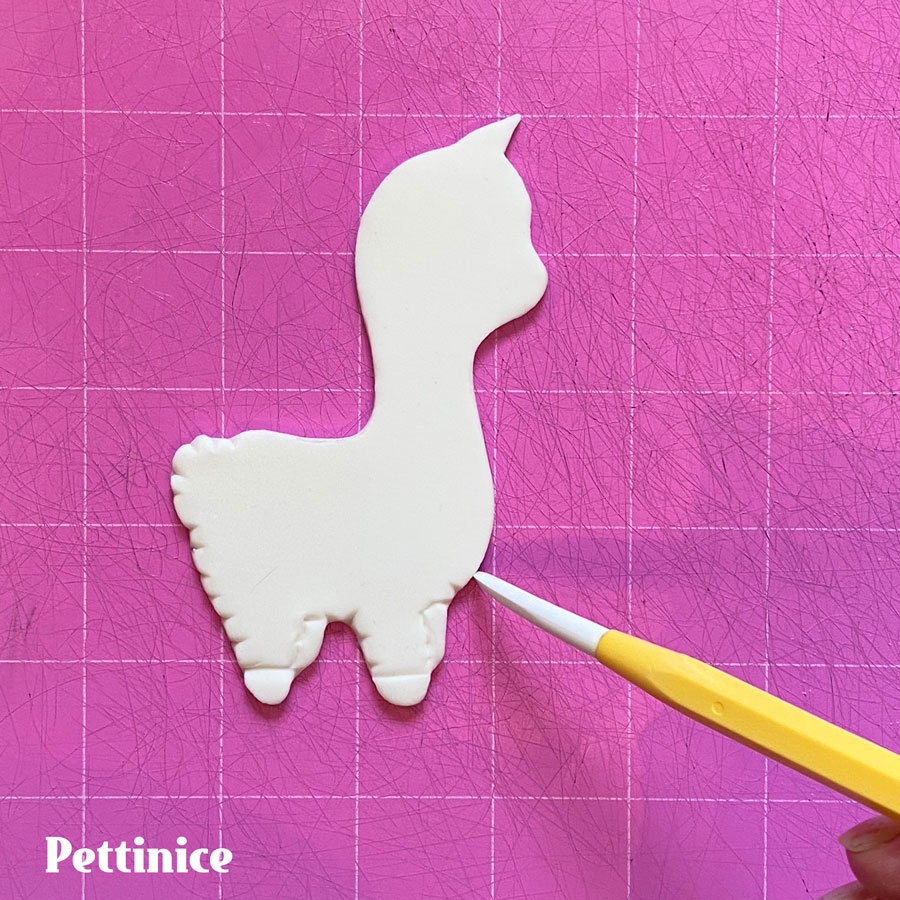
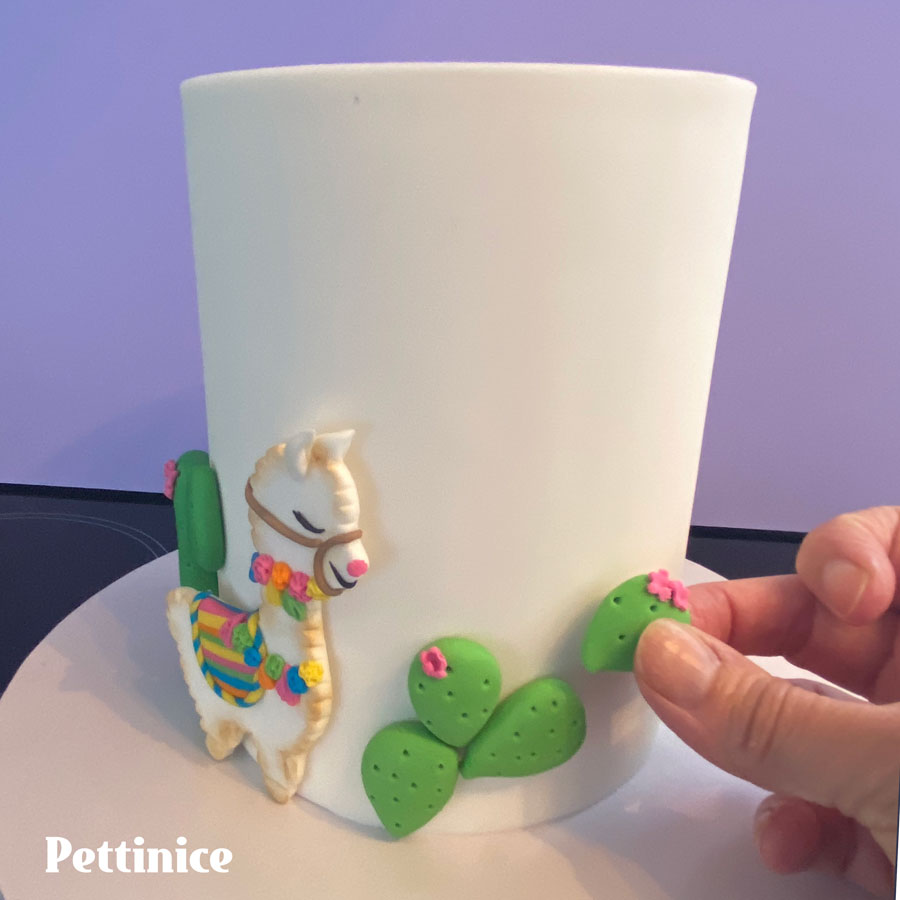
Using the quilting or Dresden tool, make little indents all the way around the cutout llama except for the area where the saddle will be, this will give it the curly fur look.
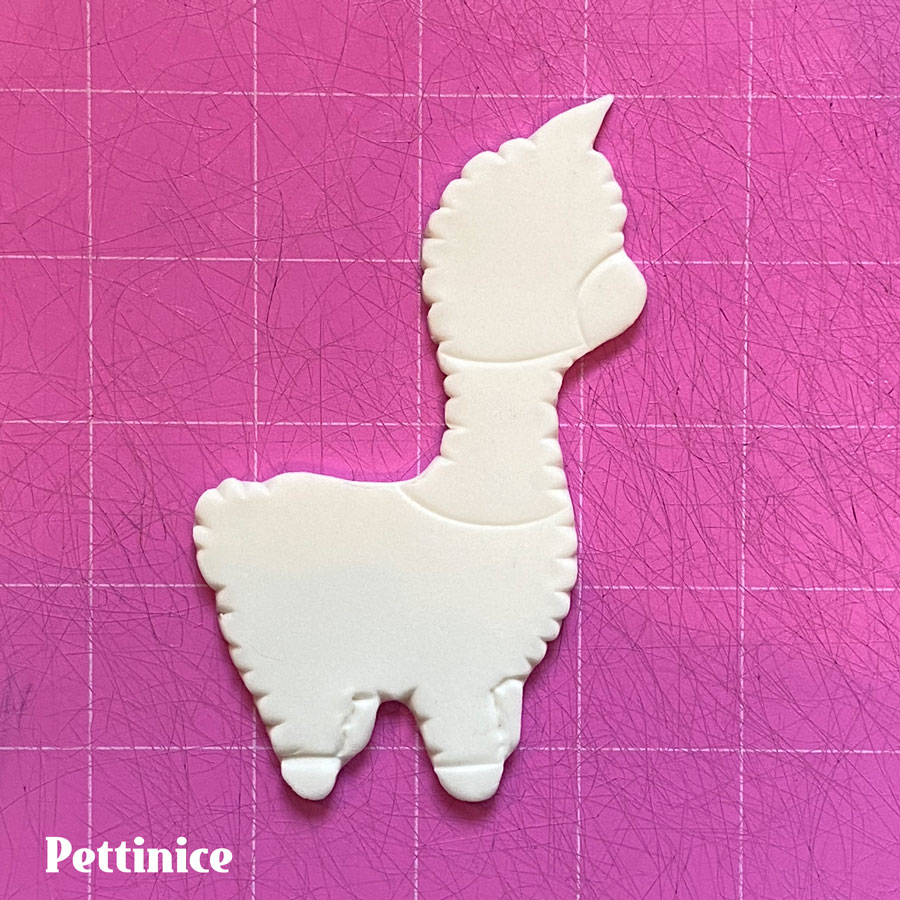
Smooth the edge with your finger to round off any raw cut edges. Make indents where the hooves are and don’t forget to make marks to show there’s 4 legs. Also score lines where the straps around the muzzle will go and around the body.

Gather your Pettinice fondant for the details. You can use any of our colour ranges, or mix your own pallet together.
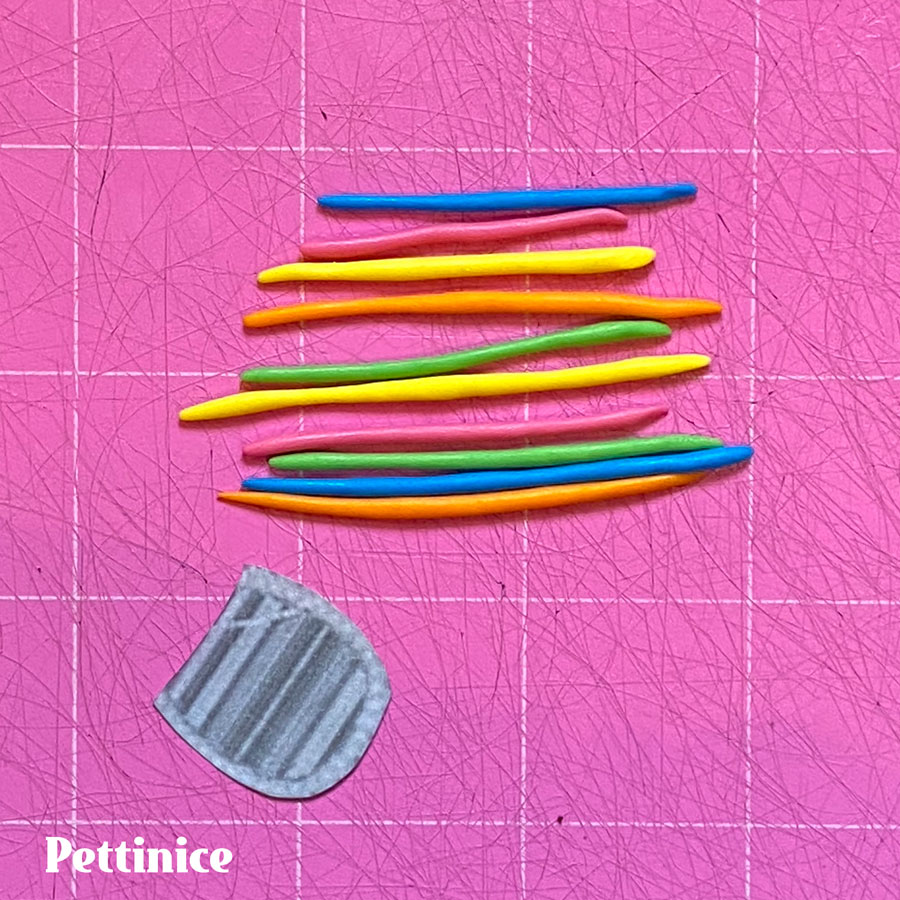
o make the saddle. Using the same template cut out the saddle. Roll various colours of fondant into thin sausages.
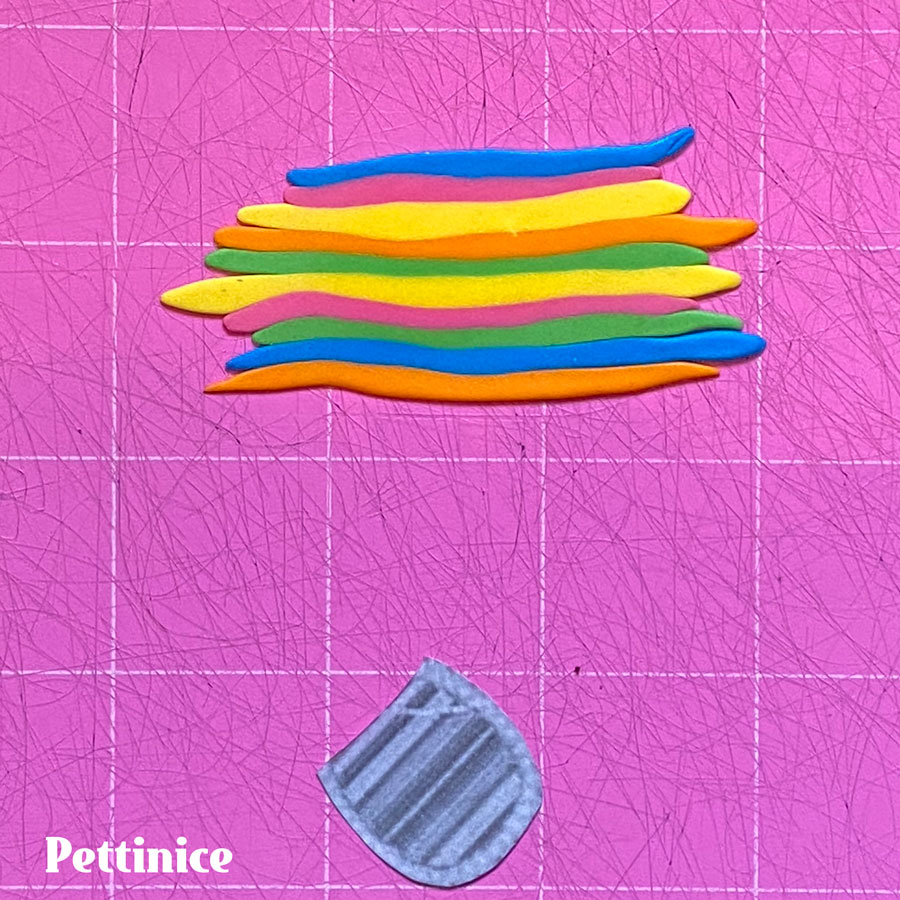
Arrange on the mat close together, flatten these so they stick to each other. You can also use your small rolling pin to help with this.
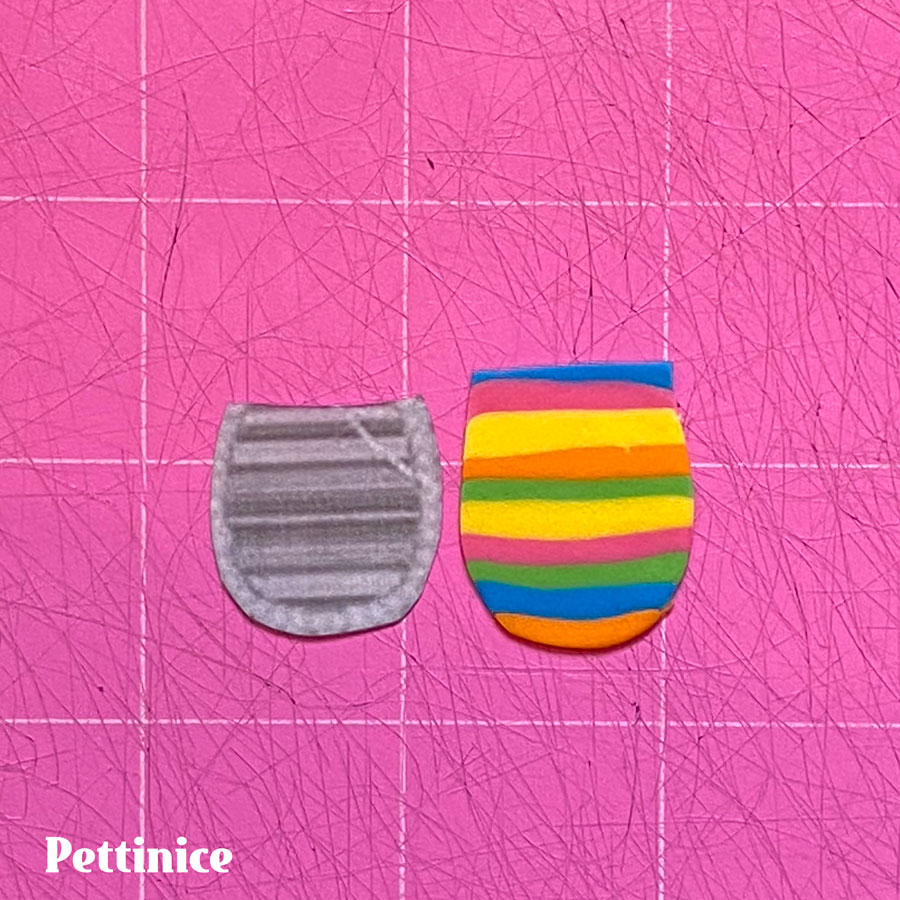
Cut the saddle shape out of this, leaving a few extra mm at the top.
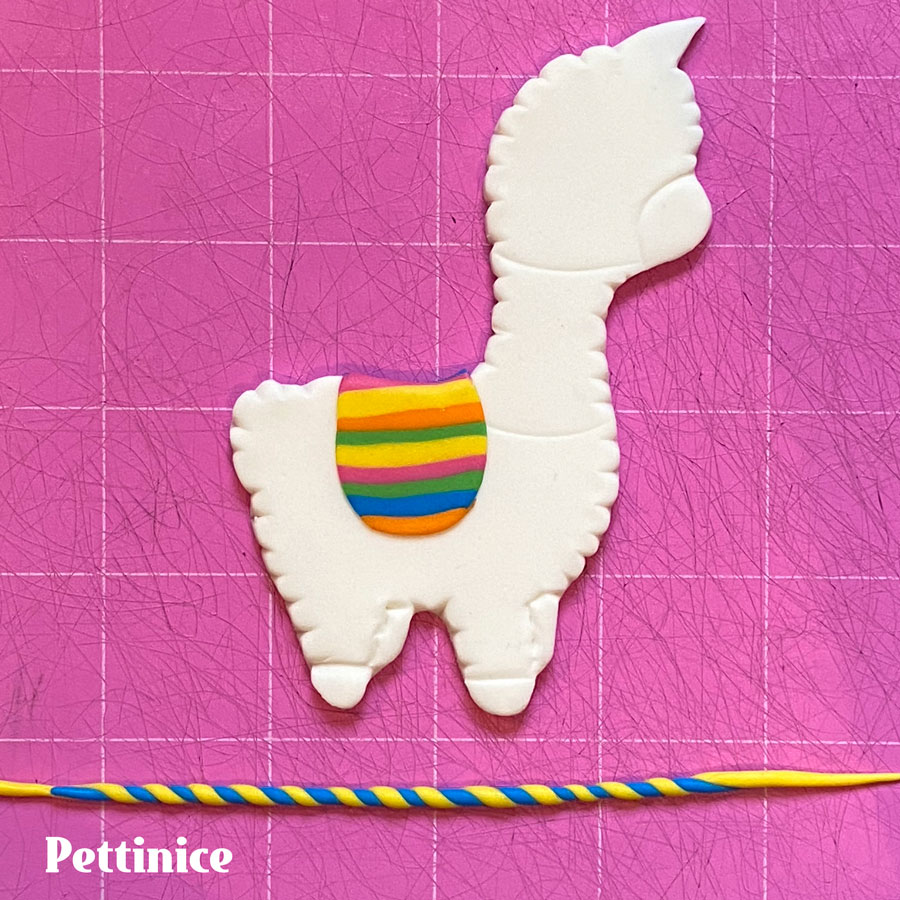
Moisten the llama where the saddle will go with a little water or edible glue and stick the it down. Choose 2 colours and roll a long thin sausage out of each and twist them together.
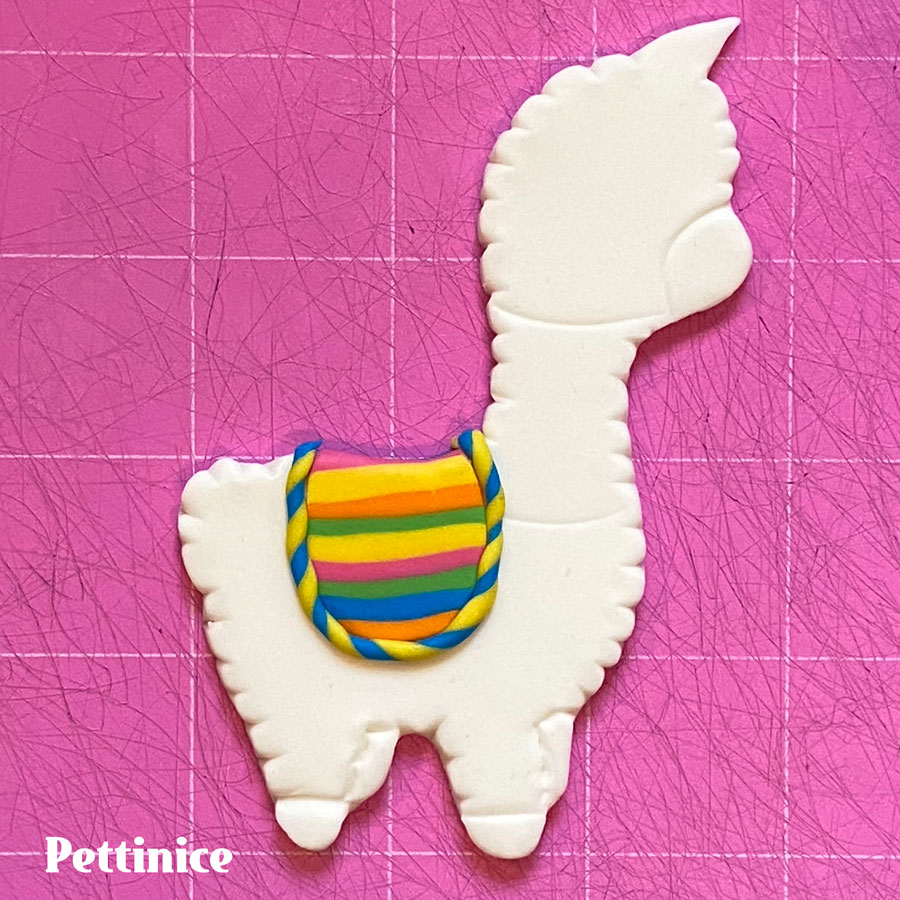
Moisten the edge of the saddle with glue or water and stick this edging down, trim off the ends.
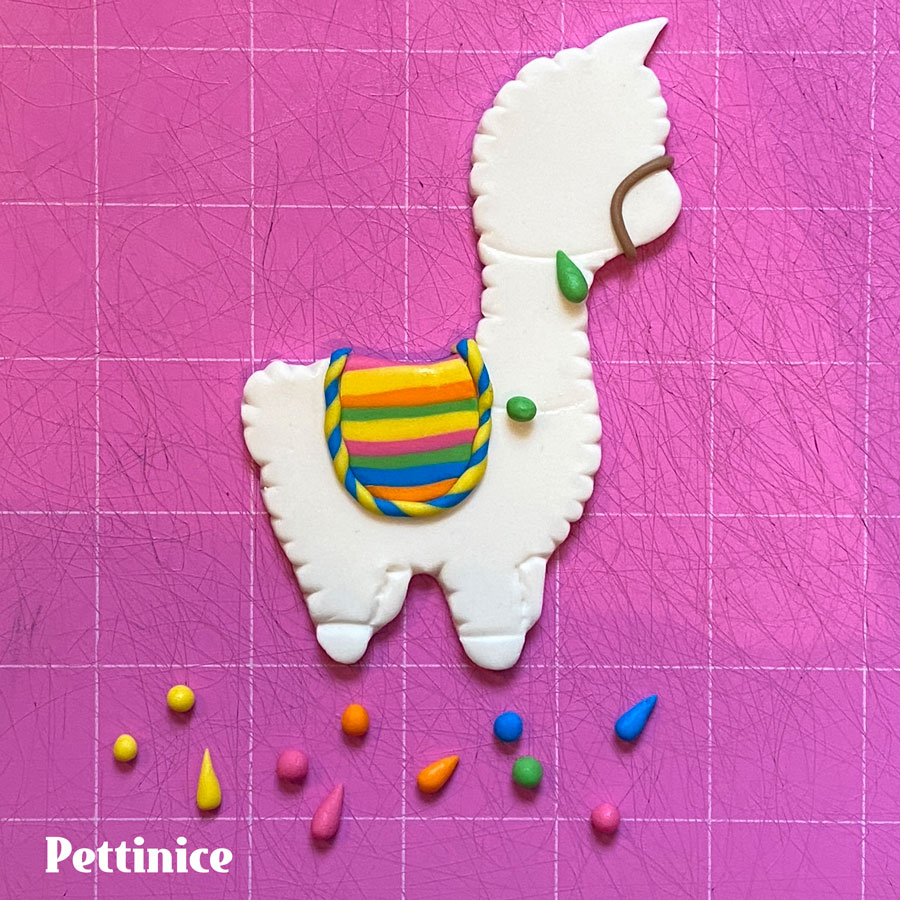
Roll a thin brown sausage and place it around the muzzle. Also roll various coloured tiny balls and teardrop shapes. These will be the tassels and pom poms.
Slightly moisten along the scored lines and arrange the balls and teardrops in no particular order.
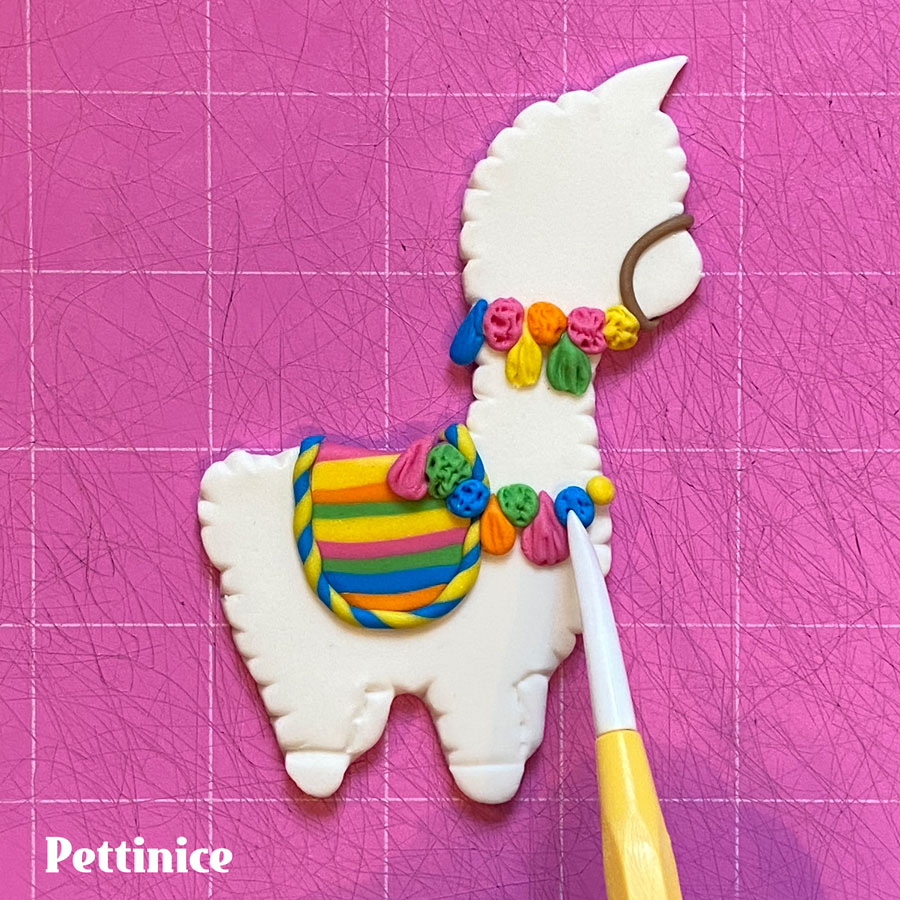
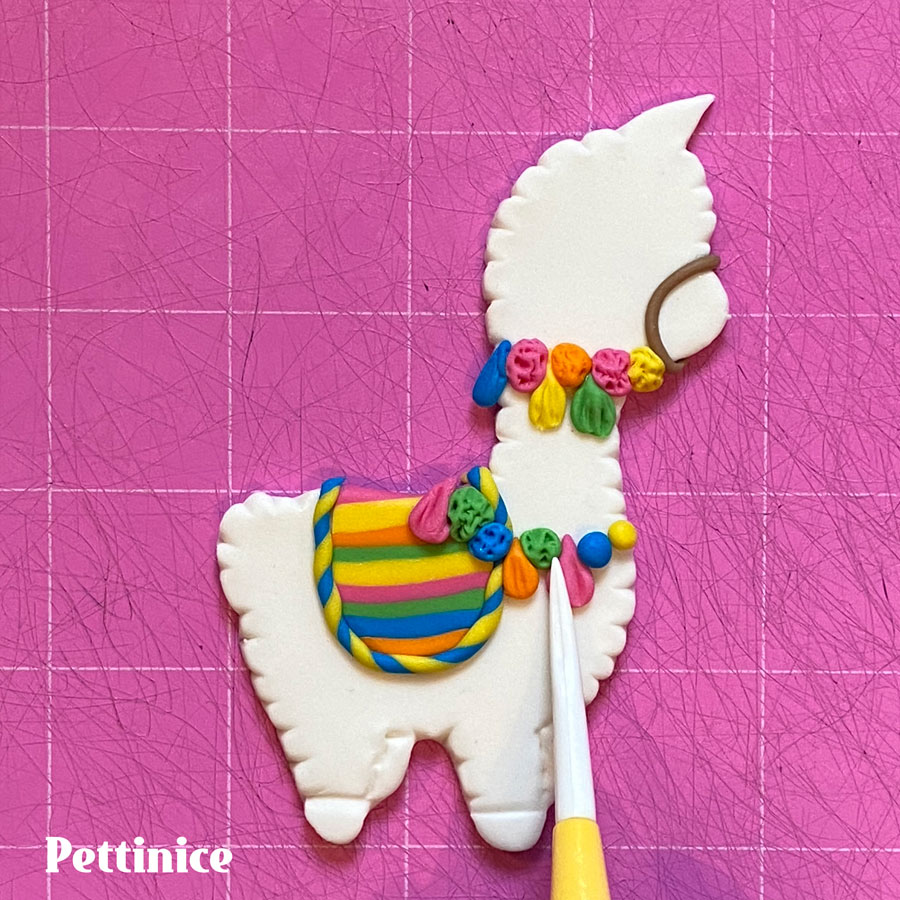
Using the quilting tool mark lines on the tassels and poke lots of holes to give the tassels and pom poms texture as shown.
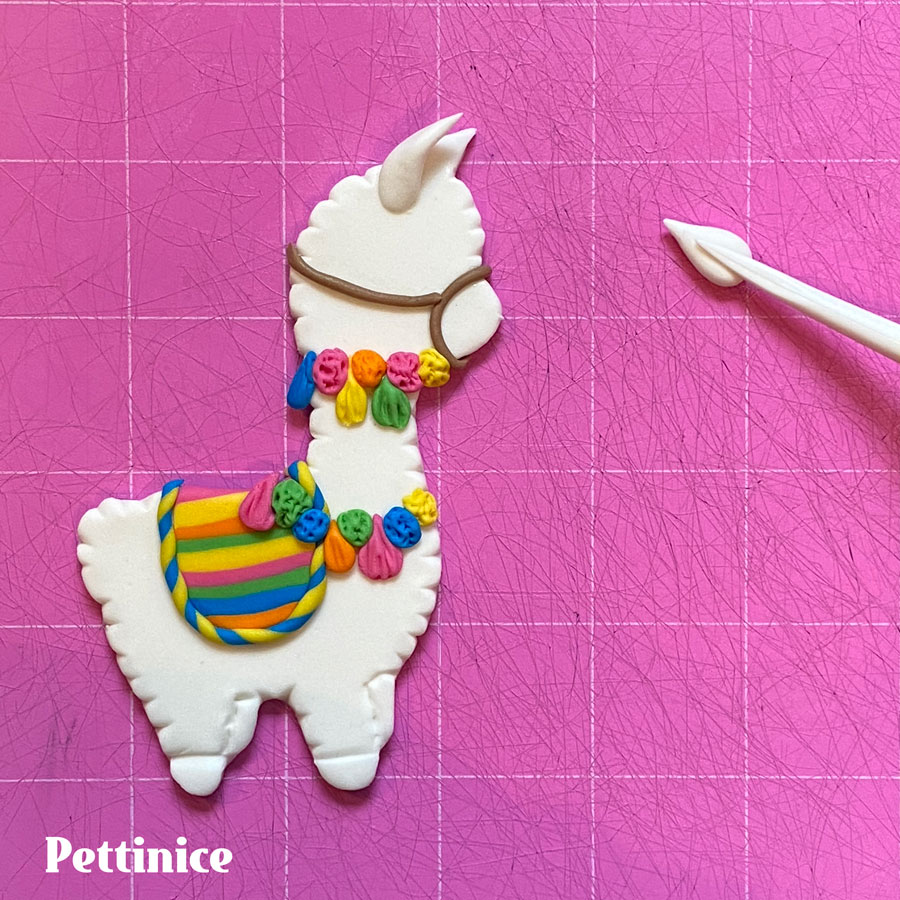
For the other ear, make a wee tear drop shape and press the quilting tool on the centre to make it more ear shaped, pinch at the base, and stick to the llama just behind the cut out ear.
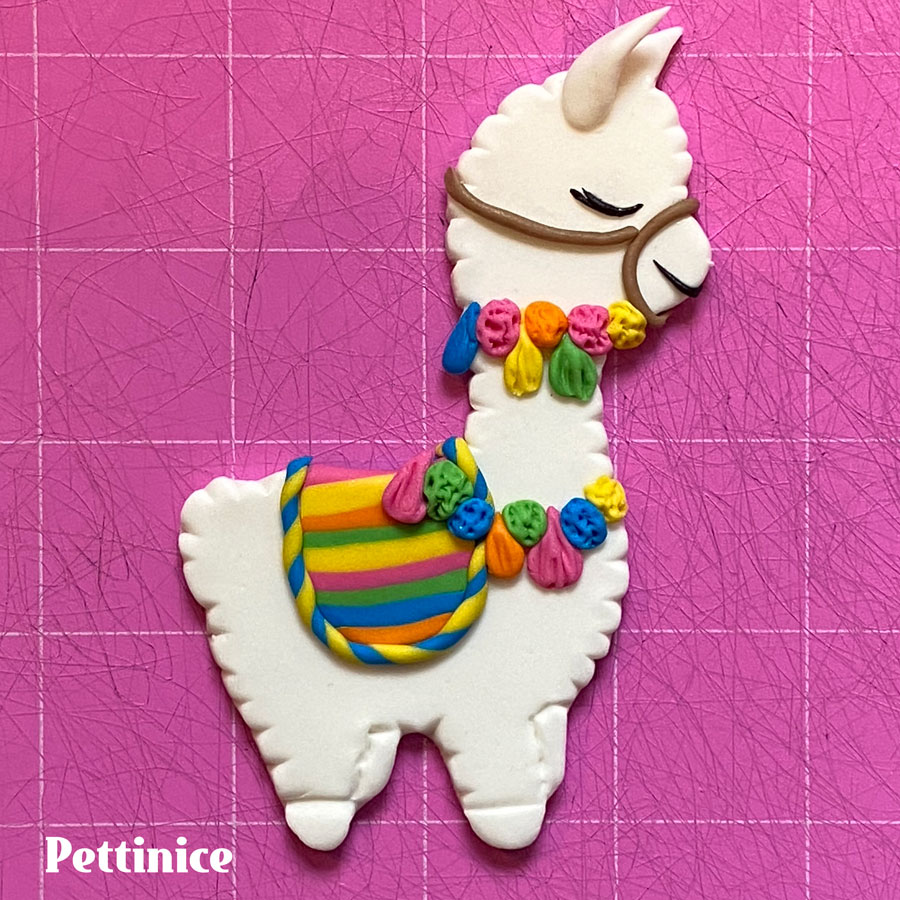
For the eye and mouth, either use teeny tiny pieces of black fondant rolled to a point and carefully glue them in place. Or they could be painted on with edible paint.
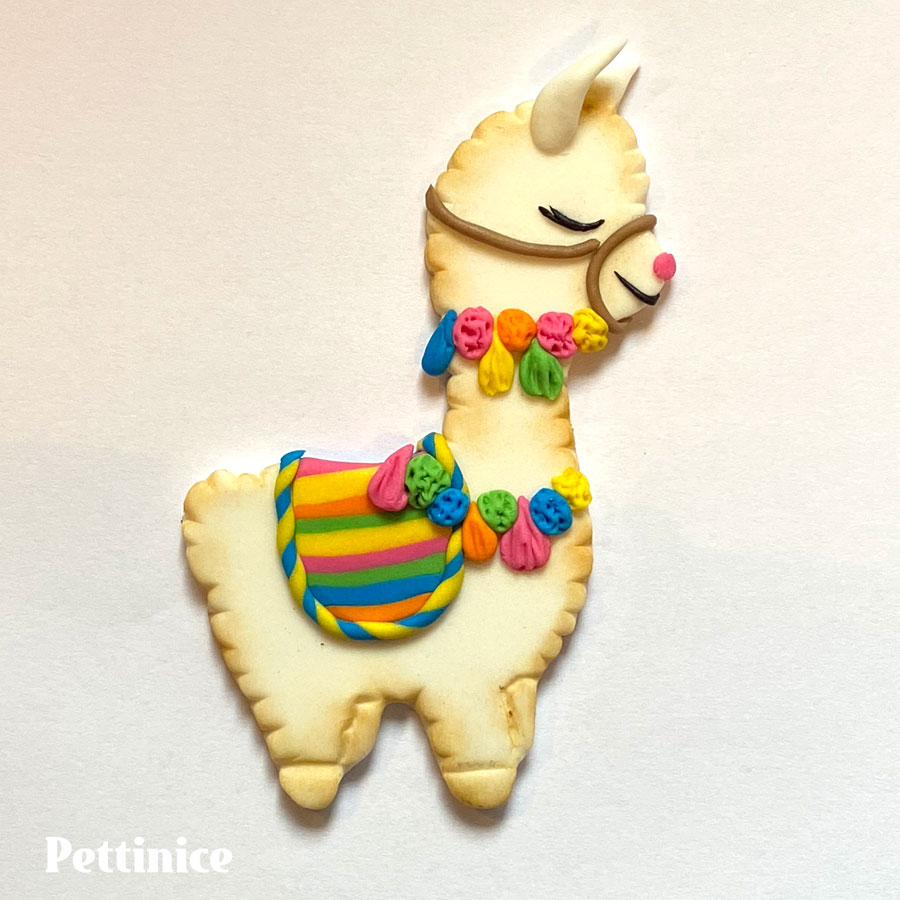
To give the llama more depth, dust the edges with a light brown, flesh or grey dusting powder. Don’t forget to add a little pink nose.
Three different ways to create the cacti
Cactus #1:

Colour mix various shades of green Pettinice fondant and a little pink and add tylose.
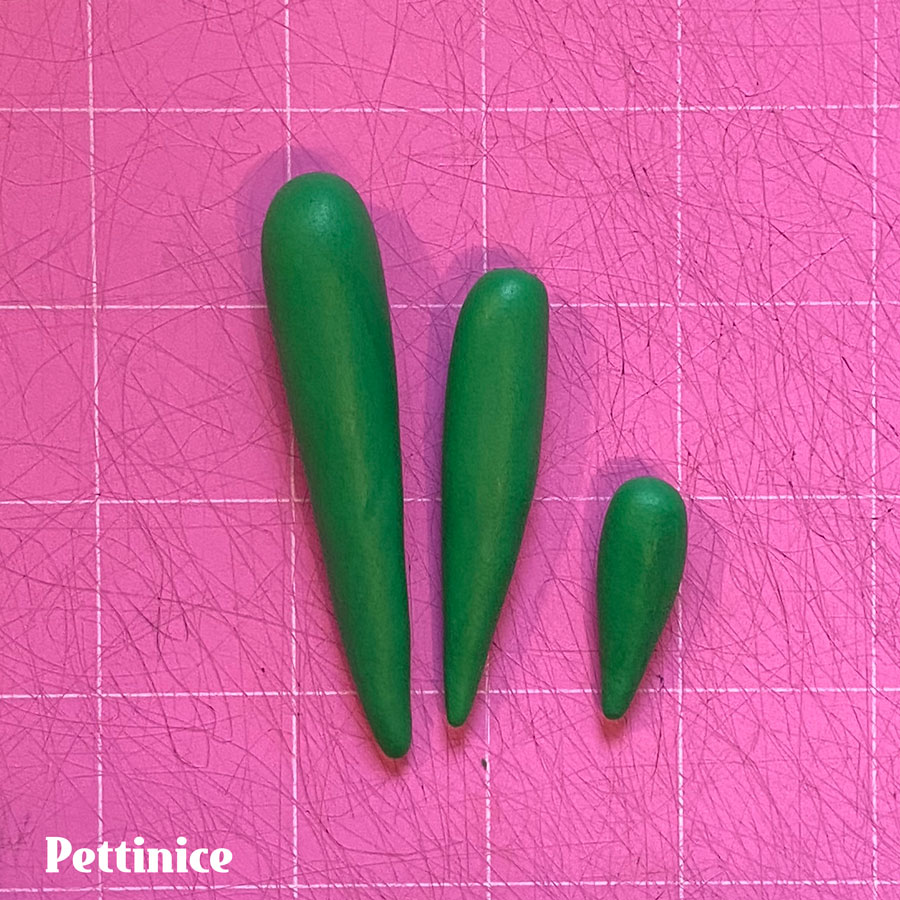
Roll 3 long tear drop shapes (or tapered sausage?) from about 3-4 inches to 1-2 inches.
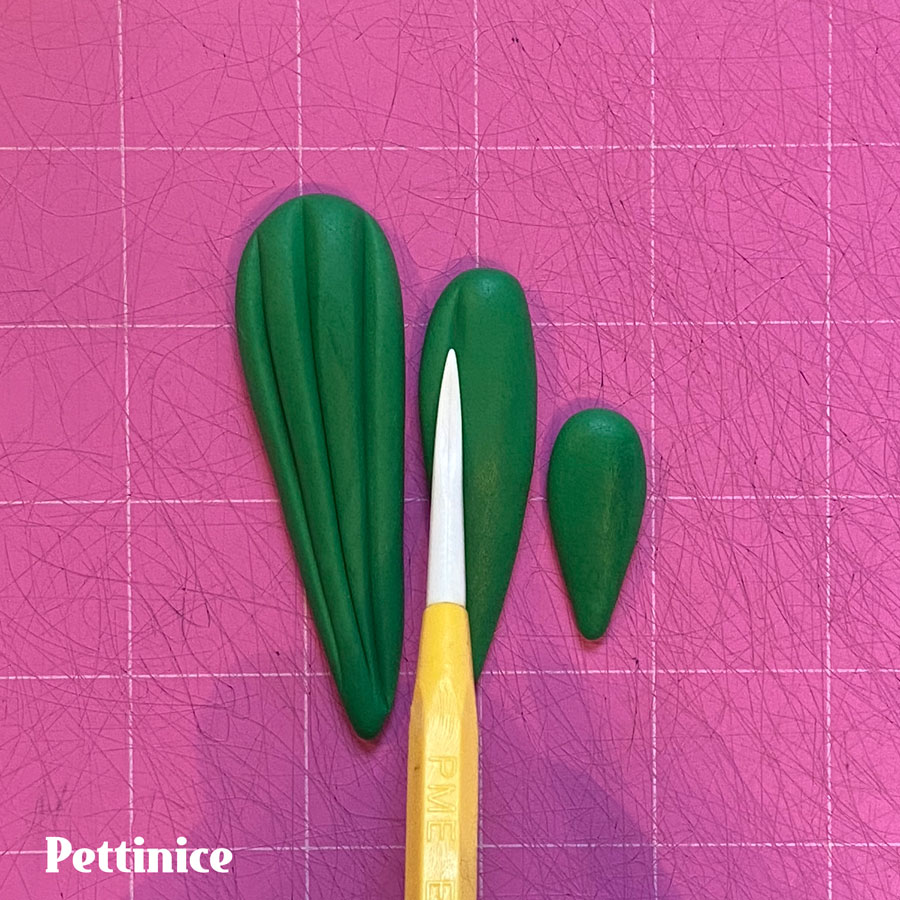
Fatten slightly and score with vertical lines.
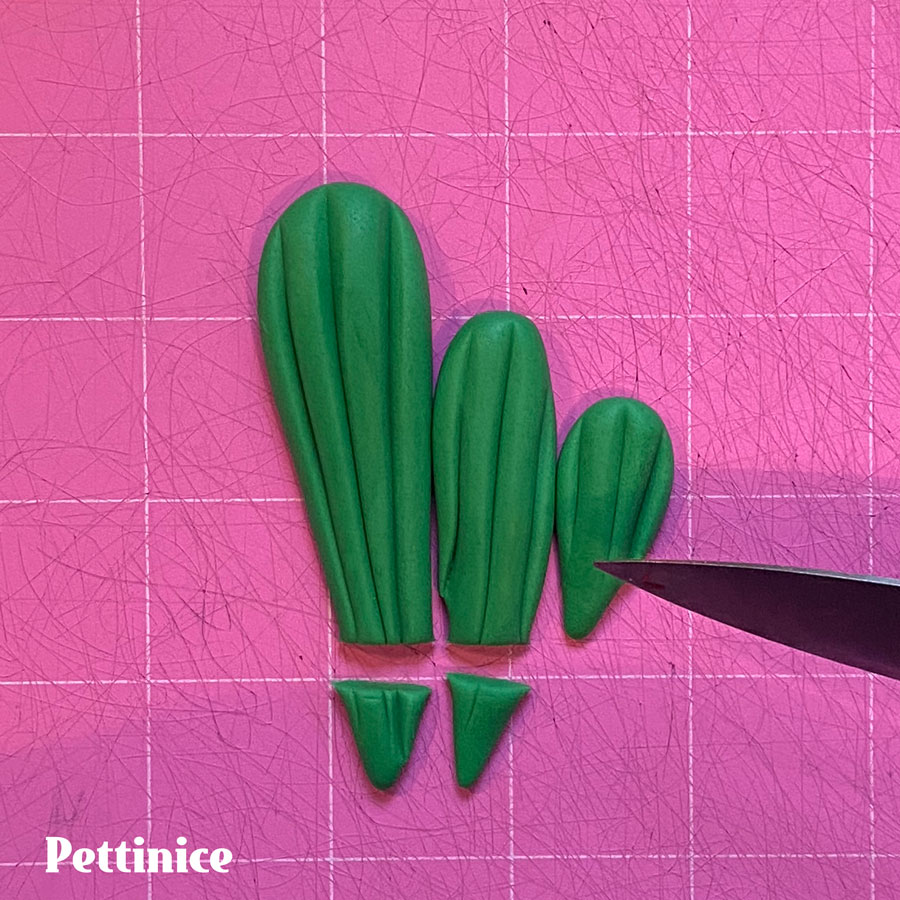
Cut off the points at the bottom.
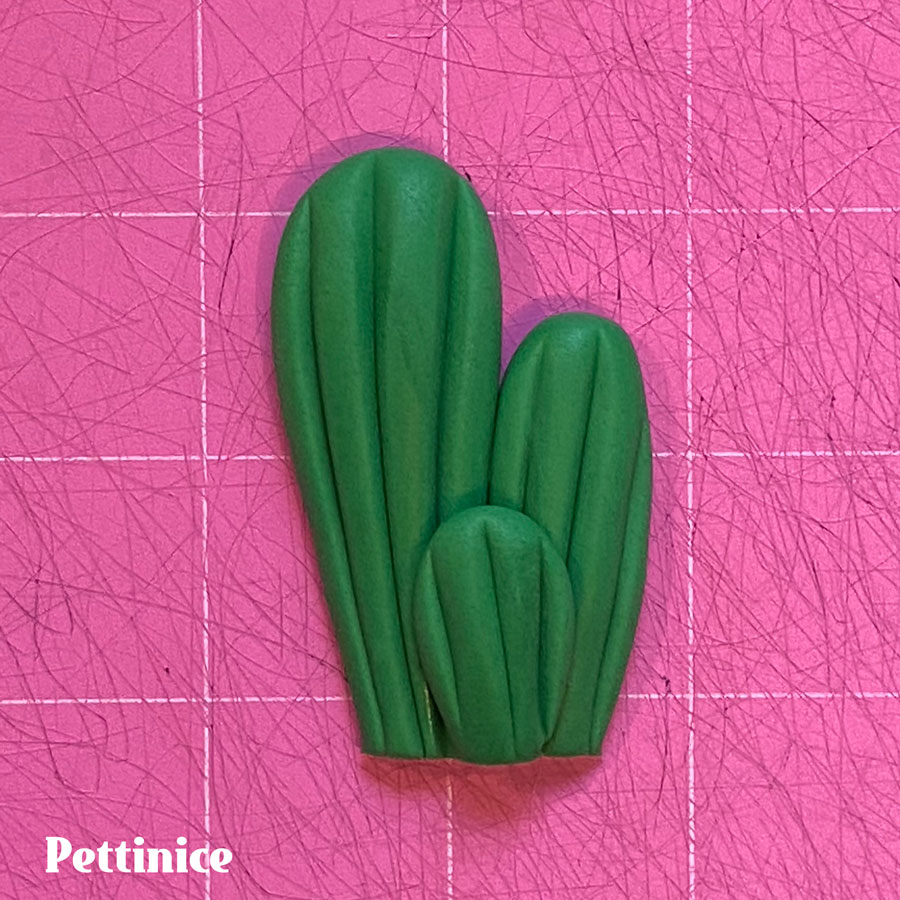
Glue the 2 larger cacti together and glue the smaller one on top.
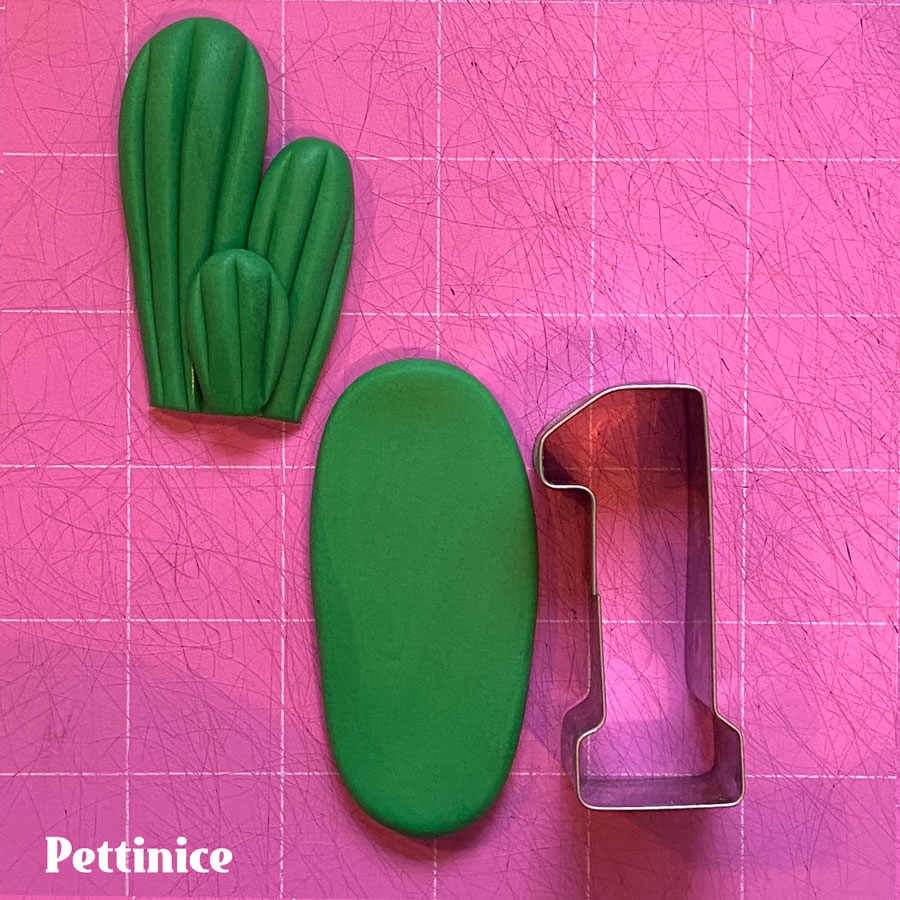
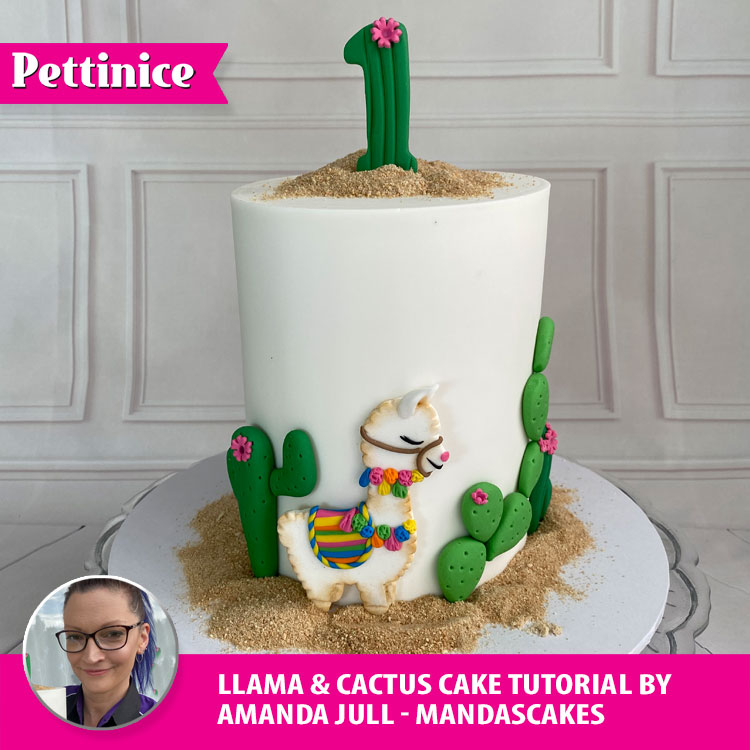
Optional number: cut out or roll a number shape and score with vertical lines for your topper.
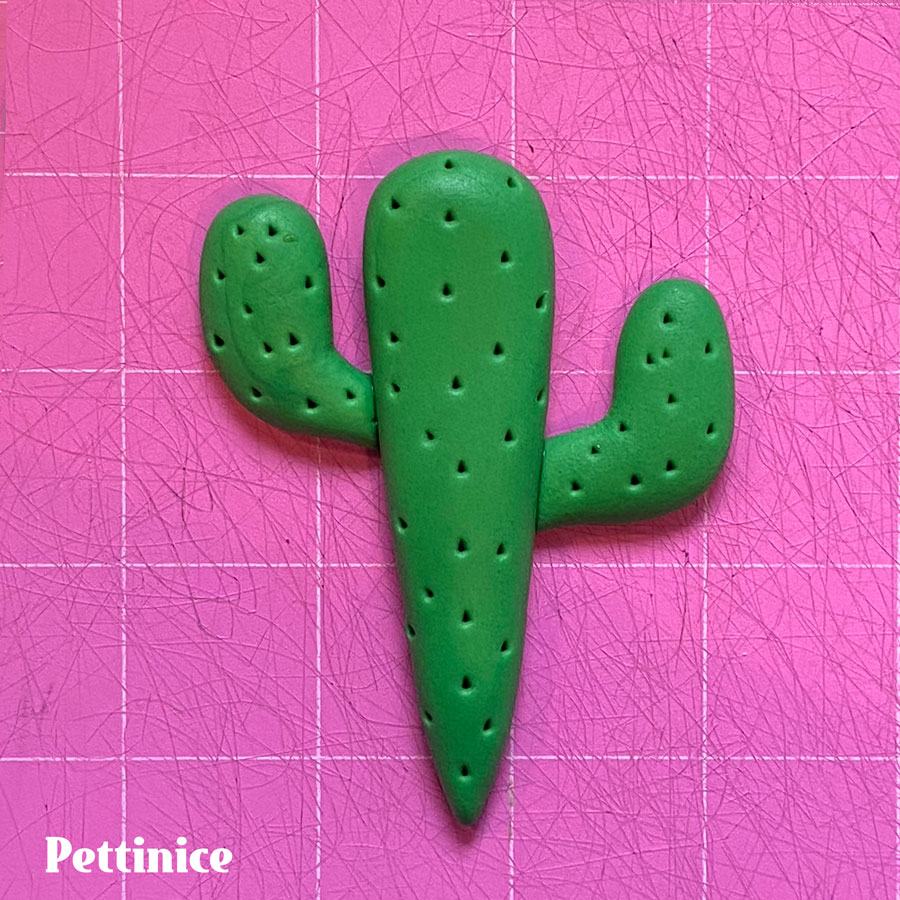
Cactus #2:
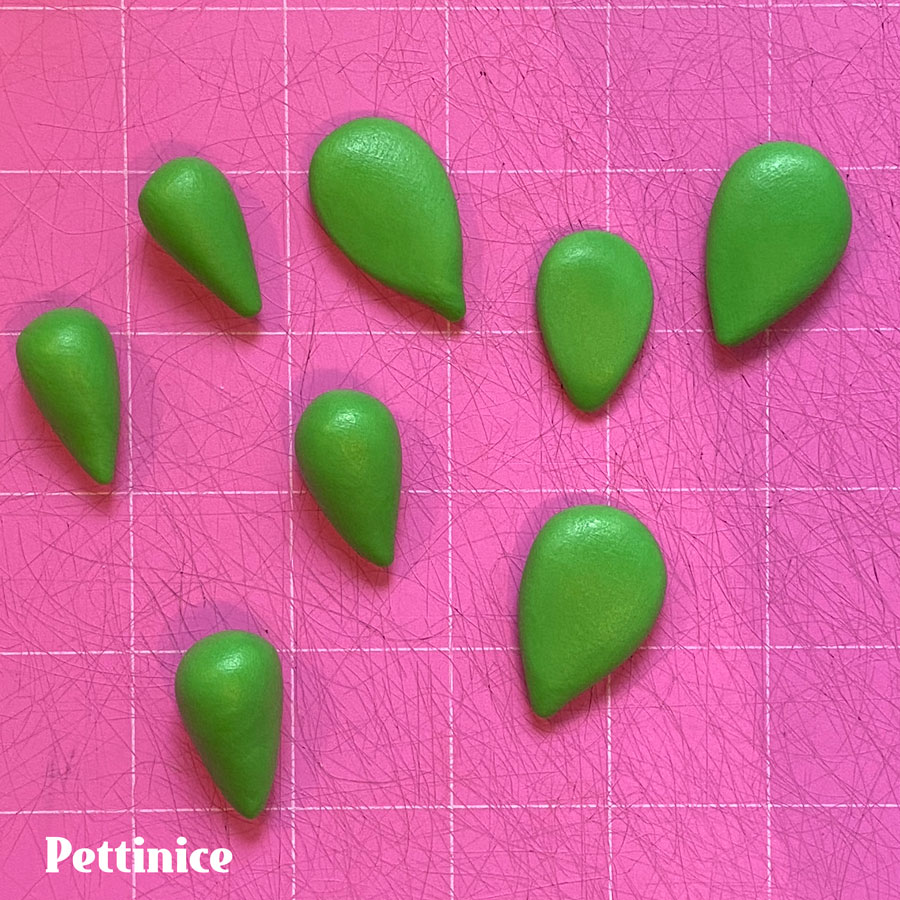
Make 7 or 8 tear drop shapes and flatten slightly.
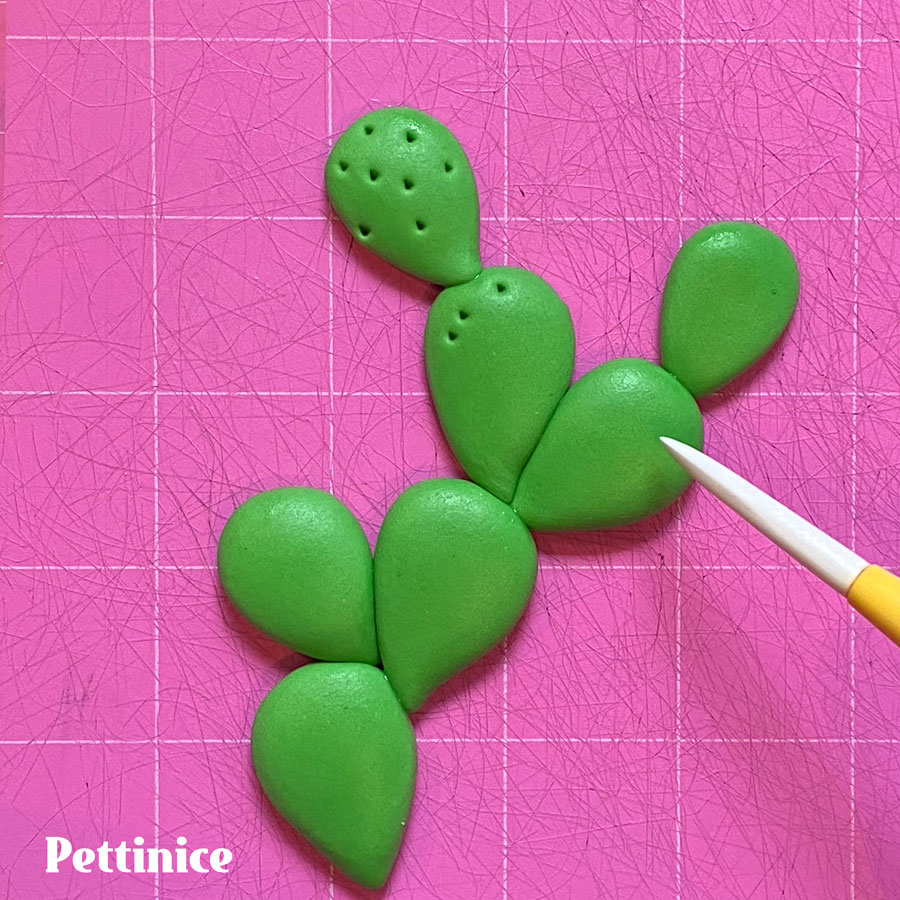
Simply arrange these as shown and poke small holes randomly all over.
For best results, plan to make the llama and cactus details ahead of time. Allow the pieces to dry at least overnight.
Cactus #3:
Roll 3 long tear drop shapes, one large 3 – 4 inches, and 2 smaller.
Bend the 2 smaller ones about half way, make sure you bend each one opposite to the other, flatten all 3 sausages. Cut off the pointy ends. Glue the 2 ‘arms’ to the larger piece.

Roll out a small piece of pink fondant, cut out a few pink blossoms and stick them to the cacti using a little water or edible glue.
To attach these to the cake, simple moisten the back with a little water or edible glue and arrange as you like around the base with the llama in the centre and the number on top.
You will love how cute this looks once it comes together.
Final details...
For the ‘sand’, I blend 2 or 3 plain biscuits with about half a cup of brown sugar and spoon on top and around the base of the cake.
If your cake is tall enough like mine, you can add a name above the llama with either a press set, tappits or click sticks, or if you have a steady hand and nice writing, you can paint a name on.

Mandascakes is based in Birkdale on the North Shore where she lives with her husband and two kids. Her cake journey began at her mum's side, when she remembers helping fill the cake tins using the good old Woman’s Weekly kids Birthday Cake Book.
When she had her own kids, her cake decorating skills continued to grow and she found herself soon making cakes for family and friends. As word got out, she turned her hobby and love of arts and crafts into a full time business running Mandascakes.
See more of Amanda's cakes at:
![]()
![]()