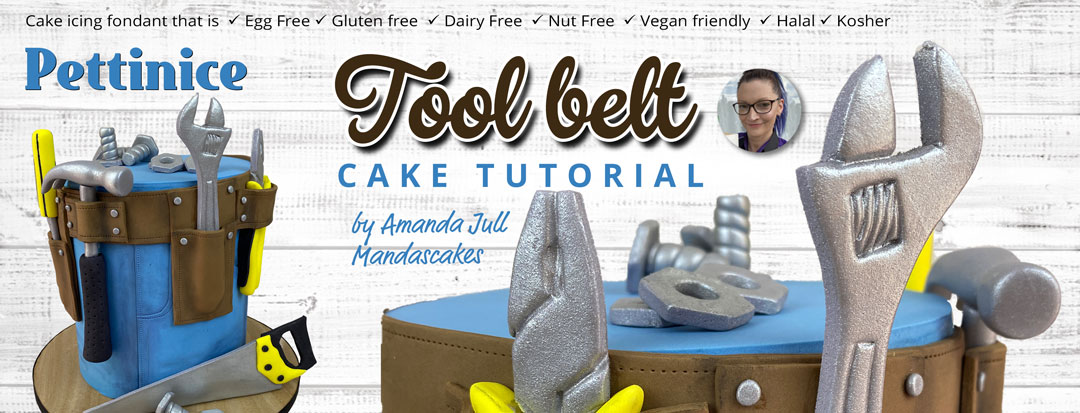
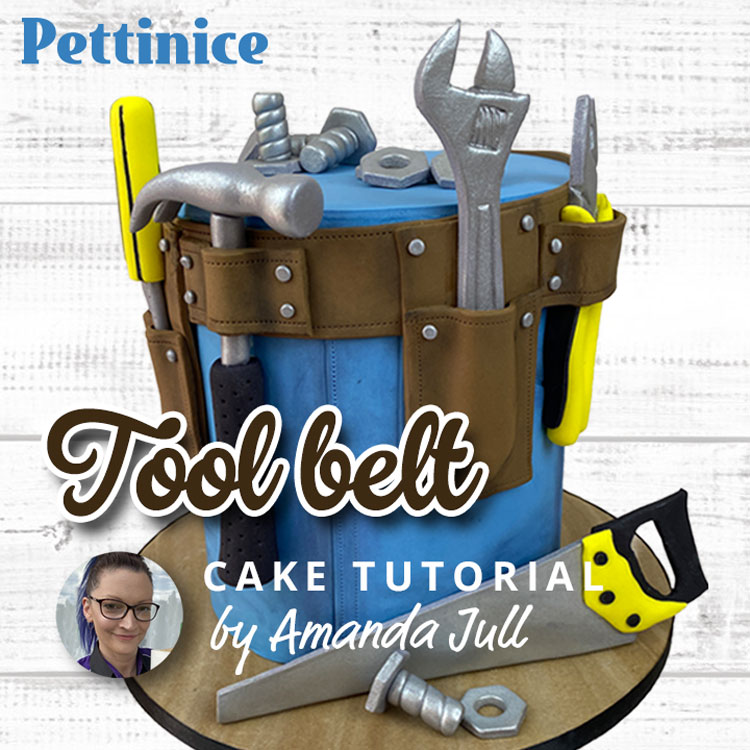
How to make a tool belt cake with Amanda Jull
What you need
- Printed tools (printed to you preferred size) for templates
- Craft knife and sharp knife
- Rolling pin
- Quilting tool
- Small circle cutter or piping tip
- Paintbrush
- Pettinice fondant (of course) in yellow, white, blue and chocolate.
- Tylose
- Edible glue (I use boiling water and tylose)
- Shortening (I use Crisco)
- Silver luster and dusting powders (suggest dark blue, brown, black).
- Toothpicks and dry spaghetti
Check out our Pettinice colour mixing guides here!
This is a really fun cake for the builder in your life. I have shown you how to create the tools and belt, plus a few assembly tips. It's up to you how you customize your cake. Have fun, and please share your creation with us by tagging us #pettinice in your social media posts. Enjoy!

Creating fondant tools with Pettinice
Note: All tools are made with fondant with added tylose to help firm them up.
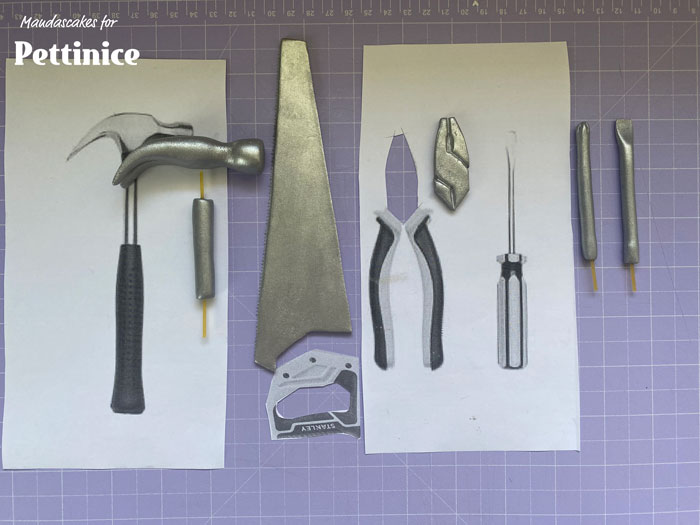
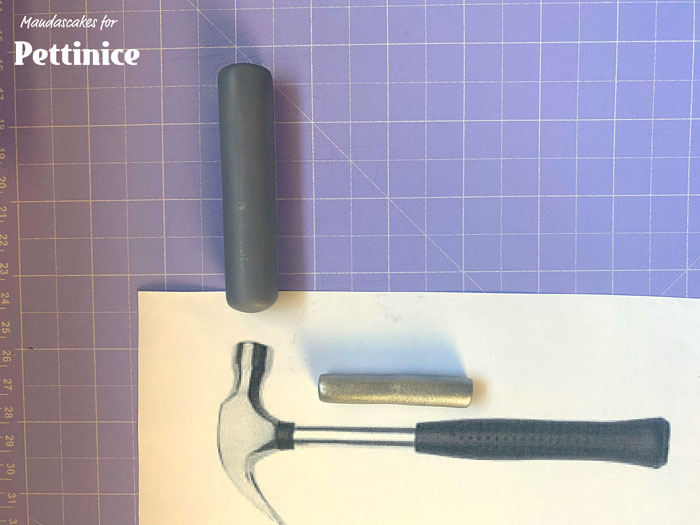
Photo so you can visualize the completed first step, this is the completed first step for each tool. I’ve popped a small piece of dry spaghetti in the end of the screw drivers and the body of the hammer.
I create all the silver parts first, then move on to the handles. This allows time for things to set up and dusting to dry. For the purpose of this tutorial, I have grouped the steps together by tool. Let your finished tools dry at least overnight. Using a little extra tylose will help them harden.
Fondant wrench tutorial
How to create a fondant wrench for your tool cake

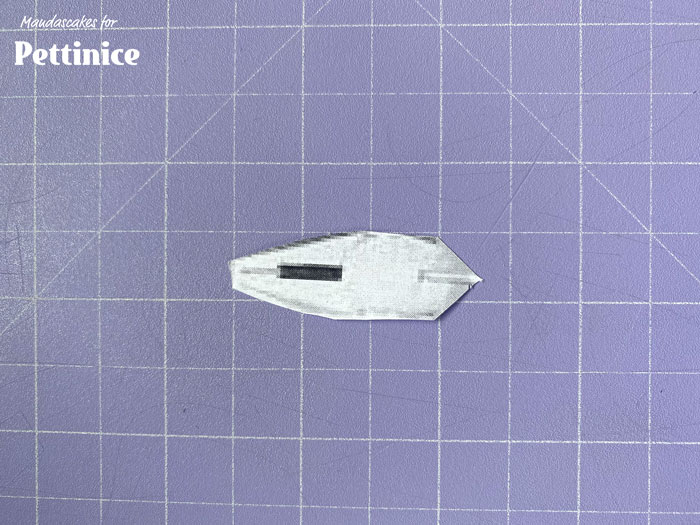
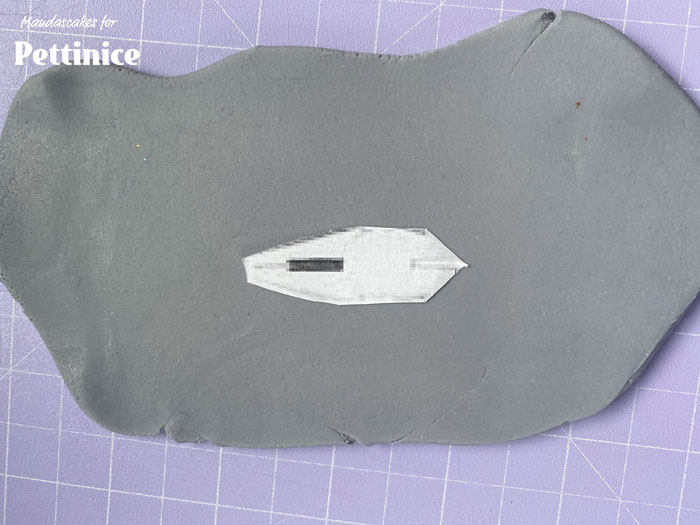
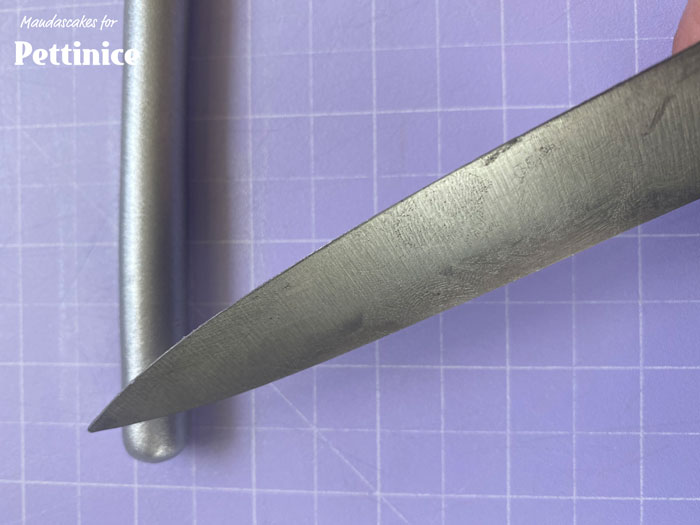
Print out some tools of your liking from the internet. Firstly I work on all the silver/grey/metal parts of the tools. Cut out the saw and spanner tools and the tip of the pliers, don’t worry about the others, they are just a guide.
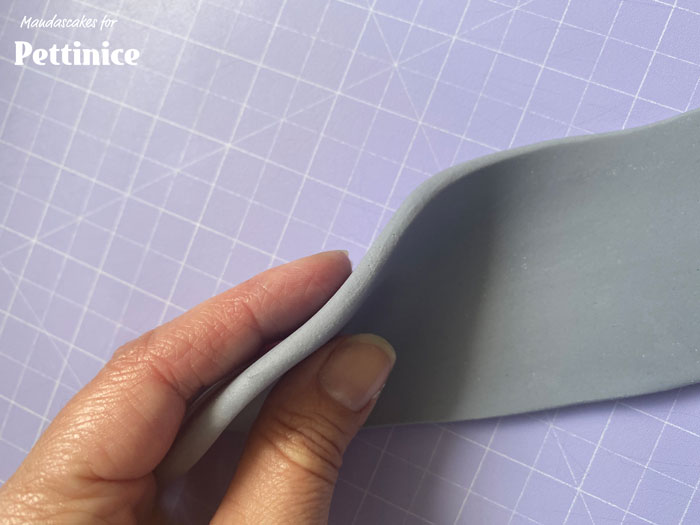
Roll out a piece of grey fondant big enough for the spanner about 1/3 – 1/2cm, decent thick ness) (we’ll do one tool at a time).
I smear a small amount of Crisco on the mat and on the rolled out fondant and picture stay put while you cut out the tools.
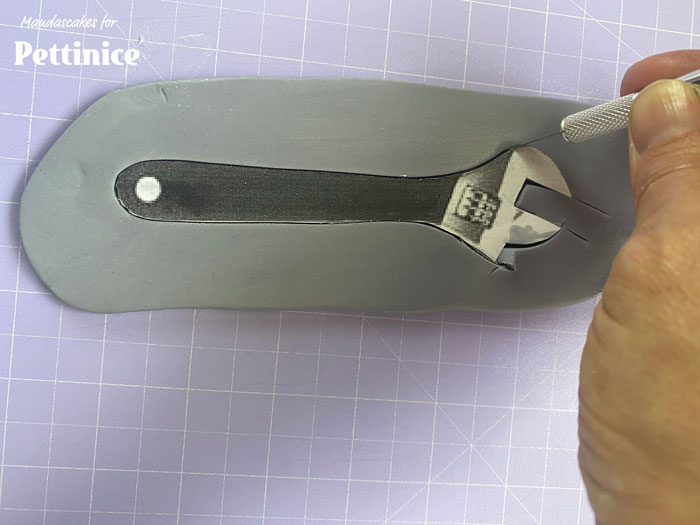
Place the template on the fondant and cut around the edges.
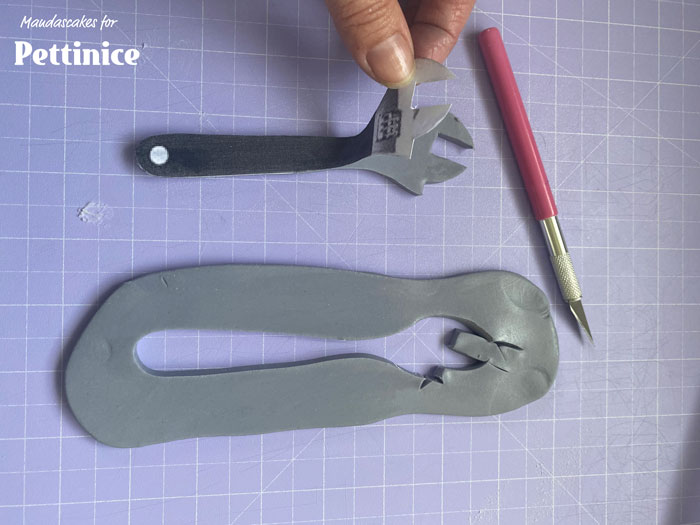
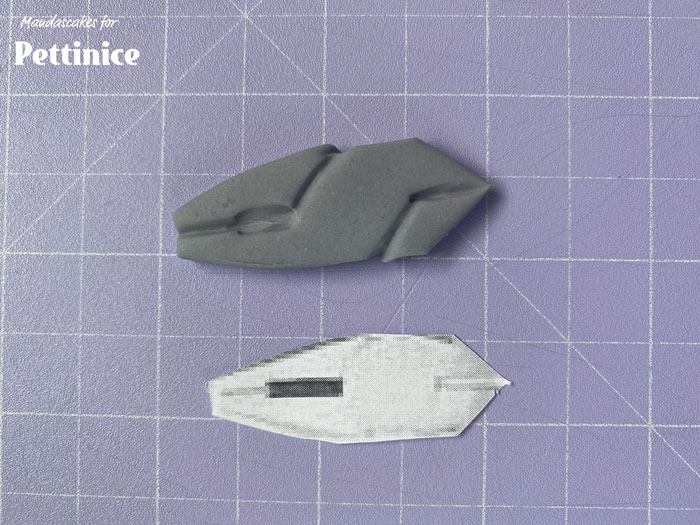
Peel off the template.
Smooth the edges with your fingers (tools don’t tend to have sharp edges).
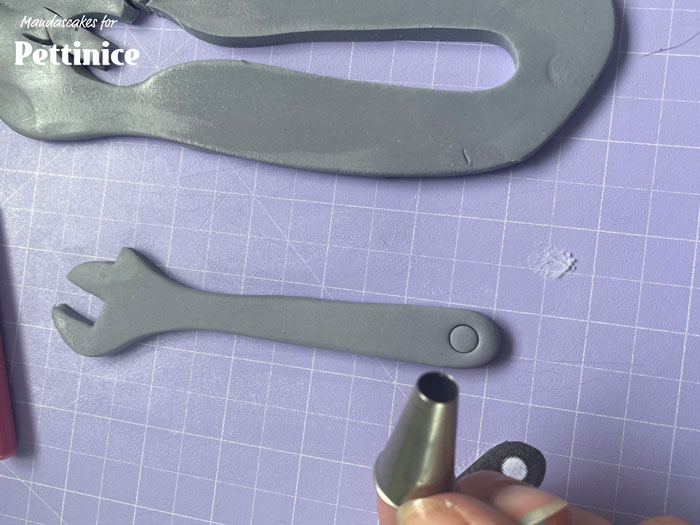
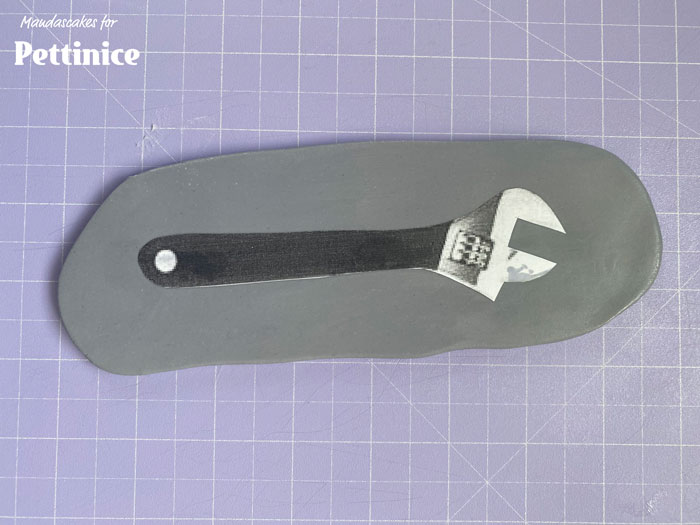
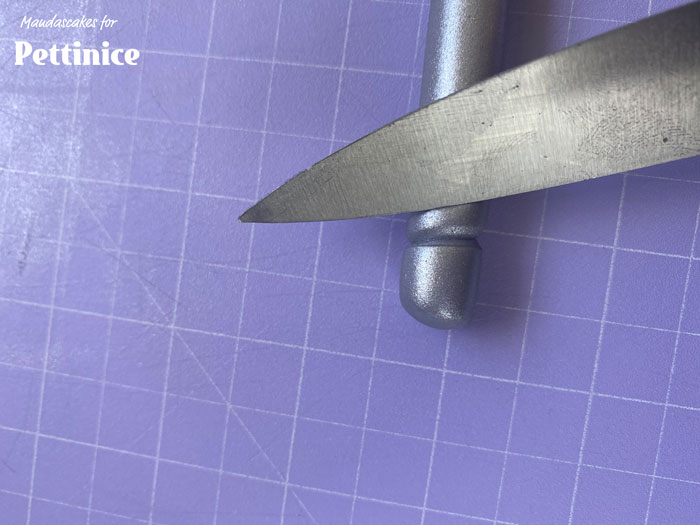
Use a small circle cutter to cut a hole in the end (optional as this will actually be hidden in the end).
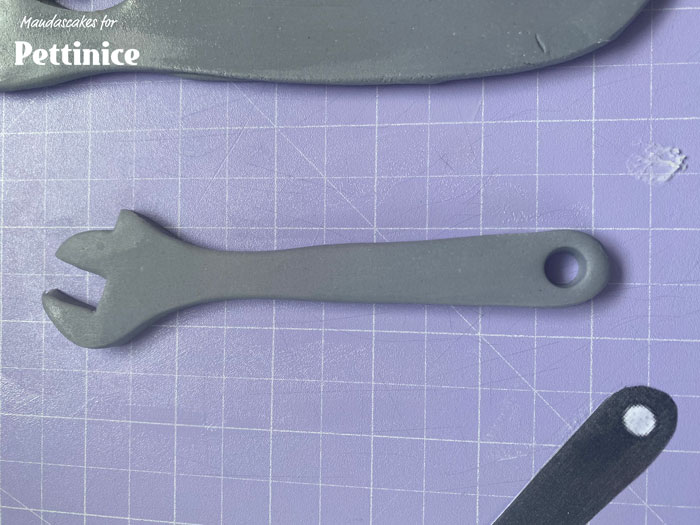
Totally optional if you will hide this in the belt.
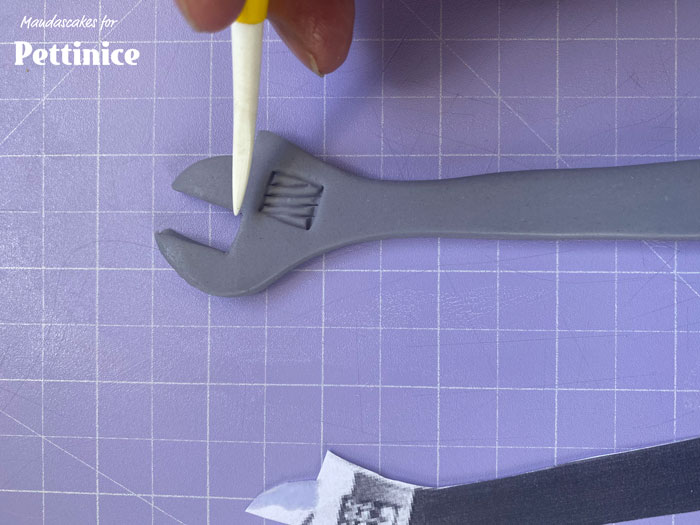
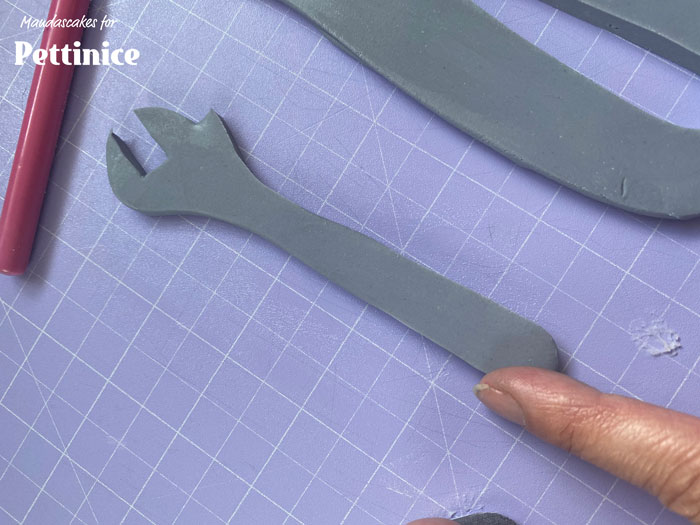
Using the quilting too score lines to show the little adjuster thingee (not sure of the technical term here) and lines and grooves of the tool.
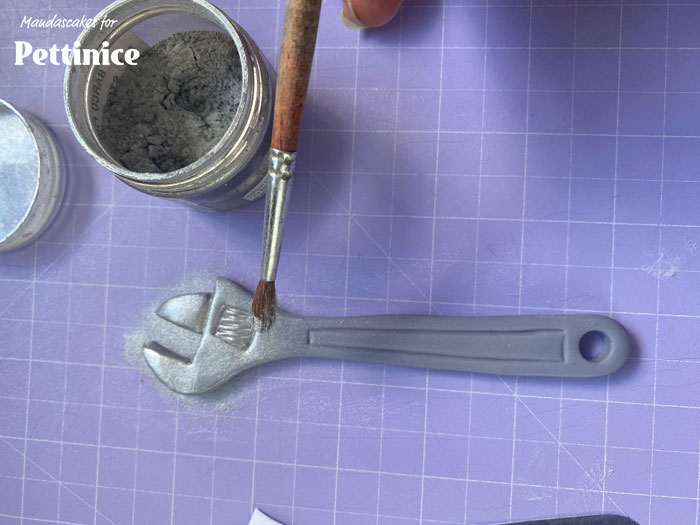
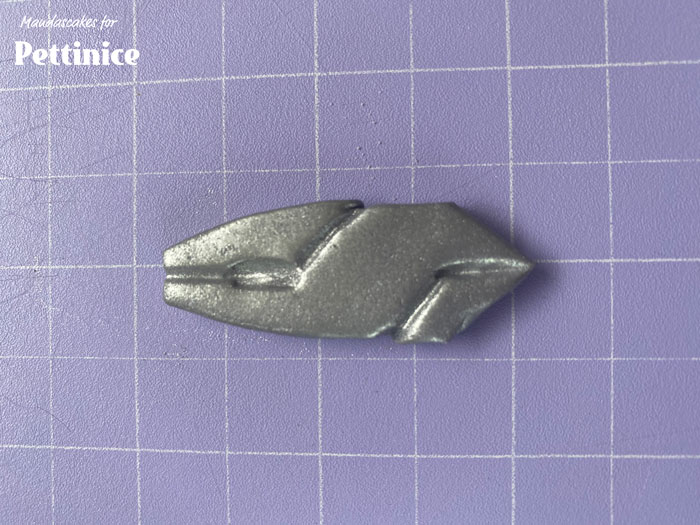
Dust with silver or pewter powder. If you don’t have these don’t worry, leave it grey, it’ll work. Set aside.
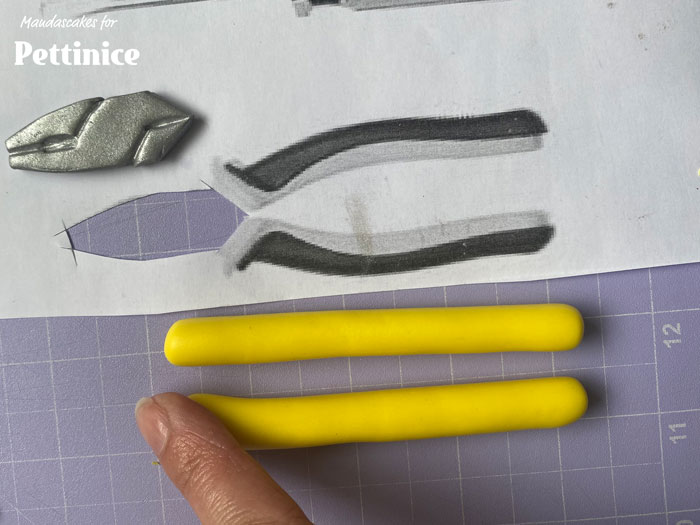
Fondant pliers tutorial
How to create a fondant pliers for your tool cake
Cut out the tip of the pliers from your template.
Smear a small amount of Crisco to prevent your template from moving, and cut around your template.
Remove the template, smooth the edges and score the lines as shown.
Dust with silver and set aside.
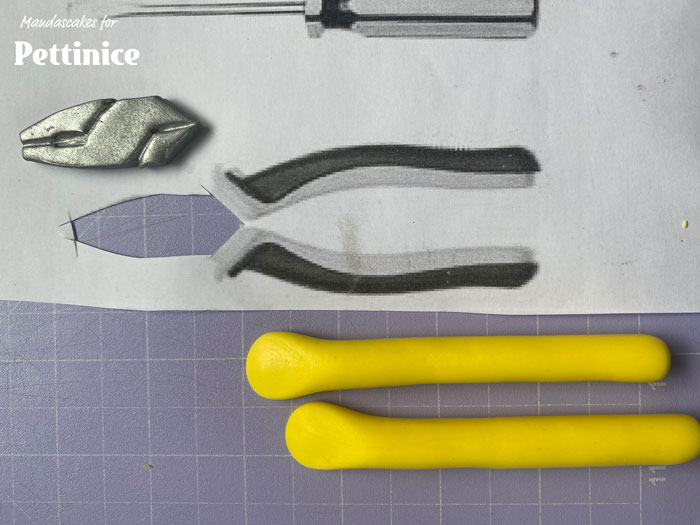
Flattened one end (this will attach to the tip.)
Using the printout, shape these to look like handles

Glue the handles to the head.
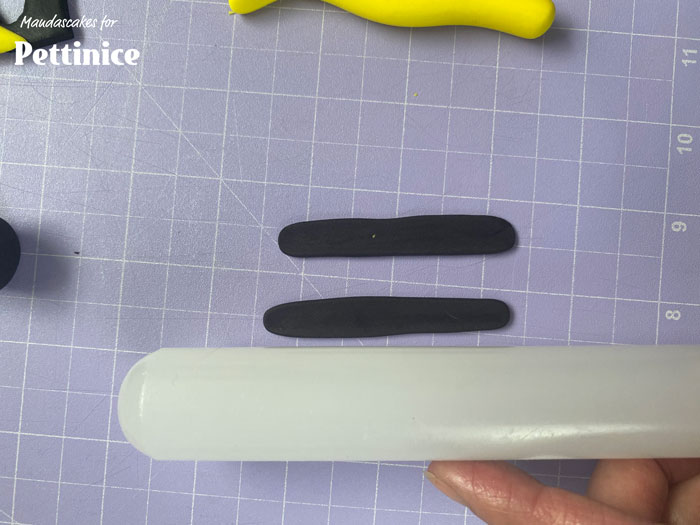
Make a couple of long flat sausages.
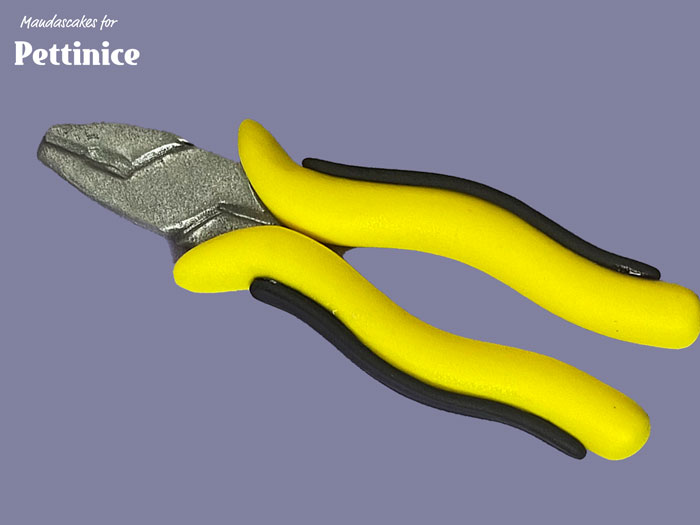
Attach to the sides of the handles for extra detail.
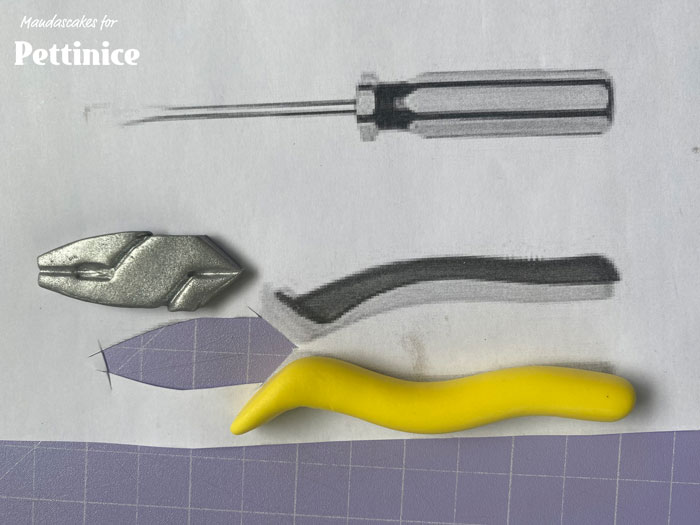
Fondant screwdriver tutorial
How to create a fondant screwdriver for your tool cake
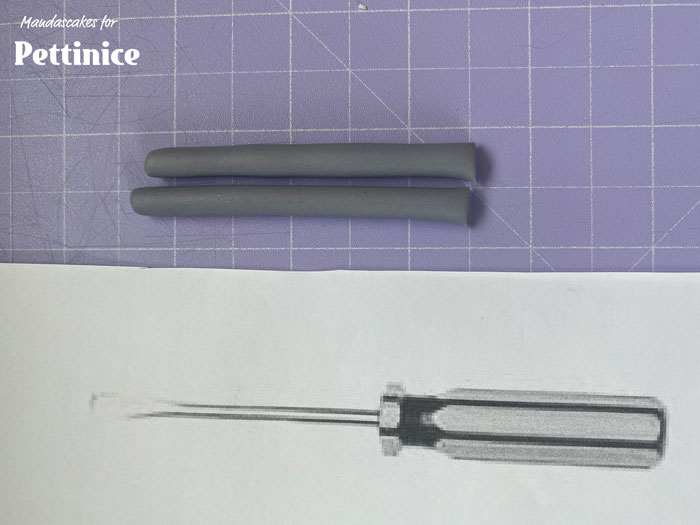
Roll out a couple of thin sausages the length of the screwdrivers.
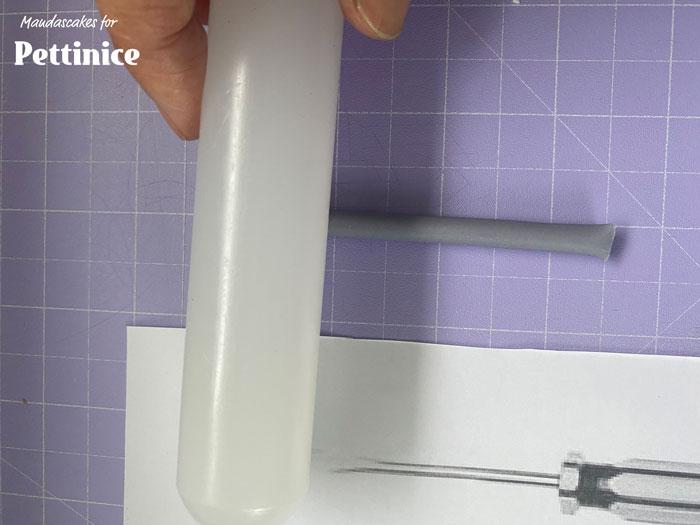
I have flattened and trimmed the end of one for a flathead screwdriver.

For a Phillips screwdriver, I made 4 indents in the end.
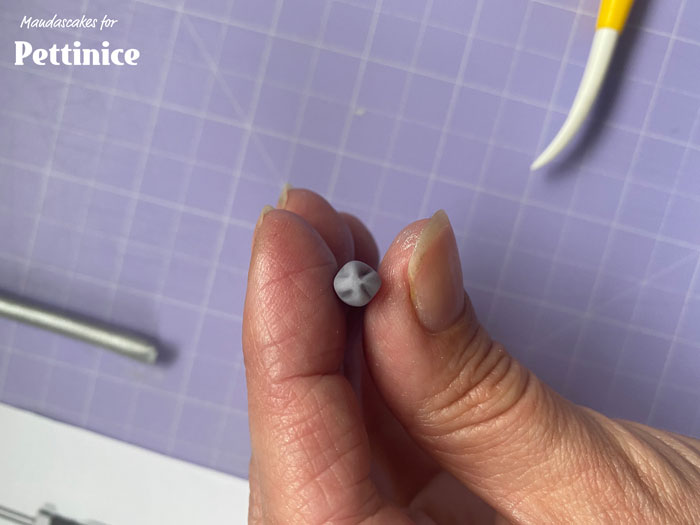
Top view of the Phillips screwdriver with the indents. Dust both with silver if you wish.
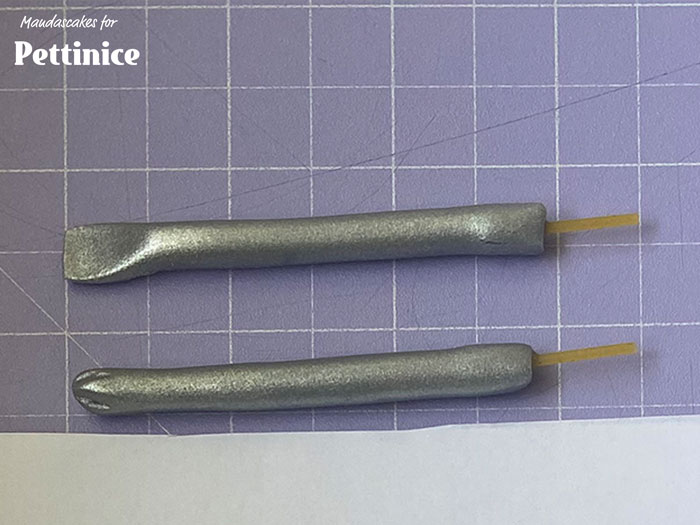
I’ve popped a small piece of dry spaghetti in the end of the screw drivers.

Make the screwdriver handles by rolling fat yellow sausages and trim to size.
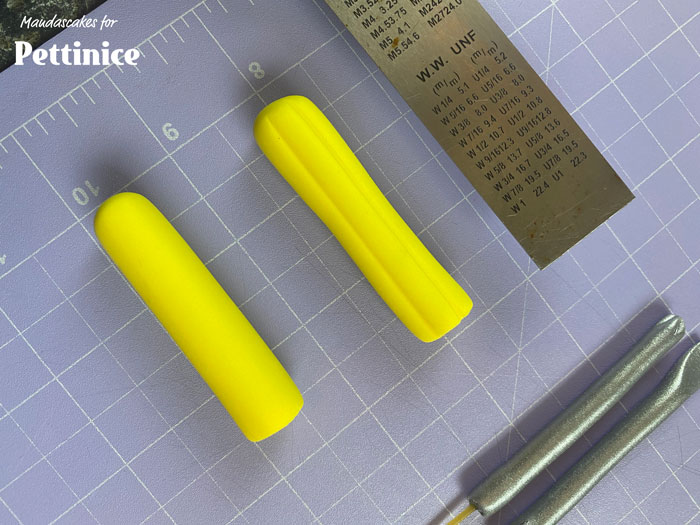
I use a ruler, but the back of a knife would work, to indent lines on the handles.
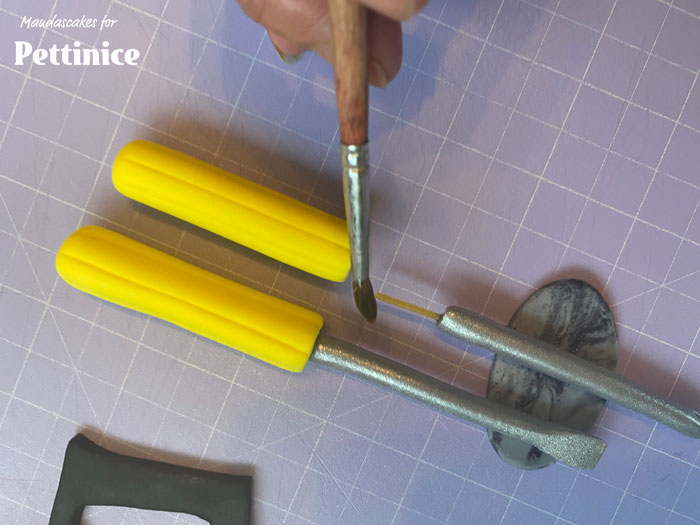
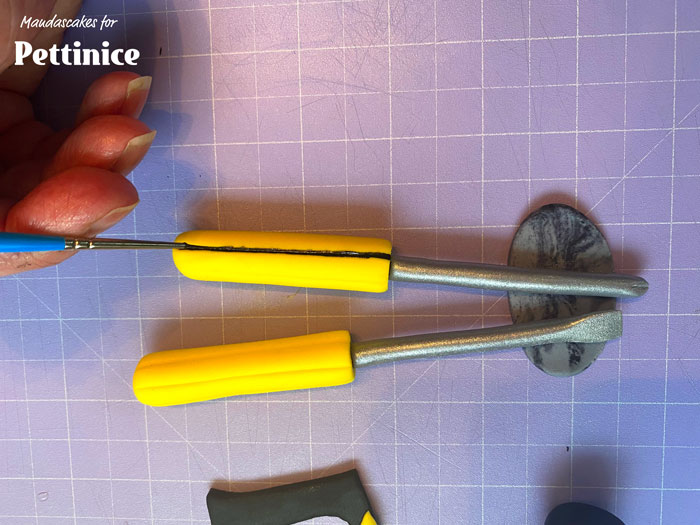
. Glue the screwdriver heads to the handles. The spaghetti will help keep them in place while they dry and it’s edible, yay.
Fondant hammer tutorial
How to create a fondant hammer for your tool cake
Roll a sausage for the hammer body, and a fatter one for the hammer head.
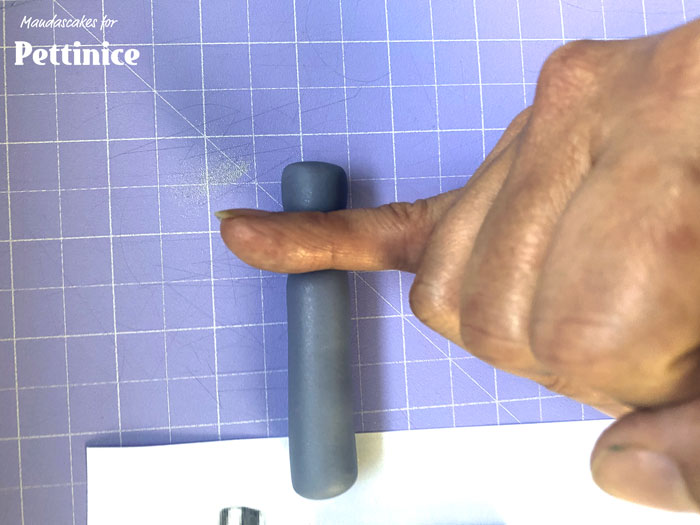
To make the head, indent one end by rolling the sausage using your finger back and forth until you’ve created the head (smacky bit)
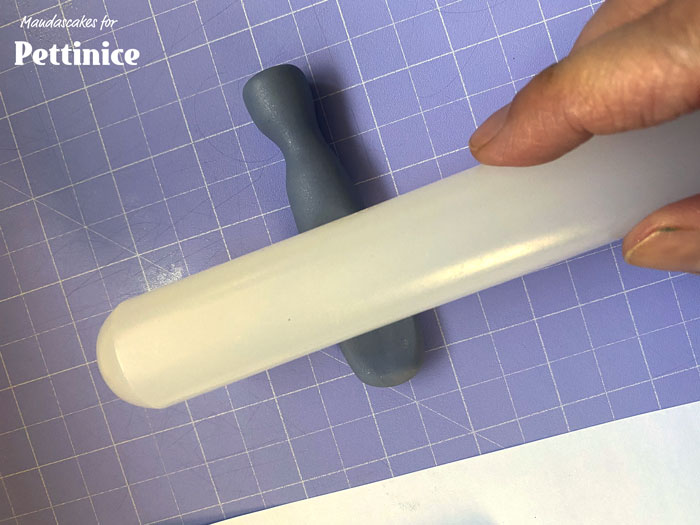
Flatten the part the hits the nails by rubbing it on a flat surface. Flatten the other end with a rolling pin.
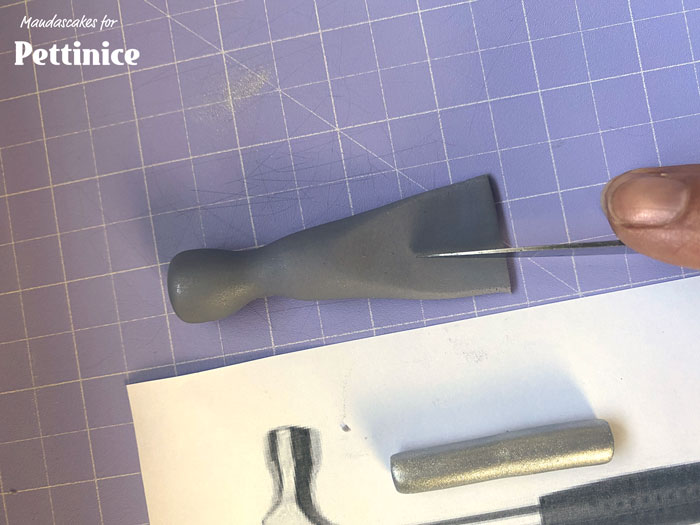
, trim the excess,
Cut out a long triangular piece as shown (for the fork bit).
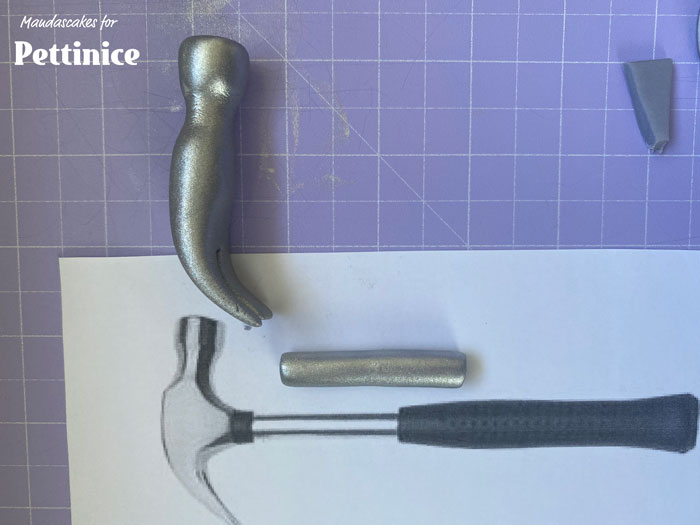
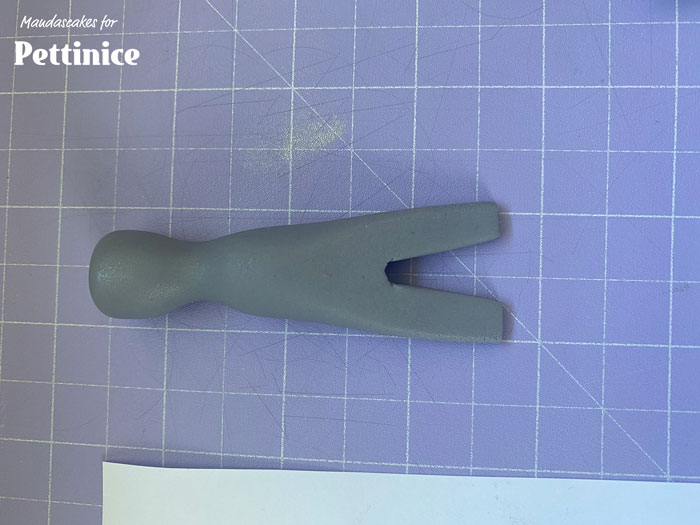
Lay it on it’s side and shape it like a hammer as shown.

I’ve popped a small piece of dry spaghetti in the ends of the hammer.
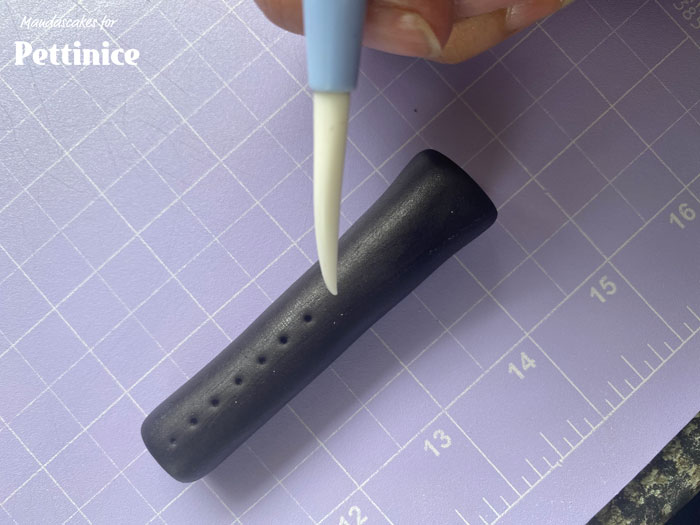
Make the handle of the hammer by simply rolling a fat sausage, flattening the end and trimming where it will attach to the stem. I’ve made indents on the handle for extra detail using the end of a Dresden tool.
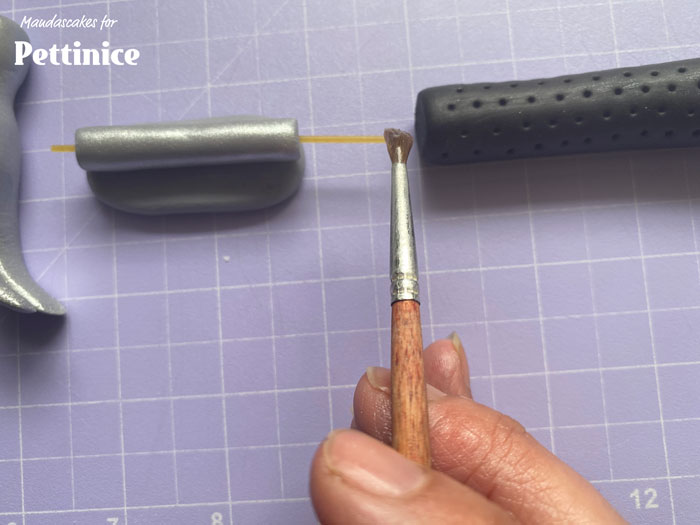
Pop a piece of flattened fondant under the stem as support while it dries.
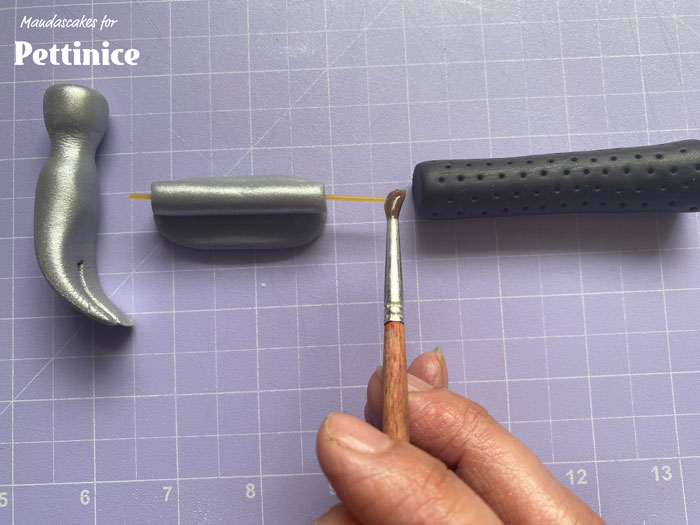
Glue the stem to the handle and the head, pretty obviously to make the complete hammer.
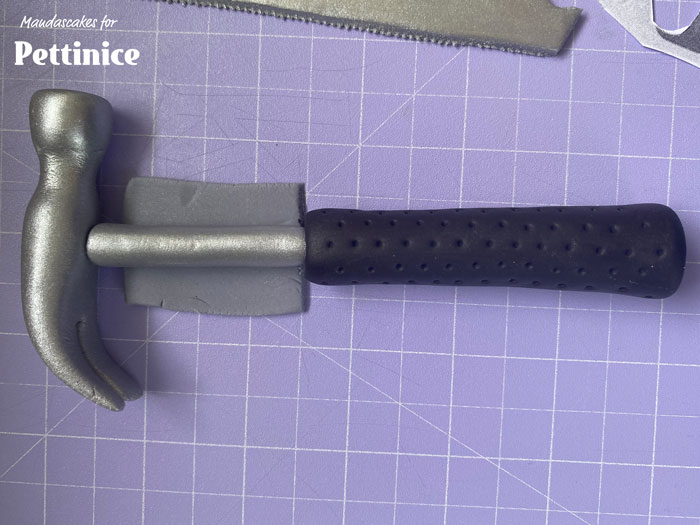
Set aside to dry
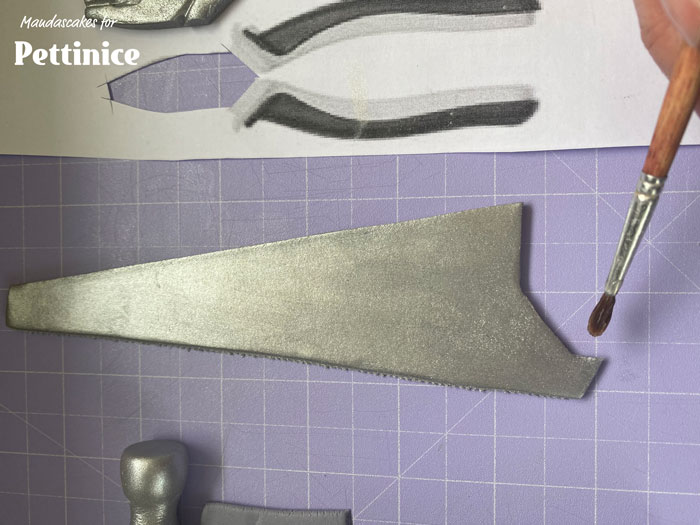
Fondant hand saw tutorial
How to create a fondant hand saw for your tool cake
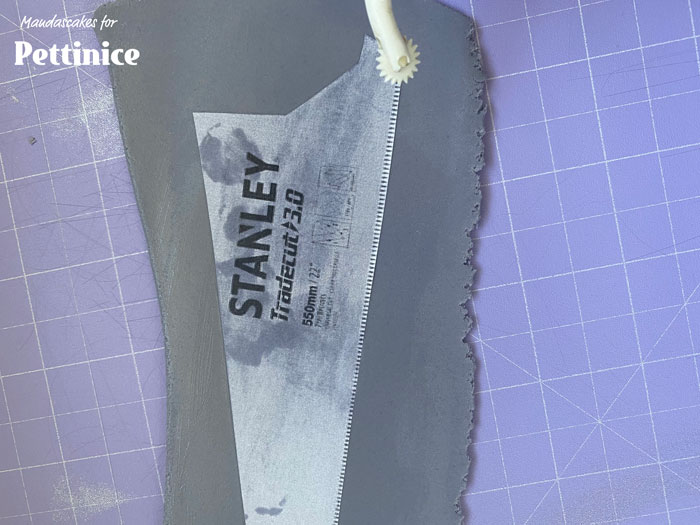
Roll out a piece of fondant for the saw. . Use Crisco to keep your template from sliding. I create the ‘teeth’ of the saw by using the quilting tool to cut this edge, and pull the excess fondant away.
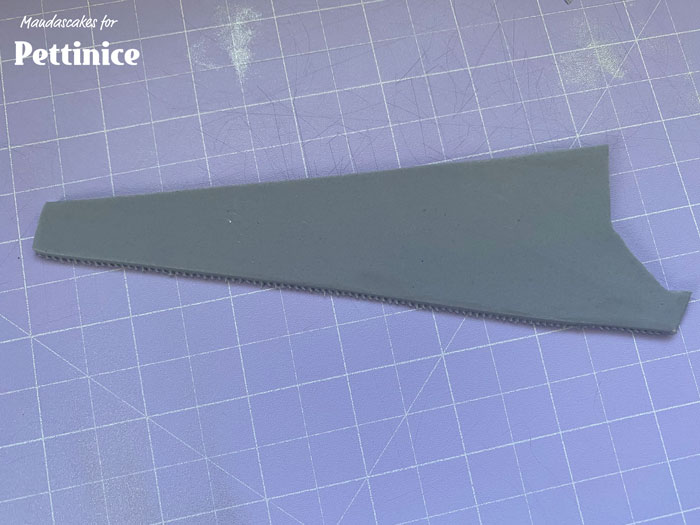
Then cut around the rest of the tool.
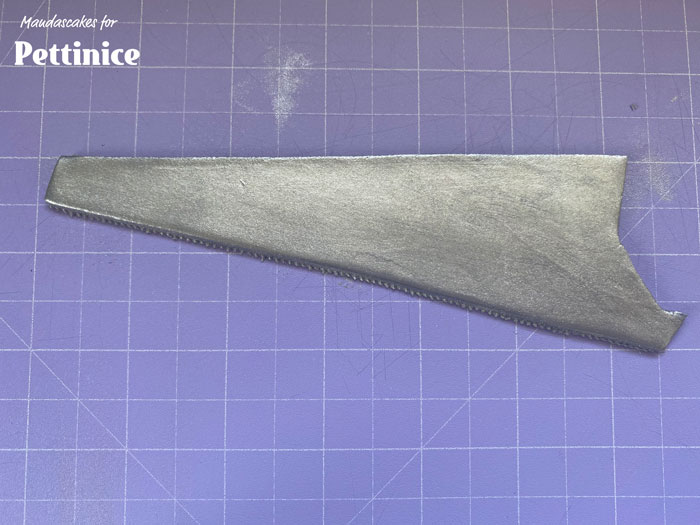
Dust as per the other tools.

Cut out the handle of the saw template, roll a piece of black fondant and use the template to cut out a handle. I’ve also cut an extra piece of yellow detailing from the template.
Glue the handle to the saw. Then the yellow detail to the handle.
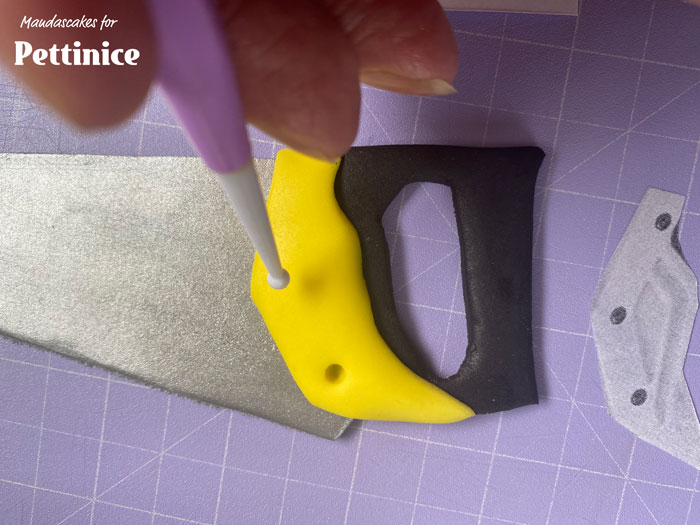
. Make a few small indents using a ball tool, and fill with black dots of fondant.
Fondant nuts and bolts tutorial
How to create a fondant nuts and bolts for your tool cake
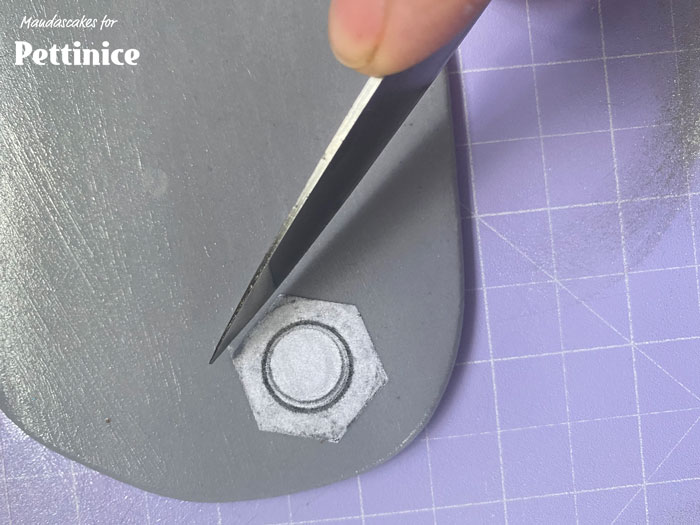
Cut out some nuts (nothing funny going on here), as many as you like. I’ve used another printed template.
Cut out some nuts (nothing funny going on here), as many as you like. I’ve used another printed template.
Now, to create the thread, using the back of a knife on a slight angle, roll it over the sausage gradually rolling while making a continuous line.
So start at the tip of the knife and move upwards until you’re at the base of the knife and start again at the tip if needed.
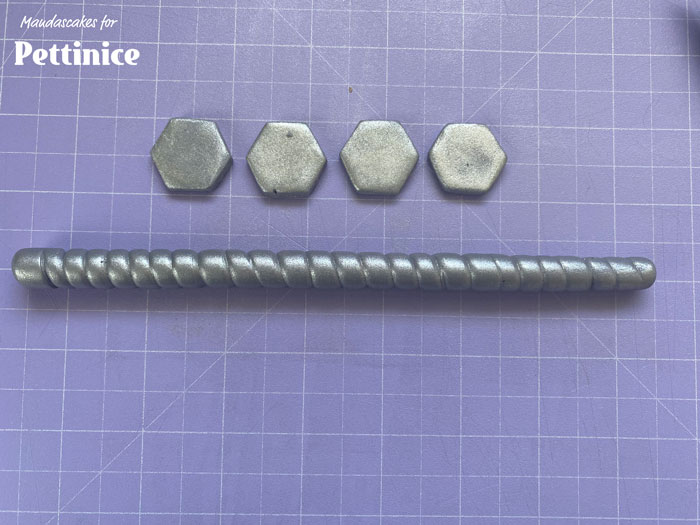
You should have one long sausage with threading.
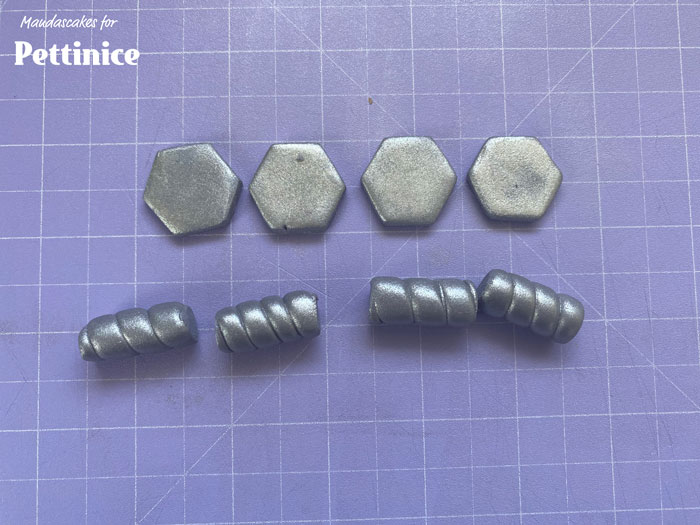
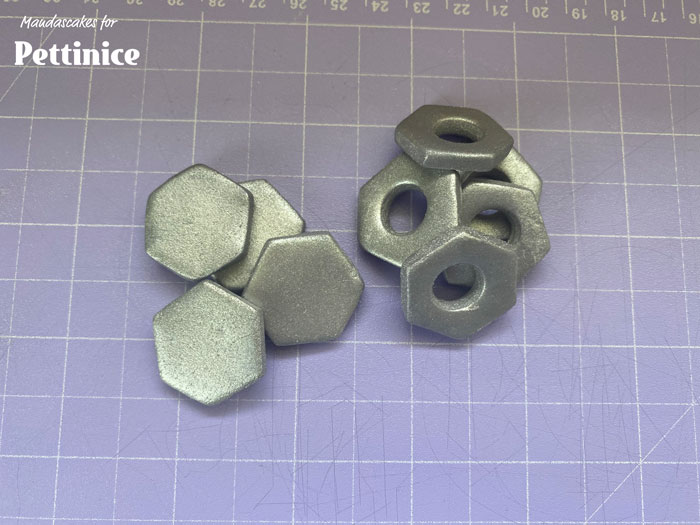
Cut into as many sections as needed for bolts, I’ve made 4, these are the nuts we made earlier without holes.
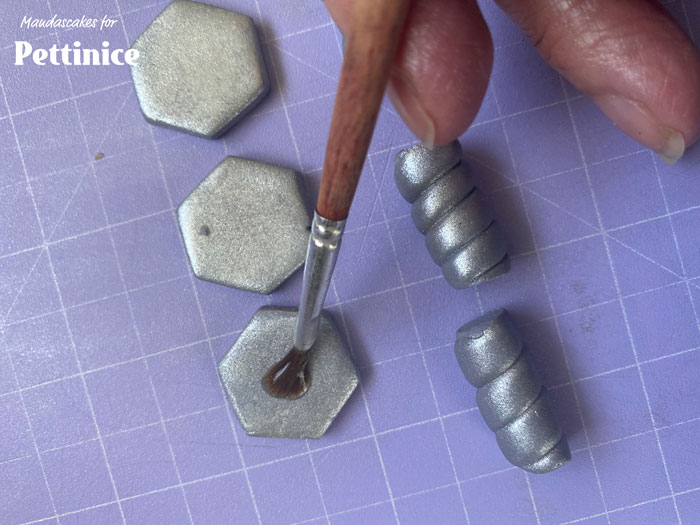
Glue the threaded parts to the head of the bolt.
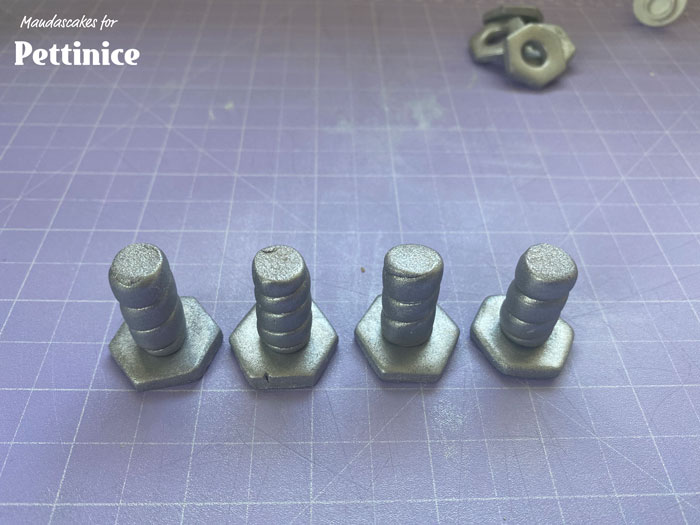
Allow to dry.
Dry your fondant tools overnight for best results
Now we have a collection of tools for the cake. Let these dry at least overnight. Using a little extra tylose will help them harden.
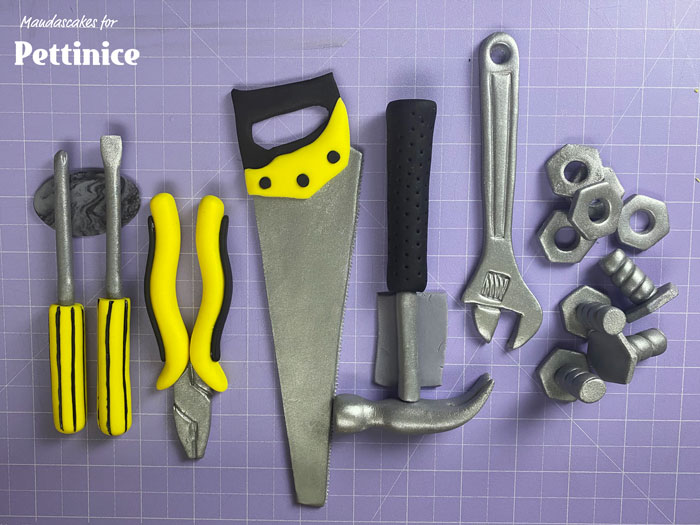
Now we have a collection of tools for the cake. Let these dry at least overnight. Using a little extra tylose will help them harden.
Denim jeans cake tutorial
Create your denim jeans base tier for your tool belt
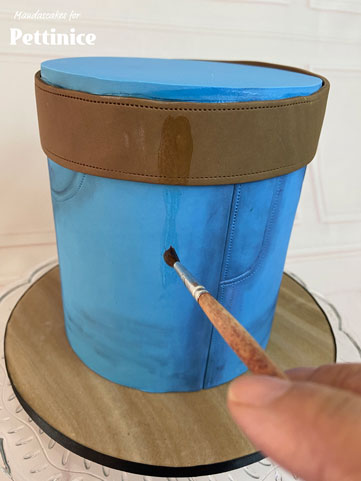
THE JEANS CAKE. I have covered a cake by using the same process at in the Covering a tall cake tutorial, except I cover the sides first and the top last. This leaves the seam on the sides, but there’s no need to smooth this as it will be covered by the belt.
I’ve then made lines for side, front and back seams, a fly and pockets and made additional stitch lines for extra detail using the quilting tool. I literally use my own jeans as a basic guide. Don’t get too hung up on detail here, a lot will be covered by the belt and tools. I’ve then dusted areas to give depth with blue and black dusting powder mixed together. These are a tradies/DIYers jeans, they’re rough, so let it be rough . I’ve placed the cake on a pre iced wood look board, but this is again, optional.
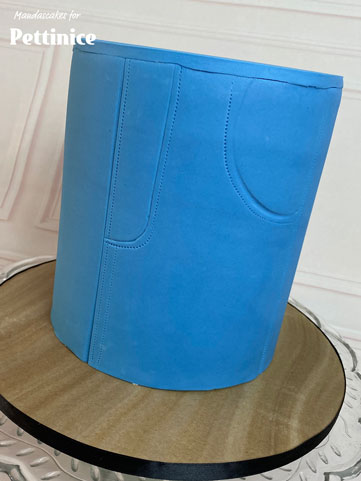
Lines and stitching detail.
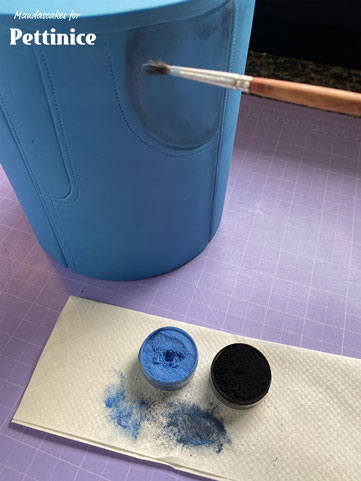
. I’ve then dusted areas to give depth with blue and black dusting powder mixed together. These are a tradies/DIYers jeans, they’re rough, so let it be rough
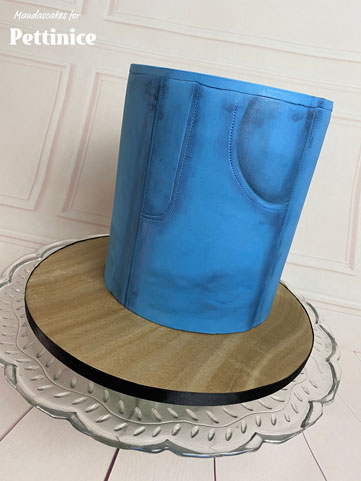
I’ve placed the cake on a pre iced wood look board, but this is again, optional.
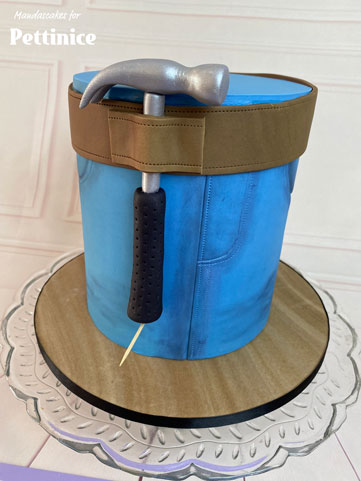
Tool belt cake tutorial
How to create a tool belt holder for your builder's cake
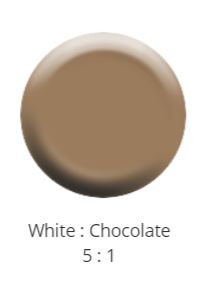
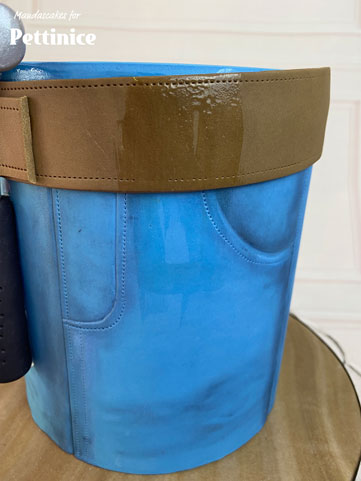
Mix Five parts white and 1 part chocolate Pettinice.
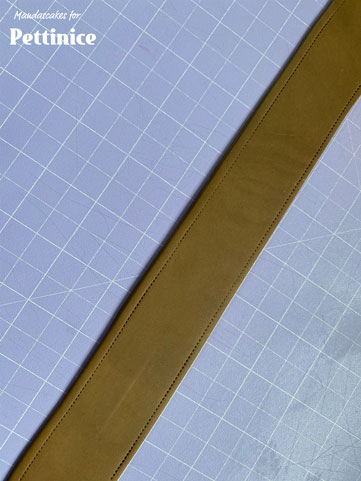
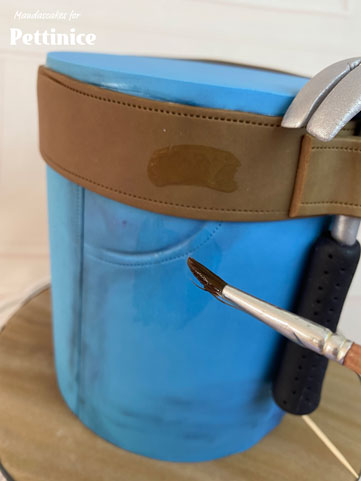
Roll and cut out your belt strap from brown fondant .
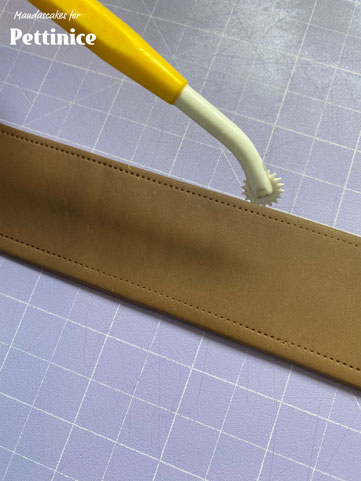
Run the edge with stitch marks using the quilting tool.
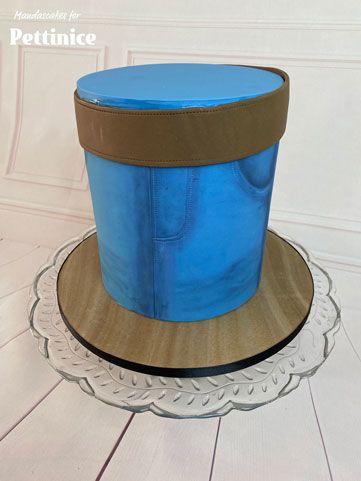
Using edible glue, adhere this to the top edge of the cake. Mines a bit wonky, but I’ve done this on purpose, after all, who’s tool belt sits straight?
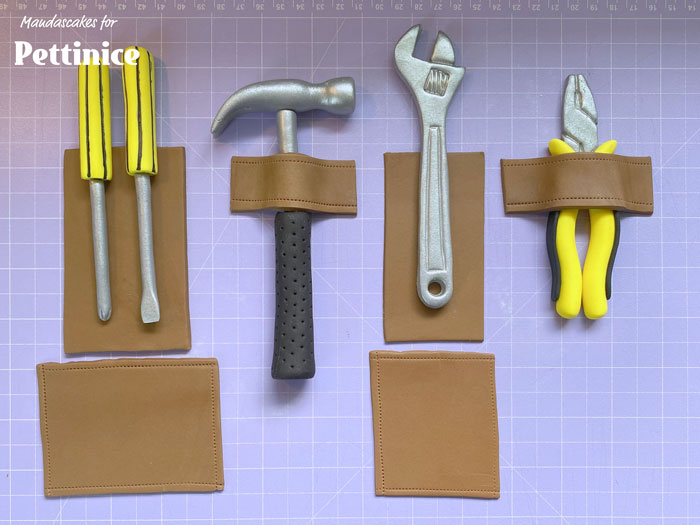
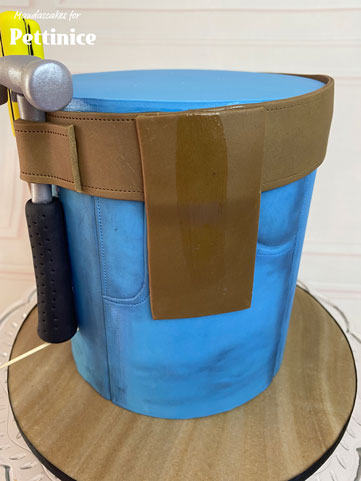
Cut out some tabs and pockets as shown which will ‘hold’ the tools. It’s totally up to you which ones go in pockets and which ones go in tabs. I’ve laid them out how I want them to go on the cake.
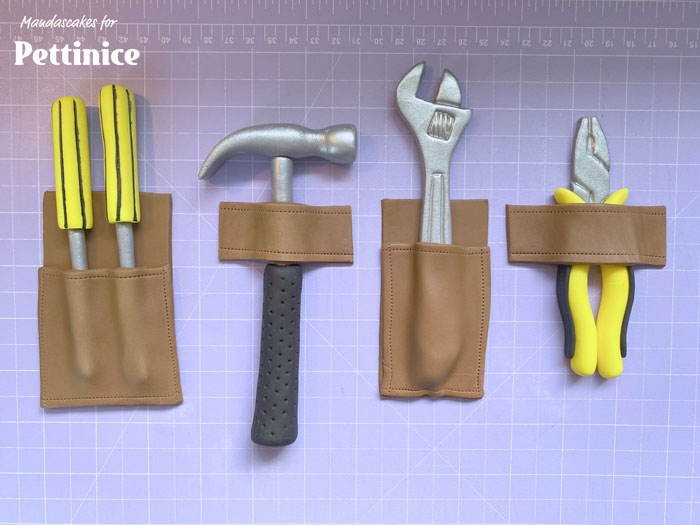
The pockets have a taller piece for the back, and a shorter slightly wider piece for the front, I also make stitched edging on these. Place the top of the pockets on the tools and press down slightly to make the shape of the tool underneath. DON’T GLUE THESE DOWN YET.
Glue the hammer to the cake by making a line of glue where it is going to stick. Make sure this is tacky to touch (not slippery) before trying to stick the hammer on, or it will slide down the cake.
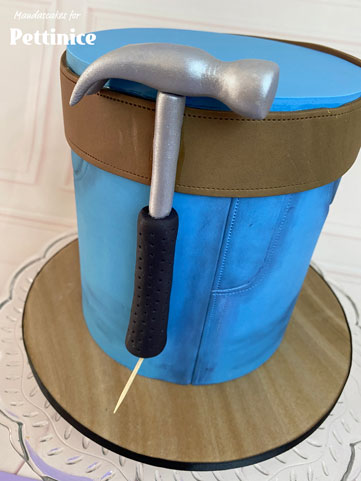
I pop a toothpick just under the hammer into the cake to help support it while it dries.
Paint some glue where the tab is going to stick, both on the belt either side of the hammer and on the hammer stem
Again, let the glue go tacky before sticking the tab on.
Cute!
Glue the back of the screwdriver pocket to the cake.

Glue the back of the screwdriver pocket to the cake

Paint some glue on the pocket where the screwdrivers will go, let it go tacky.
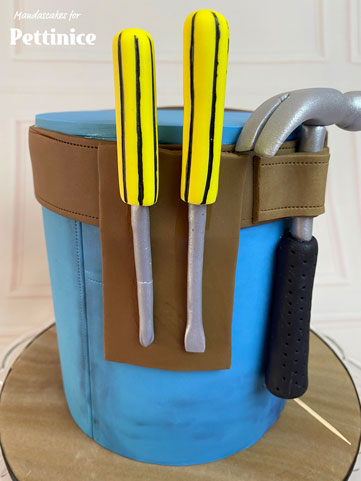
Next, stick the screwdrivers on.
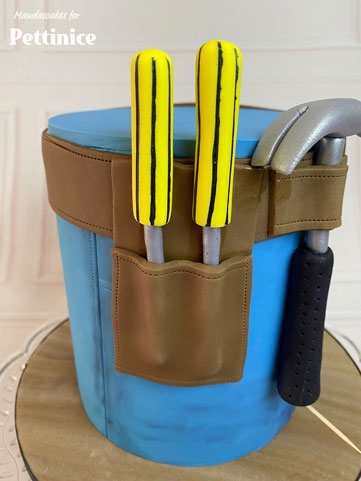
Glue the front of the pocket on top of the ends of the screwdrivers.
Repeat this process for the spanner and the pliers.

Glue the spanner, and then cover with the pocket - making sure you wait until the glue is tacky before sticking.

. I found it was easier to glue the tip of the pliers first, then the handles, then the tab over the handles. (Opps, I missed a photo of this, but it's the same process as per the hammer and spanner.)
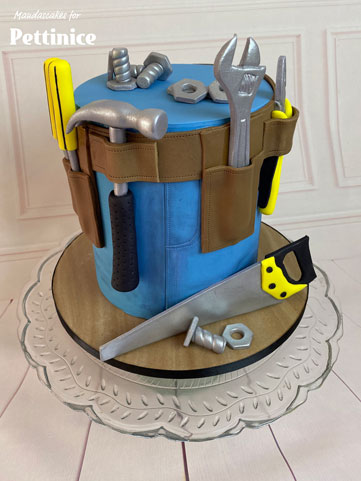
Place the saw at the base of the cake, and randomly scatter the nuts and bolts where you want them.
Finishing details
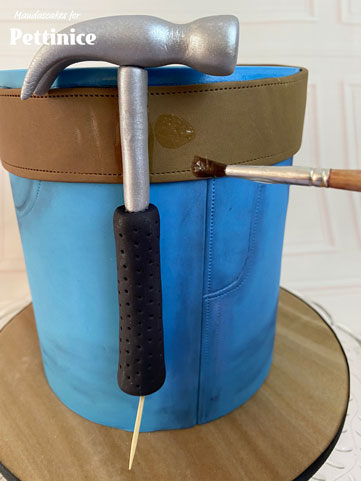
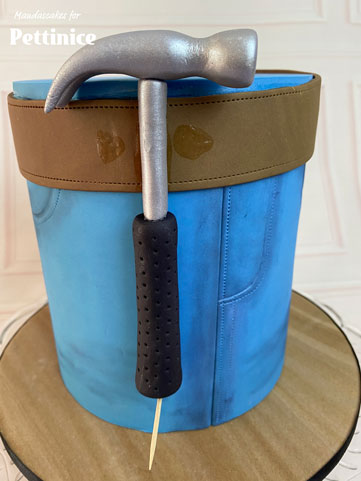
Dust the crevice’s of the belt with black or brown to give it that work look. Then roll a bunch of small silver balls and place them on the corners of the tabs and pockets to represent rivets. Flatten slightly.

Mandascakes is based in Birkdale on the North Shore where she lives with her husband and two kids. Her cake journey began at her mum's side, when she remembers helping fill the cake tins using the good old Woman’s Weekly kids Birthday Cake Book.
When she had her own kids, her cake decorating skills continued to grow and she found herself soon making cakes for family and friends. As word got out, she turned her hobby and love of arts and crafts into a full time business running Mandascakes.
See more of Amanda's cakes at: