How to make a vintage clutch bag with Jo Tan
You will need:
Pettinice
- White Pettinice (I used 300gms)
- Black Pettinice (I used 10gms)
Tools, etc.
- 2mm cake card
- Ganache Cake
- Apricot jam
- Silver lustre dust
- Silver edible paint
- Silver cachous of different shapes
- Kebab stick
- Edible glue (tylose and vodka mix)
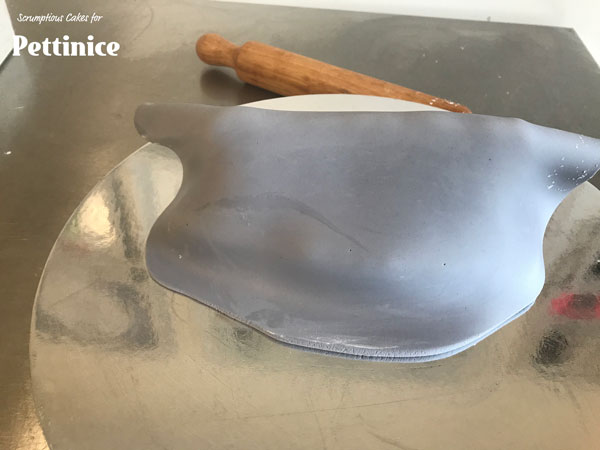
- Mould as in pic below however you can use anyone that suits the look you require.
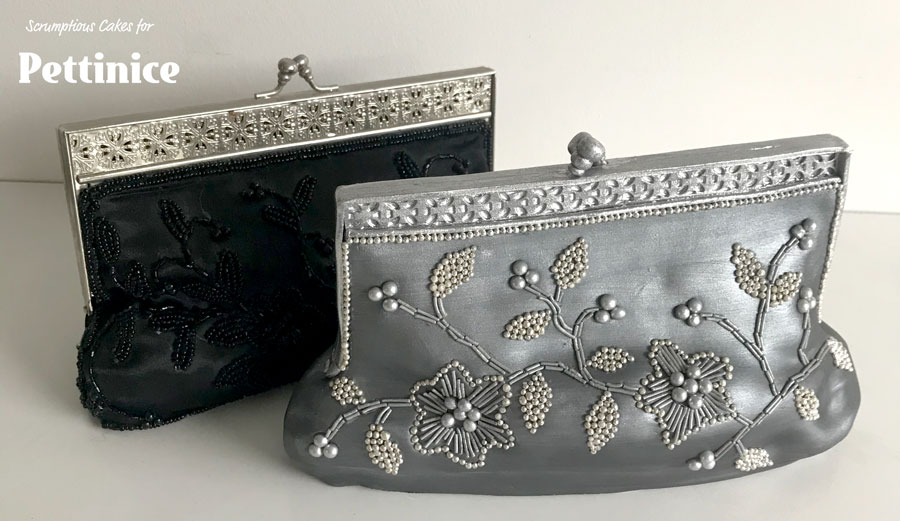
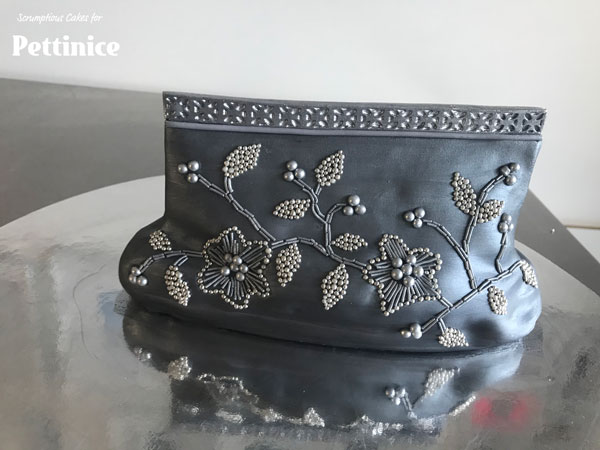
My sister in law had this beautiful clutch in silver that I admired, and so she kindly bought me the black version which I have loved and used for numerous formal occasions over the years. It now holds so many memories for me and so when thinking what shall I make out of cake, it seemed appropriately special to me; however, currently being in lockdown I didn't have black lustre and so silver it became.

Carving the cake
To start I used my existing clutch to trace a rough template from onto the cake card.
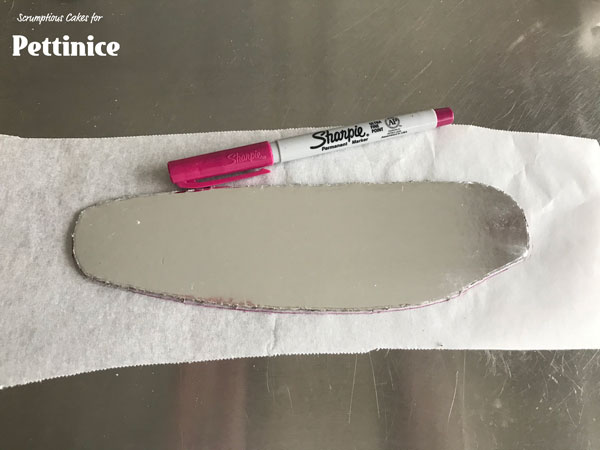
I then used the template to make another to use when cutting the cake.
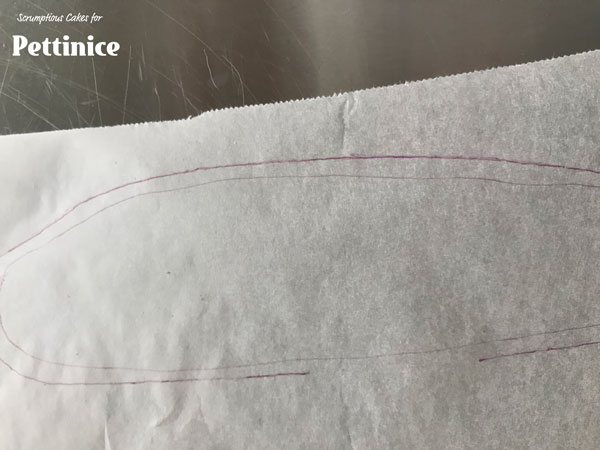
I cut the cake template about 3mm smaller than the cake card template; this allows room for ganache and some of the Pettinice.
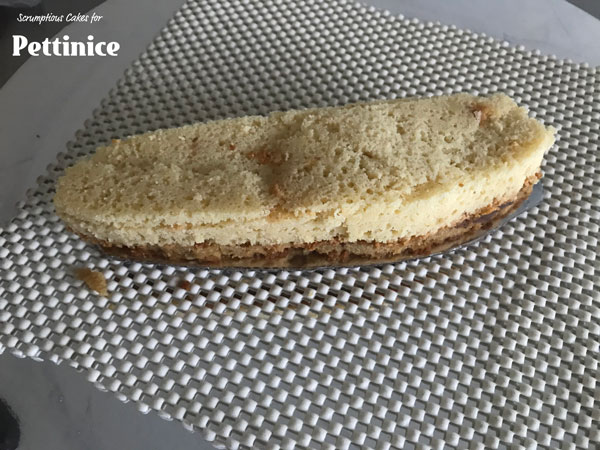
Start stacking your cake by first putting a little ganache on the board ensuring the cake sticks to the board.
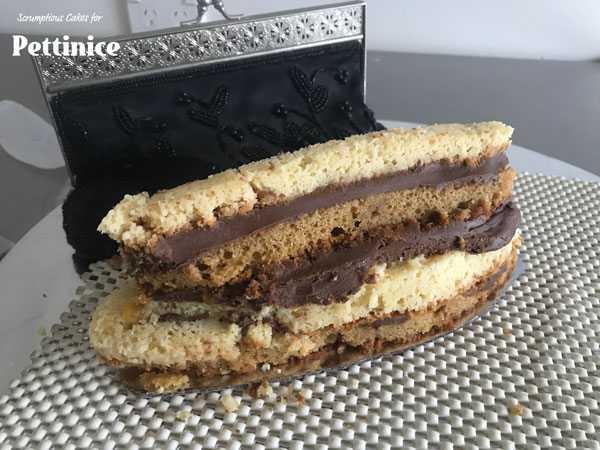
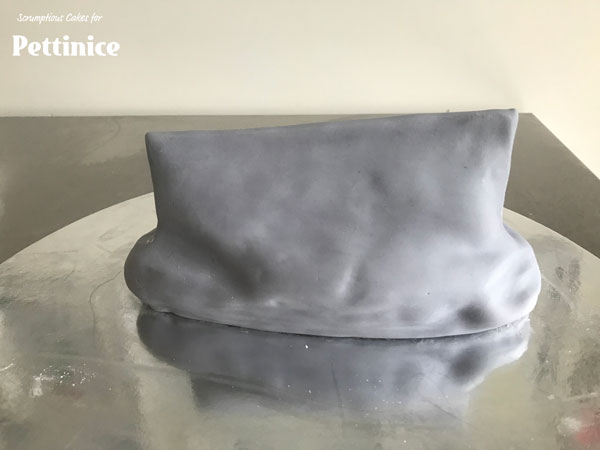
Add your cake layer by layer until you are happy with the height. I used the clutch I was using as inspiration as a guide. After stacking your cake carve it to further suit the shape you are looking for, remember to add dents and folds.
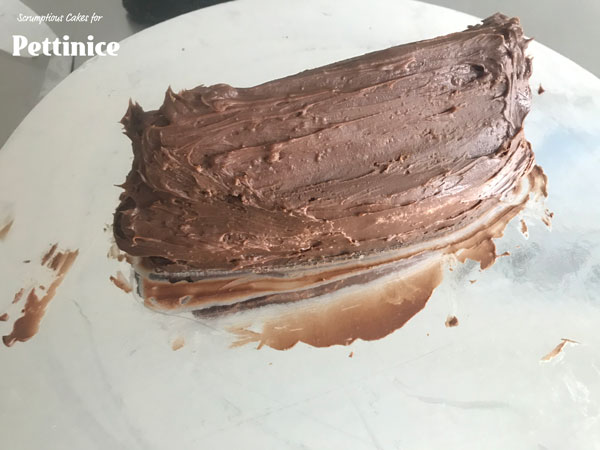
Once this is done and smoothed you will really start to see the true shape of your creation thus far, I always find it hard to see before this stage.
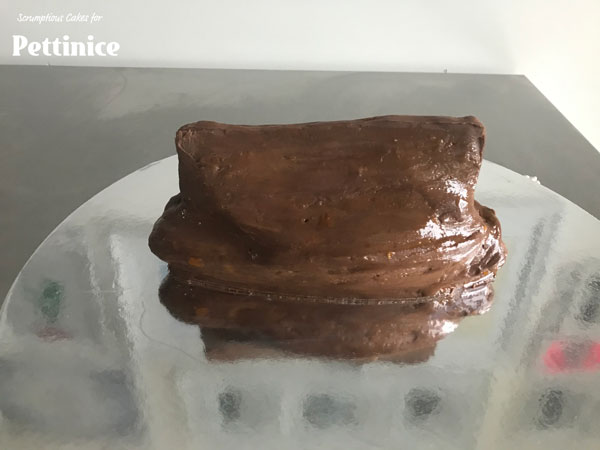
Once you have smoothed your ganache cover your cake with your "sticking' agent; I use apricot jam, others use Crisco or even water.
I'm really happy with the shape at this point, and now it's time to cover the cake.
Covering the cake with Pettinice
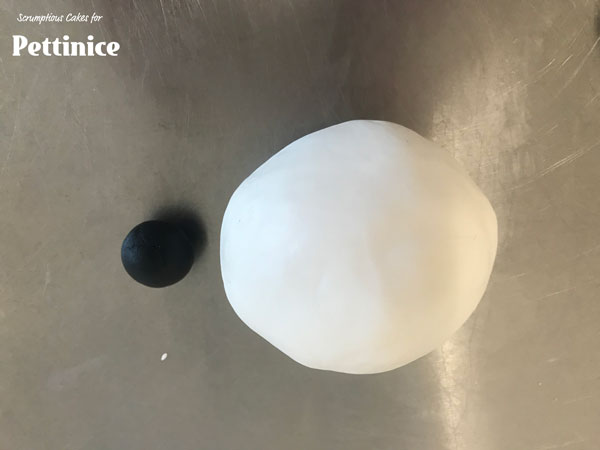
I used 300 grams of White Pettinice with 10 grams of Black Pettinice to make a light grey.
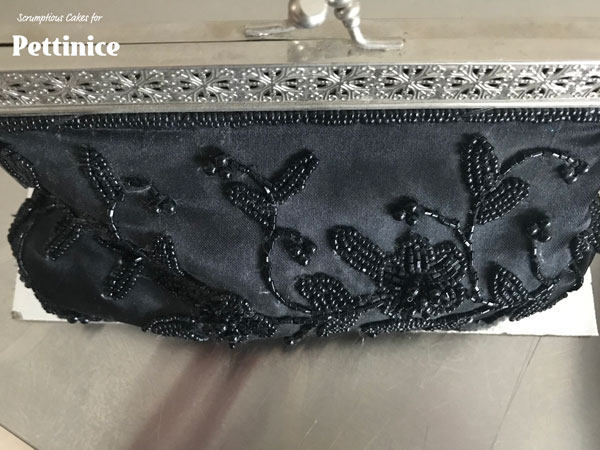
I folded the rolled Pettince over the clutch and joined seams on either end – doing it this way means it doesn’t matter if the seams don’t rub together as there is normally a seam here anyway.
When you are covering again remember to add dents and folds in the ‘material’.
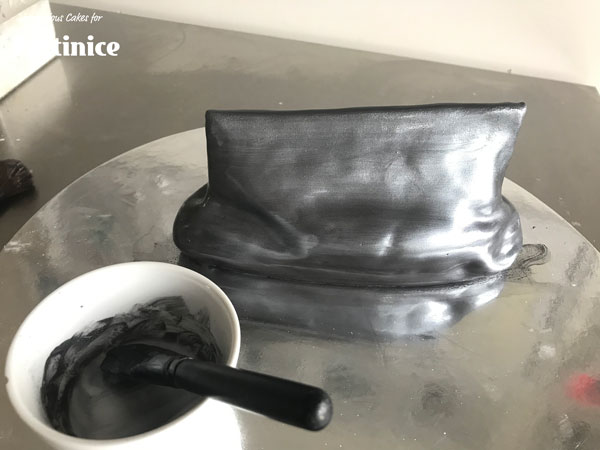
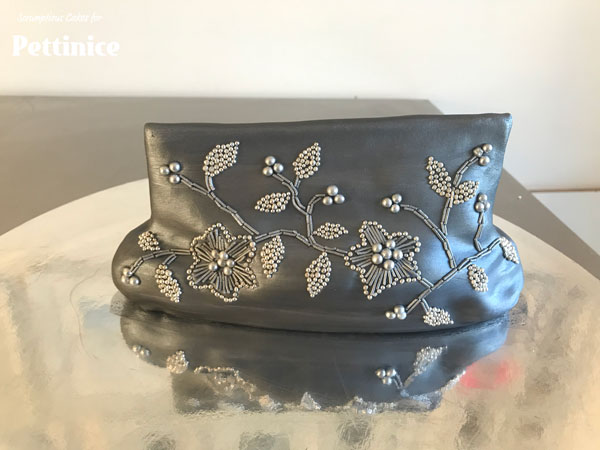
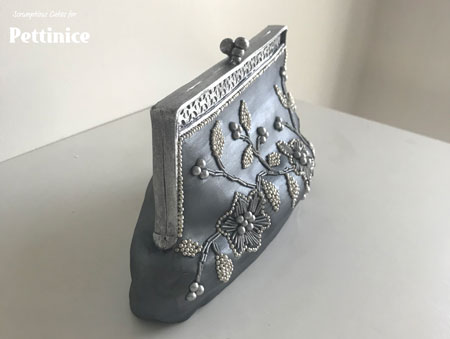
Paint the clutch with silver lustre, I used an antique silver lustre.

While the lustre is drying add the cachous, the Pettinice being wet will help the cachous stick easily. When it gets dry brush with edible glue where you want your next cashous to go.
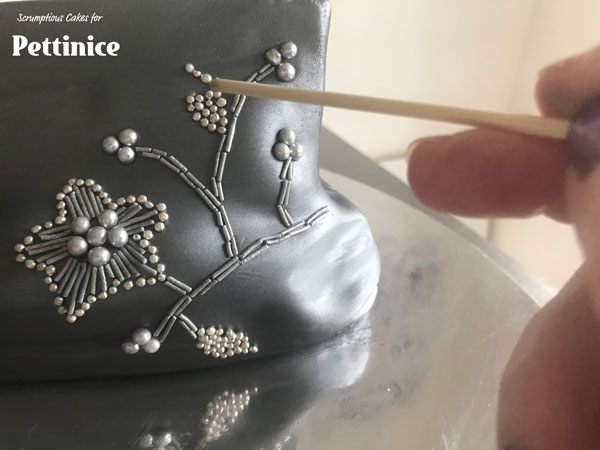
I find the easiest way to apply cachous is to dip the end of a kebab stick into the edible glue and then touch the cachous with that end and it should pick up and allow you to lift it to where you want to place it.
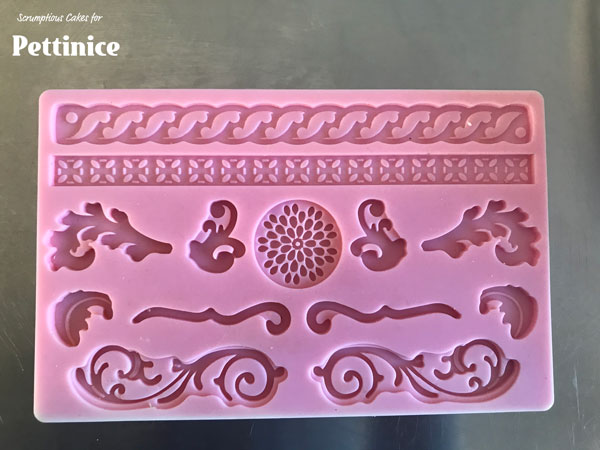
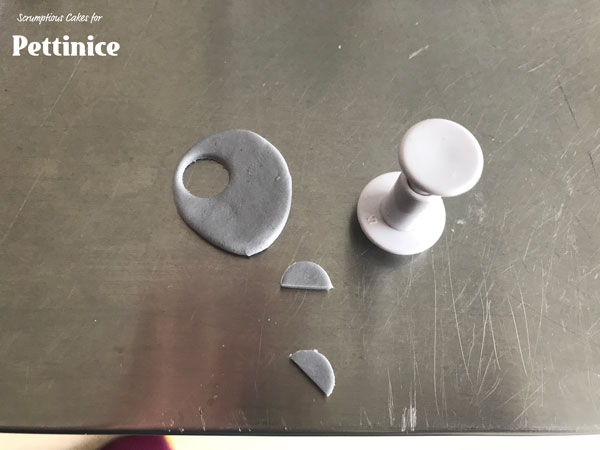
This is the mold I used for the clutch details.
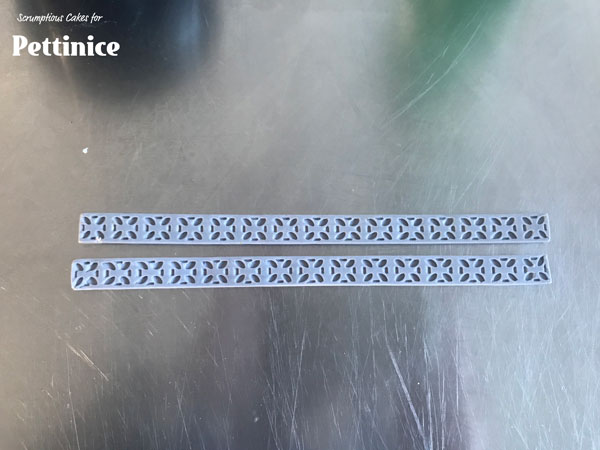
I stuck 2 imprints together and then glued them to the top of the clutch.
Before adding the imprints.
The two back-to-back imprints resting on top of the clutch.
Have fun and take your time with this fun and detailed cake.
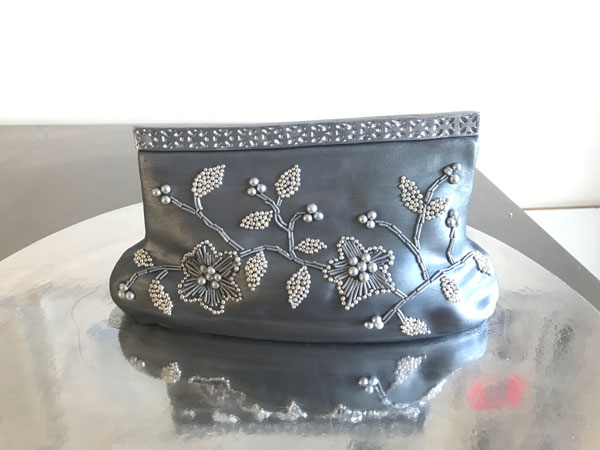
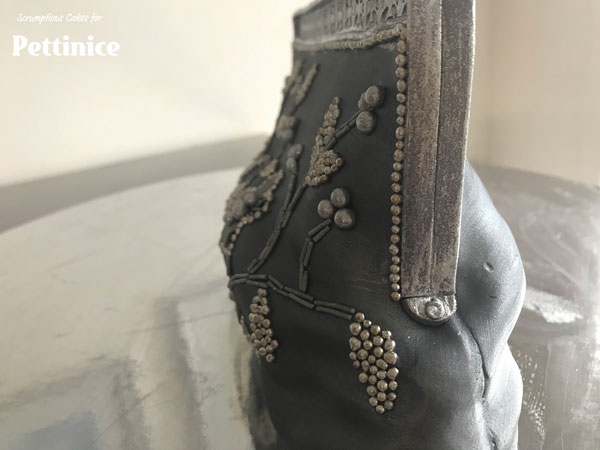
I then rolled a long sausage to place between the imprint above and clutch ‘material’.
The easiest and tidiest way to do this is to roll with your smoother which enables the ‘sausage’ to be an even thickness.
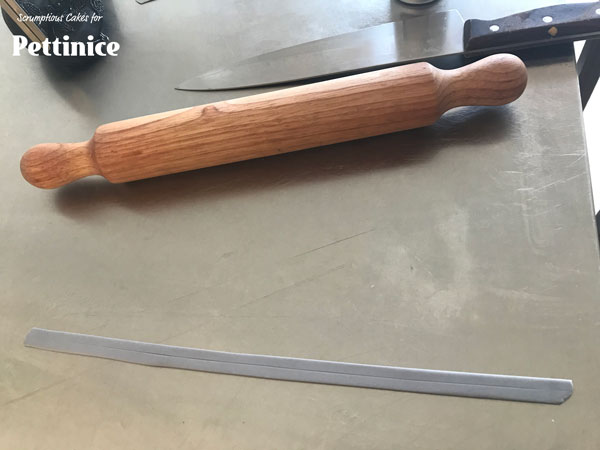
Then roll out your Pettinice to about 2mm and cut a long strip with a line indented thru the middle of it.
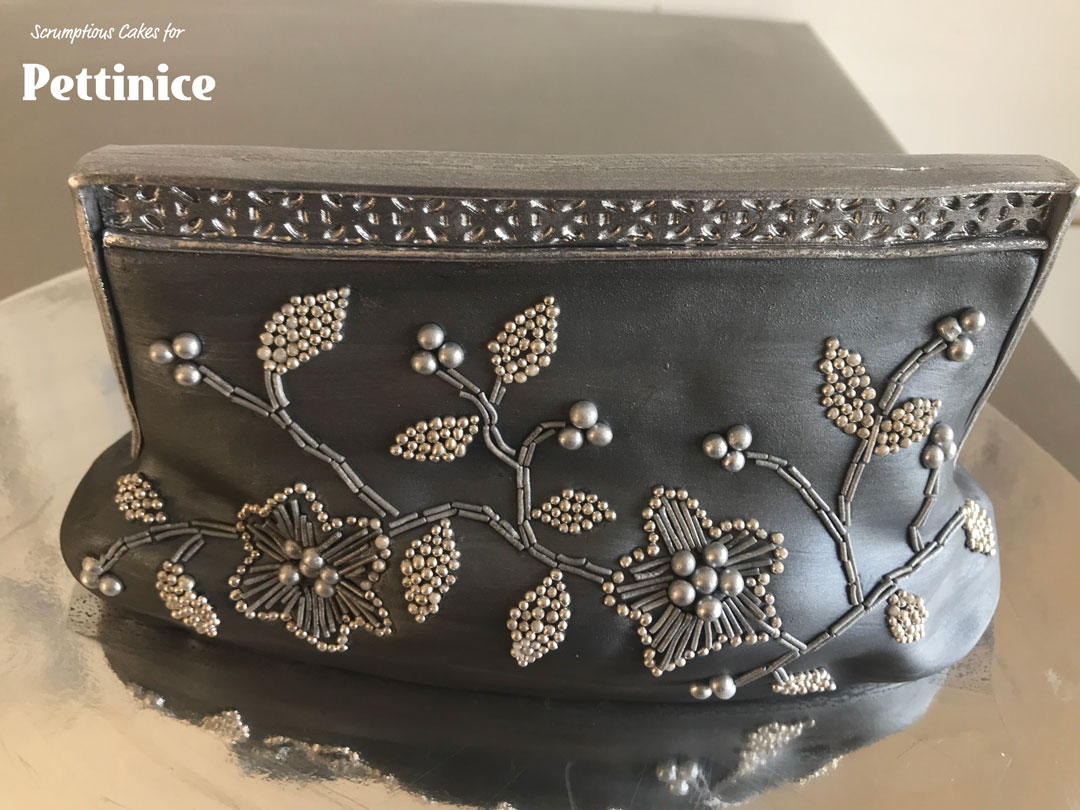
Drape the strip over the top of the mould imprint and down the side as you can see in this photo.
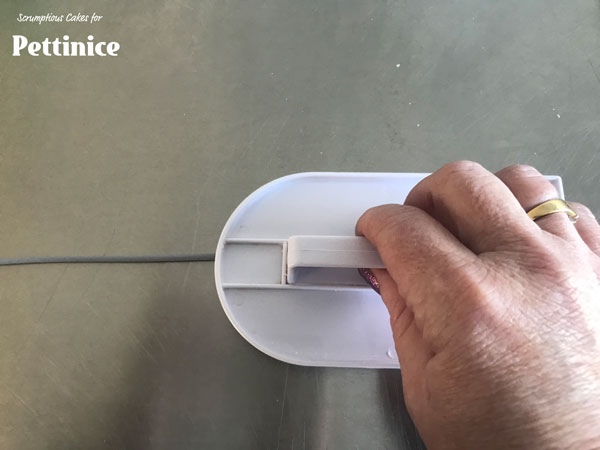
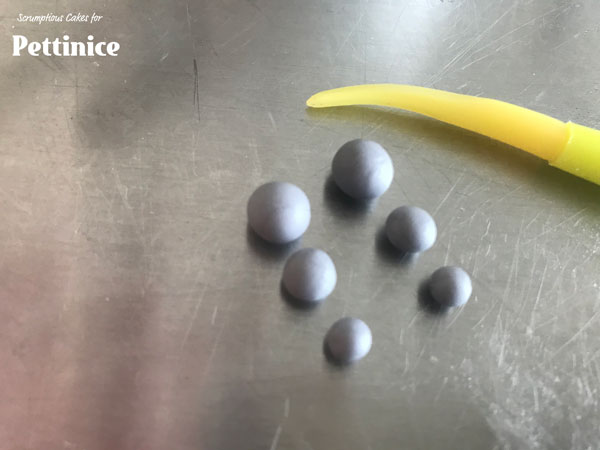
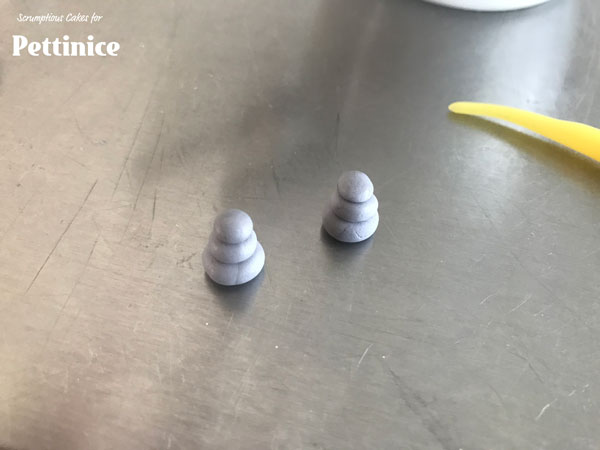
For the clasp roll 6 balls of 3 different sizes and gently push them together.
Insert a toothpick into each and then insert into the middle of the top of your cake.
.
Finally add a semi-circle at the bottom of your side detail for the hinge of the opening function of your clutch. I painted these details with edible silver paint which provided a nice contrast with the lustre of the ‘material’.
.
Side view of strips, clasps, imprints and final details.
Jo started making cakes for her children around 2001 and her designs have been fun and varied, including an octopus sitting on bananas to a rainbow tree. She laughs when she recalls how terrible her first cakes turned out, but enjoyed making them so much she decided to learn how to decorate a cake properly. Now she enjoys sharing her skills while teaching and demonstrating. Her number one tip: “Patience is a virtue, so spend that extra time to get it right."
See more of Jo's cakes at