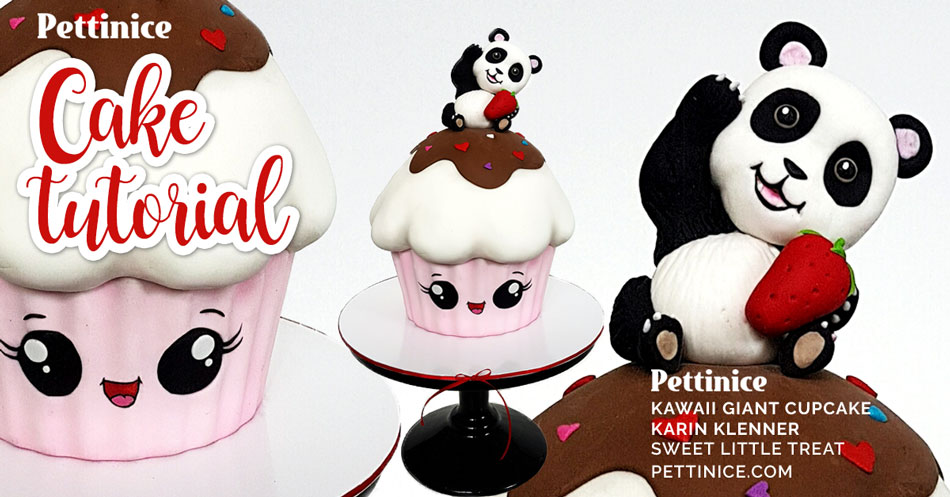
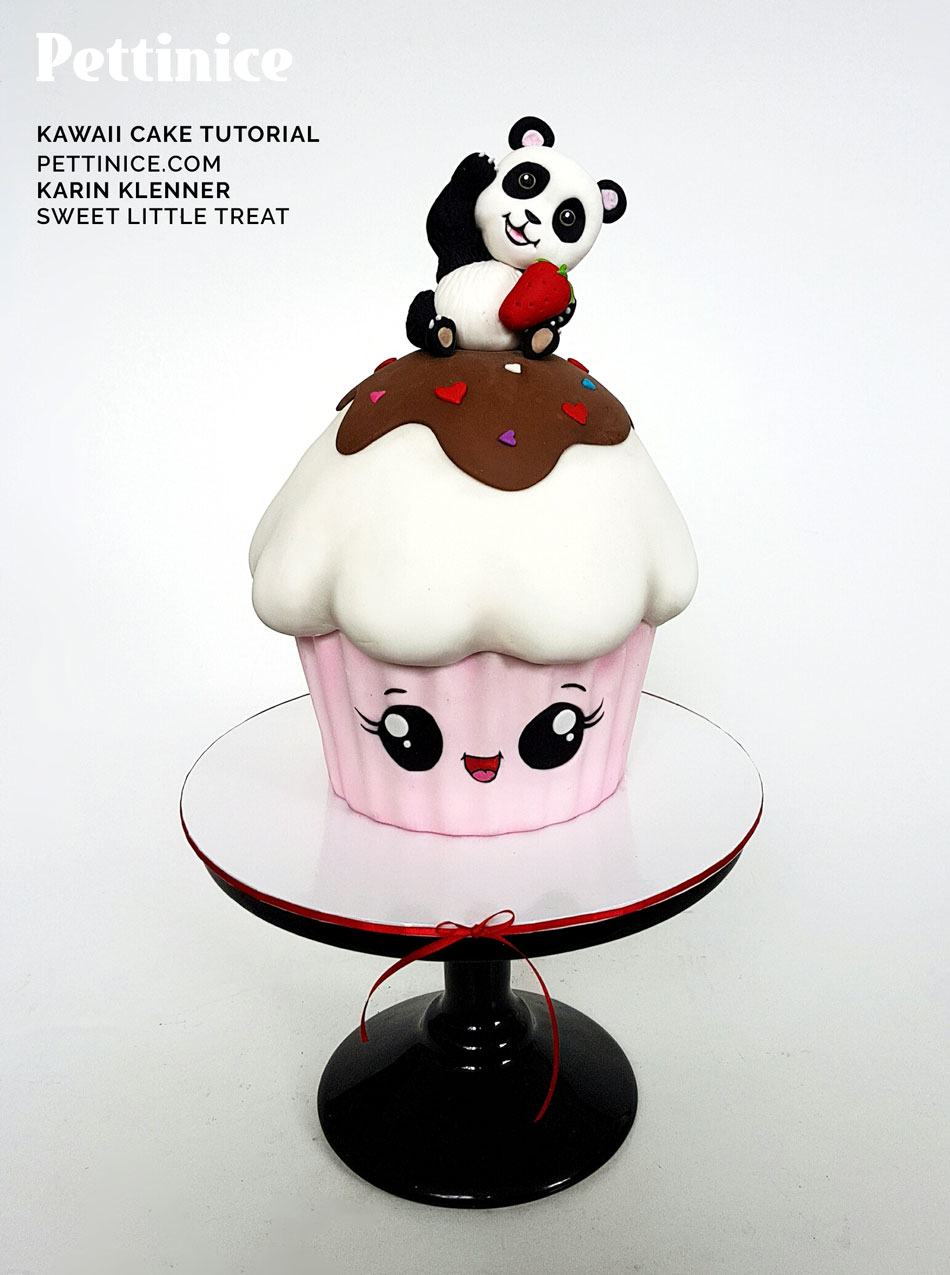
Kawaii Giant Cupcake and Panda cake tutorial
What you need:
Option 1: Chocolate shell bottom
- 1 x packet Nestles white chocolate melts
- 1 x silicone giant cupcake mould.
Option 2: Carved cake bottom
- 2 inch high 5 inch cake
- 2 inch high 6 inch cake
- 6 inch 1/2 ball tin (or carve a 6 inch into half a round)
You definitely need:
- 430grms pettinice pink fondant (I made a pale pink first by mixing with white)
- 500 grms pettinice white fondant
- 1/4 pack brown fondant
- golf ball size of black fondant
- Ganache or buttercream
- Circle cutters
- paint brush
- Silicone pointy tool
- Razor blade
- Edible glue
- Powder colours
- Vodka or decorators spirit for painting
- black gel or Sweetsticks edible paint
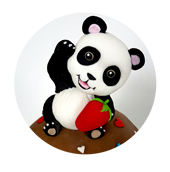
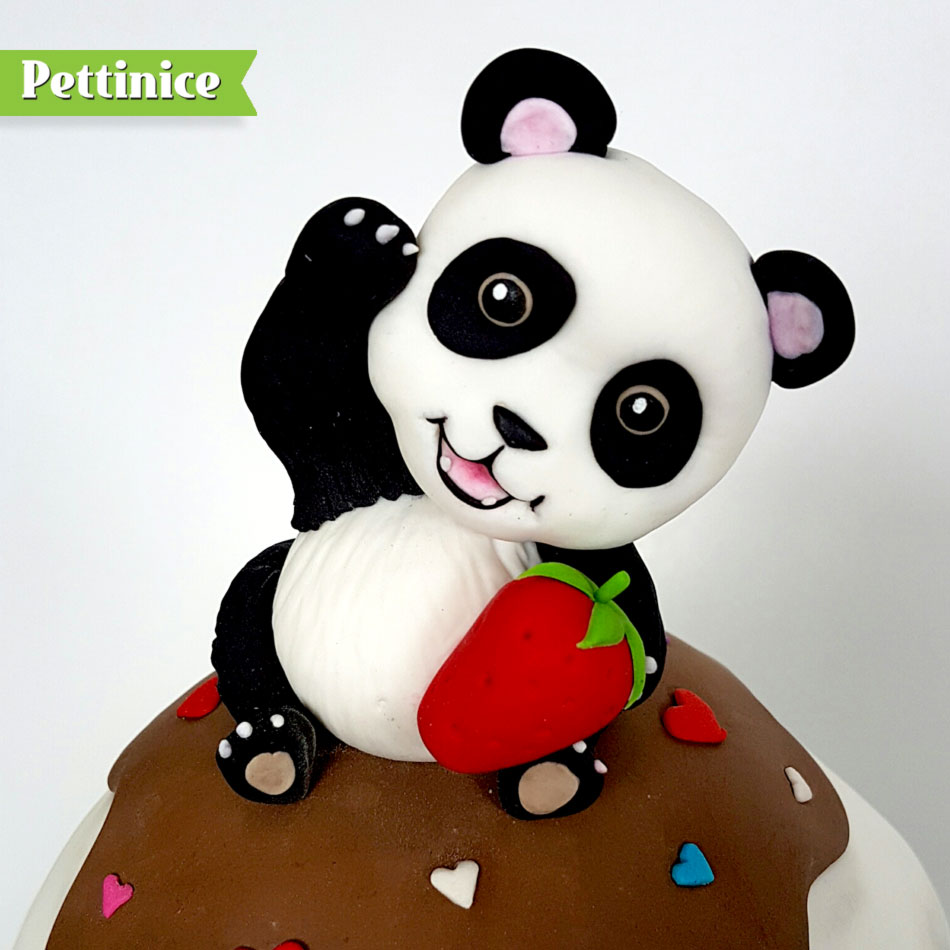
See the Panda figurine tutorial here 🐼

.
A special cake for a sweet girl
Kawaii (かわいい, [kaɰaiꜜi], "lovable", "cute", or "adorable") is the culture of cuteness in Japan. The cuteness culture, or kawaii aesthetic, has become a prominent aspect of Japanese popular culture, entertainment, clothing, food, toys, personal appearance and mannerisms.
Making the cupcake base with a chocolate shell
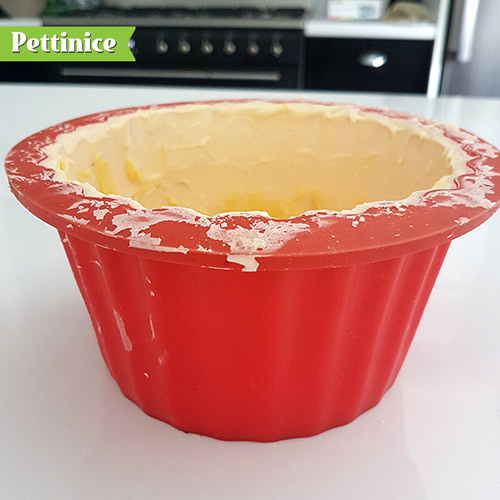
Melt your packet of white melts. Paint a coat of white chocolate covering the entire case. Put in fridge for 5 - 10 mins then add another coat using up all the white chocolate. Pop back in the fridge until set.
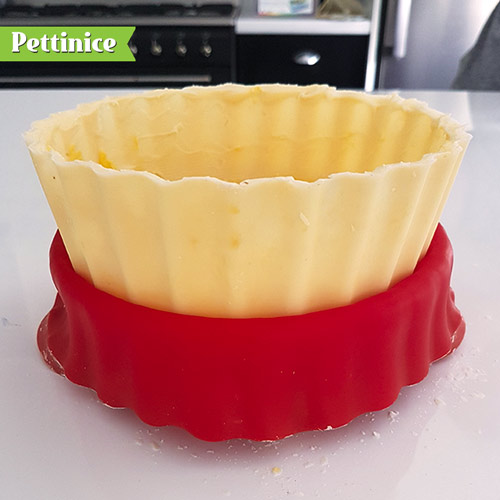
Once set, peel back your casing; once it's half down, flip it over so the base is on top and peel the remaining case off.
Grab some vegetable fat and paint a layer over the chocolate, this will give the fondant something to stick to.
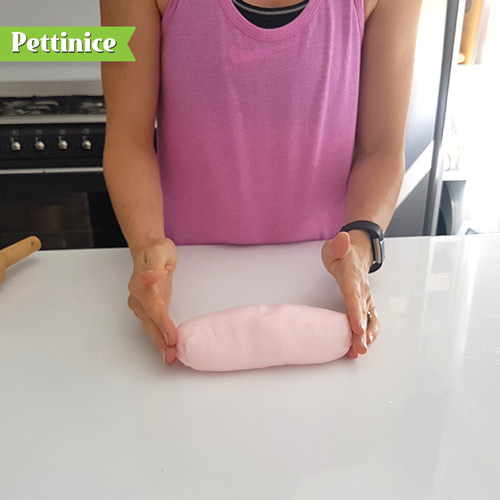
Knead your pink fondant until nice and soft. Roll in to a large sausage shape.
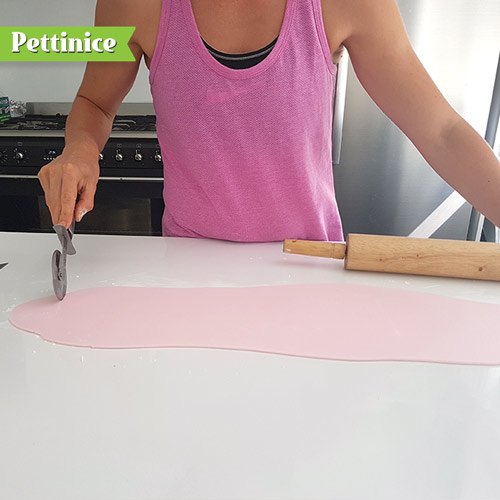
Roll out nice and thin (approx 3 mm thick). Measure the hight of your chocolate cupcake case. Cut clean lines with a knife or pizza cutter, cutting the shortest length a few cm higher than the length you just measured.
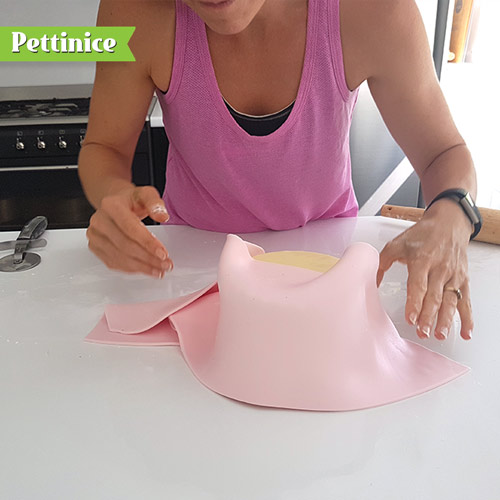
Bring you cupcake casing close and wrap it around the upside down chocolate casing, try and keep the edge of the fondant against the bench with no excess fondant. This way you won't have to trim the top later.
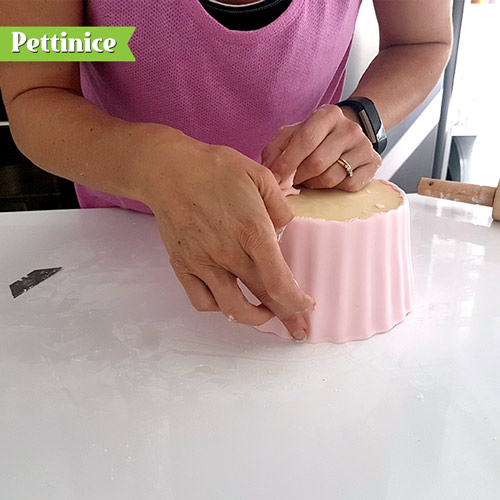
As you are wrapping fondant use your finger to indent the groves of the cupcake casing. Try and work fast to avoid it drying out.
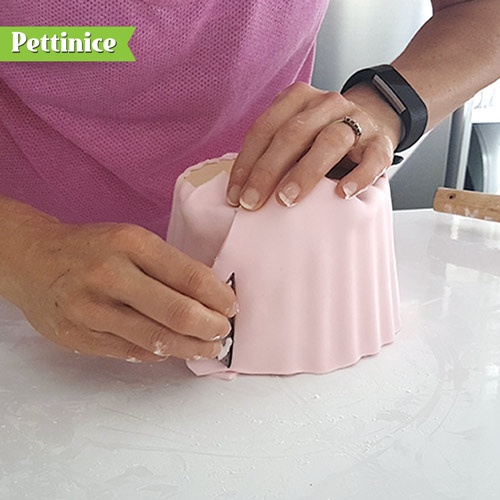
Once fondant is wrapped around do a rough trim on top to cut away the excess.
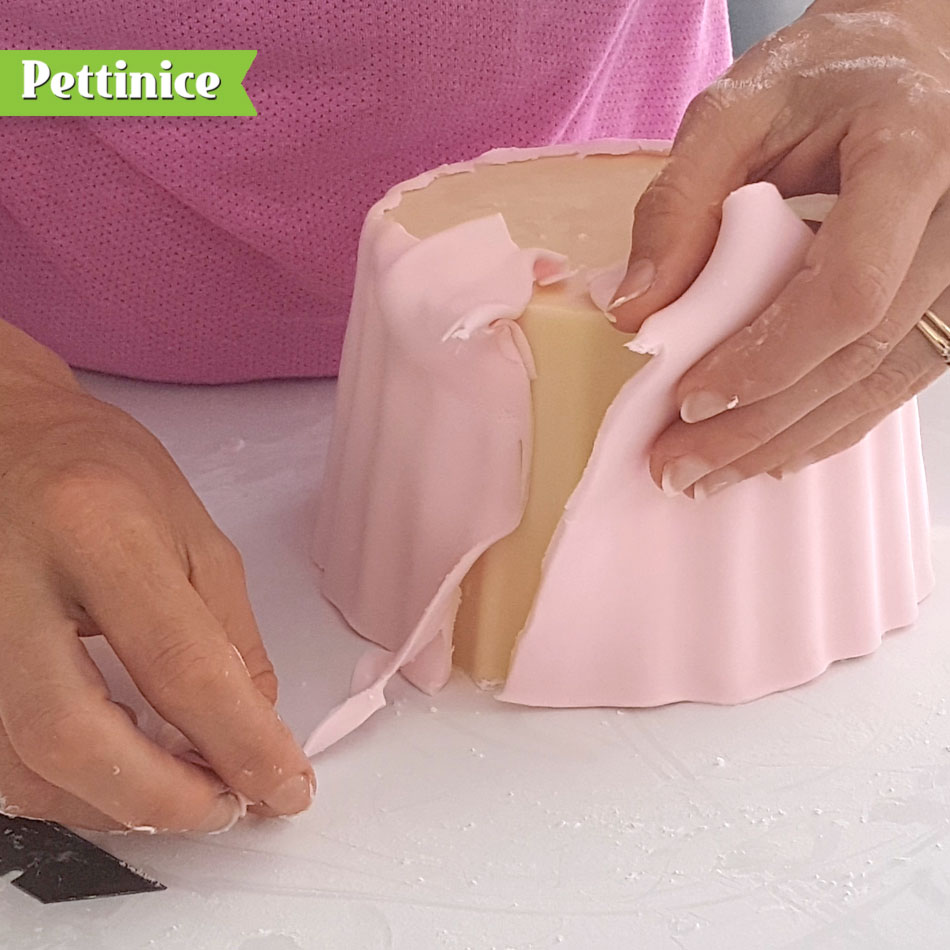
Overlap your join and cut a line through both layers of fondant. Remove excess and seal together.
Rub the join and the warmth of your finger should smooth out the join making it nearly disappear.
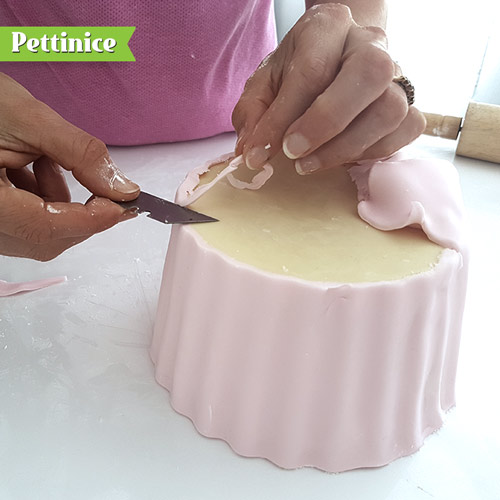
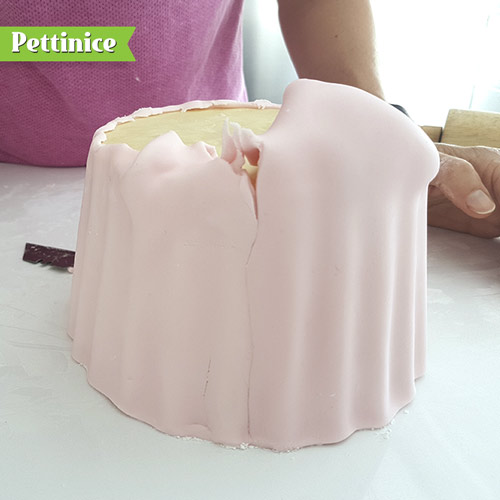
Do a final trim of the casing edge.

Smooth edges.
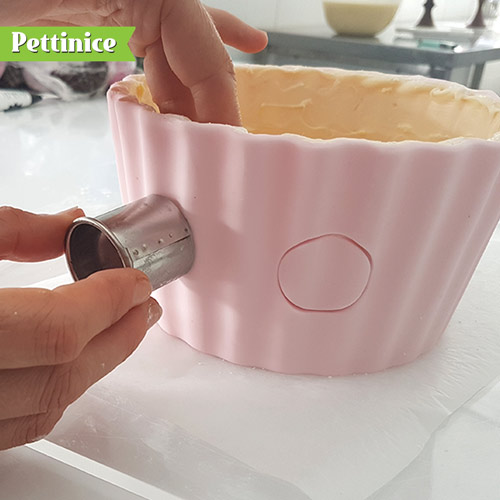
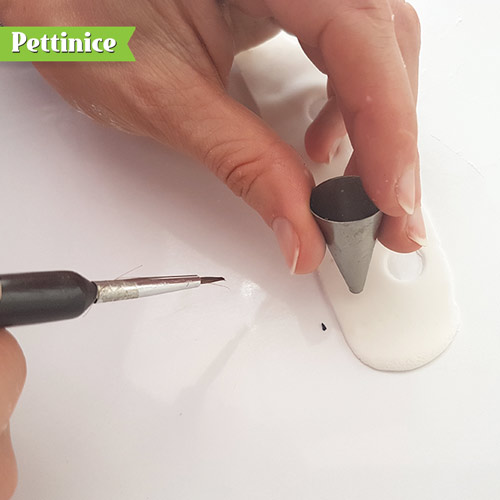
Flip you casing back over on to a bit of baking paper. Take a 3cm circle cutter and cut out two eyes.
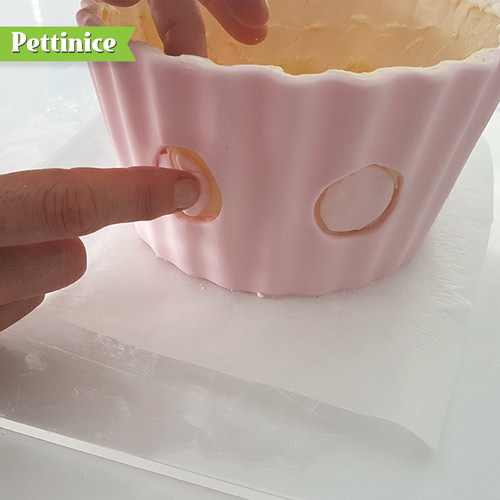
Fill in the groves with a bit of fondant. This will ensure our eyes don't look weird.
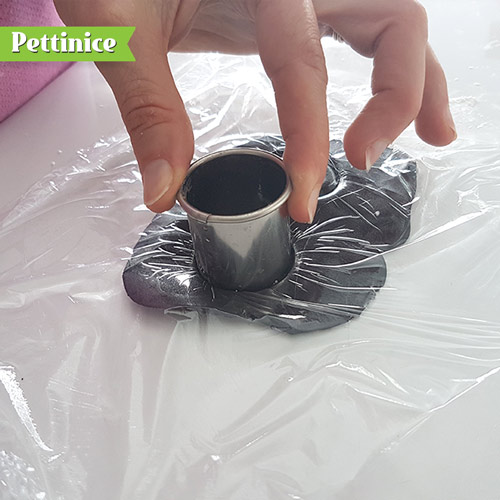
Roll out some black fondant, just a few mm thick. Cover in glad wrap. Press your 3cm circle cutter over the fondant and give it a good turn so you get a clean cut.
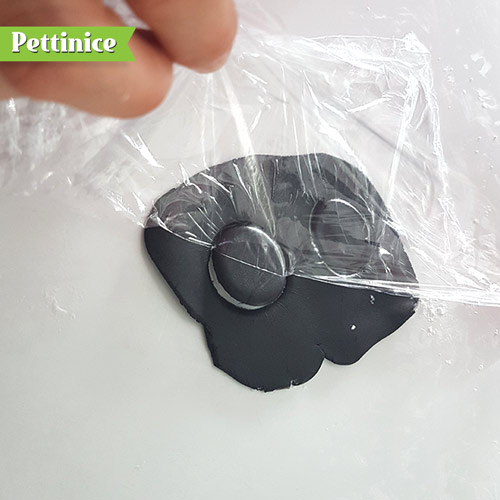
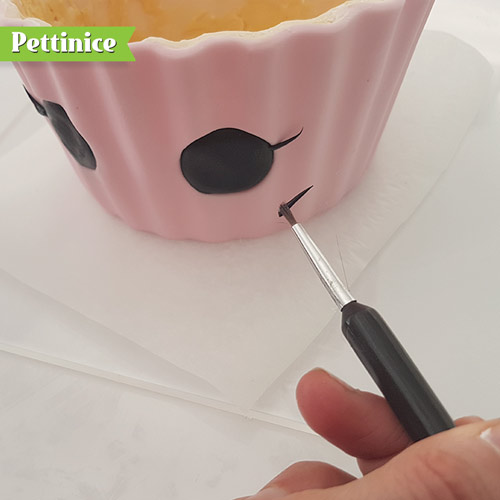
Peel back the gladwrap. Your eyes will be slightly raised which is what we wanted. Clean up any bits on the edge of eye with a paintbrush or silicone tip point.
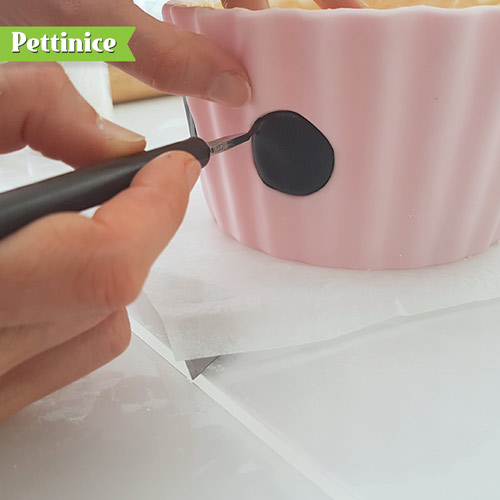
Adhere to your cupcake case with a bit of water or crisco.
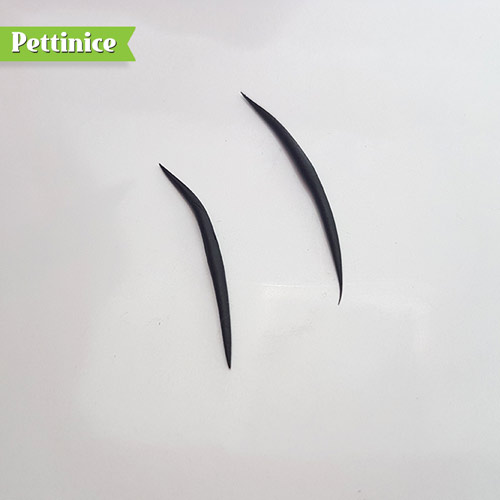
Roll out thin bits of fondant, one slightly smaller than the other. These will be the eyelashes.
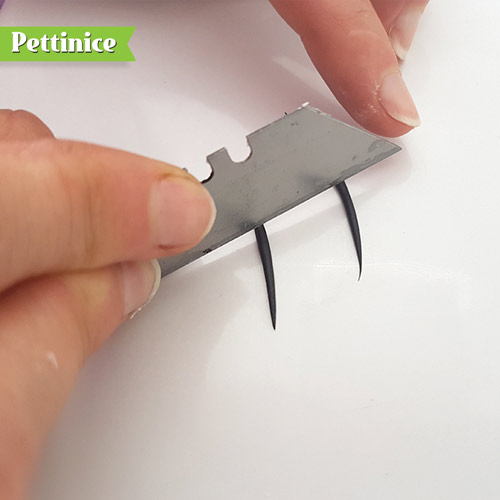
Cut them in half
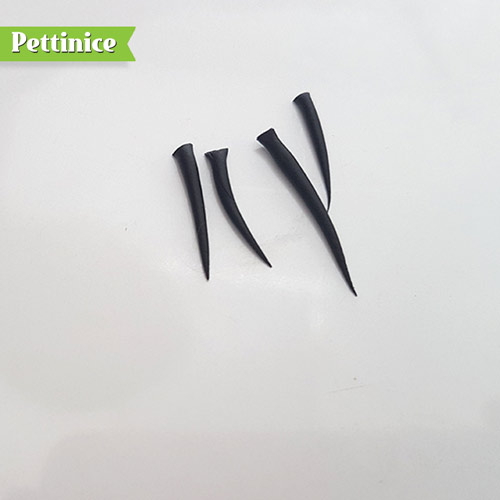
Lashes. xoxo
Attach to the cupcakes eyes with a little sugar glue.
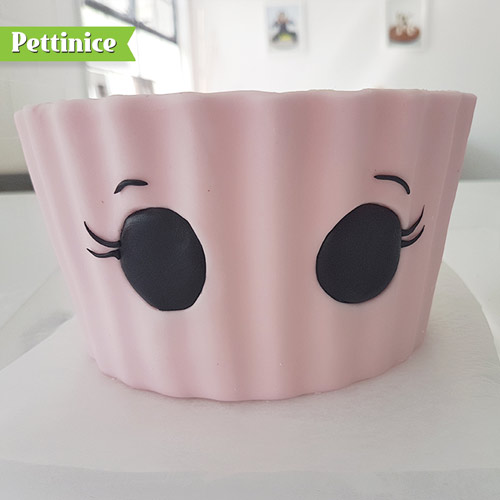
Now make some little eye brows
Roll out a small thin white strip of Take a 1 cm circle cutter and a small circle piping tip. Cut 2 of each size and attach to your eyes.
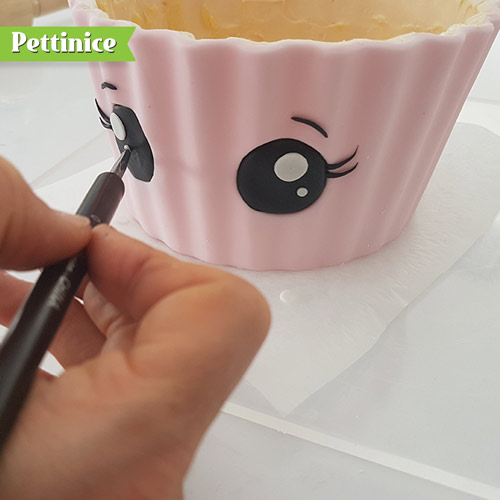
Attach to your eyes as shown.
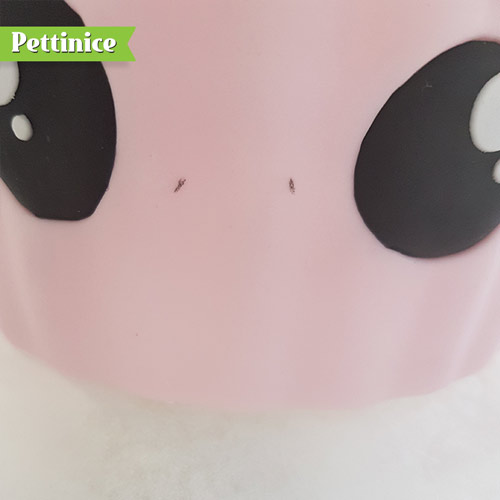
Take a food safe pencil and mark the two sides where you want your smile to go.
Draw in the rest of the mouth.
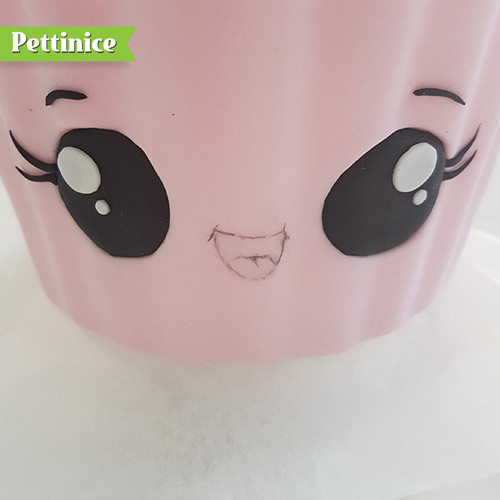
Paint the back red and the tongue pink.
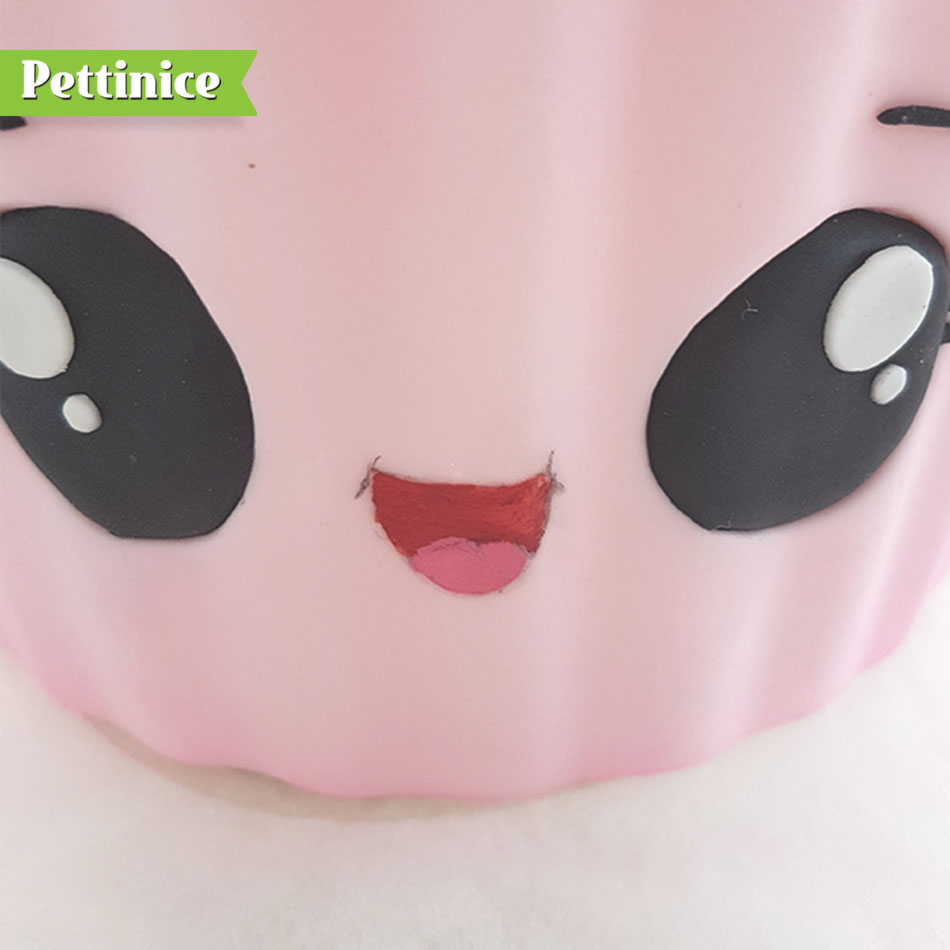
Paint the back red and the tongue pink. Once dry, Line the mouth with black. (I used Sweetsticks edible paint for all this).
At this point, it is important to let the paint dry, ideally overnight or at least a few hours so your fondant can firm up as well.
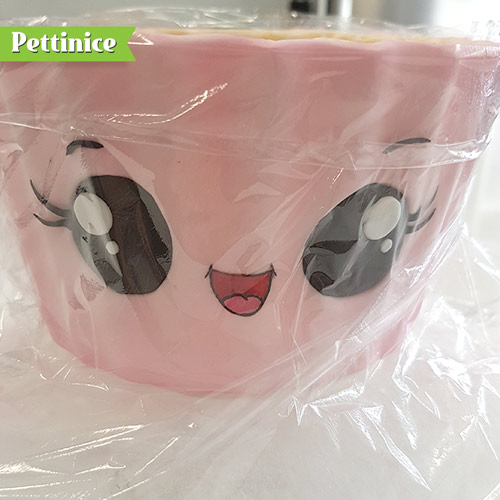
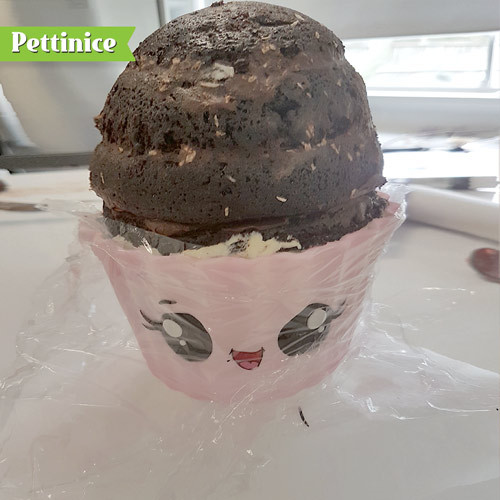
Once fully dry, next wrap your case in glad wrap.
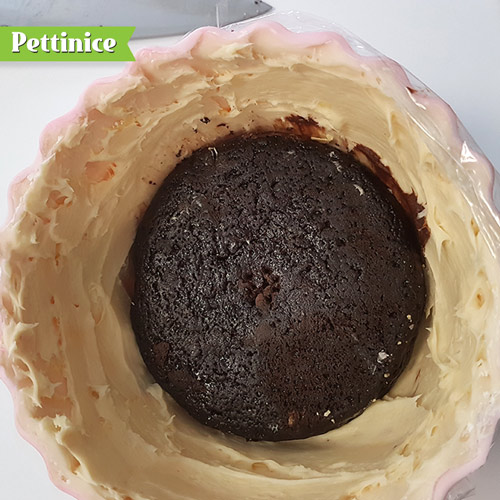
Line your case with ganache or buttercream and press in your five inch cake, then 6 inch cake (icing in between).
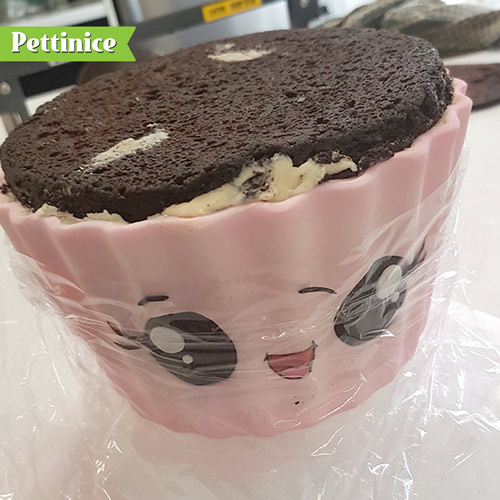
Continue stacking and filling your cakes until full. Trim cakes to size as needed and save your offcuts.
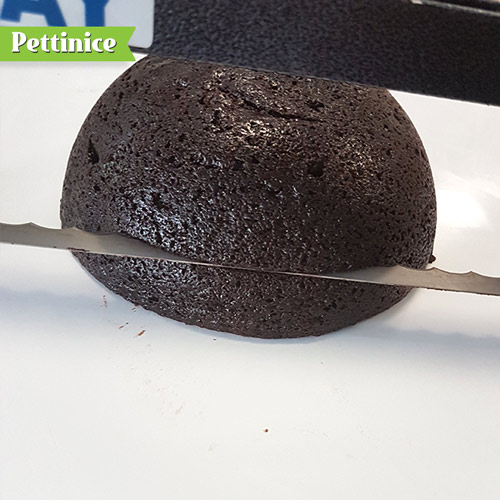
Take your 6 inch 1/2 round cake. cut and fill (optional).
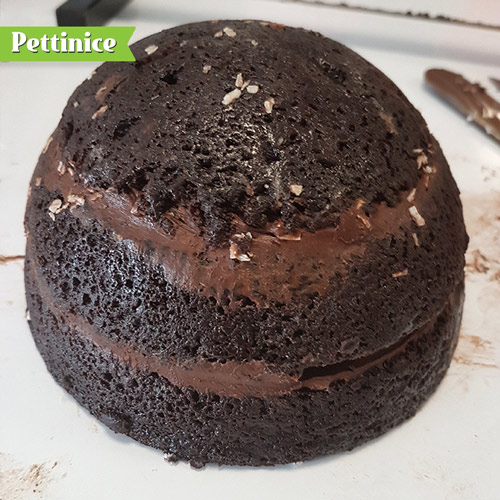
I wanted two filled layers for my cake.
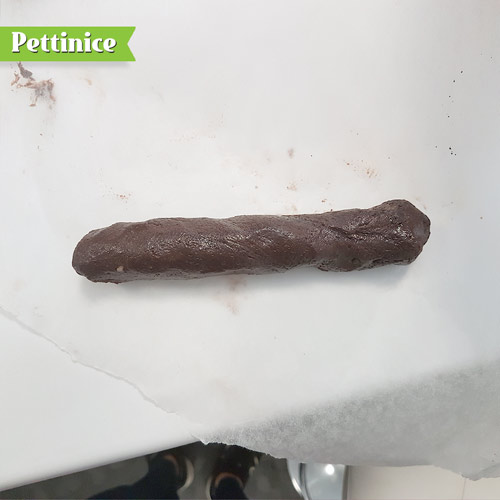
Put your cake offcuts on you mixer with a bit of icing or use a beater and mix together firming cake pop mix. Put down some baking paper.
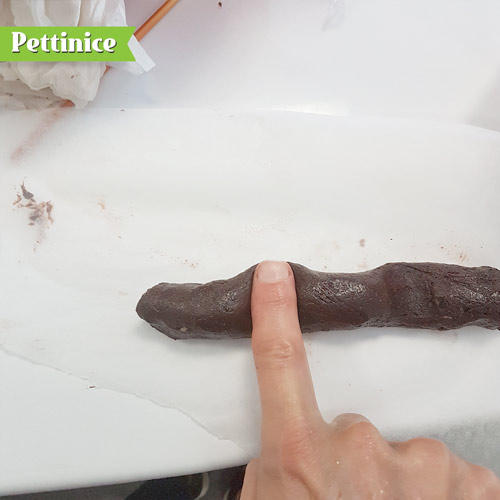
Roll out a sausage and indent with your finger.
Shape a rounded edge.

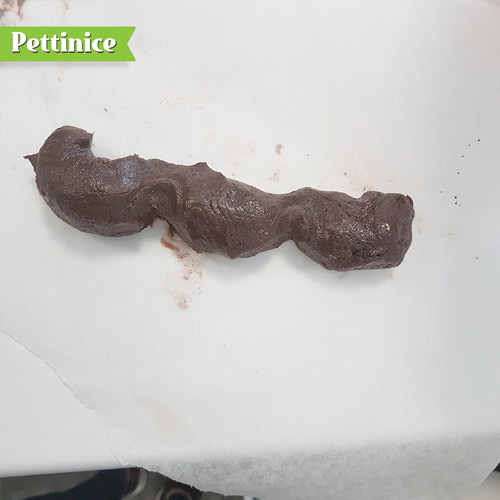
Attach your cake pop mix to the side of your cake with a bit of icing. Smooth off so it blends together well.
Pipe icing underneath your cake edging.
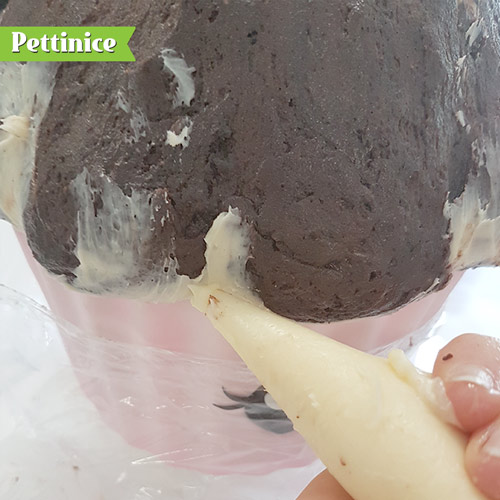
Cover the top in ganache or buttcream.
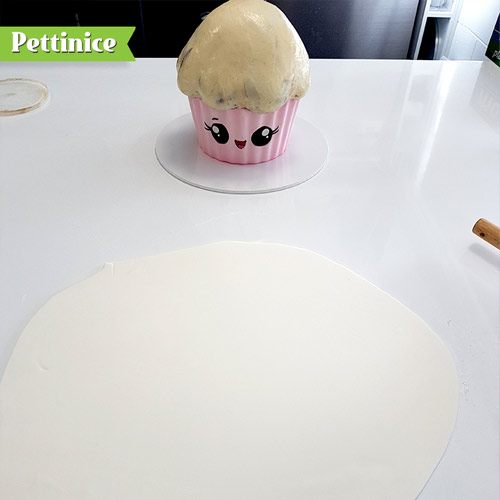
Use crisco or hot water to make the icing sticky preparing it for fondant. Roll out your white fondant in a large circle shape.
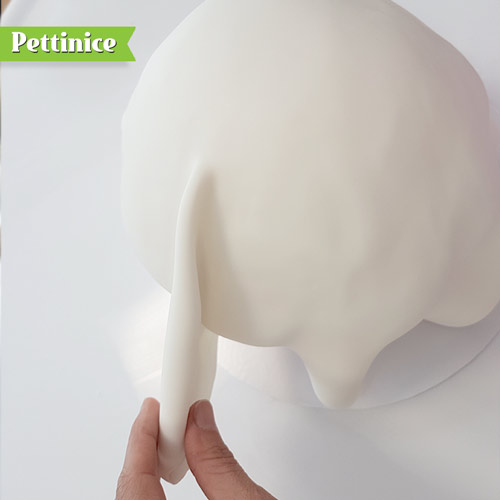
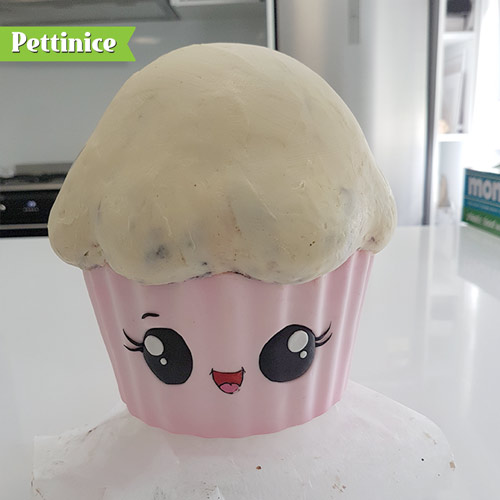
Pick it up and place it over your cake, smoothing around. Gather the excess and make a fold at the back of the cupcake.
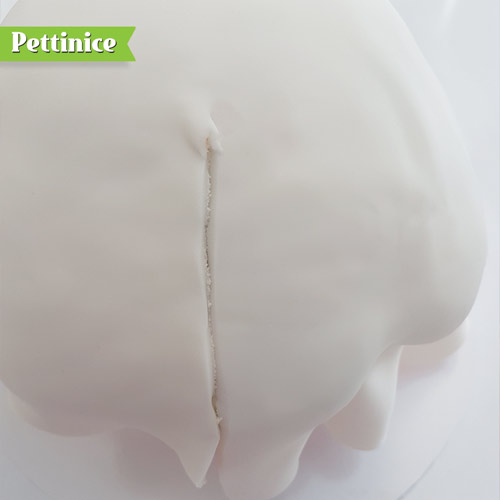
Trim the excess and join together like you have done before.
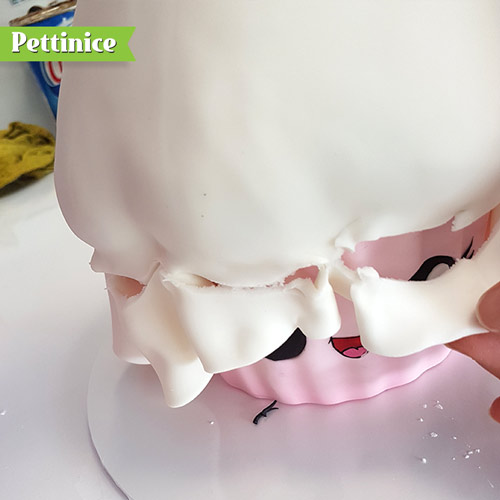
Trim off excess fondant around the bottom of 'icing'.
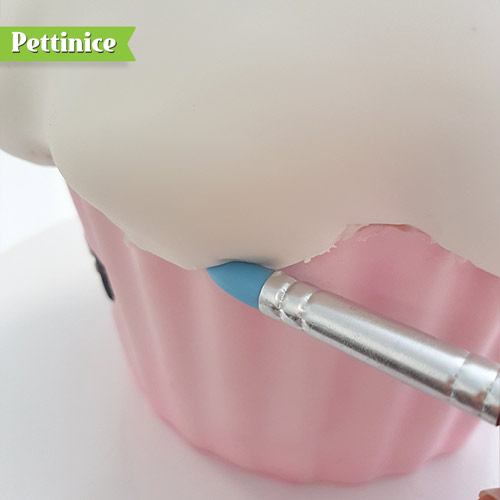
Use your silicone tool or paintbrush or both to smooth and tidy up the edge.
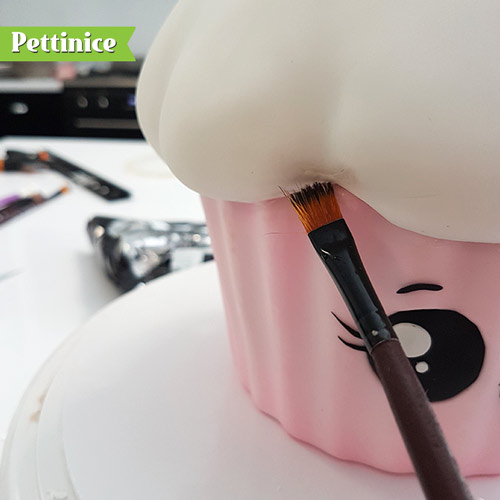
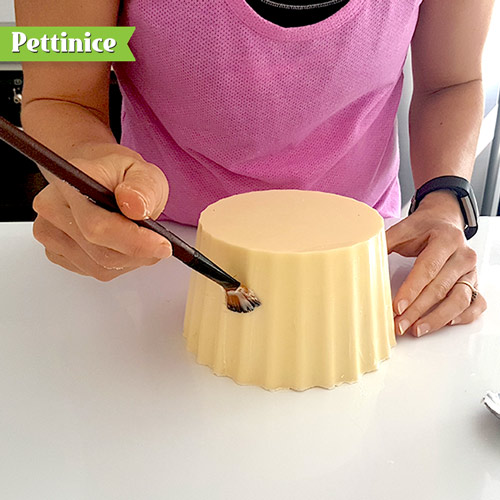
I run a damp paintbrush around the base to set it to the cupcake casing.
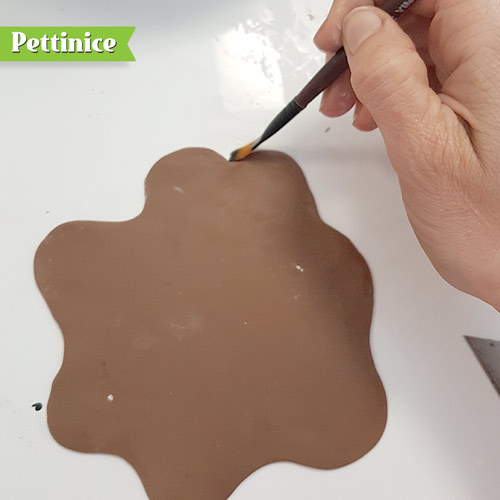
Partially roll out a bit of brown fondant. before it gets to thin stop rolling an use the palm of your hand to push out bits, then run your roller over it again. Alternatively you can use a pizza cutter to make an icing wavy shape but i find the first method looks better. Run your paintbrush around the edge to tidy up and manipulate the fondant into a more splattered shape.
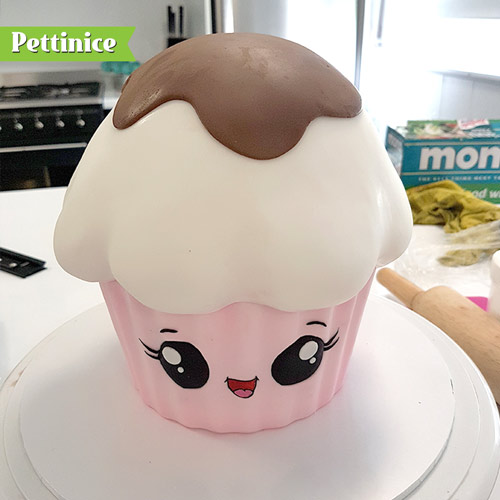
Adhere to your cake. Melt a bit of chocolate and stick your cupcake on to it's cake board. Ideally leave your cake for a few hours or overnight to set up and any wet spots to dry.
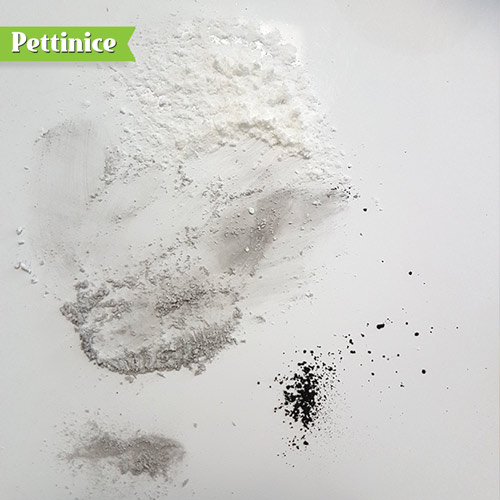
Once dry, mix some white cornflour and black dust together to form grey.

Once dry, mix some white cornflour and black dust together to form grey. Lightly dust around the edging to give it more depth
.
Final touches
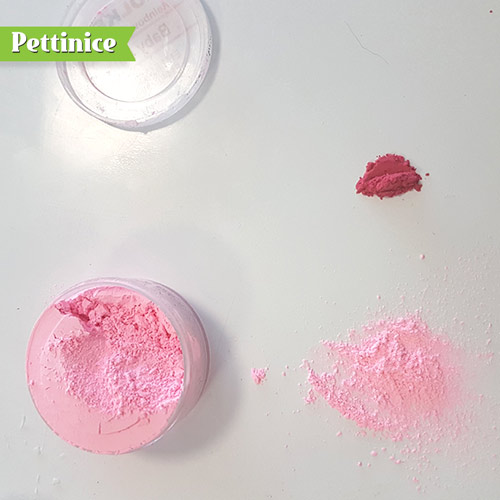
Mix light and dark pink together and dust in the hollows of the cupcake liner, also around the top and bottom.
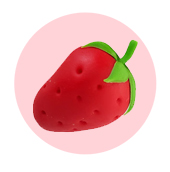
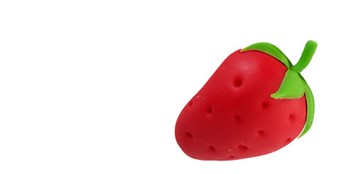
Add sprinkles to the top and if you feel up to it follow my panda and strawberry tutorial and recreate this design.
Feeling like you don't want to complicate things? Don't worry it would look super cute with just sprinkles and a strawberry!


Karin Klenner owns Sweet Little Treat located in Hamilton, New Zealand. She says "I'm a mum to two little boys which are my world (and have been known to destroy my world by attacking the odd cake) and married to an amazing guy who, thank goodness, is very good with a drill because my favourite cakes to do are 3D sculpted cakes. I love doing animals especially."
You can find Karin on Facebook and Instagram. ![]()
![]()